Phanteks P200A Review
Introduction

The Phanteks P200A is definitely aimed at maximum Airflow performance. With an astonishing amount of fans and radiator support, there is nothing is cannot keep cool. But all of that becomes even more shocking if the size is taken into account. At slightly less than 30l, the P200A still counts as a Mini-Tower case. But this miniature of size did not prevent Phanteks to make this case versatile to the largest extend. But we will see that down below.
Positive
- Price
- Airflow
- Fan / Radiator Support
- Tempered Glass
- ATX PSU
- Versatility
- Quality
- Amount of Cable management utilities
Neutral
- Size
Negative
- Space behind Mainboard slim to none
What's in the Box?
The Phanteks P200A comes in the usual brown carton box we all learned to love and hate. Once opened, we will find the case itself wrapped in some plastic foil and styrofoam blocks.
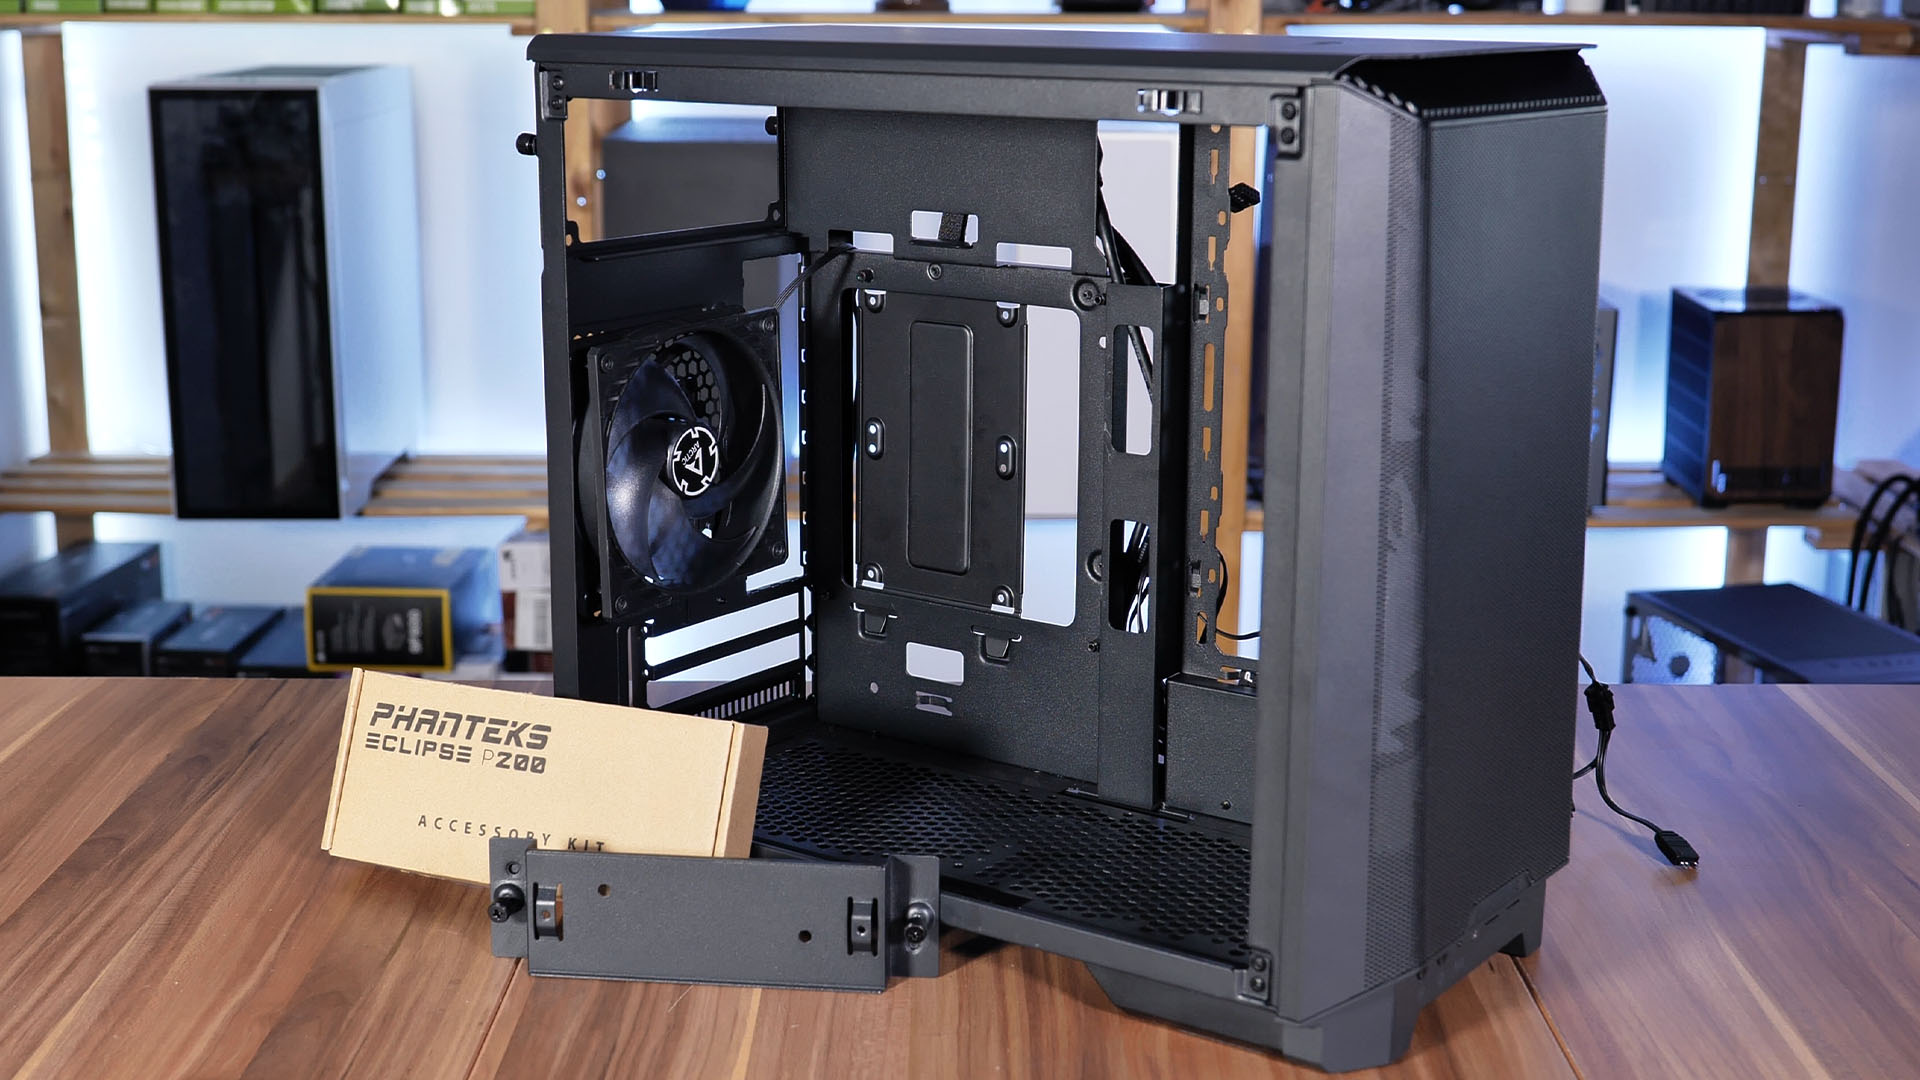
Inside the case, Phanteks hid another small carton box that contains the usual Mainboard, PSU,.... screws, and a black piece of metal. That exact piece is what allows you to mount your Graphics Card vertically.
To jump a bit ahead, in order to mount the GPU vertically, you need to detach the PCIe brackets as well as the centerpiece of the fan. At that point, both pieces can be de-attached from each other and rotated in order to have the PCI brackets vertically. At this point, the black metal piece can be screwed into the bottom of the case with help of the screws that are already attached to it.
This installation method might look really good, but it comes at the cost of the back and bottom fan spot, something worth thinking about if you plan to use high-end components.
Please note that there is no PCIe Riser pre-attached or included with this case. Anybody who wants to install its GPU vertically needs to bring his own.
Specs
One of the most surprising aspects about Phanteks P200A is its versatility and the long spec sheet that comes along. We tried to summarize the most important points down below, but due to some points relying on others, we will cover each point in-depth later on.
| Name | Phanteks Eclipse P200A |
| Type | Mini-Tower |
| Mainboard Sizes | mini-ITX / mini-DTX |
| Color | Black |
| Side Panel | Tempered Glass |
| CPU Cooler Height | 165mm |
| GPU Length | 355mm |
| 2.5" Drives | 4x ( if no Fans are used in the center ) |
| 3.5" Drives | 4x Stackable containers (Has to be purchased separately) |
| IO | 2x USB 3.0 / 1x USB-C 10GBit / Audio in&out bundled |
| Dimensions | 205x365x400mm (WxHxD) |
| RGB | 2x ARGB Fans included |
| Fans | 2x in the Front (ARGB) |
| Fan Spots |
2x 120/140mm in the Front 1x 120mm in the Back 2x 120mm in the Bottom 2x 120mm in the Center |
| Water Cooling |
Up to 280mm Rad in the Front 120mm Rad in the Back Up to 240mm Rad in the Center |
| Extras | Included ARGB controller in the IO Panel |
Compatibility
The Phanteks P200A's versatility and the compatibility that comes along is one of the best selling points of this case in our opinion.
But before we get to the complicated stuff, let's talk about the general specs.
Being a Mini-Tower case, the P200A supports only mini-ITX and mini-DTX motherboards. But to our very surprise, the PSU is as full-sized as it gets with the ever-so-loved ATX standard. But keep in mind that the maximum PSU length is set to 205mm. And considering how the case is built, this is not a value to be stretched.
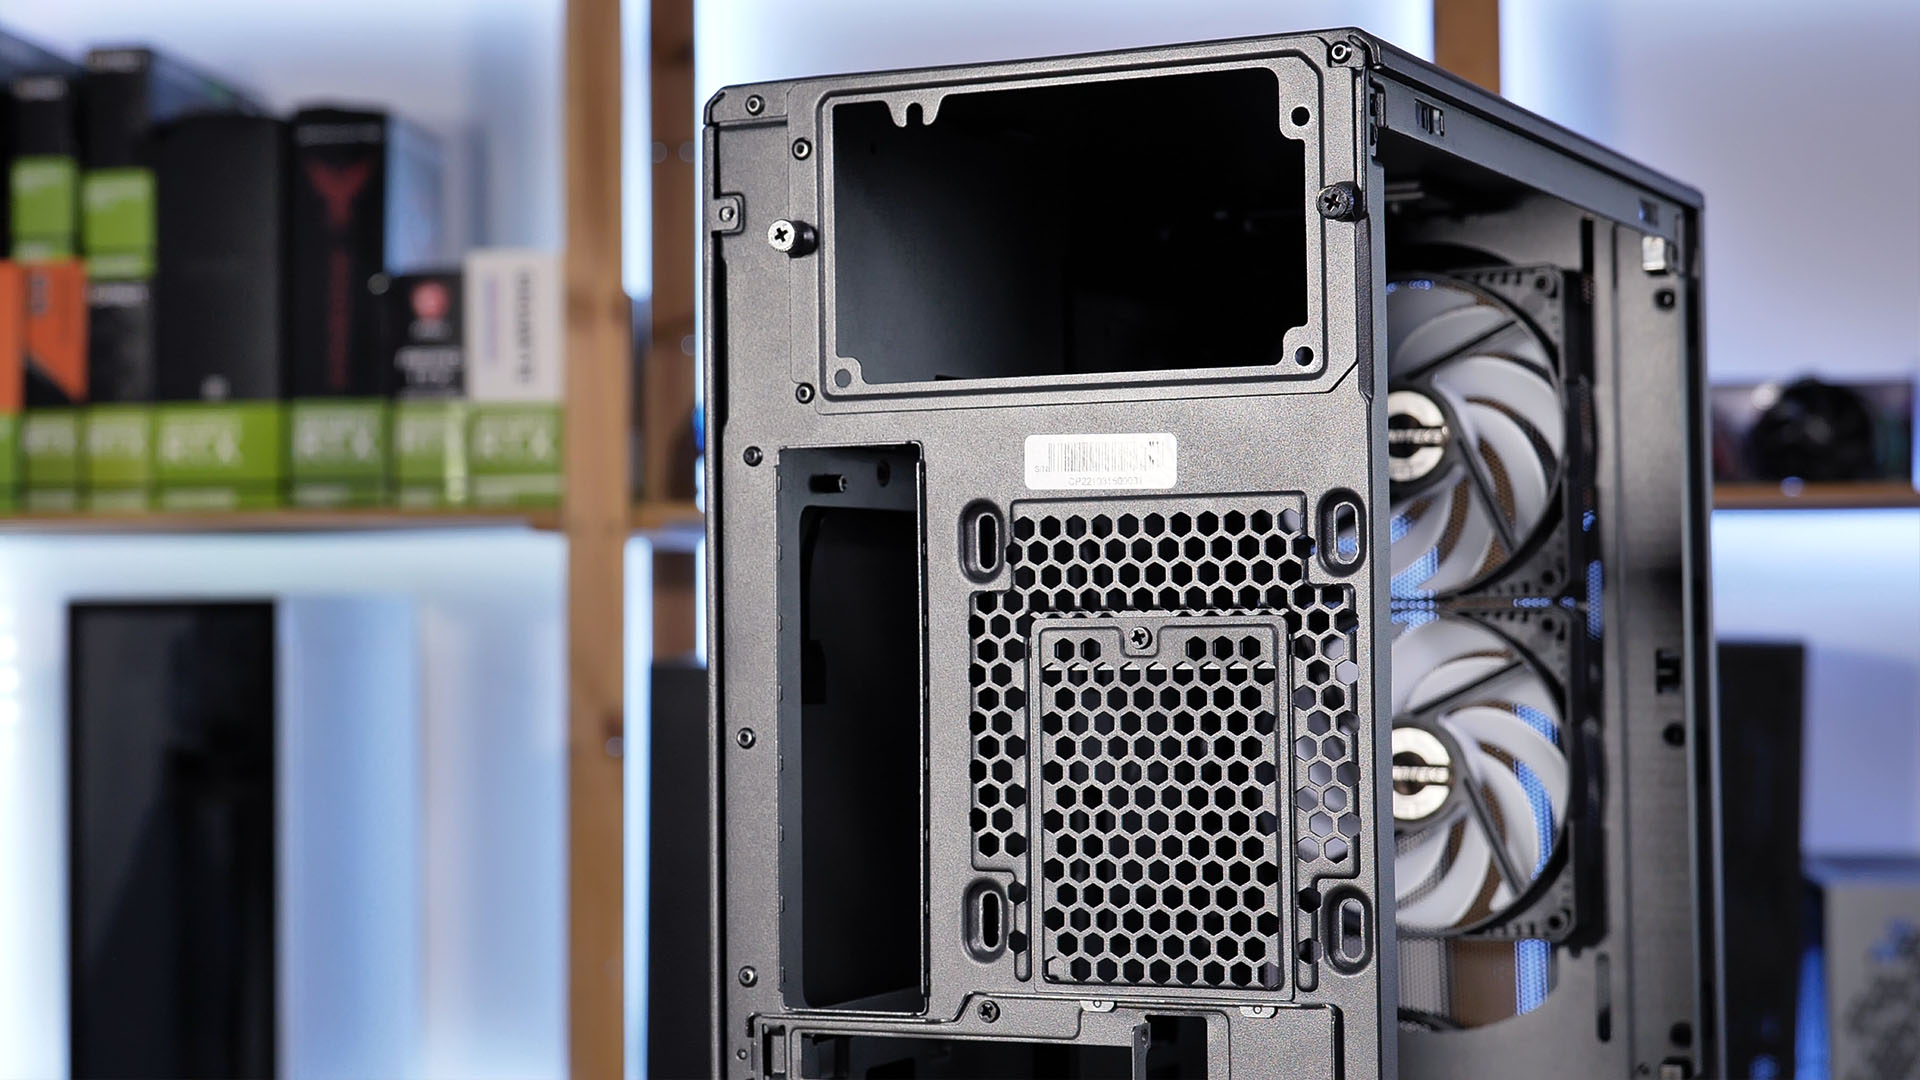
The PSU is meant to be installed at the top of the case by using the pre-mounted PSU bracket. Just detach it, mount the PSU to it, and slide it back in.
In terms of Component size, the P200A does not follow the usual Mini-Tower approach. WIth CPU coolers up to 165mm high and GPUs up to 355mm long, there is little to none that cannot fit into this case. Even heavy cavalries like an RTX 3090 paired with a Be Quiet Dark Rock Pro 4 can easily fit into here.
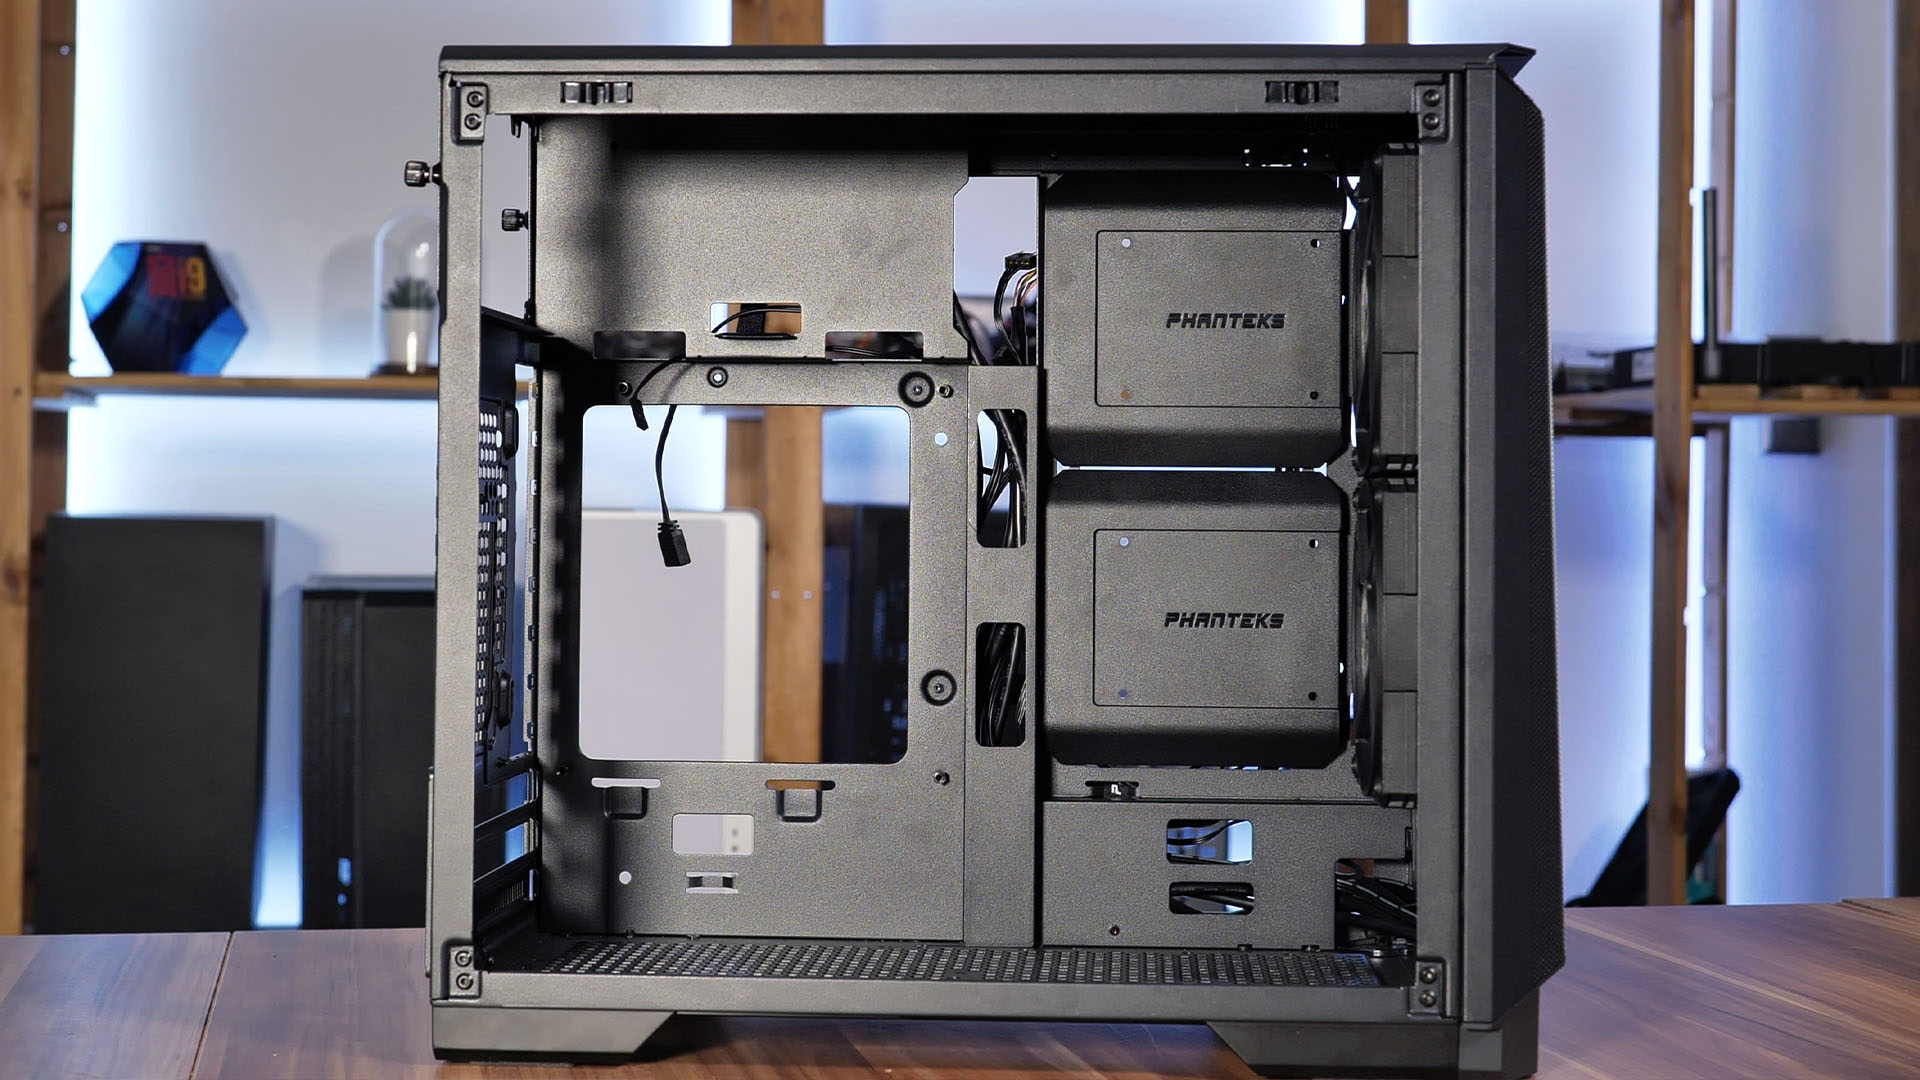
If there is a need for 3.5" drives, Phanteks offers an optional upgrade in form of up to 4 stackable 3.5 Drive compartments. These can be mounted right in front of the front panel. Keep in mind that this is an option that has to purchased separately.
The placement of these drives may not be ideal as they block off a big portion of the front and central airflow. Though do not assume that there will be many people planning to use 3.5" in such a small case. Therefore we think this optional upgrade is a great aspect as it allows every scenario to use the case to its fullest extend.
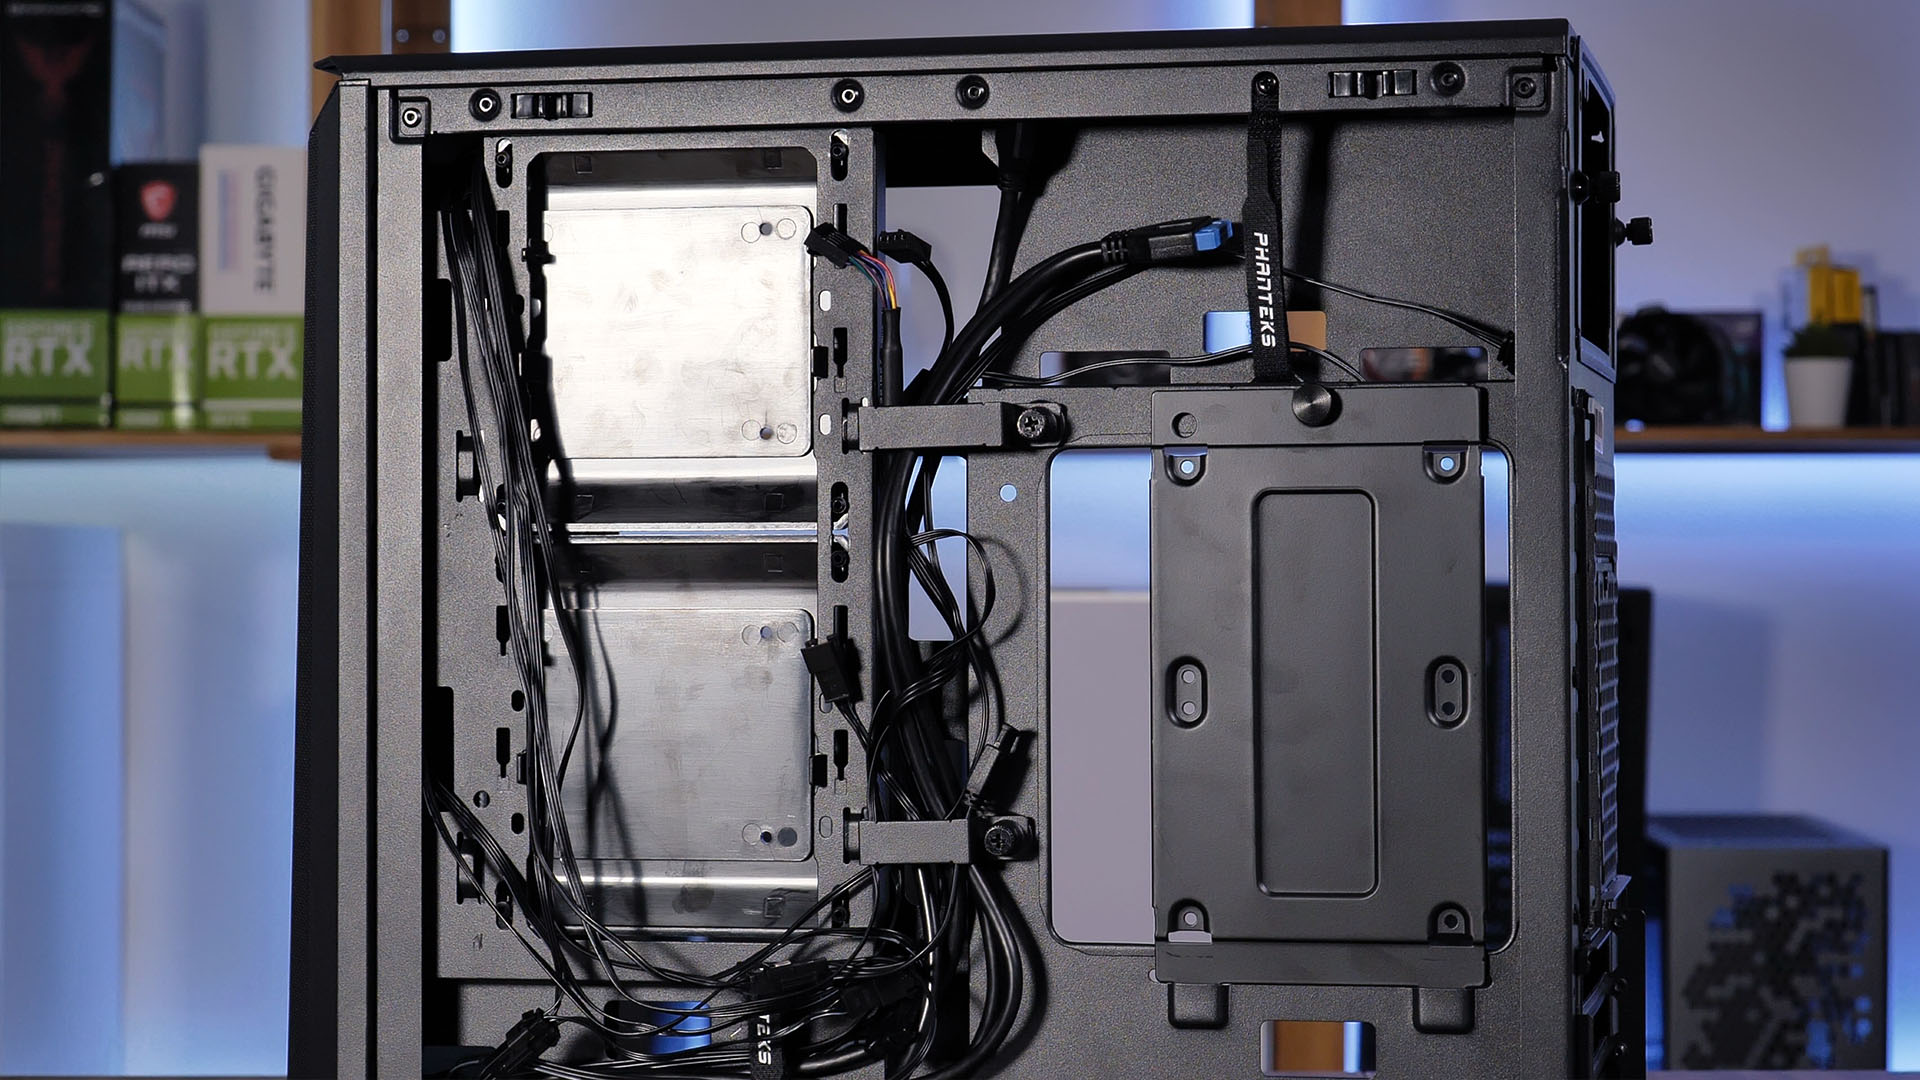
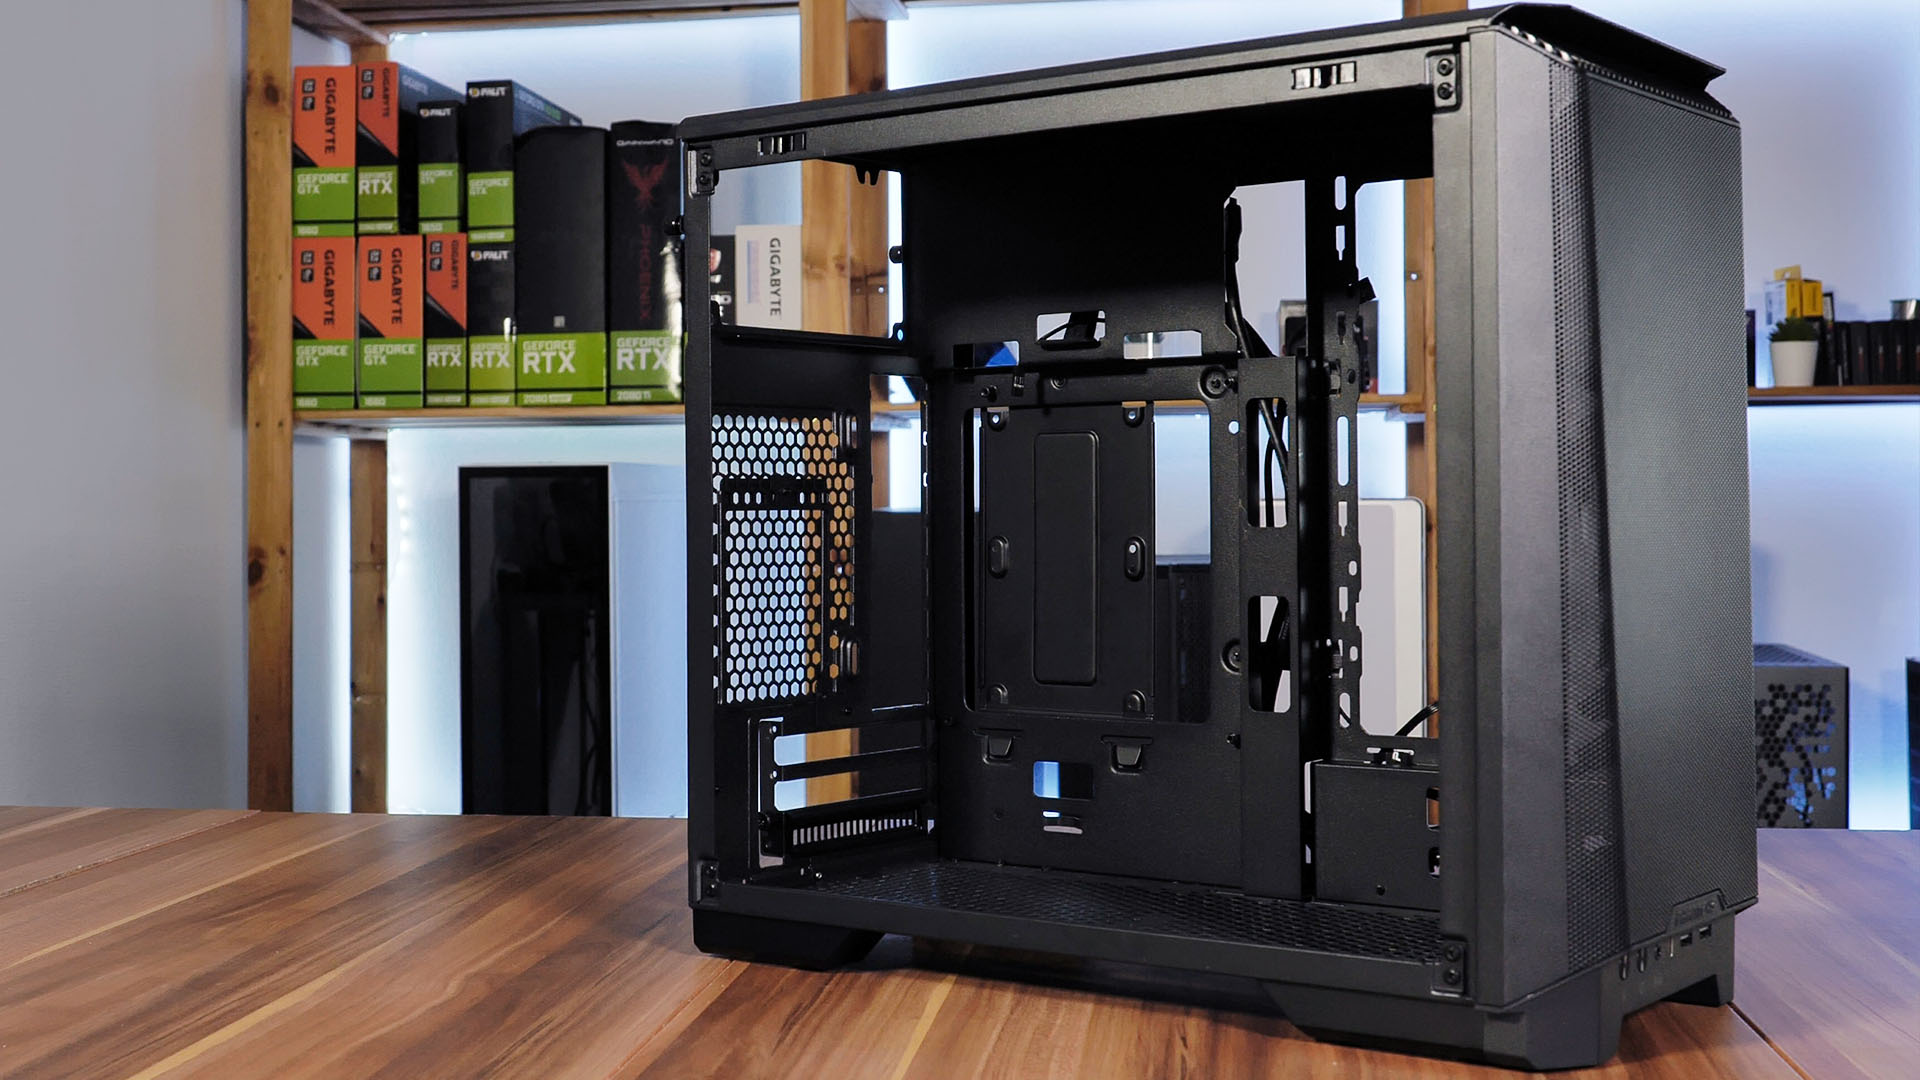
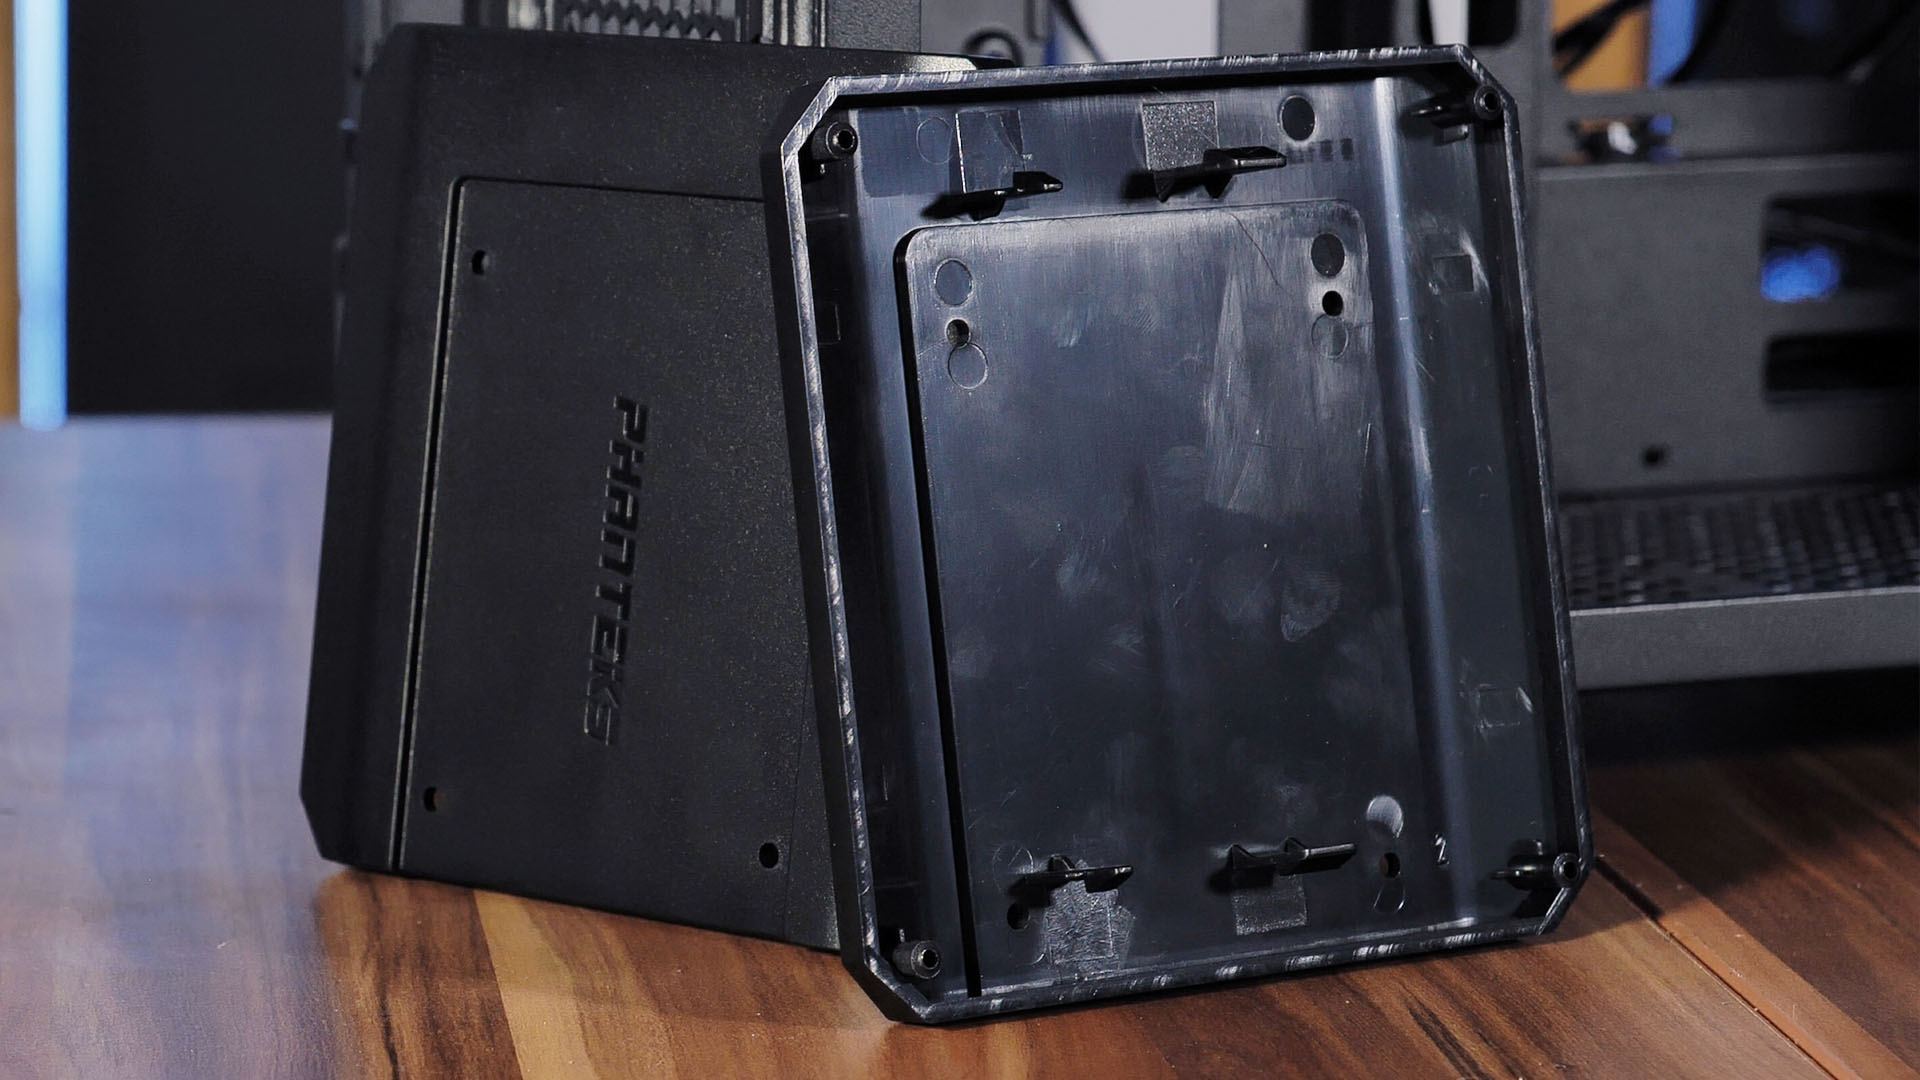
For the 2.5" drives it gets a bit complicated. Out of the box, there are 2x spots behind the motherboard on a detachable plate.
Additionally, there are 2x spots inside the "Phanteks" plastic covers that are located right behind the front panel.
These two spots are also hiding an additional Fan mount. Therefore, in case you want to prioritize fans, this comes at the cost of 2x 2.5" spots.
Speaking of fans, there are a lot.
Including the already preattached 2x ARGB fans in the front, there are a total of 7 fan spots:
- 2x 120/140 in the front
- 2x 120 in the bottom
- 1x 120 in the back
- 2x 120 in the center
Each of these spots is also compatible with a radiator for water cooling.
Keep in mind that the central spots are the ones that come at the cost of 2x 2.5" spots (and vice-versa).
IO
The IO of a Case is one of the few things that for some reason does not get updated regularly. But Phanteks did!
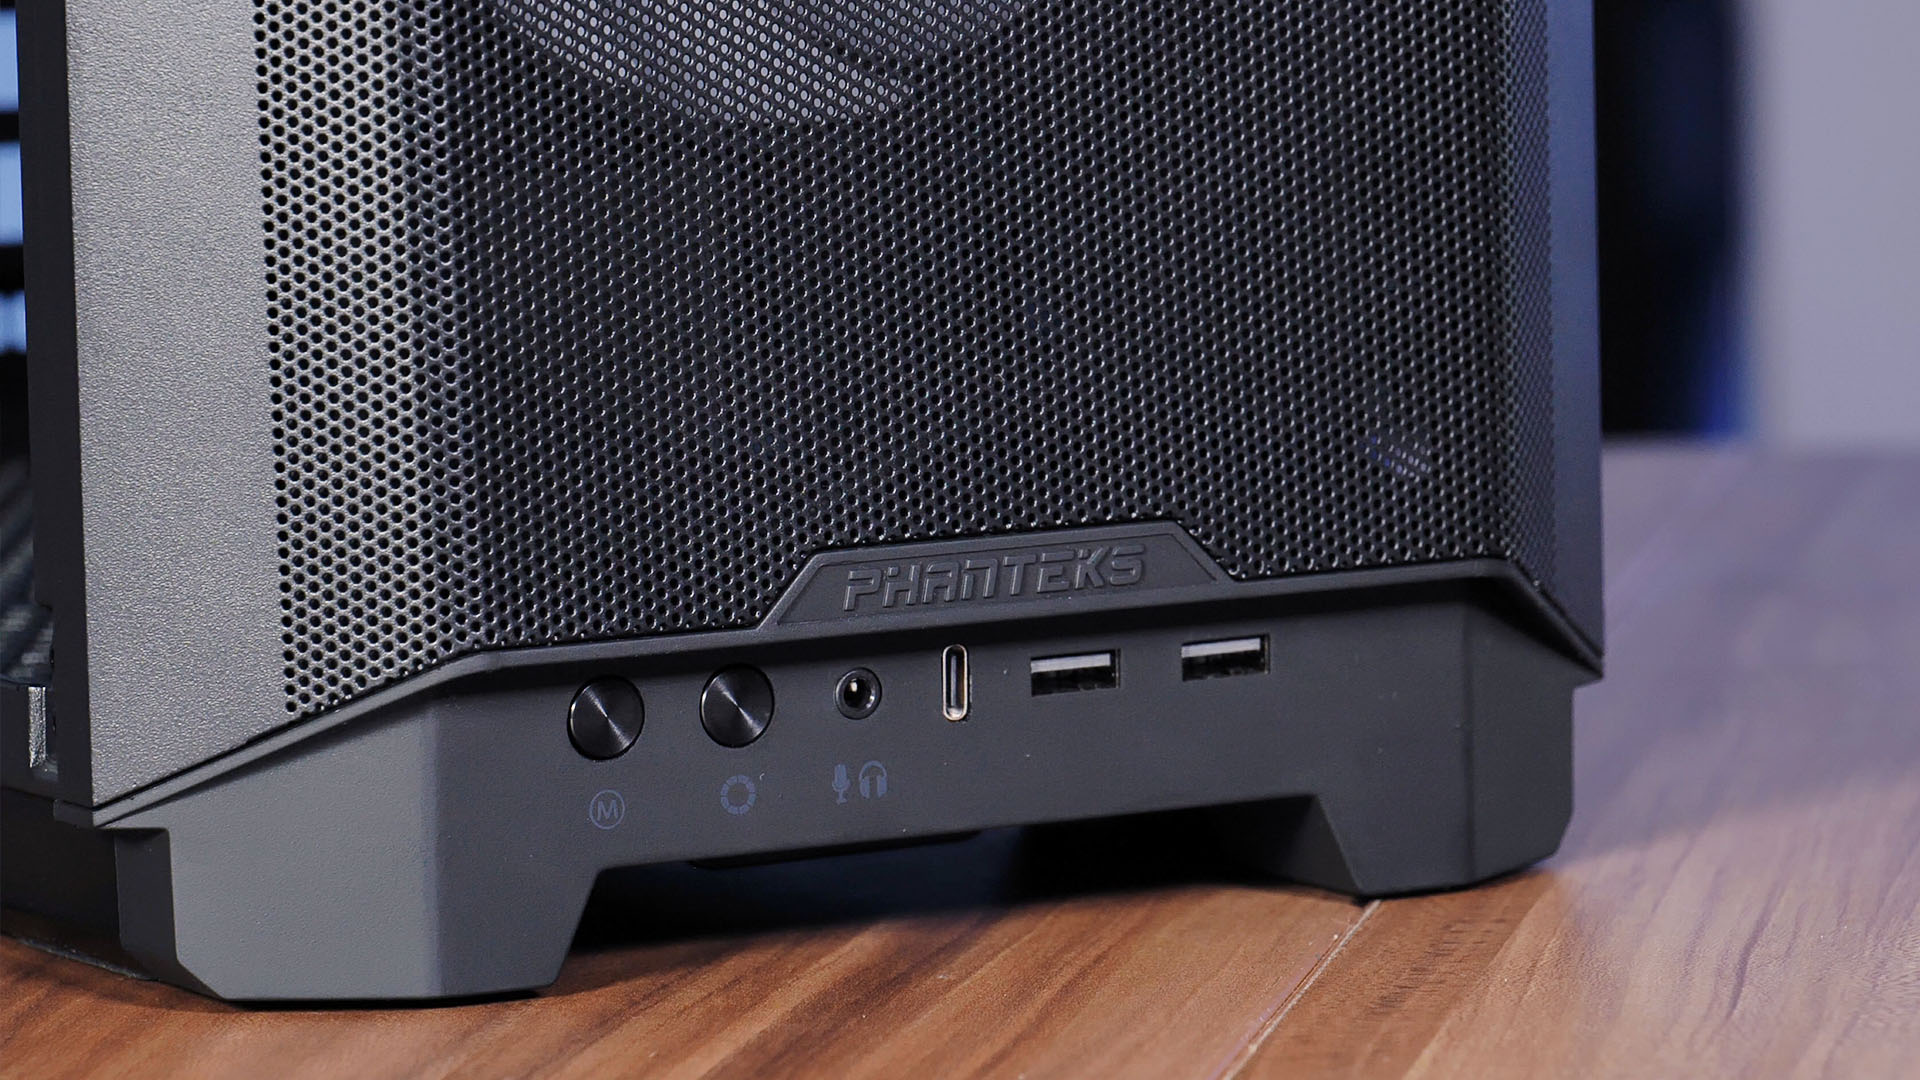
With 2x USB 3.0 Type-A and 1x USB Type-C in its 10GBit variant, there is no room for improvement at this time.
Additionally, the IO panel comes with an integrated ARGB Controller which allows the included Fans to glow in their natural unicorn-themed colors.
On the IO Panel, there are 2 buttons meant to control the ... Controller.
The left one controls the Modes whereas the right one controls the color. Additionally, Long-pressing the left one shuts everything off, while long-pressing the right one allows the controller to go back into its unicorn state.
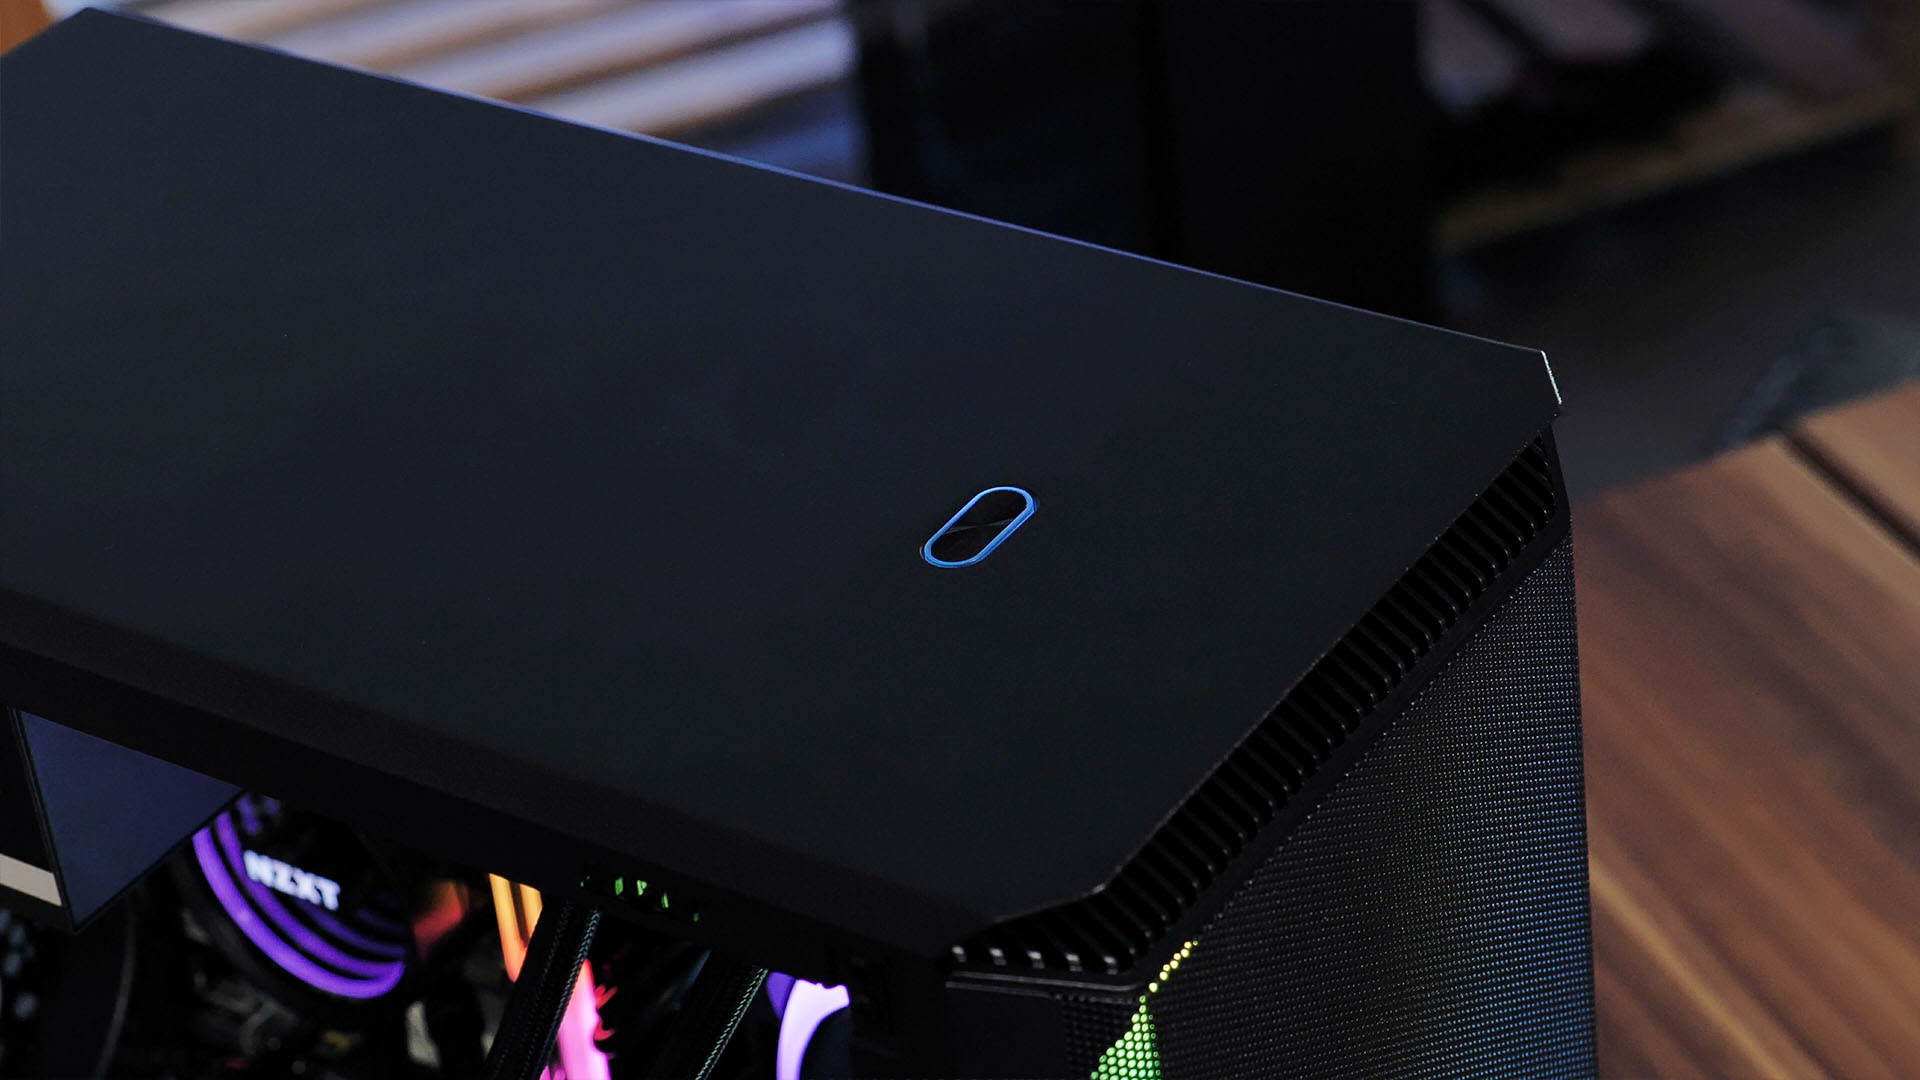
Unlike most cases, the power button is located far away from the IO panel. Phanteks placed this one at the top of the case surrounded by some nice-looking RGB.
Cable Management

While reviewing this case, it became pretty apparent that Phanteks had to make some cuts in order to allow for the versatility that we mentioned before.
That being said, Phanteks tried everything they could in order to make the best out of this situation which is due to the case's small size.
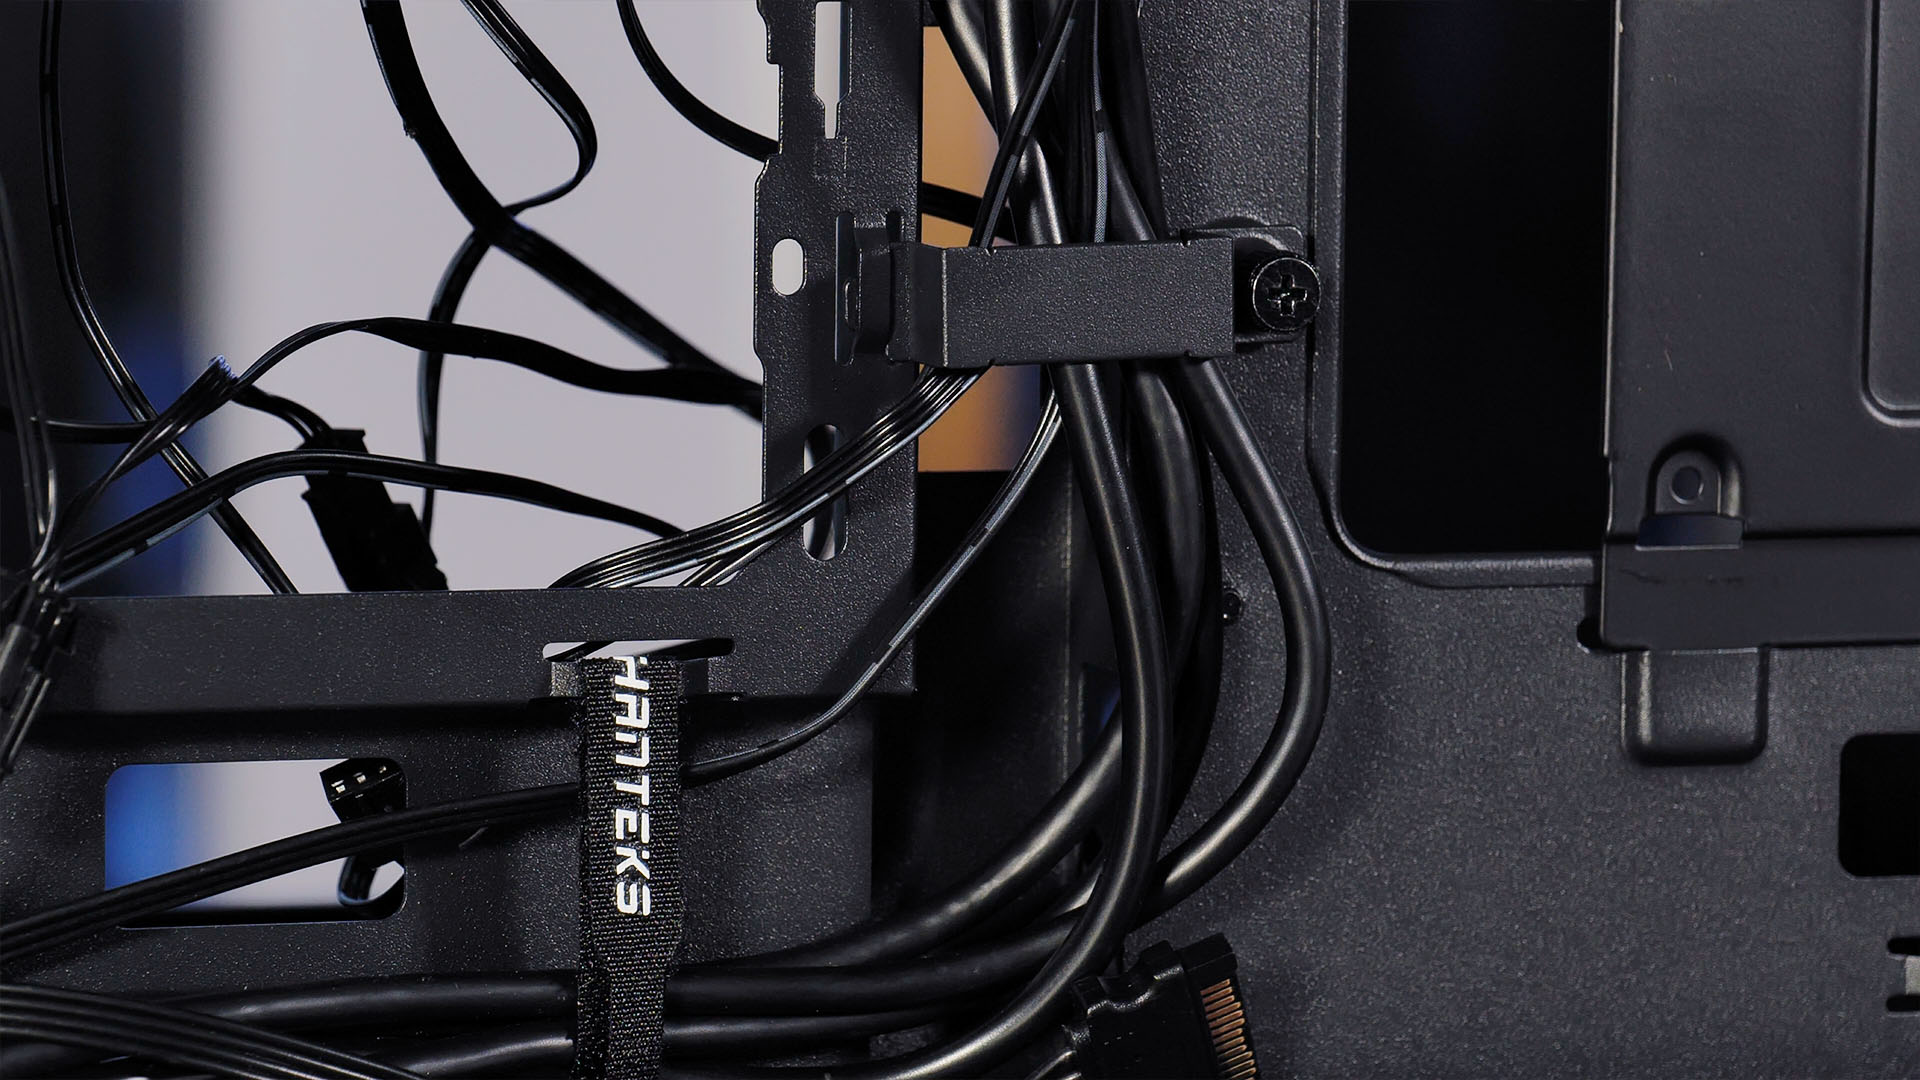
With Cable cutouts, rails, straps, and holders, Phanteks tried to make the cable management as easy, pretty, and forcefully efficient as possible.
But unfortunately, some things cannot be improved, such as the slim to none space behind the motherboard plate.
Even if cable management is pretty hard within the P200A, we still admire Phantek's dedication to make this as enjoyable as possible.
Cooling
As we mentioned in the Compatibility segment, there is a lot of room for cooling inside the P200A.
With a total of 7 Fan spots, you can go for pretty beefy Air-cooling builds as well as up to custom Hardline Watercooling.
In total there are 3 big air in/out-lets, ignoring the 120mm spot in the back.
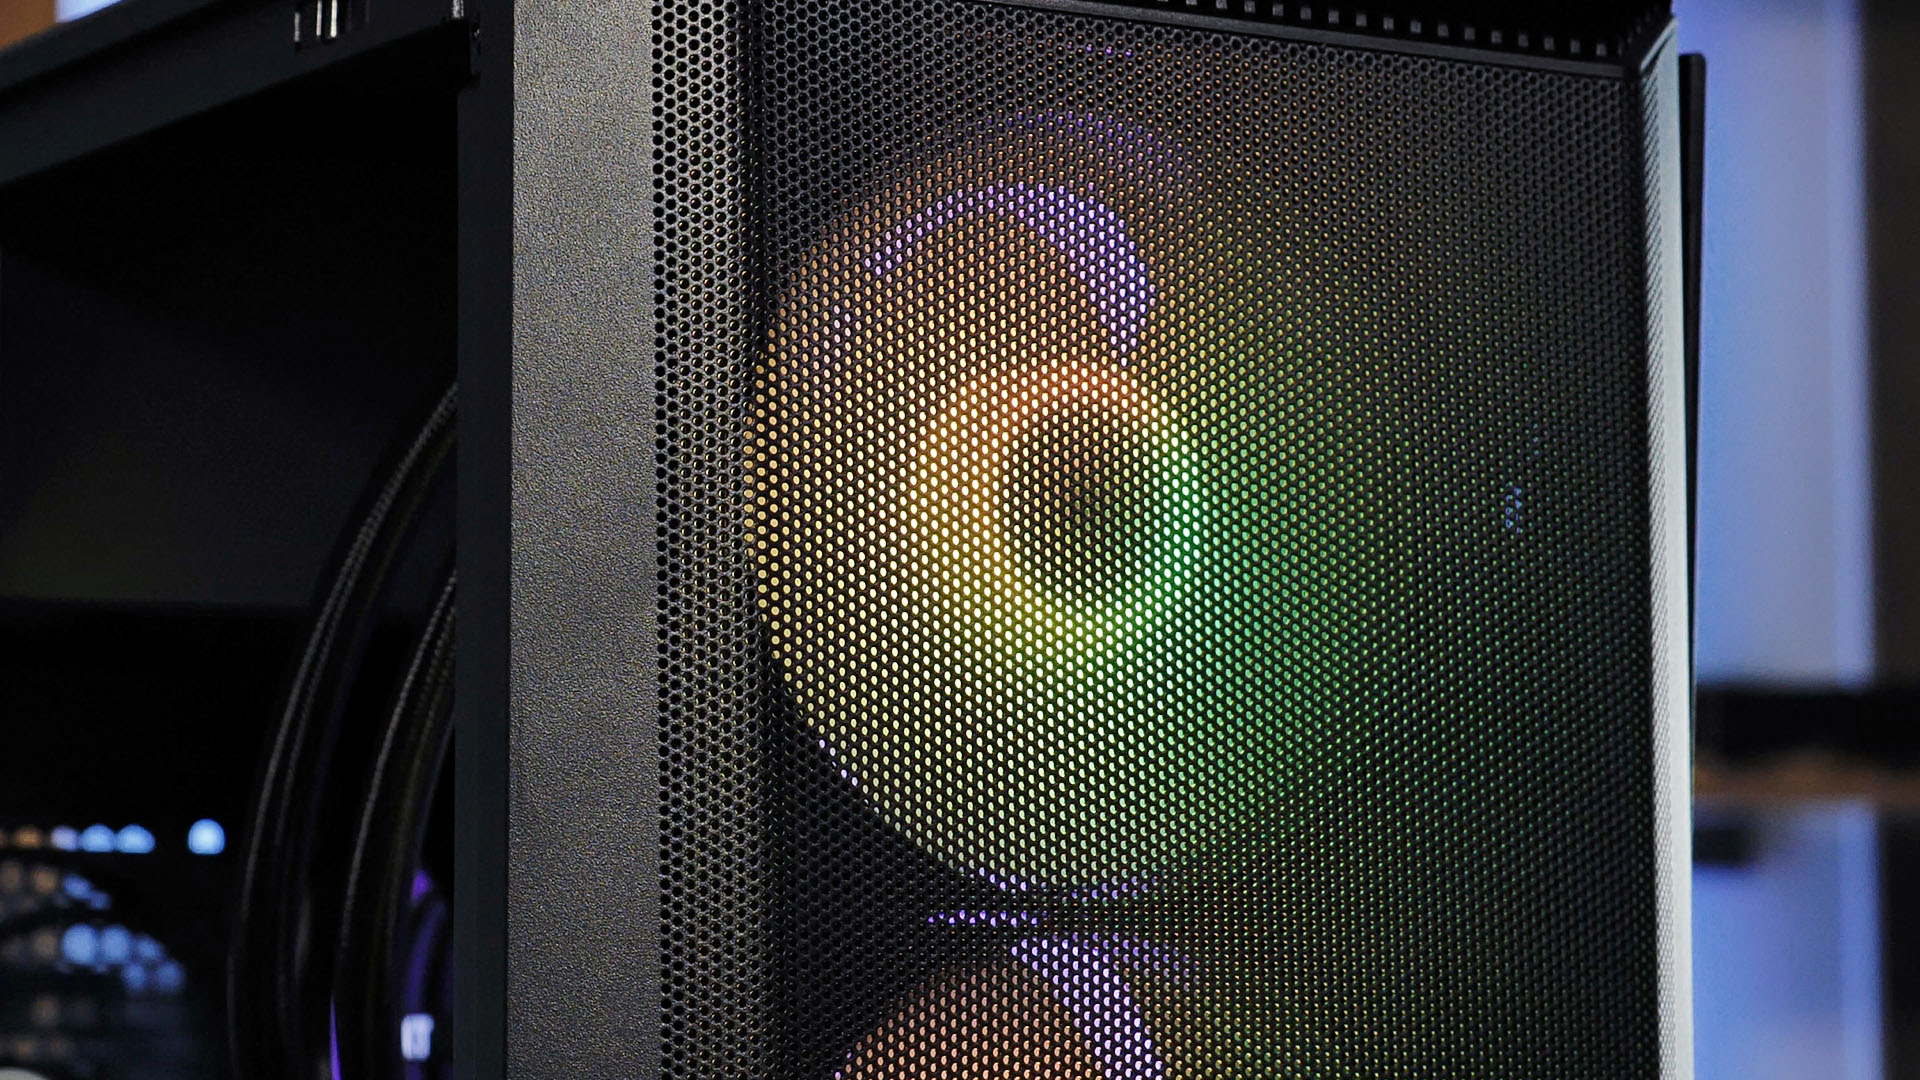
The front airflow is provided by the 2x 120/140 fan spots from the back which is provided by the Front Panel covered in a "high-performance" mesh-style material. Something that we will test in the Benchmark section.
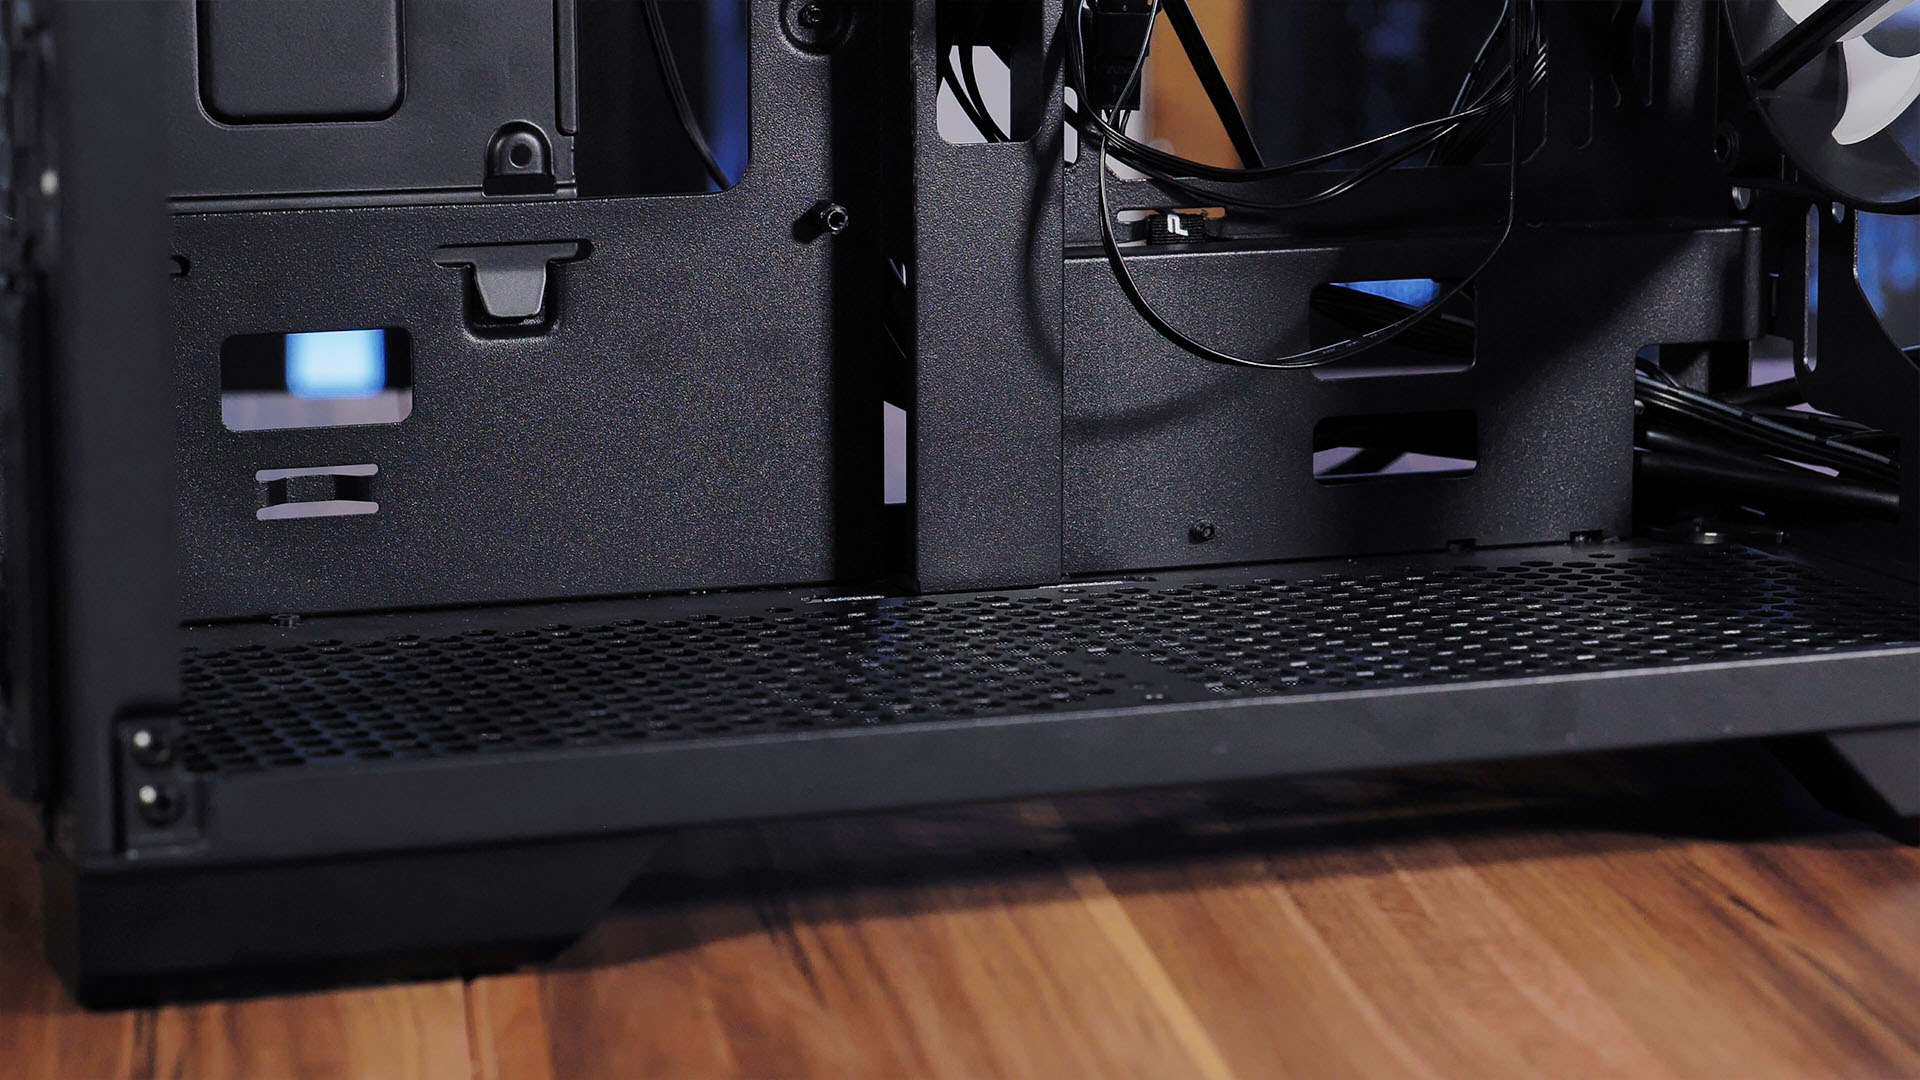
The bottom airflow is provided by a cutout covering almost the complete bottom of the case. Additionally, Phanteks includes a removable dust filter which can be accessed after removing the front panel. Even though the bottom dust filters are often overlooked and cheap, this one feels high-quality.

The last big air gap stems from the backside of the case. After removing the 2x plastic Phanteks covers which double as 2.5" spots, we can find Fan/Radiator rails from top to bottom of the case. In order to not choke these Fans, Phanteks made sure to cover this portion of the side panel with the same mesh-like material we found in the front panel.
Generally, we have to admit that we were pretty surprised with the Cooling capability that the P200A is able to offer. Cases in this form factor do not always come with such an amount of fan spots.
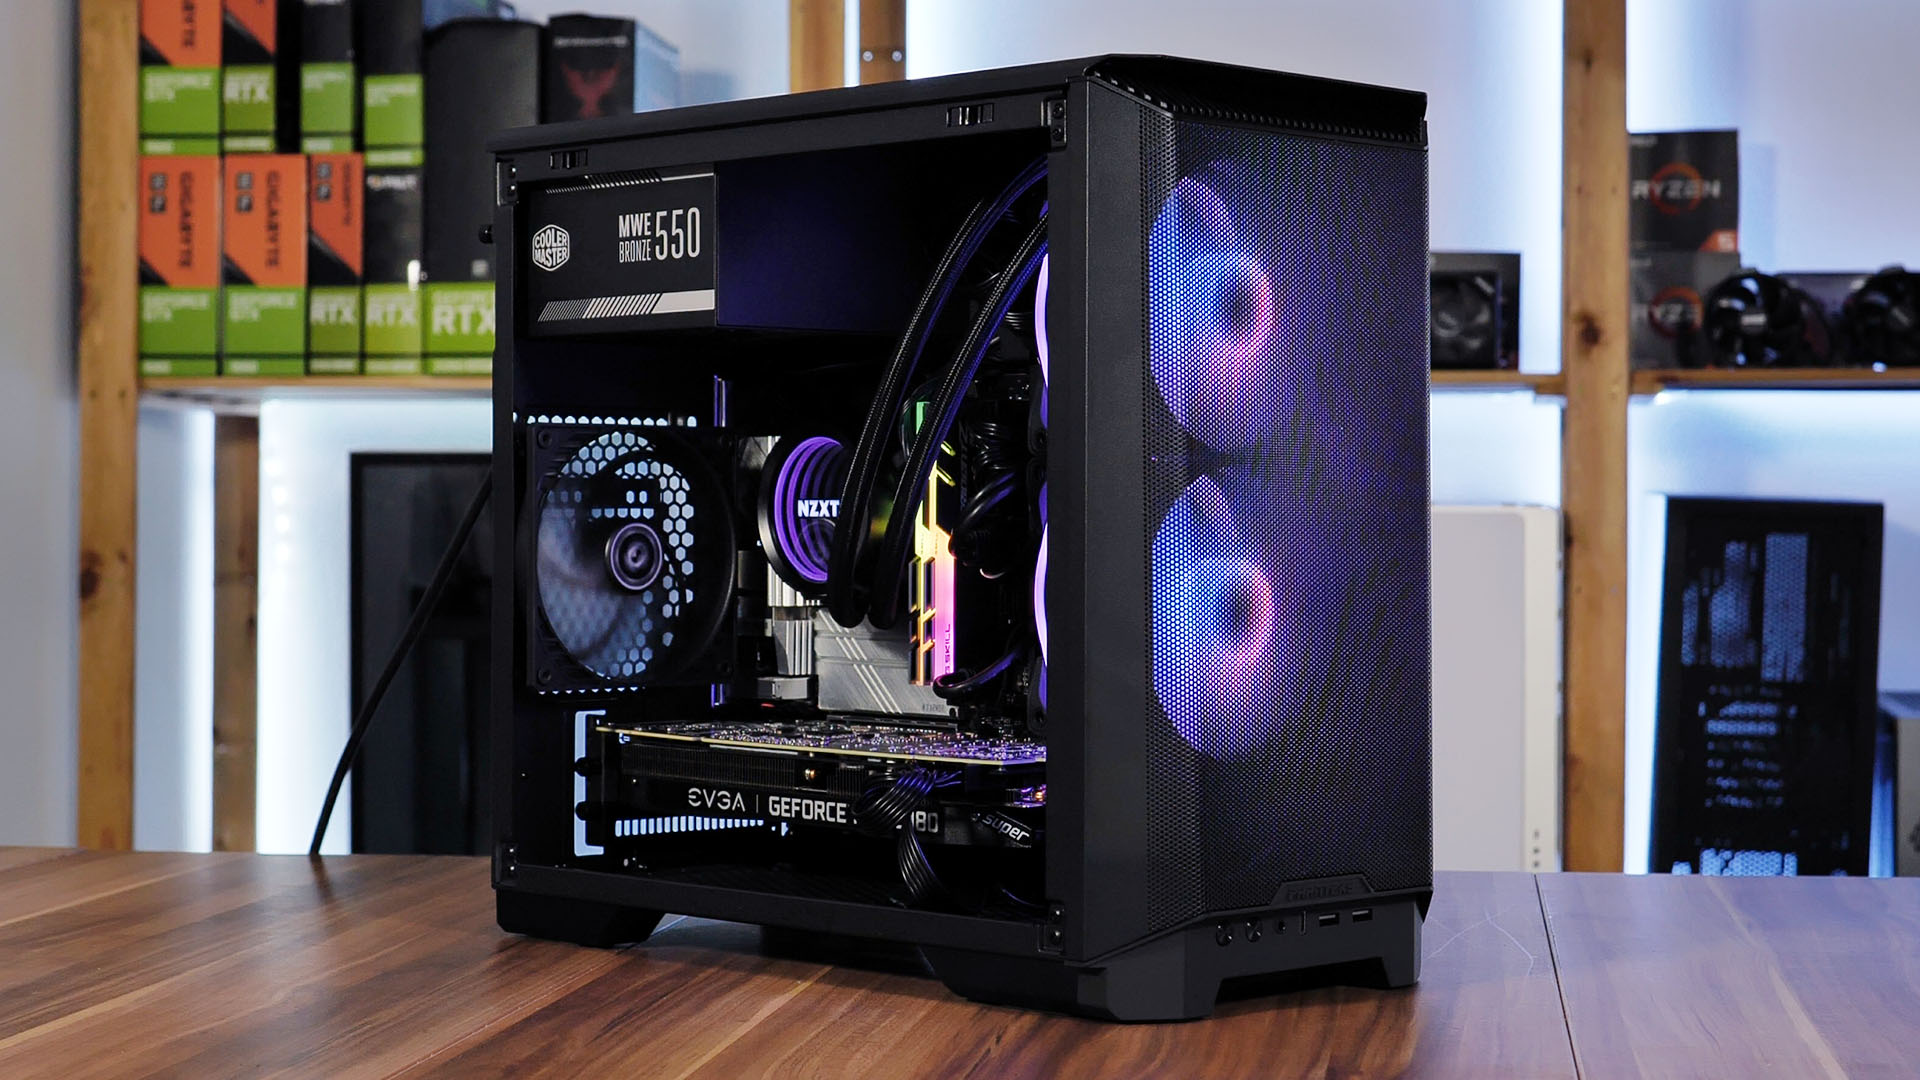
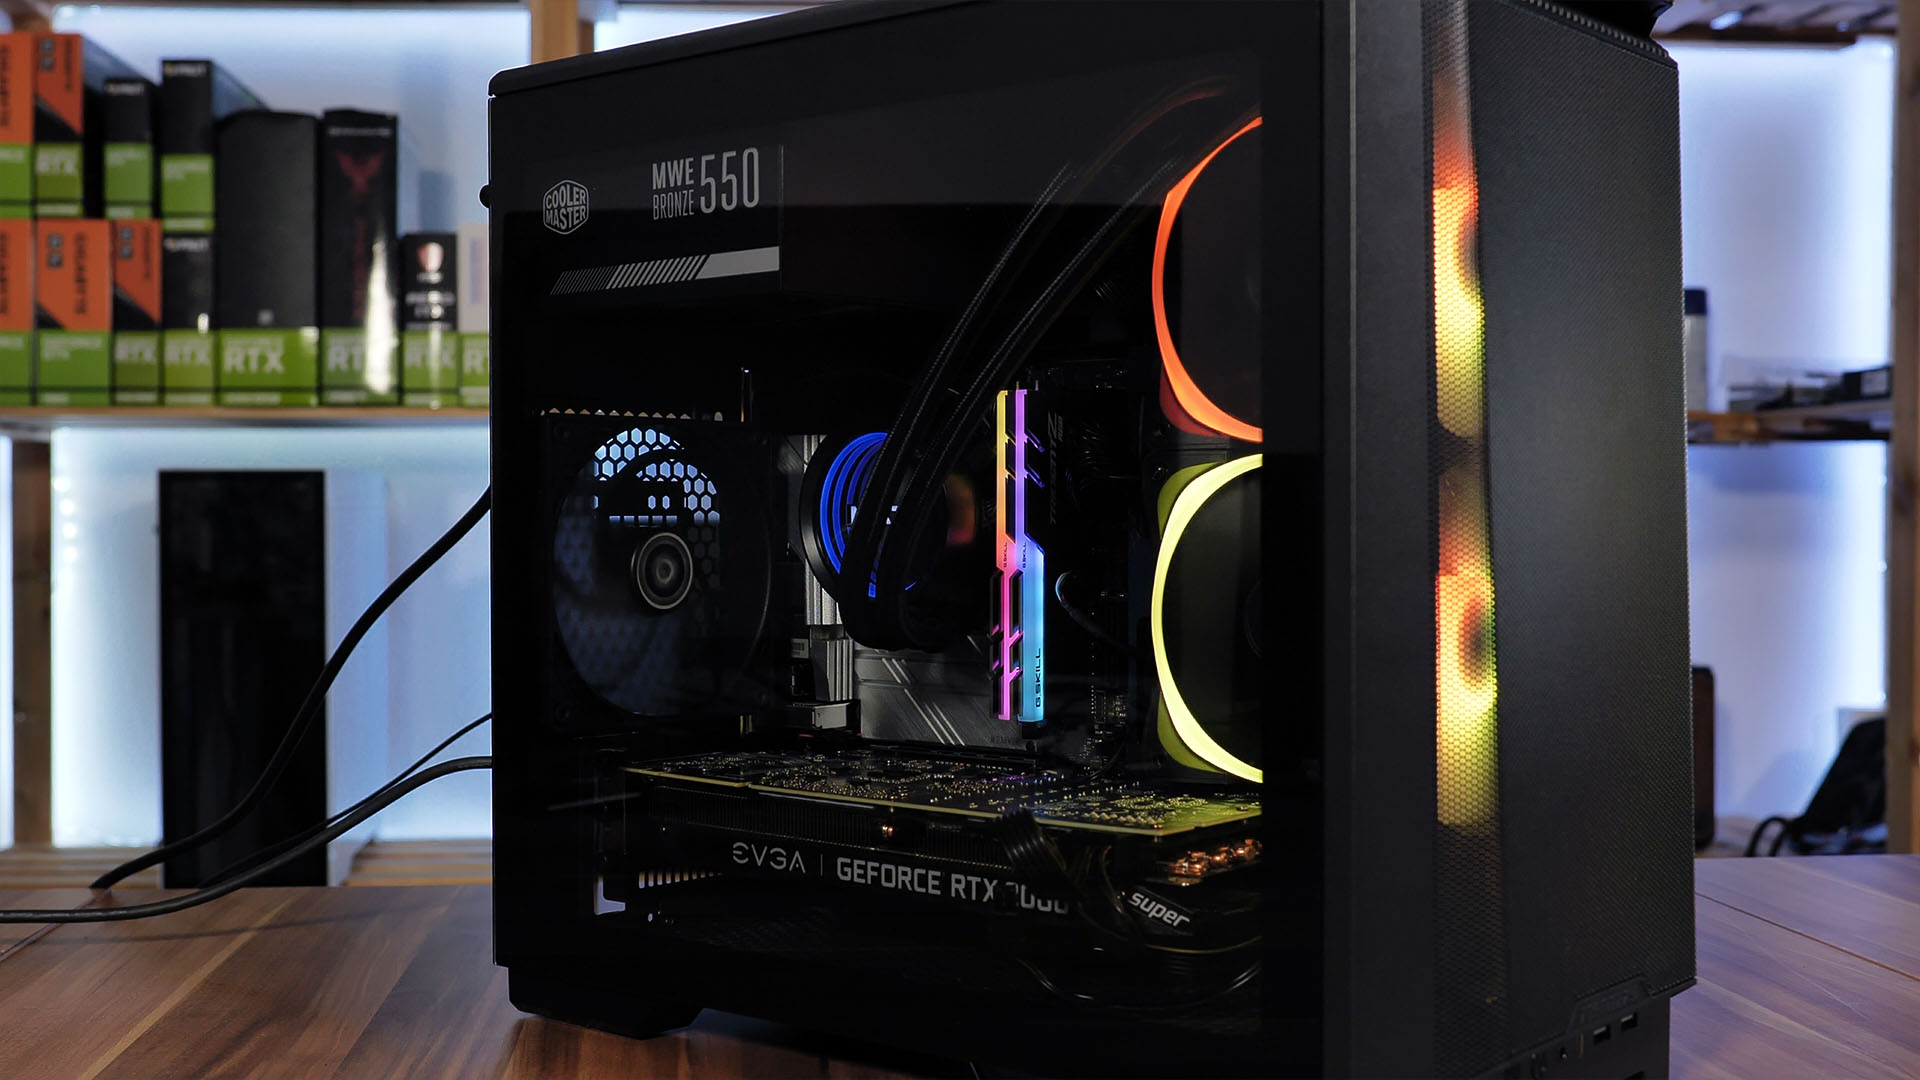
Design
After initially seeing the P200A on Phanteks website and looking over the provided pictures, we were not the biggest fans of the design.
The front panel reminded us of 2000- Speaker grills while the rest of the case looked moderate at best.
But after receiving the case and finishing the first build, we had to completely overthink our opinion.
The mesh used in the front panel does not in any way look aged, while it doubles as a nicely-looking diffuser for the ARGB fans behind it.

The overall "emptiness", or lack of any outstanding accents does not make the case look boring, it makes it look clean and subtle. A look that we admire the most.
Even if it is a question of taste, the huge amount of fan spots, and especially the centrally positioned fan spots allow to showcase a lot of RGB, making this case subtle, and potentially striking at the same time.
In general, we have learned to love the look of this case. Even if our initial thoughts were negative, Phanteks managed to change our minds and we became big fans of the P200A.
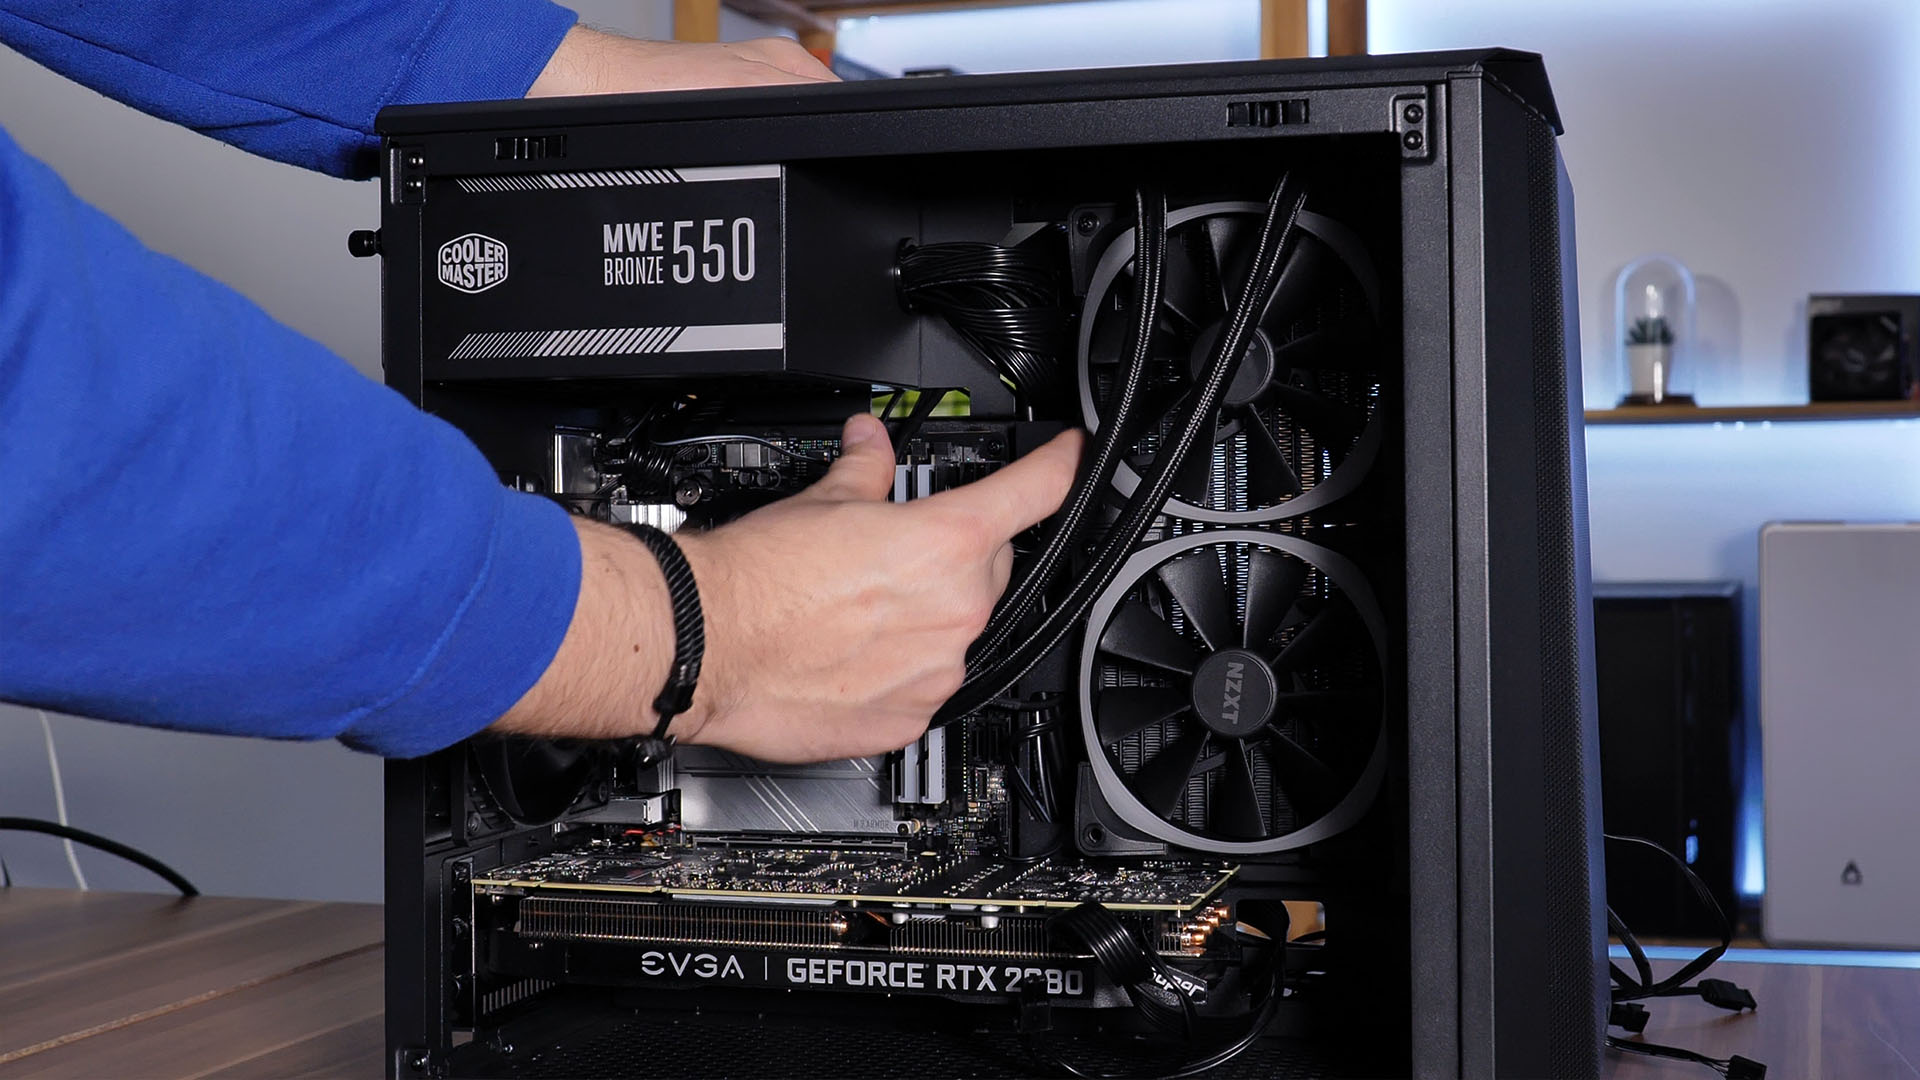
Installation

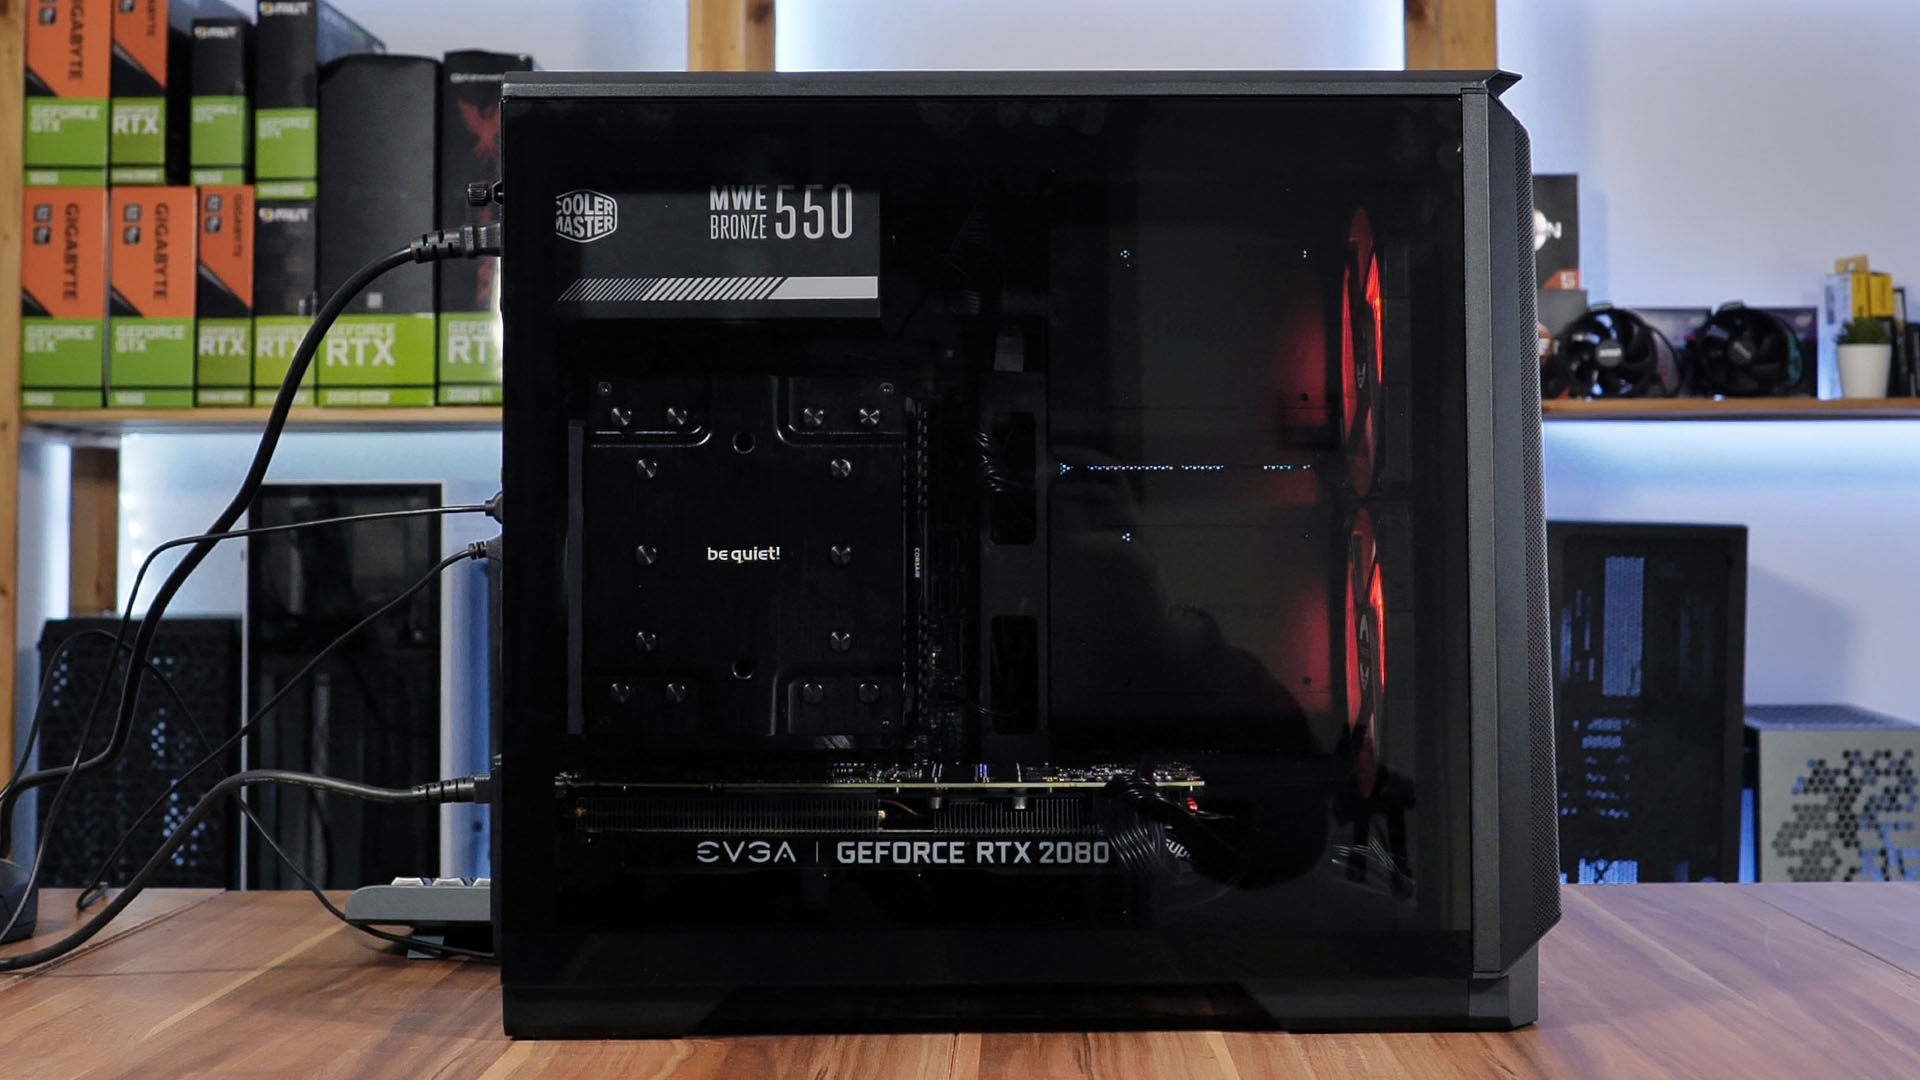
For the installation segment of this case we used the following components:
- ASRock Z590 ITX/AC
- Intel 10700K
- 2x TridentZ RGB
- EVGA RTX 2080 Super
- NZXT Kraken X53 RGB
- Cooler Master MWE550
As mentioned in the Cable Management section, building inside the P200A is not an easy task.
Placing the components and installing the GPU was as easy as expected, but positioning the cables in a non-embarrassing manner was a completely different task.
This was made even harder by the fact that Phanteks did not use the usual Sidepanel-Screw-in system that we know from a variety of other cases.
For the P200A, both side panels are held in place using a simple click-in mechanism. Something that we love to see in other cases. But in this case (pun not intended), this forces you to position the cables perfectly, without having the space to do so.
At this point, we want to mention again that Phanteks seems to have tried everything they could to make the cable management work. But there is just nothing they could have done due to the very limited space behind the motherboard.
That being said, it is by no mean an impossible task. Having a straightforward plan, including a fully modular power supply, makes this a lot easier.
Performance
Seeming to be an Airflow beast, there is a lot to test within the Phanteks P200A.
For all of our tests, we used our usual Test-Set, a Ryzen 3700x locked at 4.2 GHz with a Be Quiet! Dark Rock Pro 4 on top (without any fans).
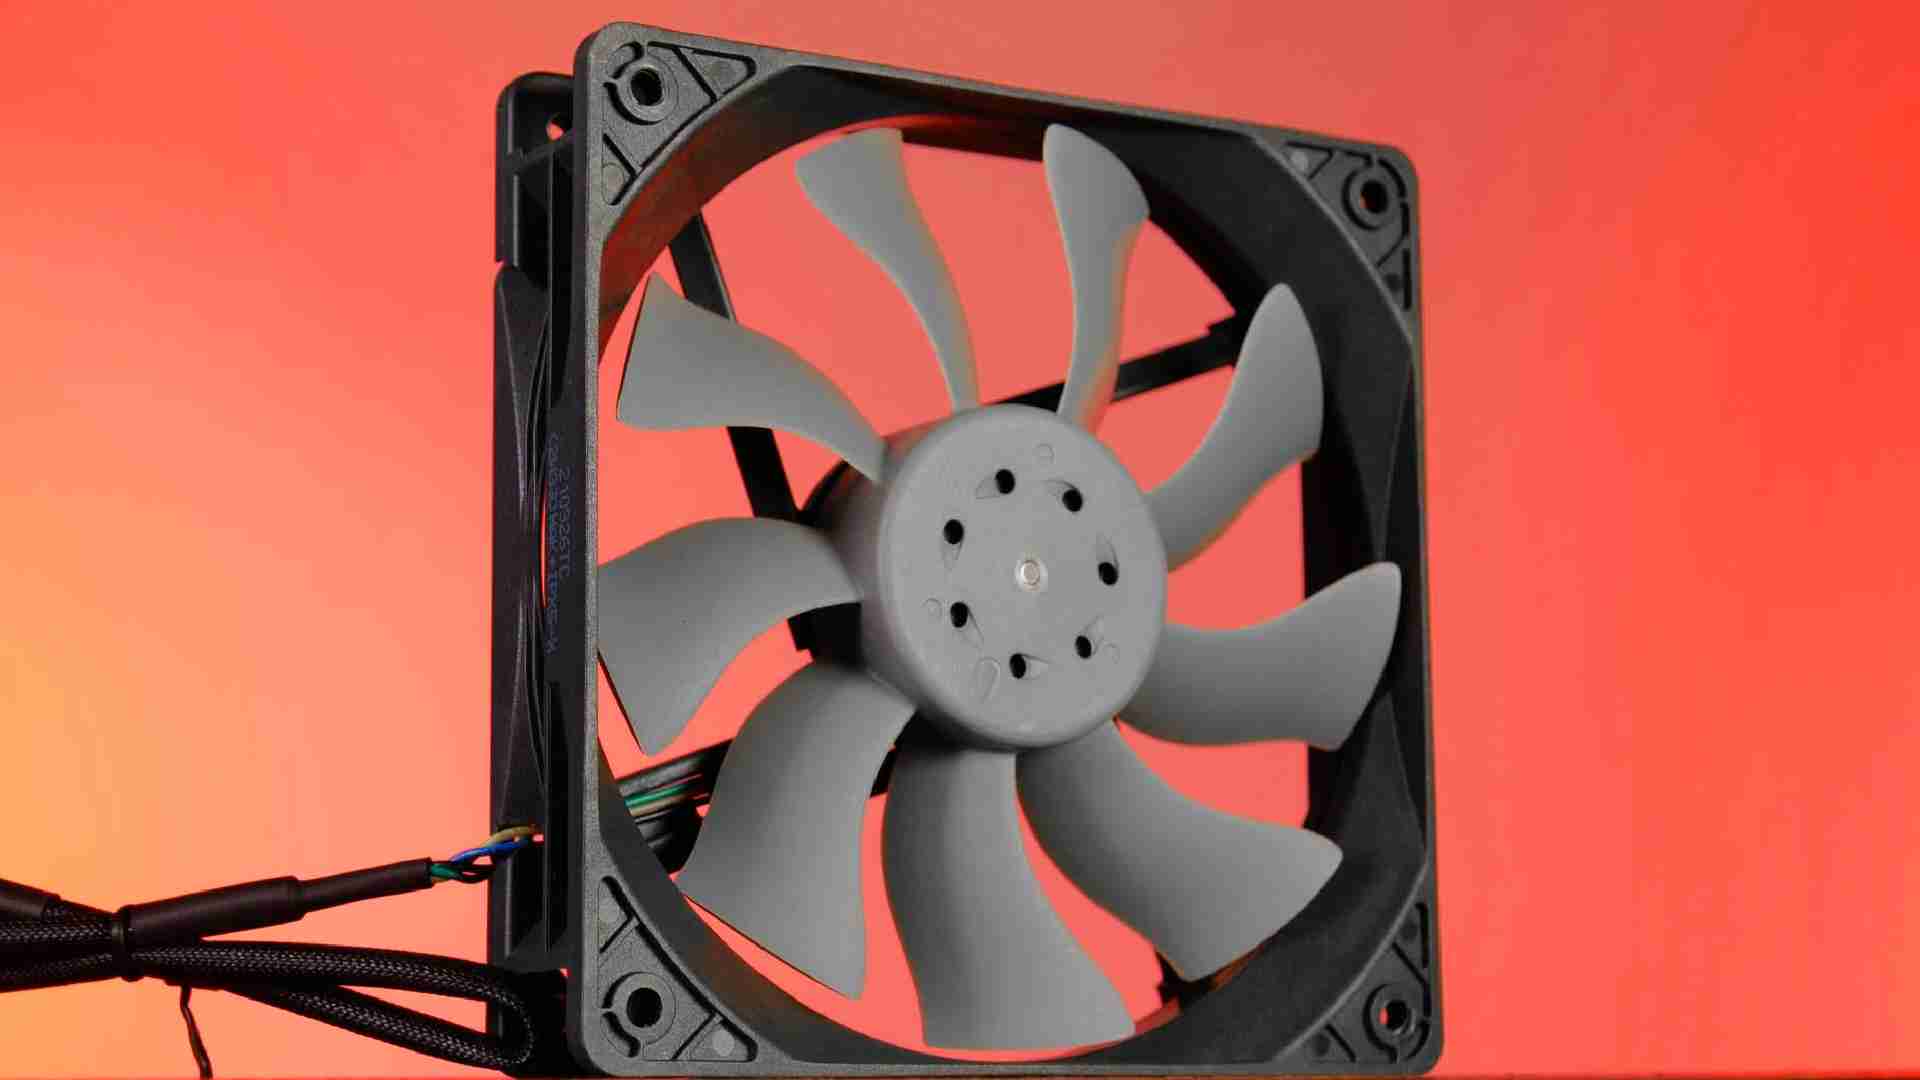
The first aspect to test was the "High-Performance" Mesh front panel. Herefore we stress-tested our 3700x with and without the Front panel one Arctic P12 in the back while leaving the included 2 fans in the front.
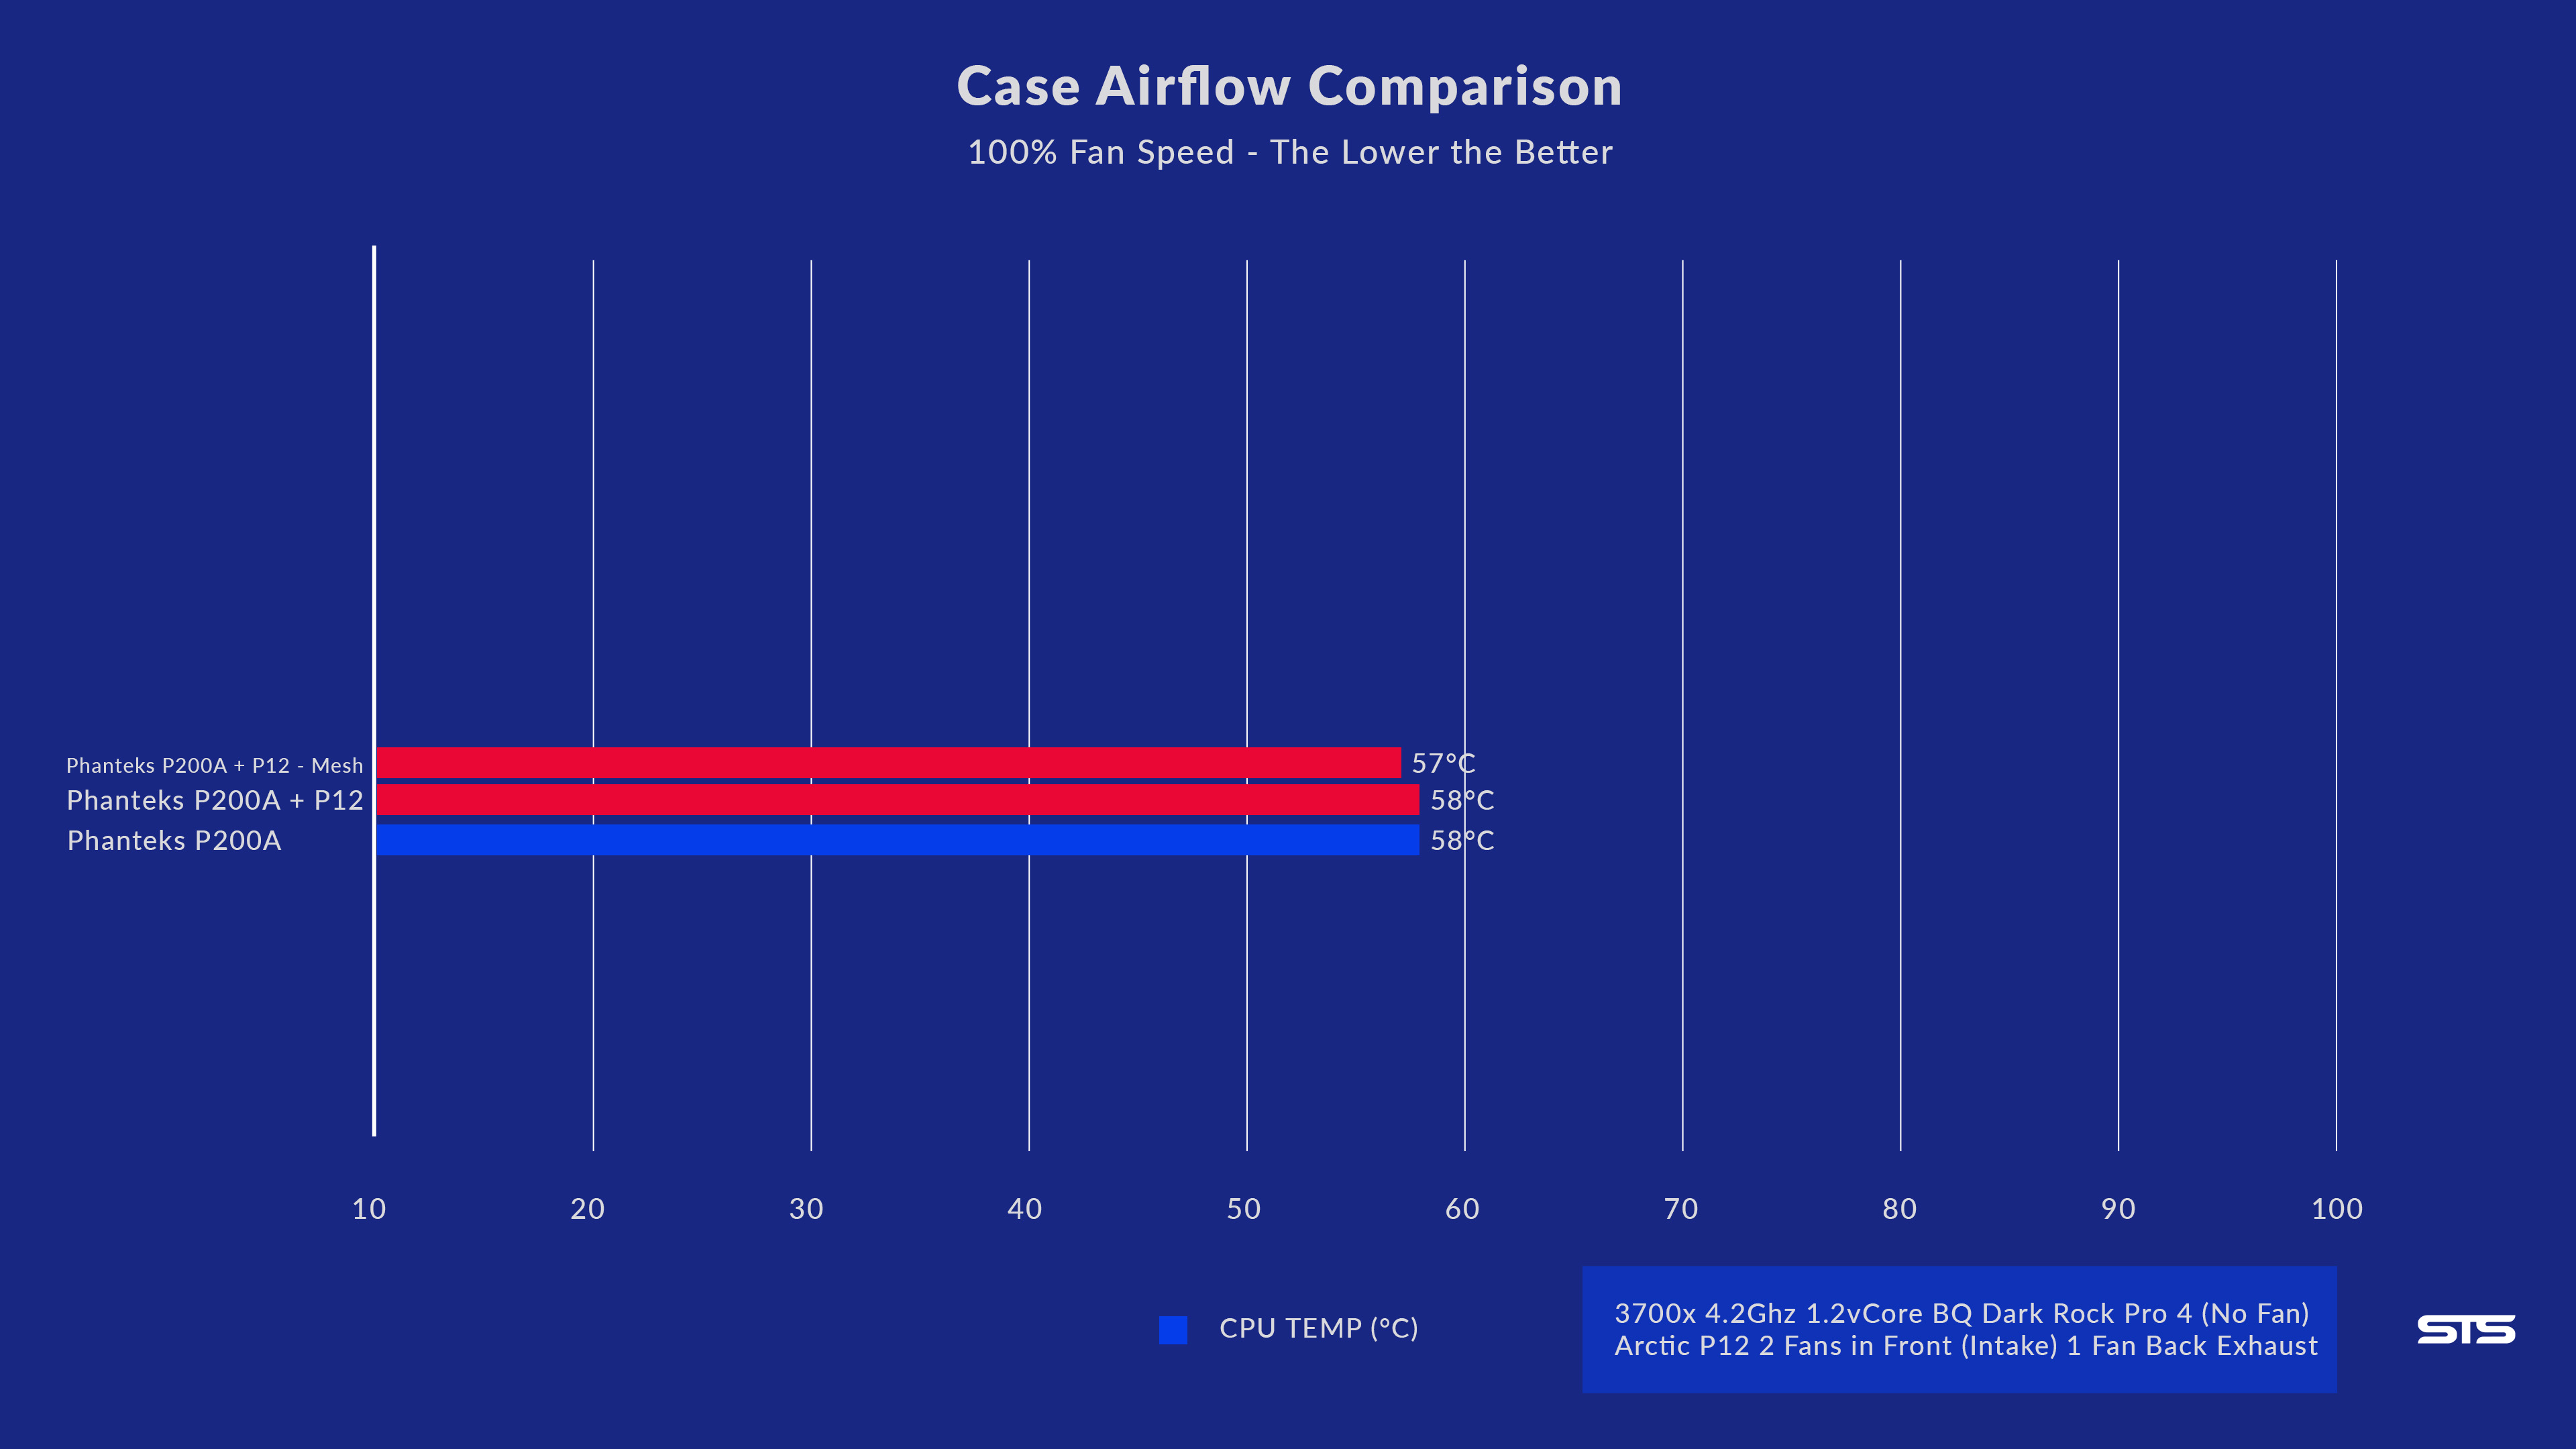
A 30 minutes Heavyload session revealed that the lack of the front panel only let the CPU temp rise by 1°C. A fantastic result considering what we have seen before.
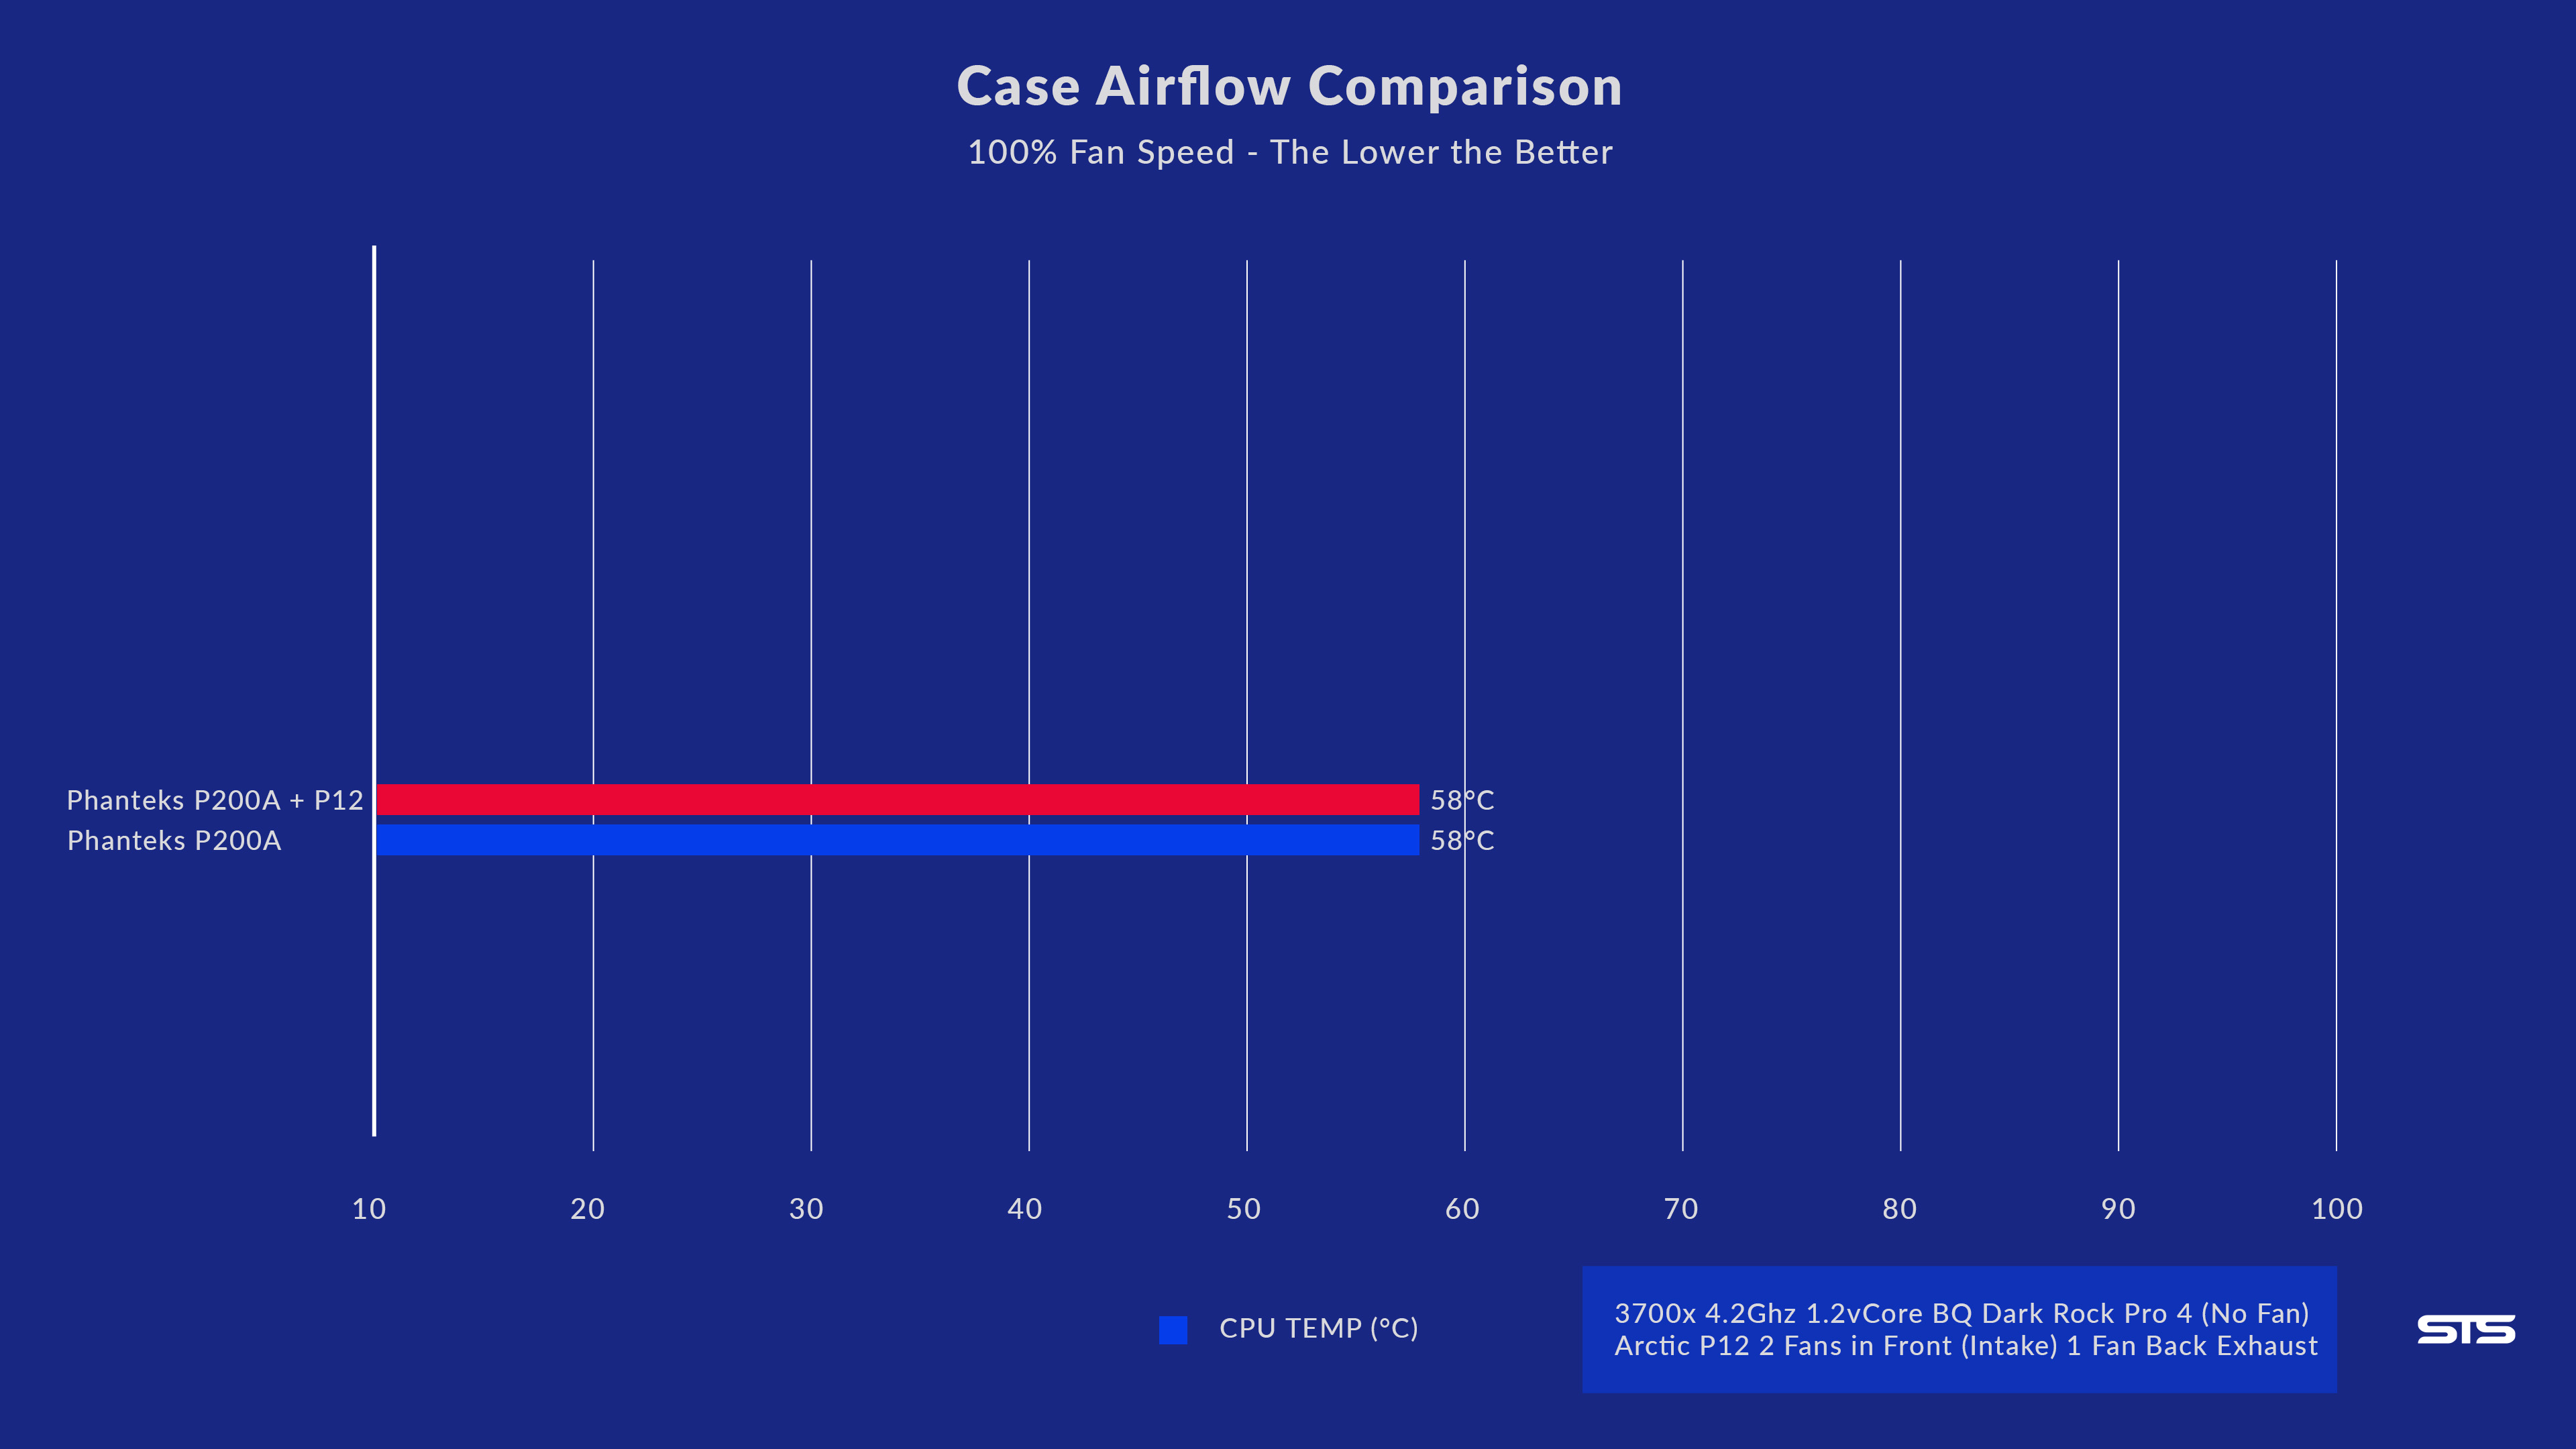
Next up are the included fans, herefore we stress-tested the CPU using the included fans as well as a pair of our Arctic P12. To our very surprise, there was absolutely no difference in temperature after replacing the fans. Something that we have in no way anticipated.
Funnily enough, the last test doubles as our standardized test, which placed the P200A at the very top of our benchmark list.
But absolutely do keep in mind that because of the position of the back fan spot (squished against our Dark Rock Pro), it starts to act as a CPU fan, something that we avoid in order to exaggerate our results. Therefore you need to take these results with a grain of salt as they are heavily influenced by that fan.
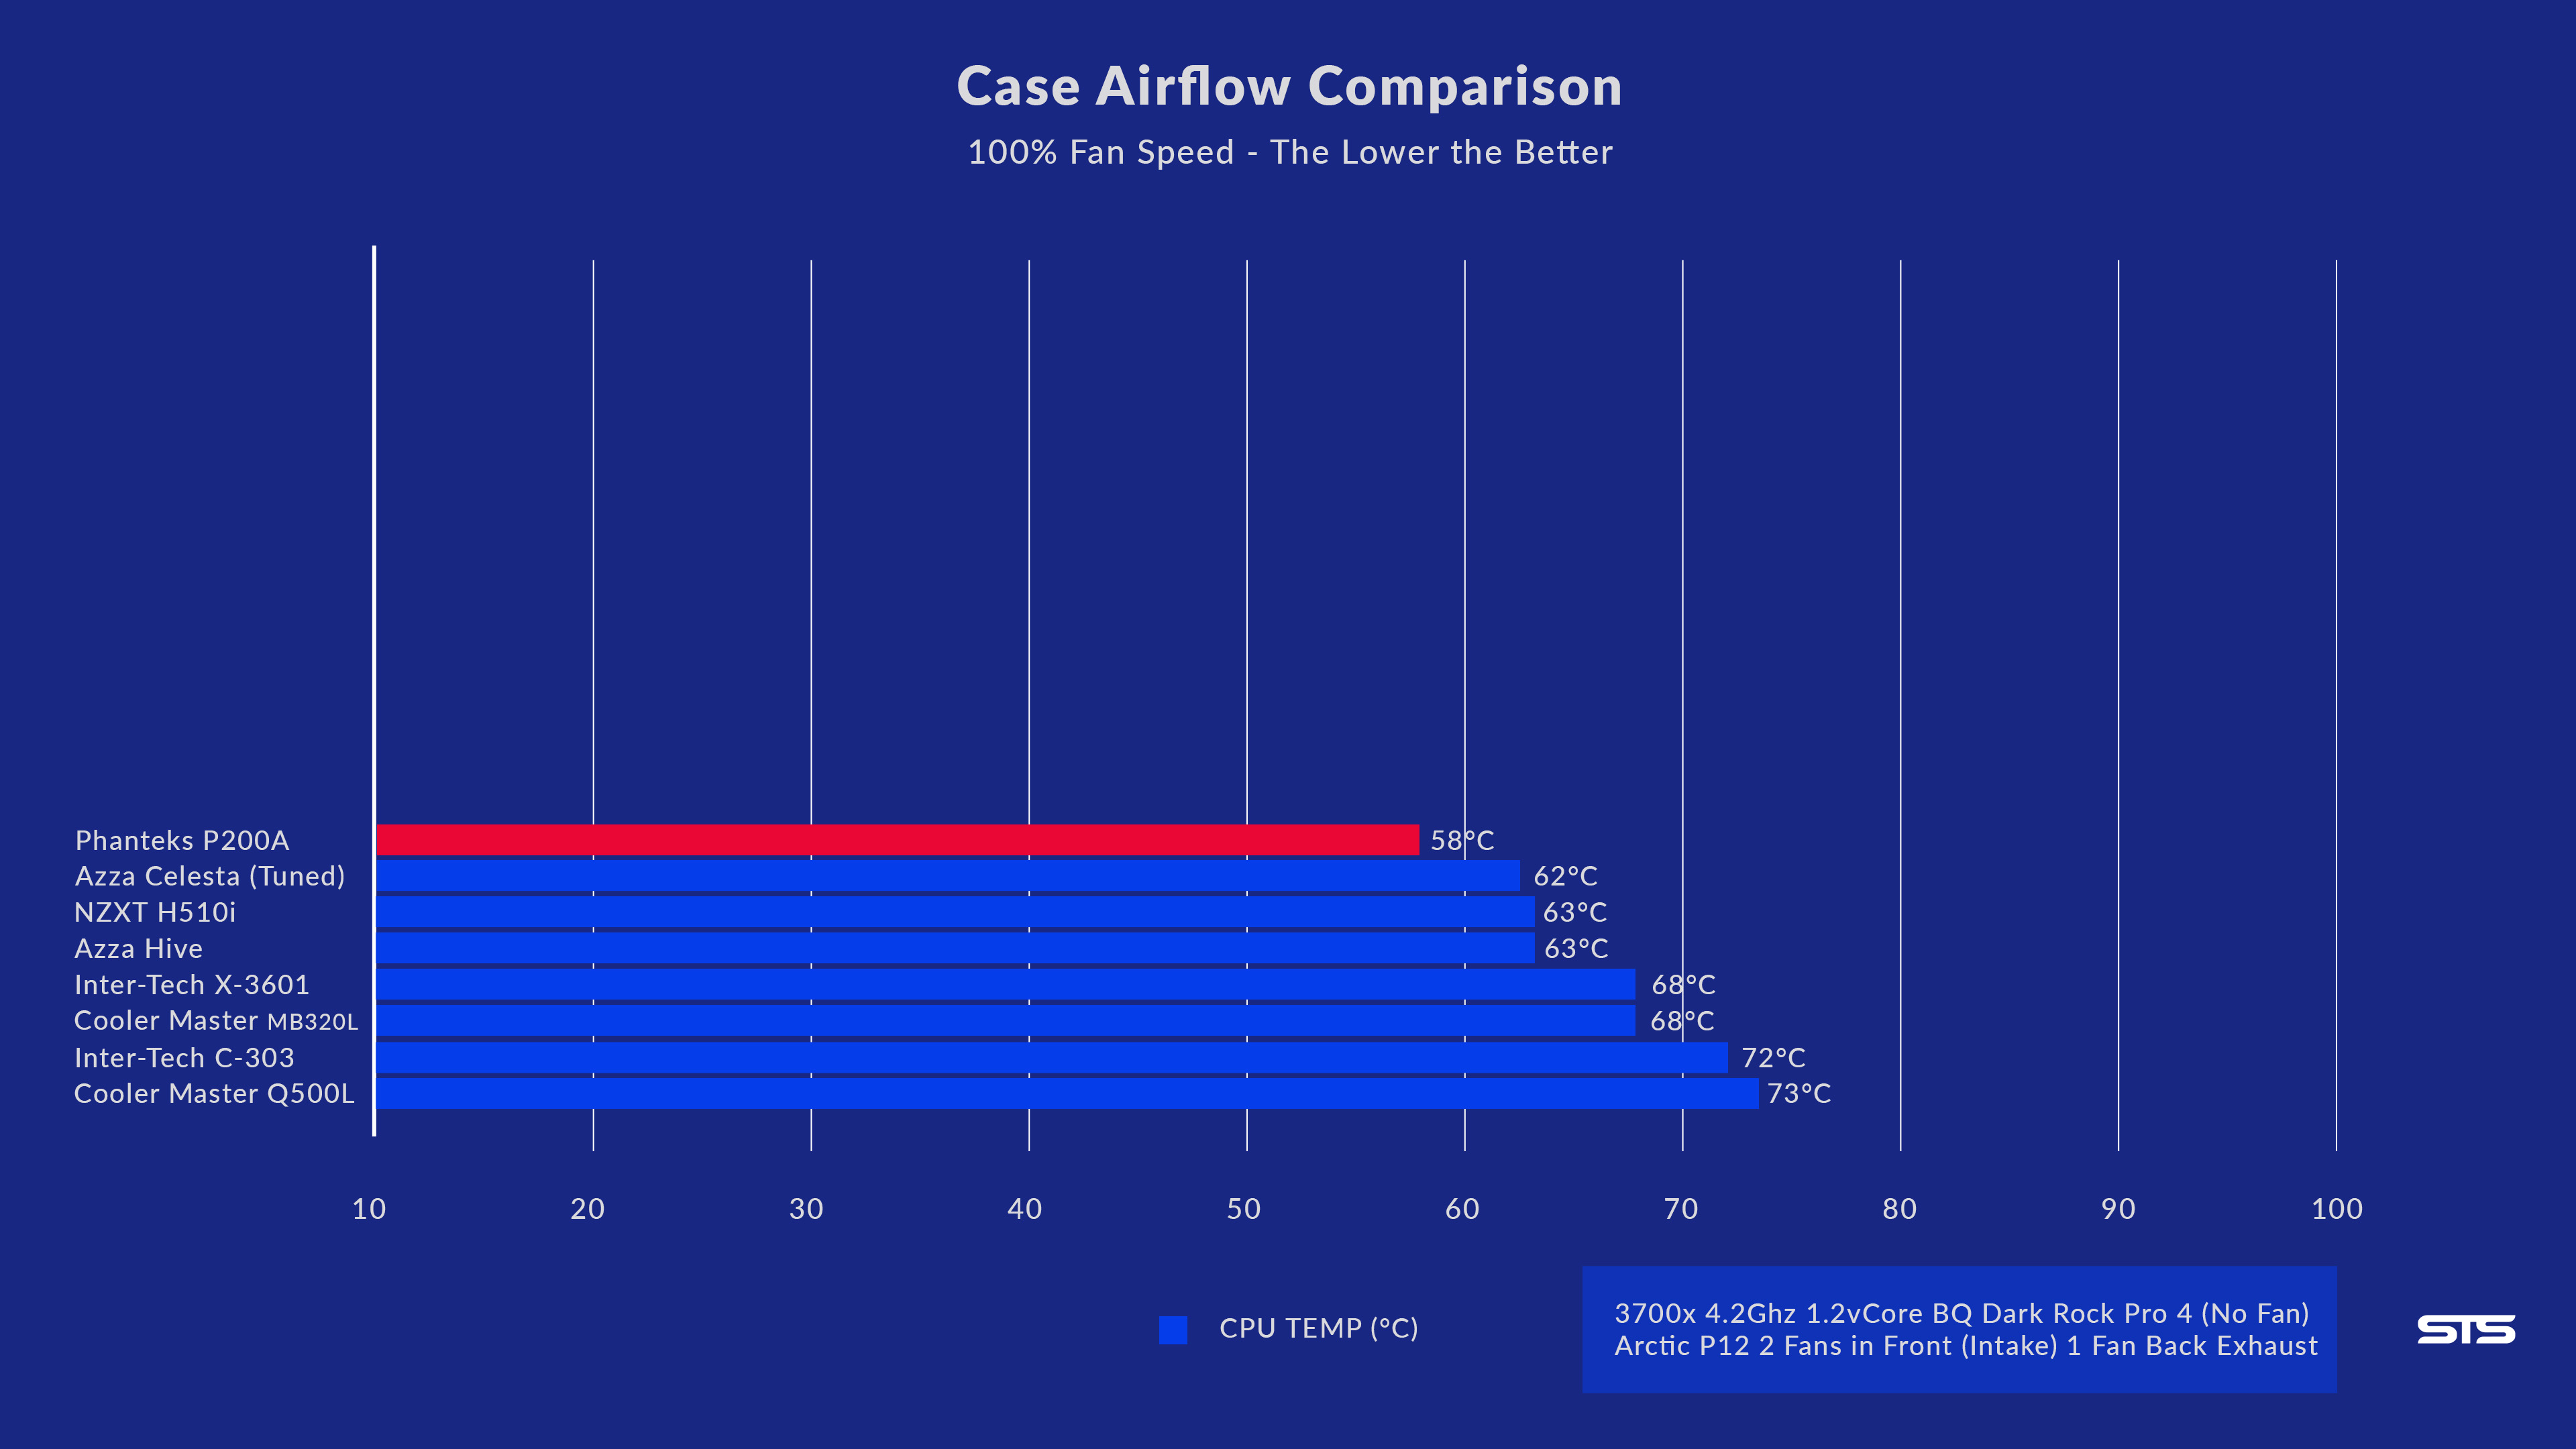
That being said, we cannot say anything negative about the P200A's cooling performance. Considering the form factor, this is by far the best cooling setup we have seen inside such a small case.
Conclusion
Even if our initial expectations were slightly on the negative side, we have become huge fans of the Phanteks P200A case.
The Quality is outstanding for the price point,
the versatility is unique for its size,
it has a clean looking design,
the cooling potential is among the best considering the size,
it features a full ATX PSU,
it allows for full-sized Tripple-slotted GPUs,
it comes with up-to-date IO,
integrated ARGB controller,
2x included (good) ARGB Fans, and the list goes on.
There are very few things that we found which could have been better:
- There is no included 2-1 PWM splitter for the Fans,
- There could have been a bracket that hides the cable portion of the PSU.
But considering the 70€/70$ pricetag, this becomes nagging on the highest level.
Generally, we were highly surprised by what the P200A had to offer. The number of positive aspects outweighs the two little negative ones by a margin.
It became clear that Phanteks tried to fill in a gap that has not been fully addressed before. With Mini-Tower cases favoring smaller form factors on one side, and Mini-Towers favoring compatibility on the other side, there was not much to be looked at in terms of cooling.
But Phanteks managed to produce a good-looking case, which little-to-none loss in terms of hardware compatibility, while featuring an outstanding amount of cooling power at the cost of a little bit of size.
Because of all of this, we can absolutely recommend this case for anybody who is looking for a relatively small case that favors the highest level of cooling performance.

Akasa Otto SF12 Review
Akasas Otto SF12 is their Airflow focused version of their extreme performance Otto lineup. With ear-shattering performance a
Read More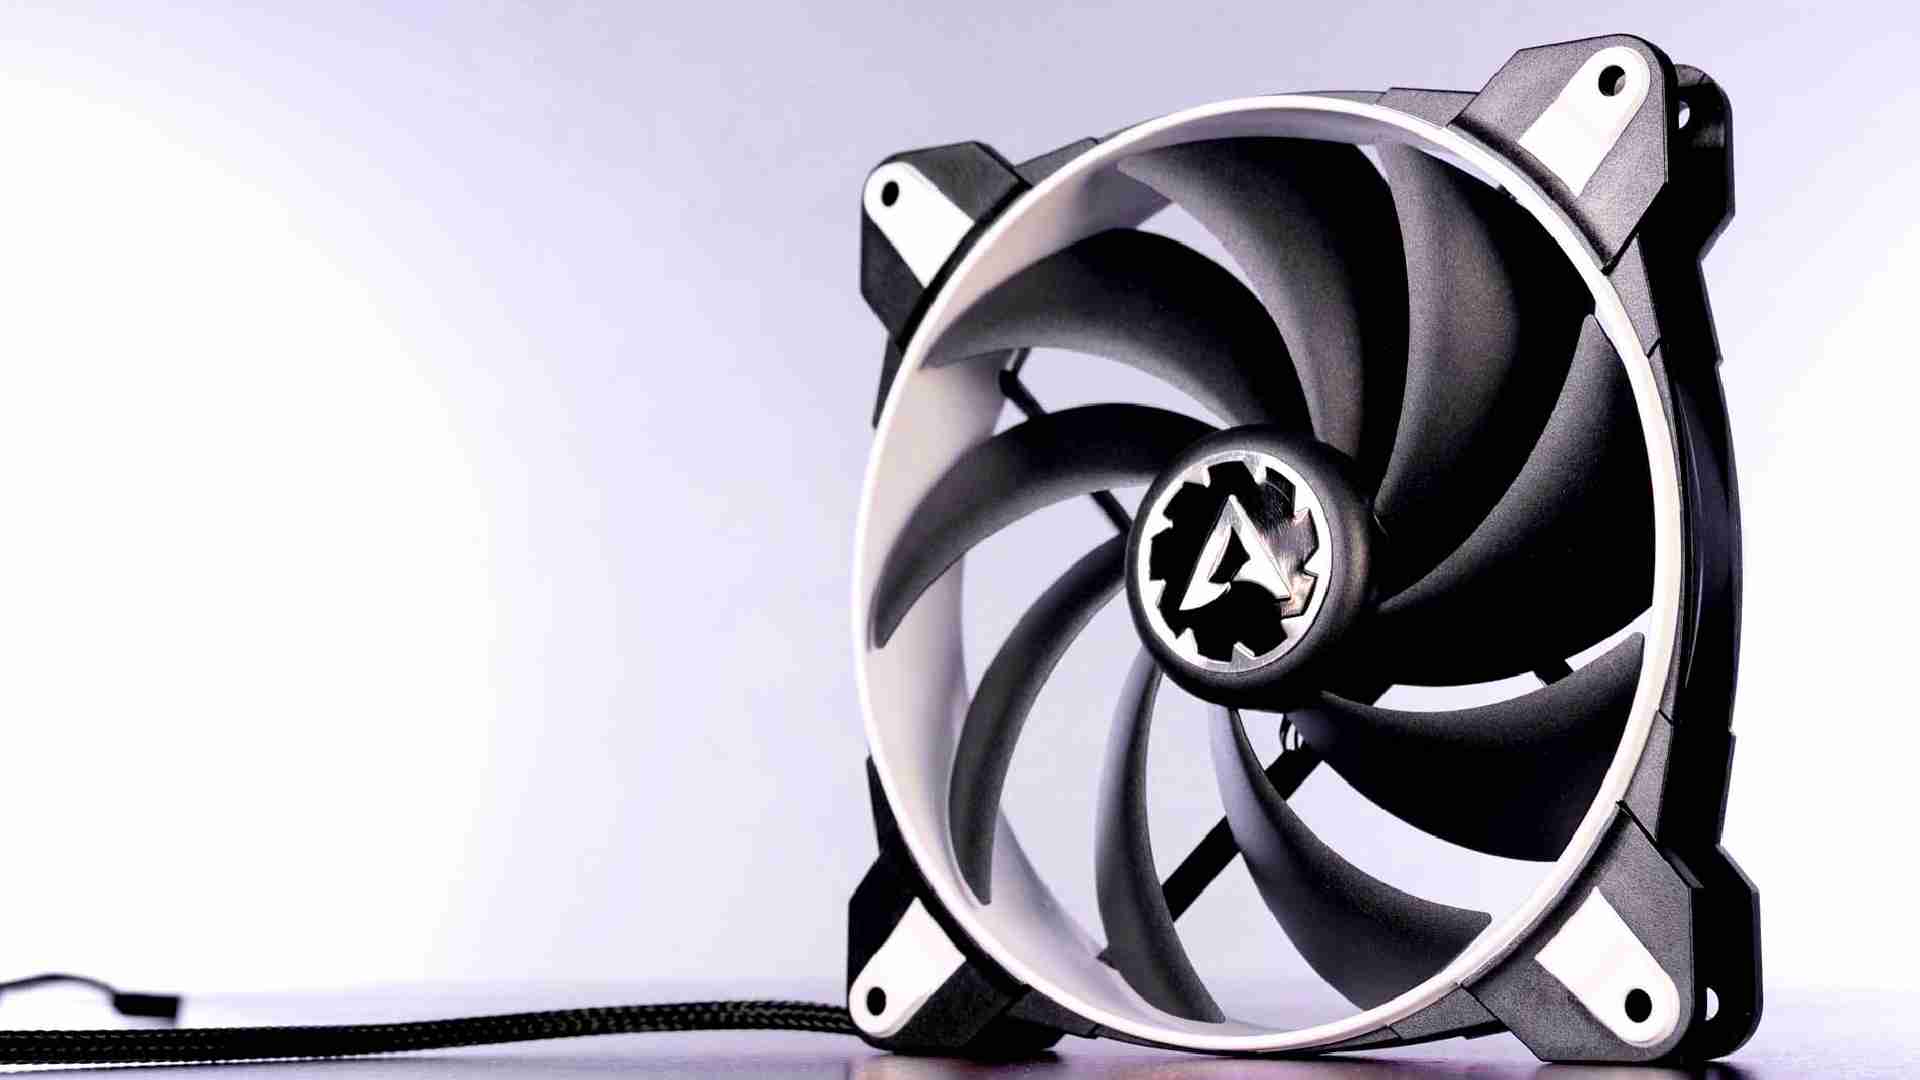
Arctic BioniX F140 Review
Arctics BioniX series already proved itself to be an overpowered version of their Normal P and F counterparts. Knowing that i
Read More
Xilence XPF120X.B.PWM Review
Lets have a closer look at Xilences newest XPF120X.B.PWM fan, the fan for every use case. Used on their new AIO, Air Cooler,
Read More
Lian Li Galahad II Trinity Performance Review
Using a new double wave fin design, Lian li tried to double the potential performance of their latest and greatest AIO. To ma
Read More