Inter-Tech C-702 Diorama Review
Introduction
After reviewing the Inter-Tech C-701 Panorama, we were immediately baffled by the things you get, considering the Price. But there we a couple of things that "could have been better".
Now Inter-Tech came forward with a little sister case, the C-702 Diorama. With 140mm Fan support, better cable management, and a number of other tweaks, this case may fix the issues we had before.
Let's take a closer look at the Diorama and see if it ends up being better than the Panorama, despite its smaller size!
What's in the Box?
Just like we're used to, the C-702 Diorama comes in a big brownish carton box. Inside, we will find the Case itself, wrapped in some plastic foil and held in place with the usual styrofoam blocks.
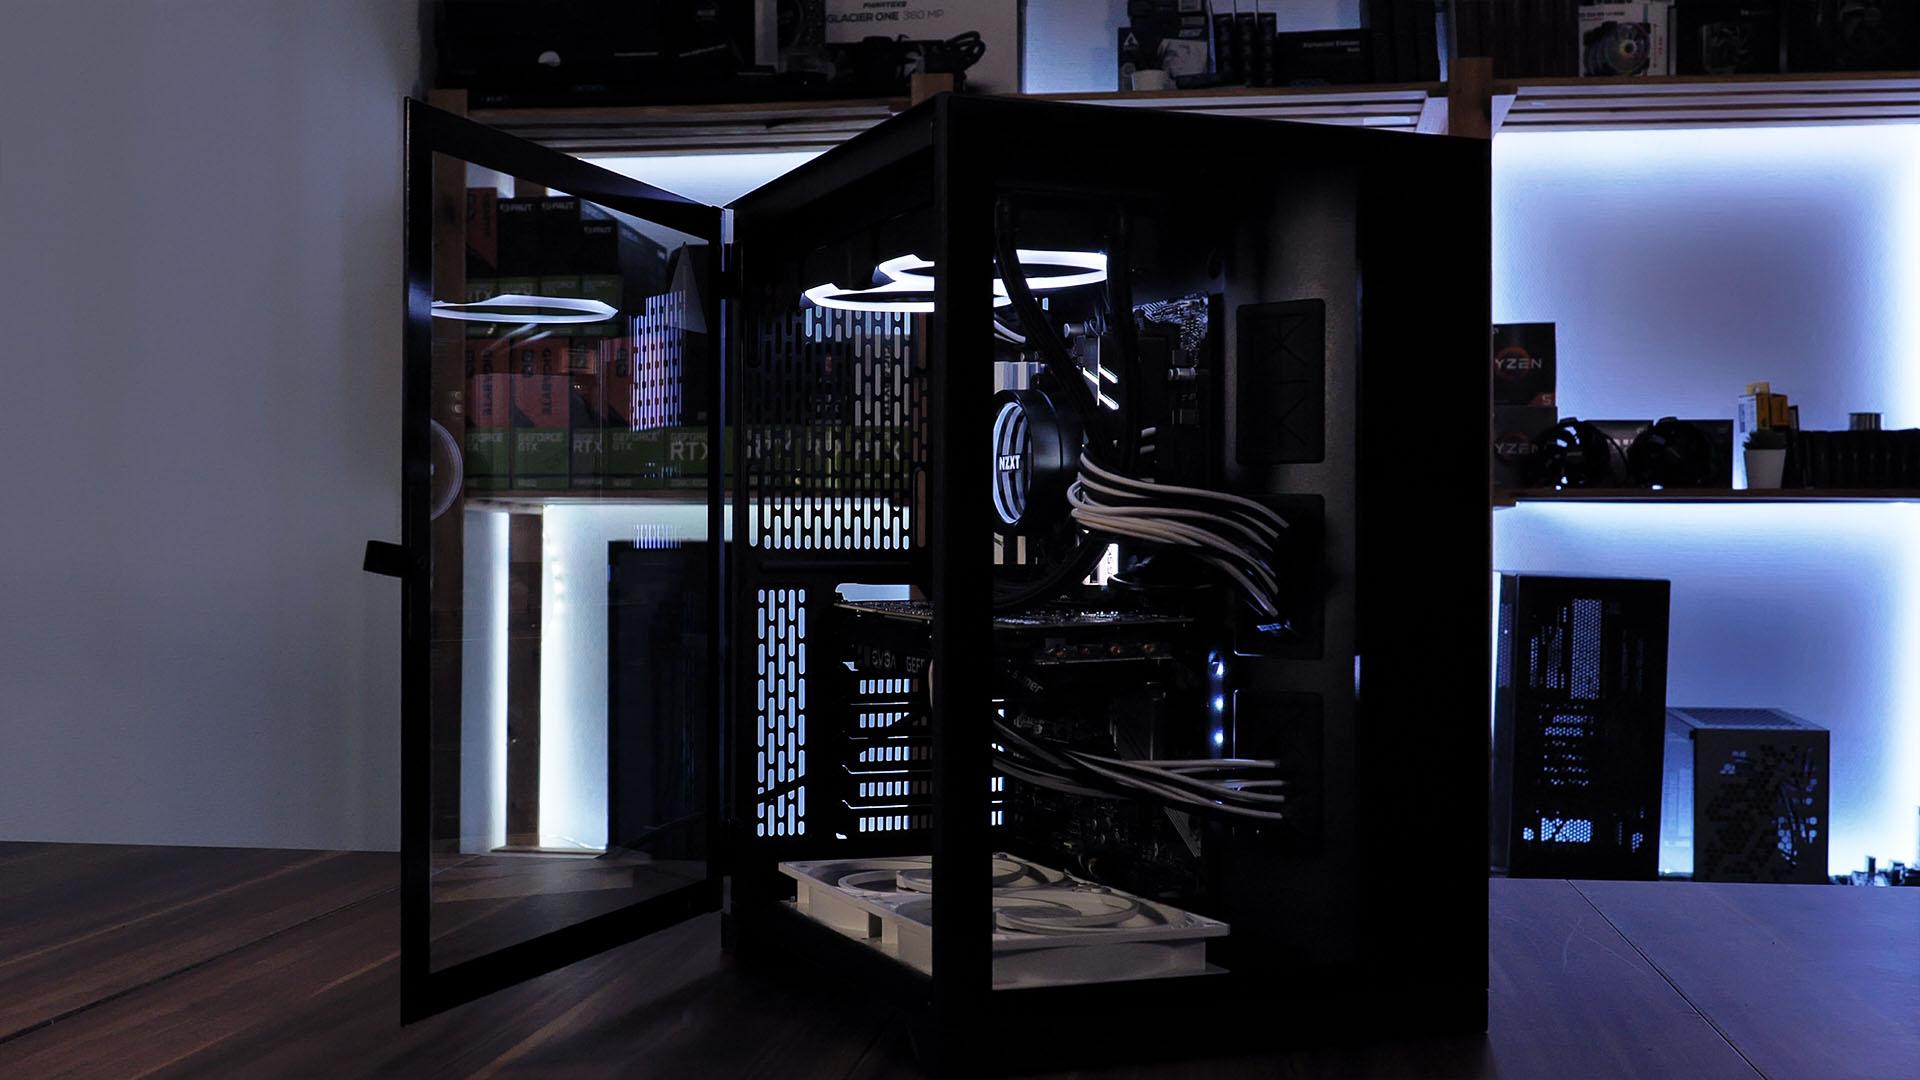
However, once the case is outside, you will immediately see the two Tempered Glass side panels that are responsible for the case's incredible design.
Inside the case, we will find an additional bag of goodies containing the usual Mothoard/PSU Screws, Spacers, and so on.
Specs
The Inter-Tech C-702 Diorama comes with a quite long spec sheet, therefore we summarized all the important points down below:
| Name | Inter-Tech C-702 Diorama |
| Type | Mid-Tower |
| Mainboard Size | ATX, Micro-ATX, ITX |
| PSU Size | ATX |
| PSU Position | Separate compartment behind Motherboard |
| Color | Black |
| Side Panel | Tempered Glass |
| Front Panel | Tempered Glass |
| CPU Cooler Height | Up to 160mm |
| GPU Length | Up to 325mm |
| 2.5" Drives |
2x Behind MB 1x Above the PSU |
| 3.5" Drives | 2x Behind MB |
| IO | 2x USB 2.0 1x USB 3.0 Mic in/out |
| Dimensions | 430x285x360 (HxWxD) |
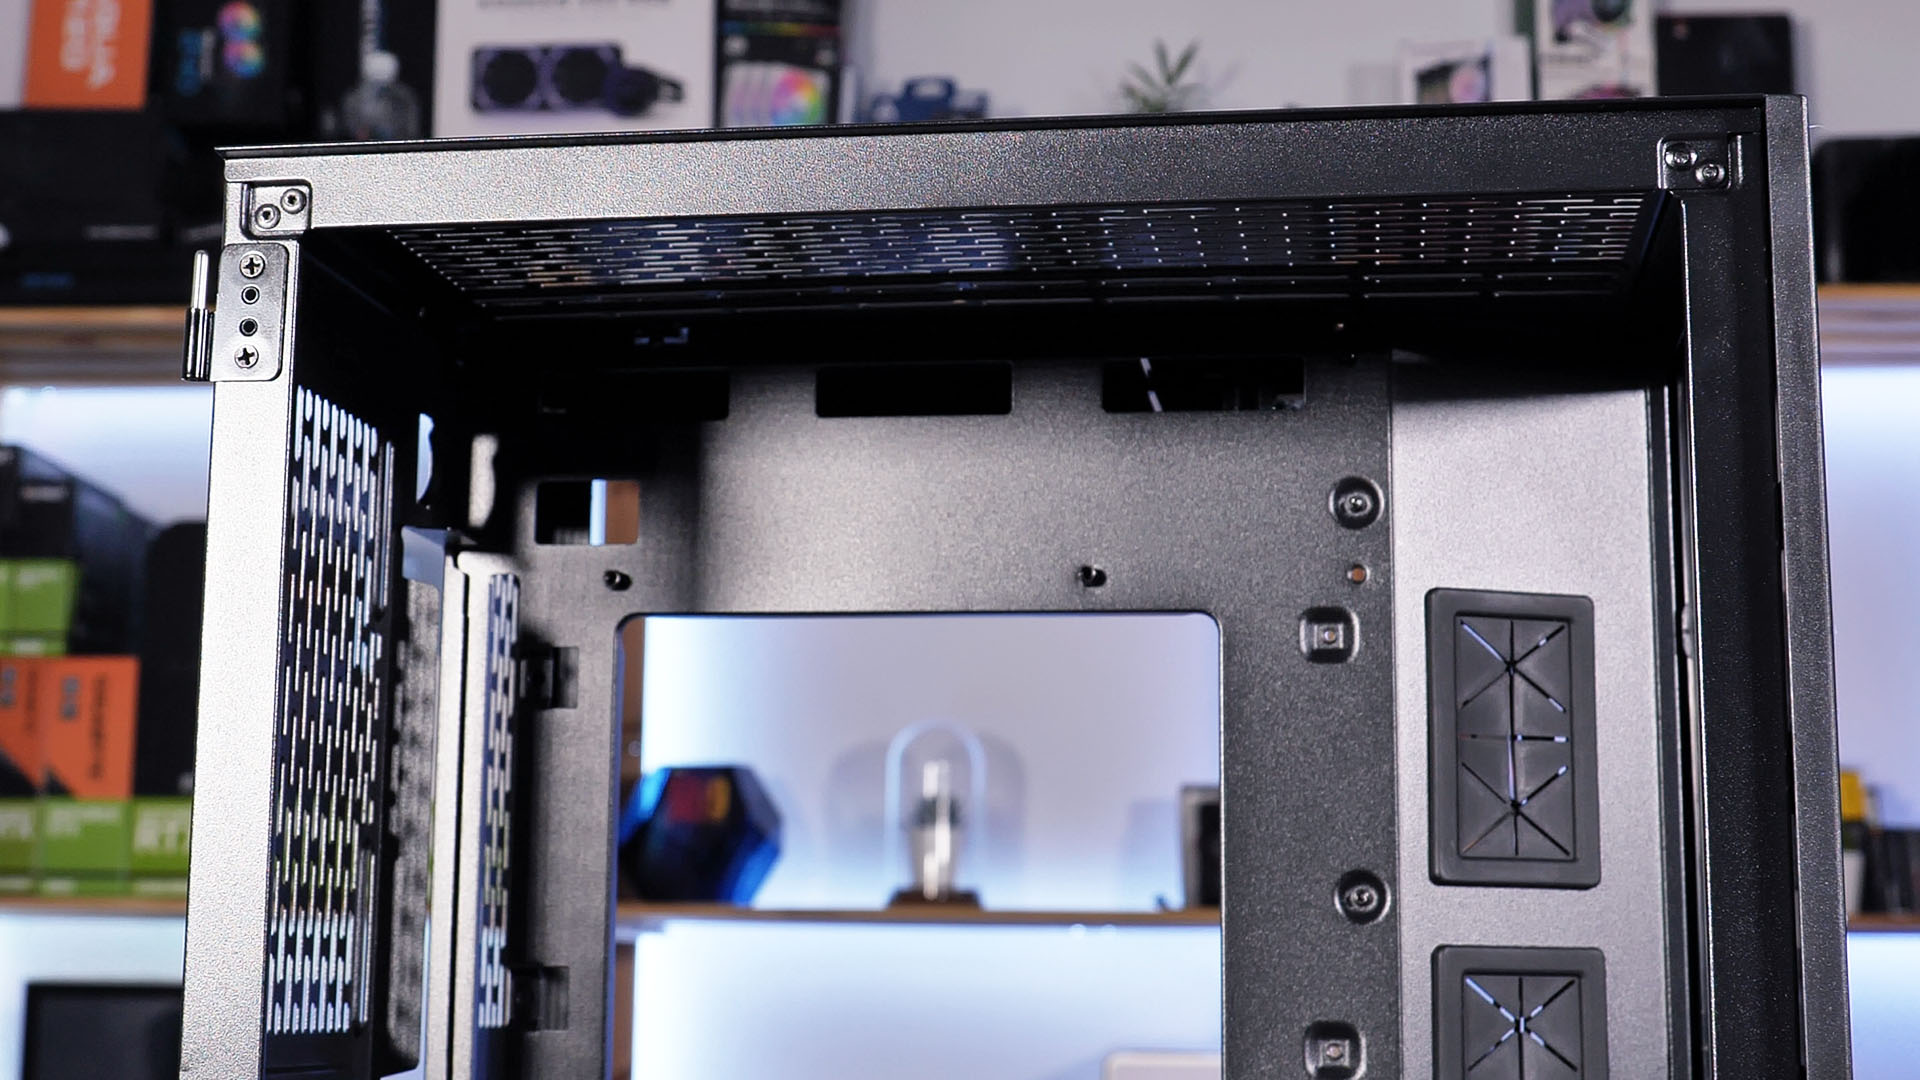
| Fan Spots |
2x 140/120 in the Top 2x 140/120 in the Bottom 1x 120 in the Back |
| Watercooling |
Up to 280 in the Top Up to 120 in the Back |
| Extras |
Vertical GPU Mouting available |
Compatibility
In terms of compatibility, there is not much to nag about inside the C-702 Diorama.
For Motherboards and PSUs we can use up to ATX Size.
For the GPU, we can go with up to 325mm long cards. This also includes every card of the latest and greatest RTX 3000 Series.
One aspect that got a little tweak in comparison to the original C-701 is the CPU Cooler height. Inside the Diorama, we can now use up to 160mm high coolers, including things like the Be Quiet Dark Rock Pro 4. An extremely welcome change.
One part we will skip for now is the Fan and Radiator support. Of all the changes made going from the Panorama to the Diorama, this will most surely be the most important one. Therefore we will look at this aspect in-depth in the Cooling segment.

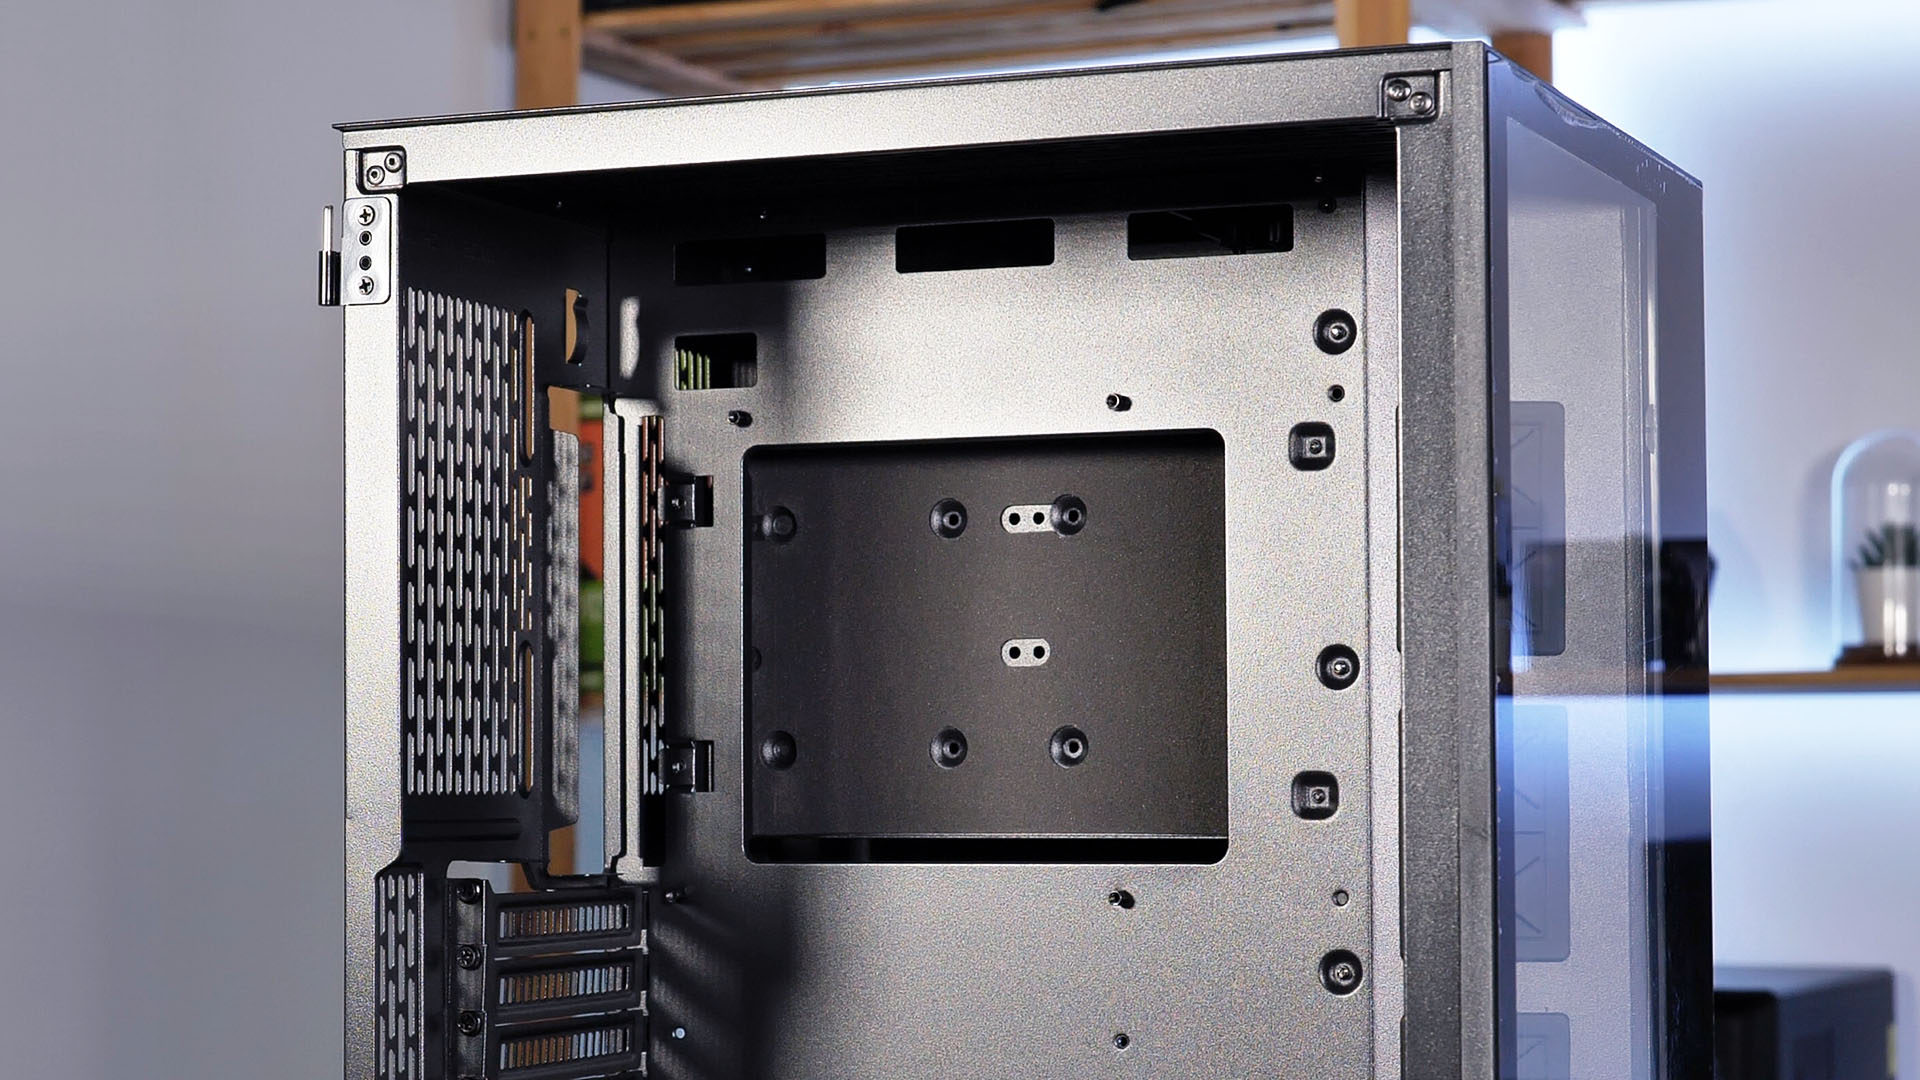
For the Drives, you will find a detachable Frame behind the motherboard that can hold 2x 3.5" Drives on the inside and 2x 2.5" on the outside.
Additionally, there is 1x 2.5" spot above the PSU unit.
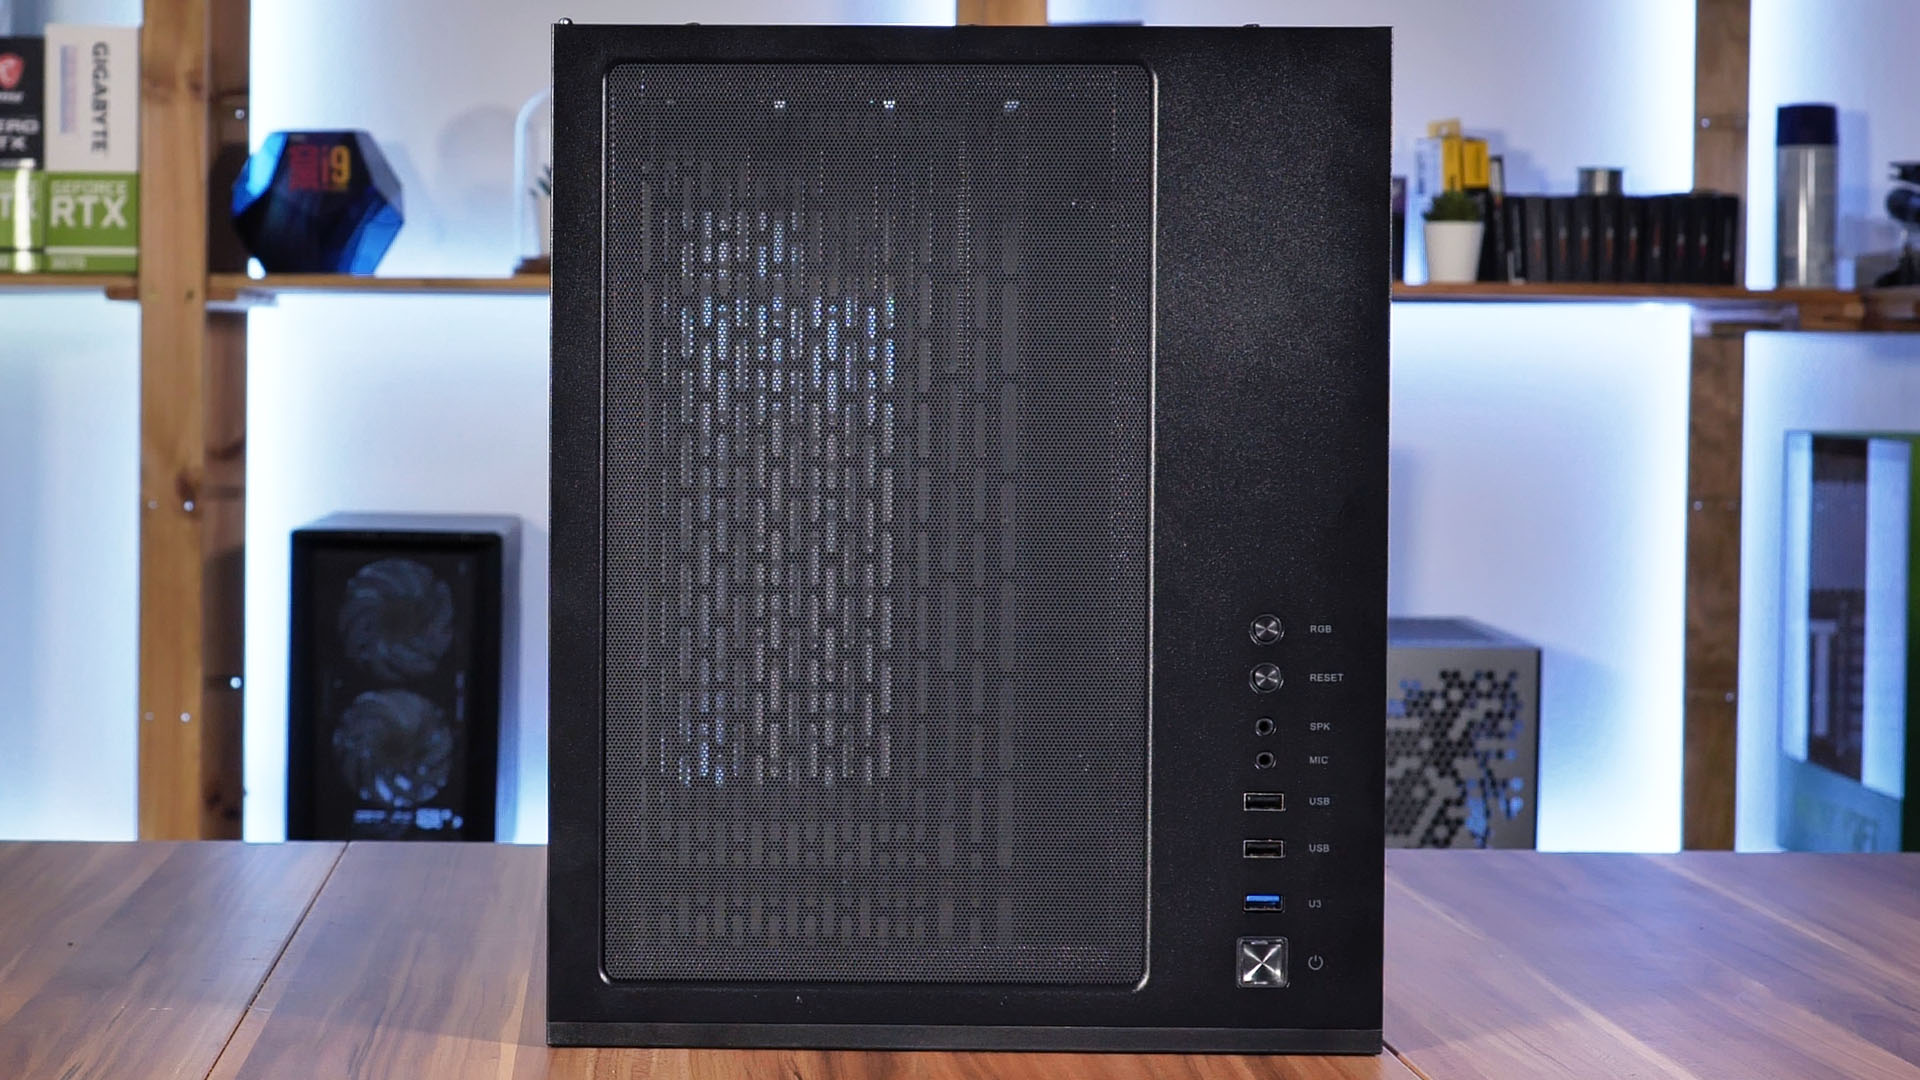
IO
One of the few issues we've had with the original C-701 Panorama was the IO. Unfortunately, this is an area in which Inter-Tech did not do any improvements. Quite contrary actually.
Instead of following our good advice, Inter-tech ditched one of the USB 3.0 Ports, ending up with 2x USB 2.0 and 1x USB 3.0 (ignoring the usual Audio In/Out RGB Button). A pity.
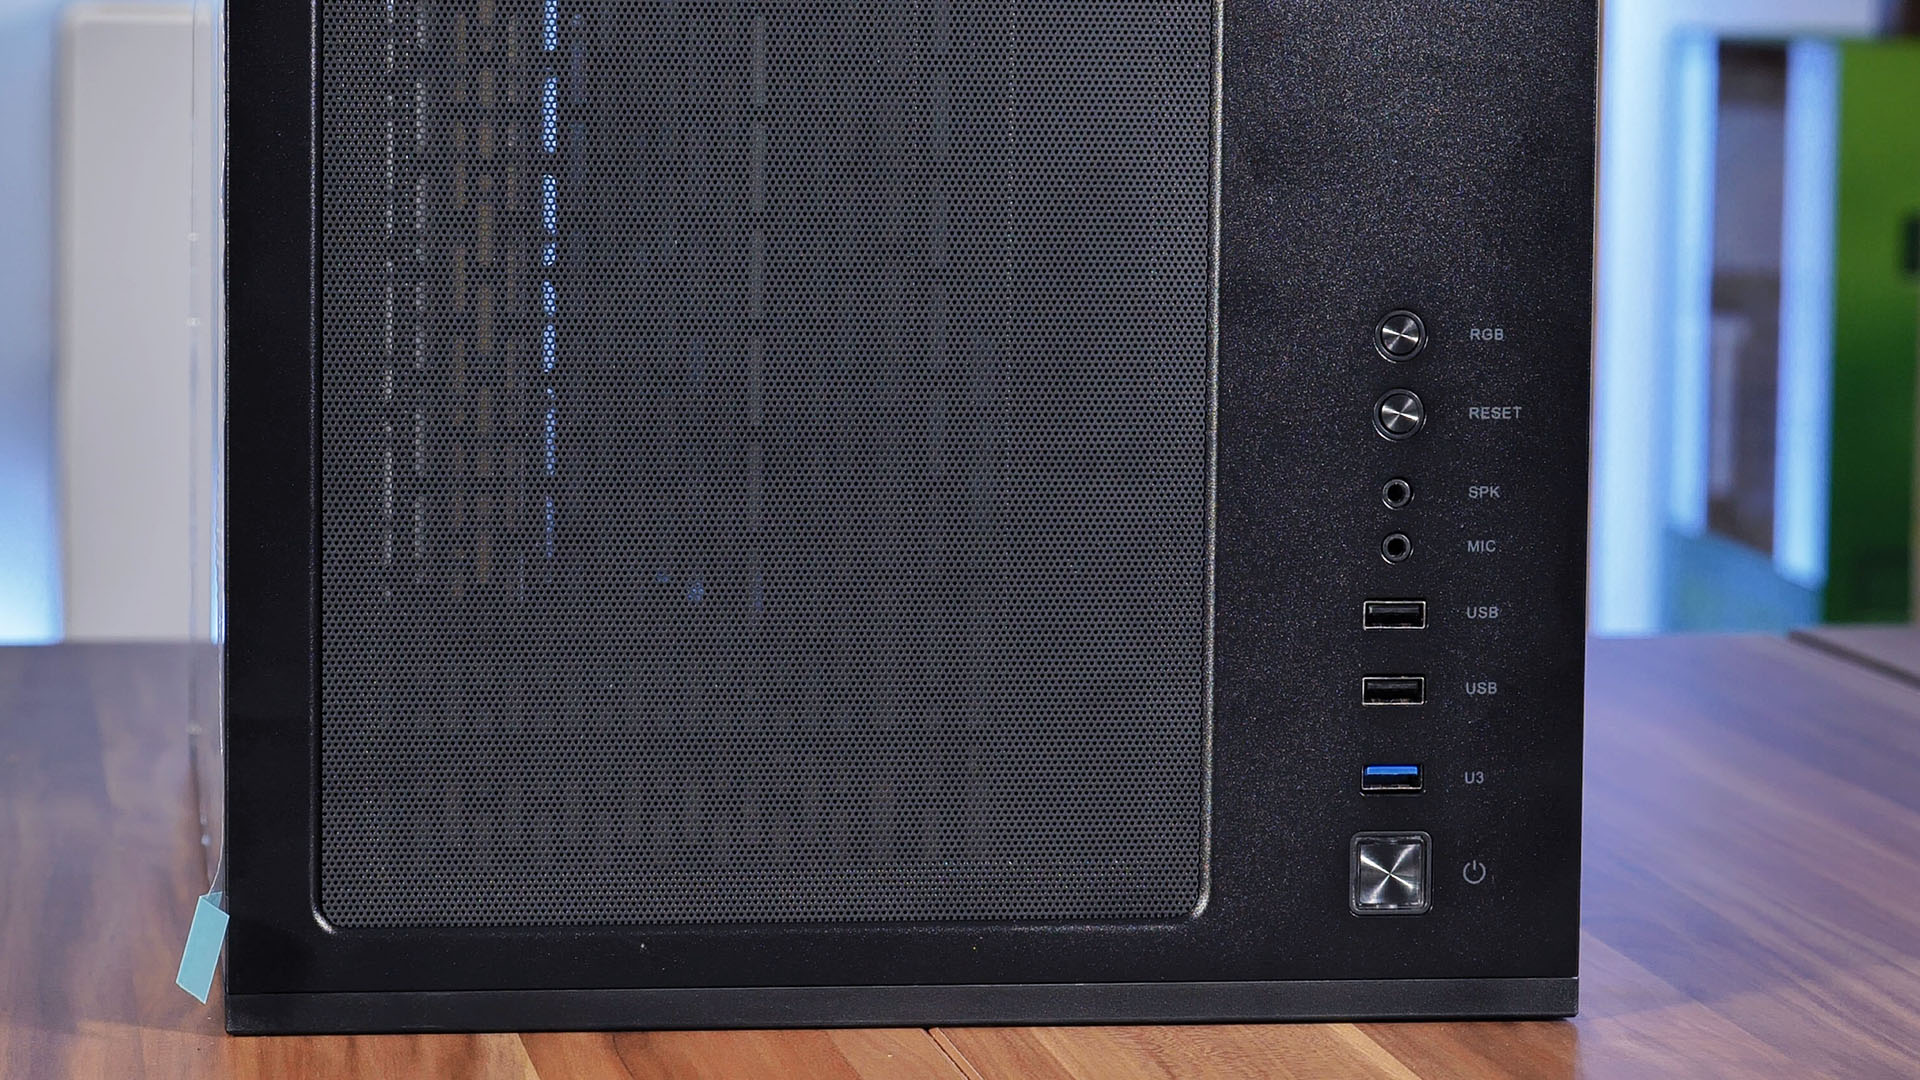
But not everything is bad. The Reset and RGB buttons, which previously were (only) pressable by using a pencil/stick due to them being too narrow are now pressable. The new buttons are now a tiny bit wider, making them usable again.
Cable Management
The cable management is right on point within the C-702 Diorama. As the Diorama follows a very cable-friendly build-type, hiding your filthy wires is an ease.
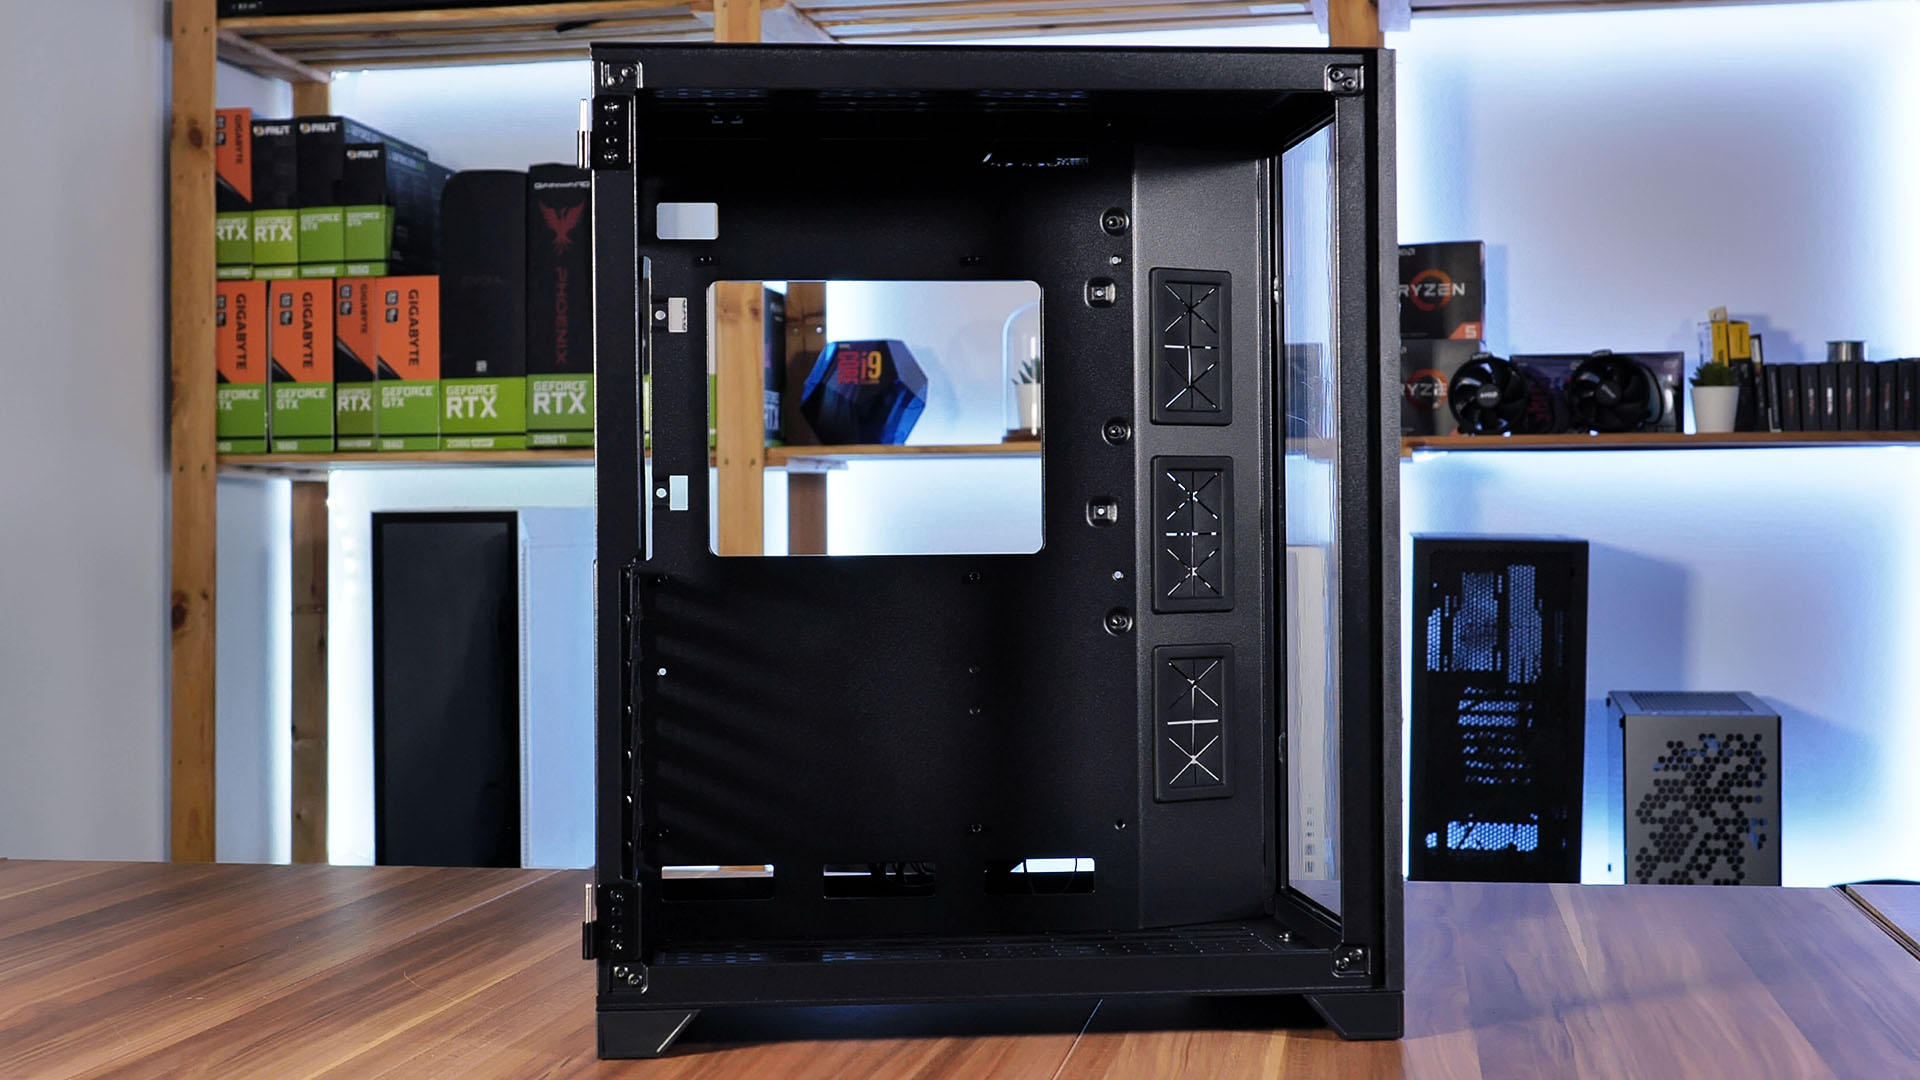
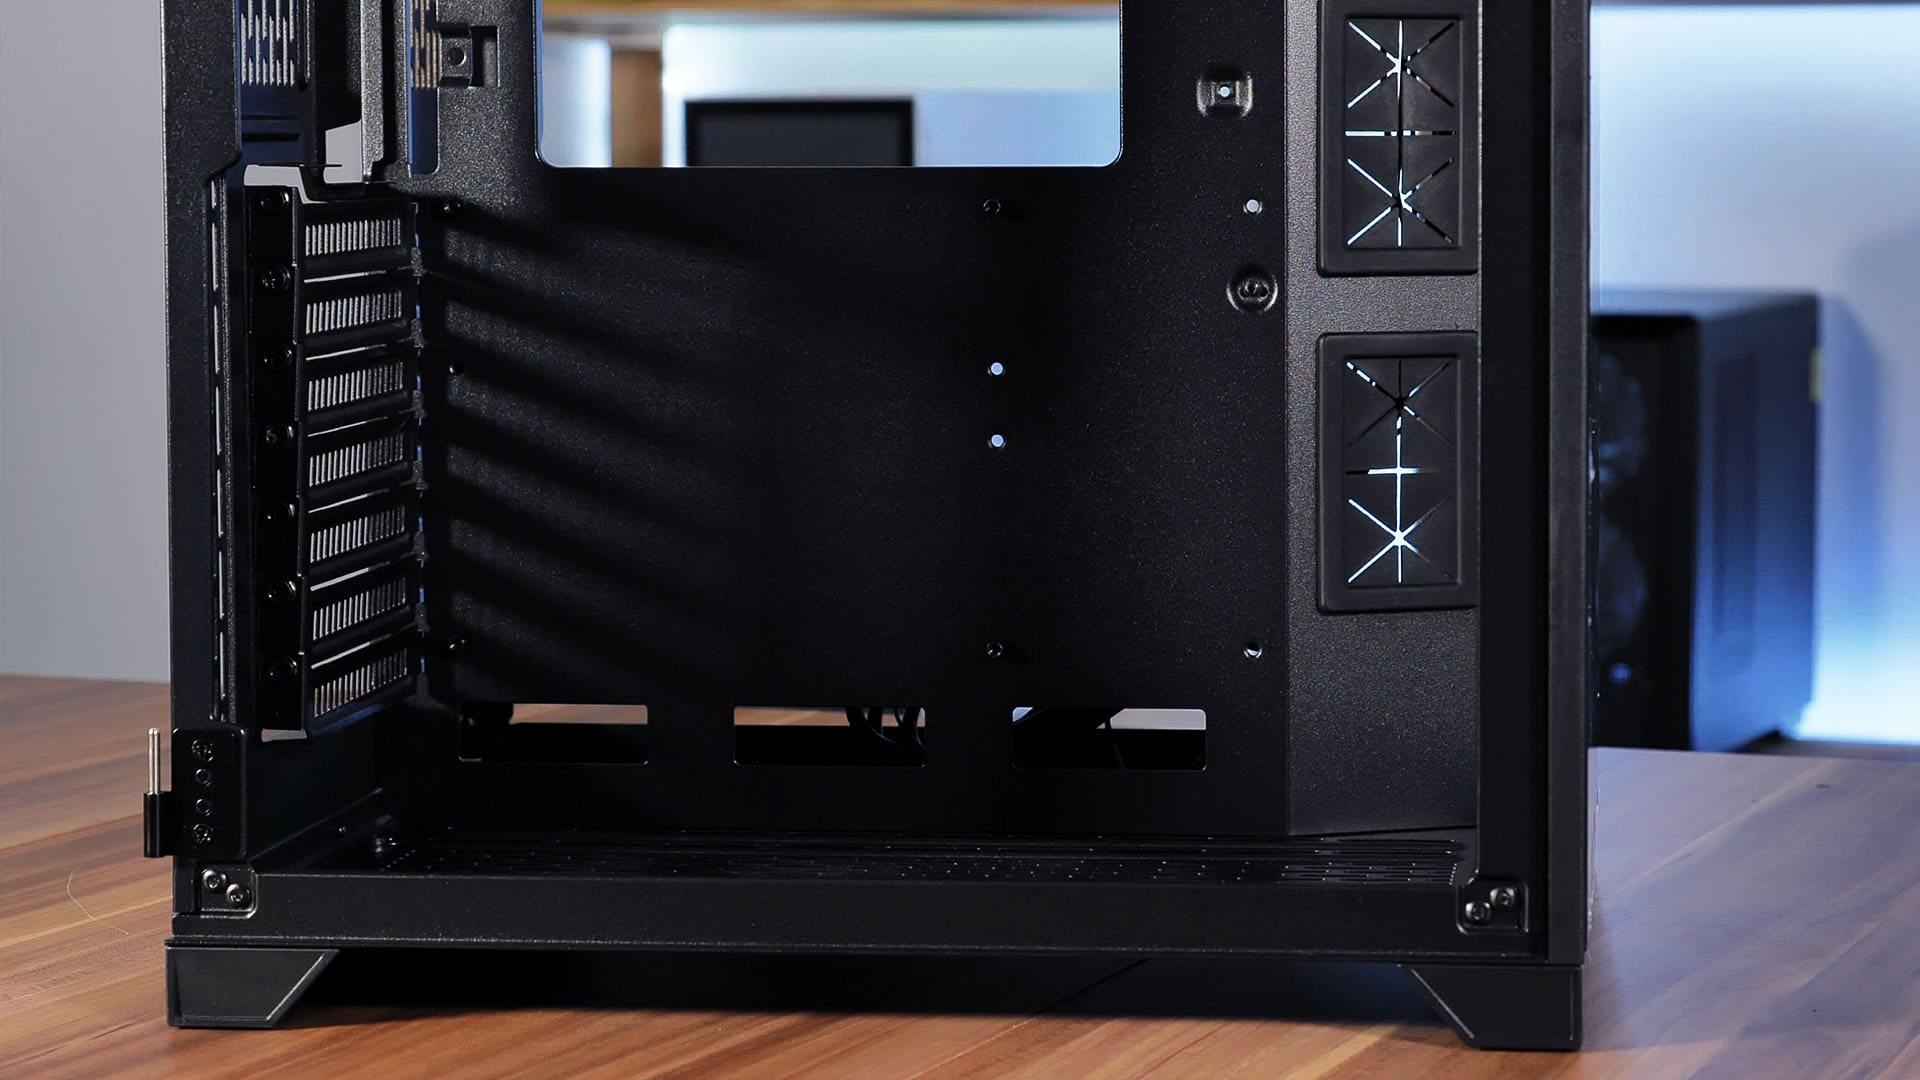
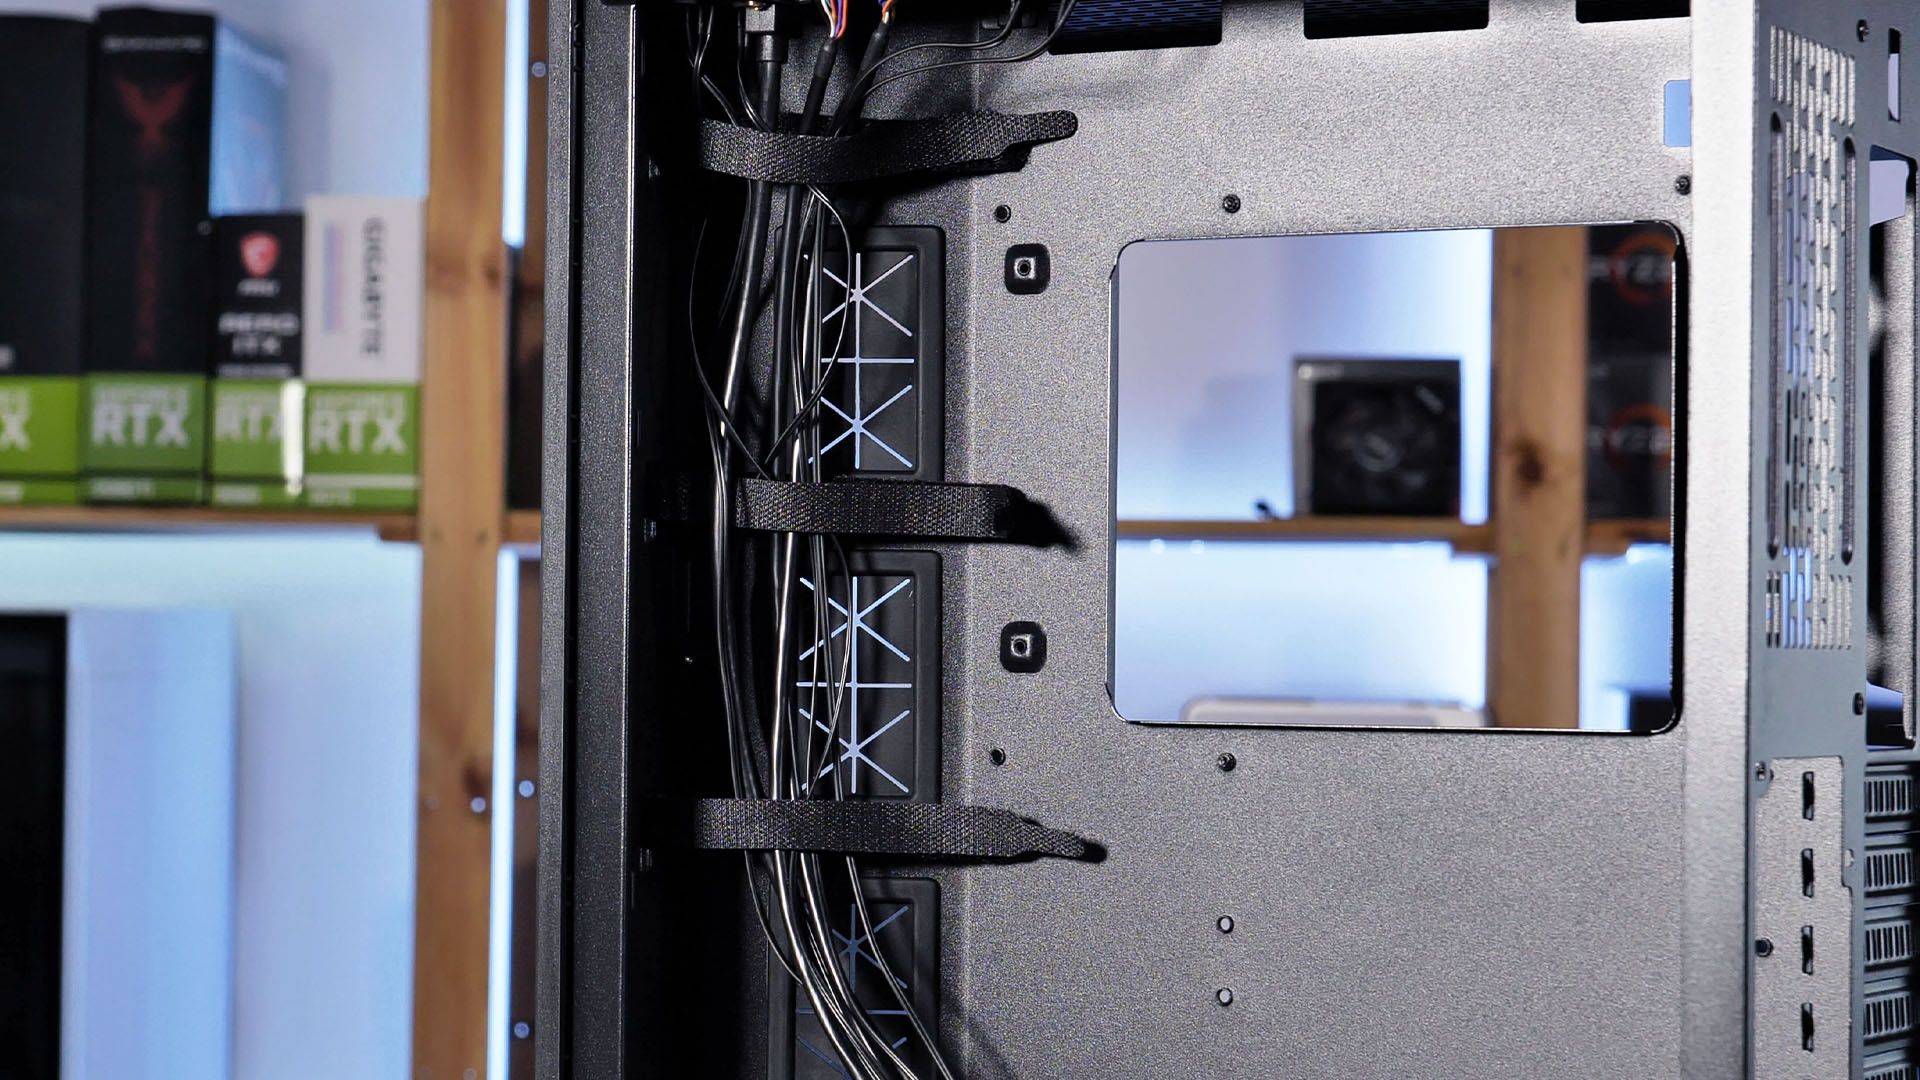
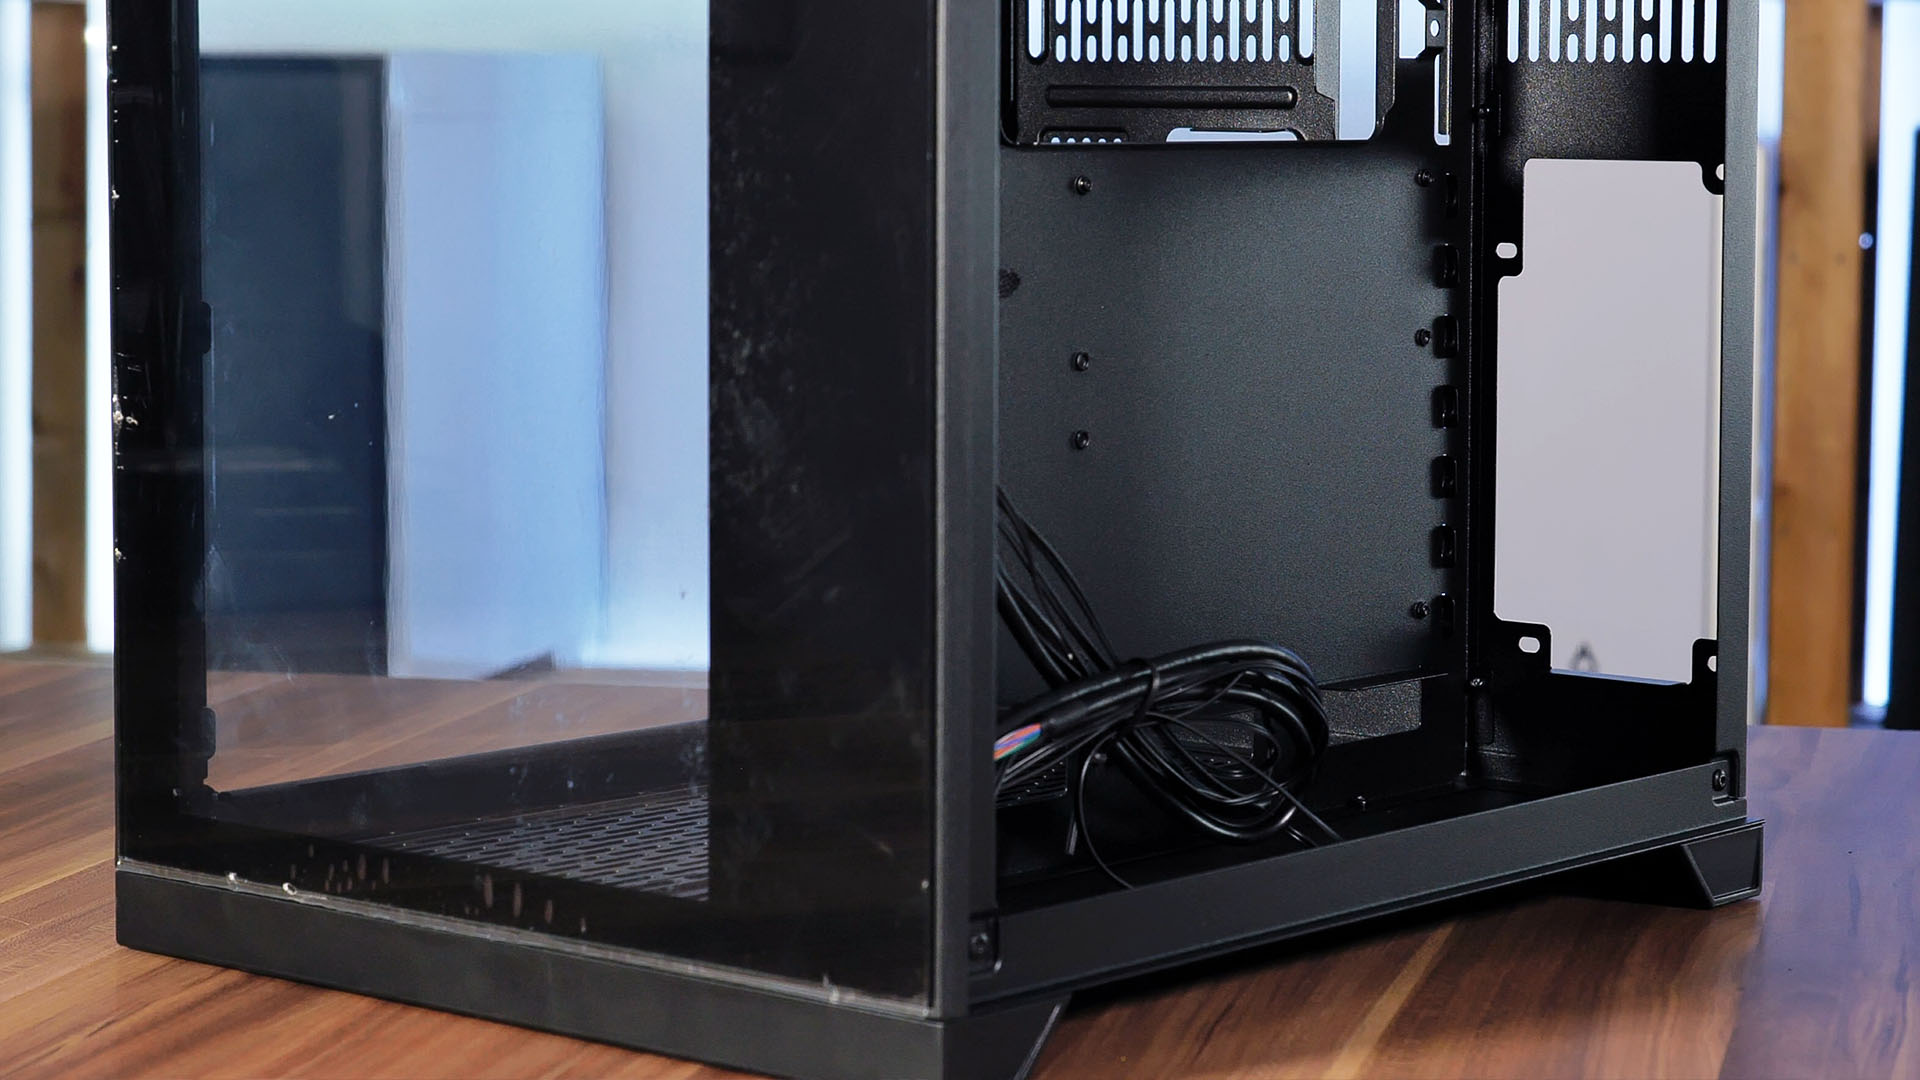
The backside of the case where the PSU should be located is completely empty. But unlike the C-701 Panorama inside the Diorama, Inter-Tech placed a couple of treats.
Instead of the usual Cable cutouts, the right side of the case is covered by three big Cutouts which are hidden using rubber cable "hiders"? Behind those, Inter-tech prepared a wiring route that helps you guide the cables to the appropriate spot, as well as fixating them by using the already pre-installed velcro ties.
This potential cleanness as well the extras like the rubber and the routings are a very welcome addition. These do not only contribute to clean cable management but also make the installation itself much more enjoyable.
Additionally, we wanted to point out that having these kinds of gimmicks is still quite rare inside budget-oriented cases.
Cooling

In comparison to the C-701 Panorama, the C-702 Diorama's cooling capabilities are ... different.
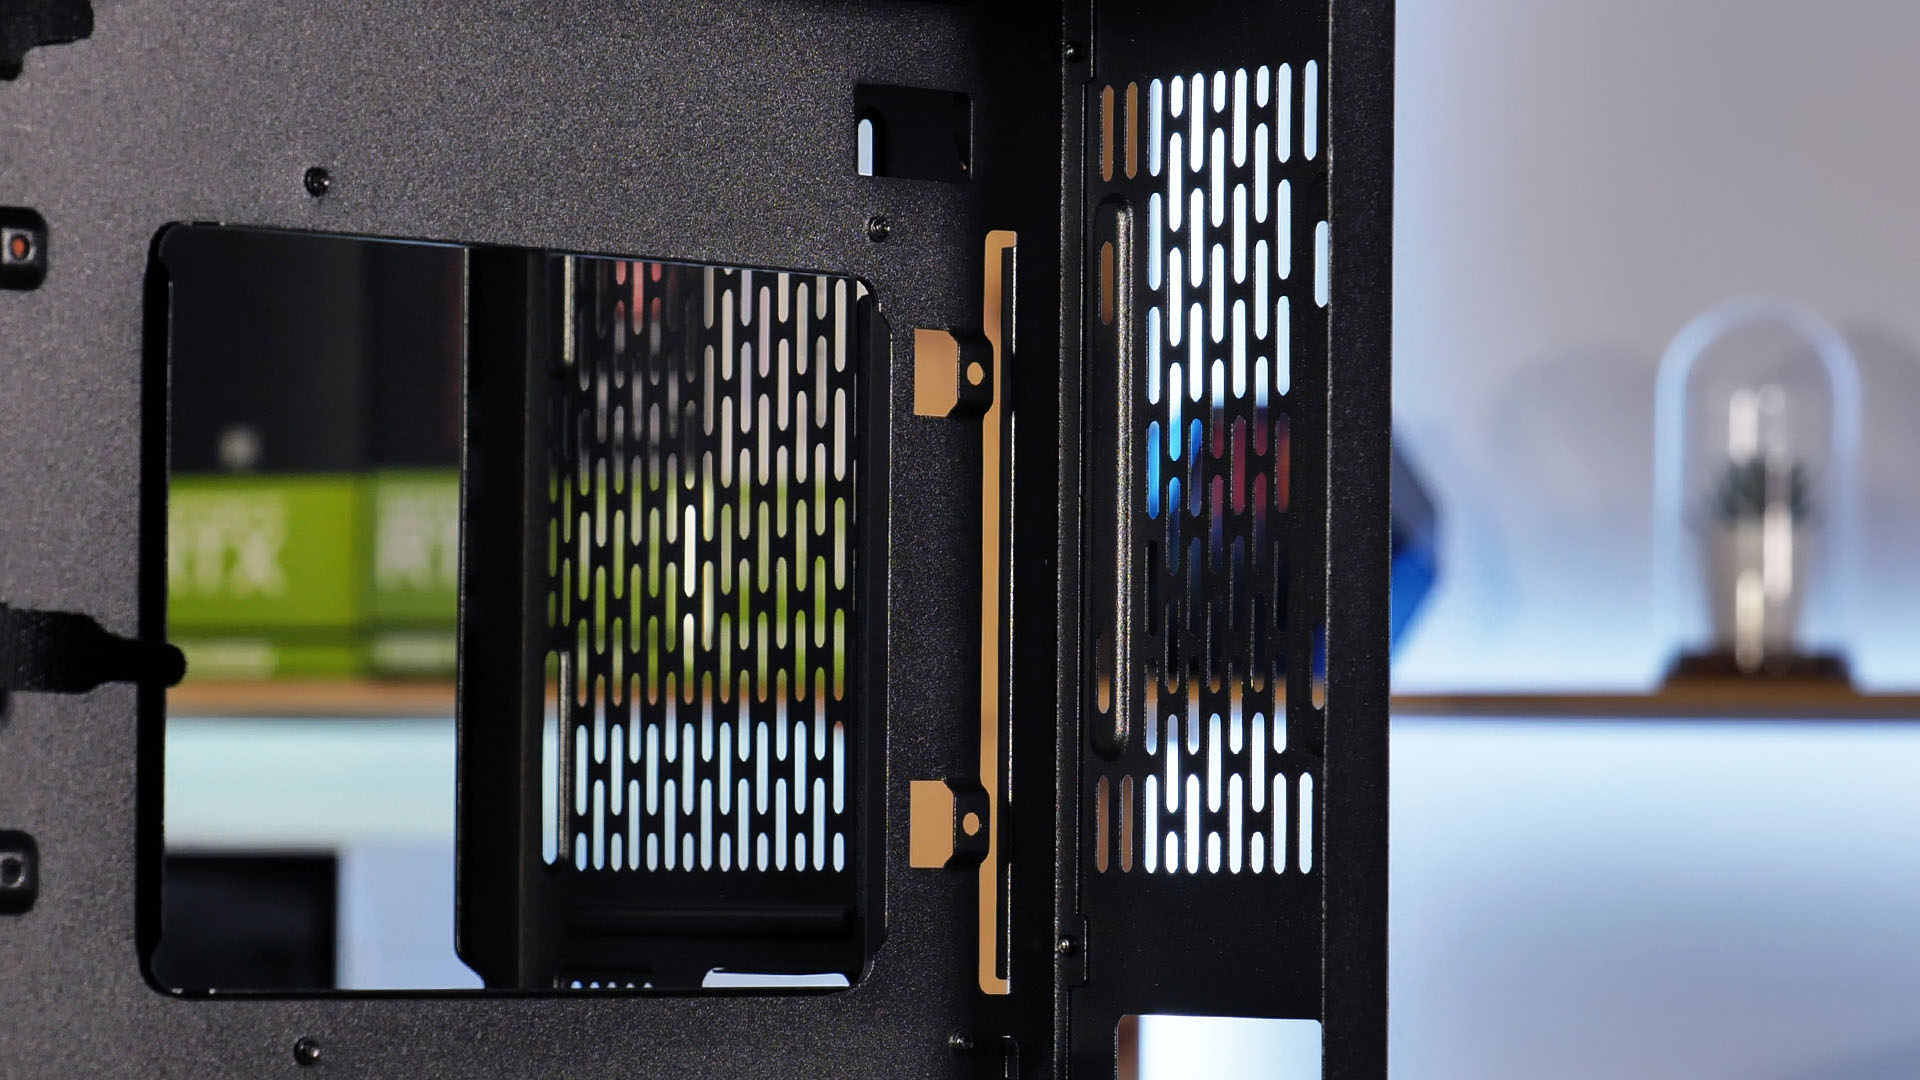
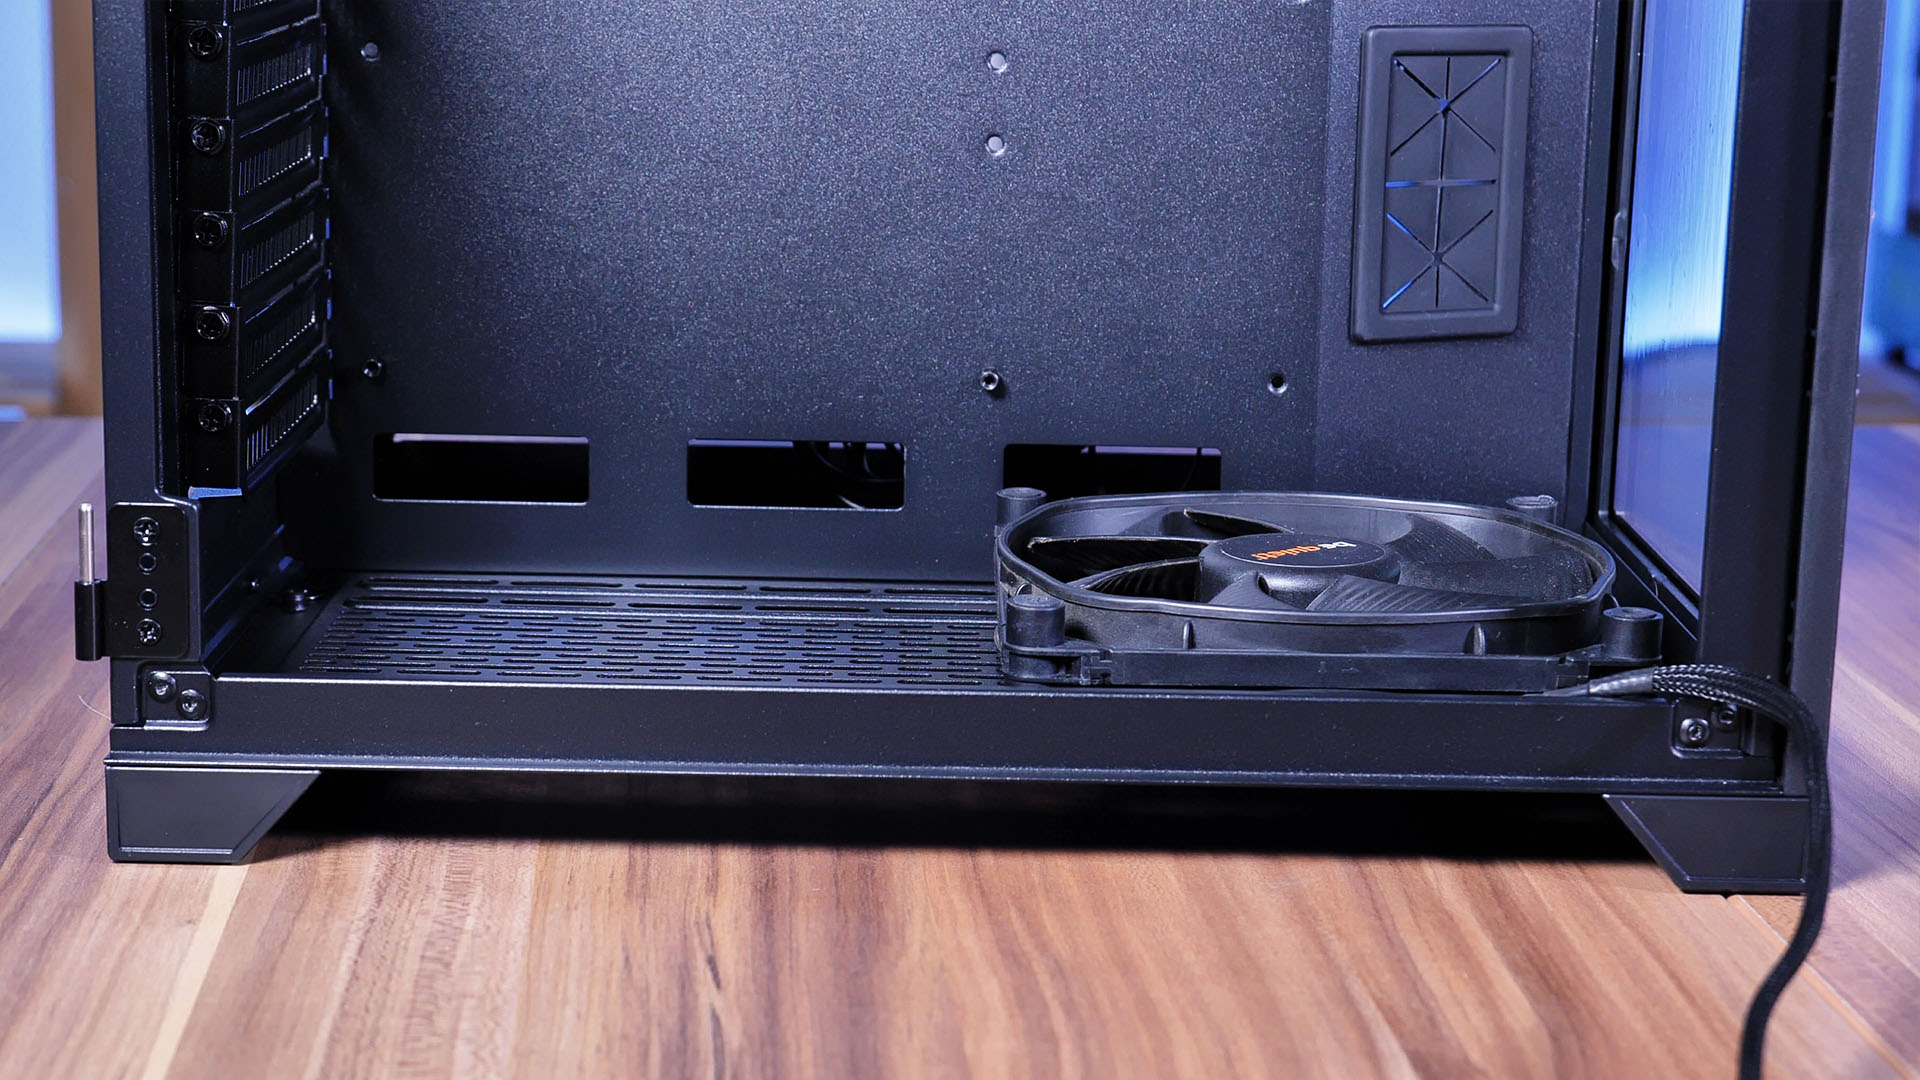
One of the most obvious changes is are the 3 missing 120mm Fan spots on the right side. This area is now being used for cable management.
Additionally, the spot at the top and bottom of this area had to go as well.
But this does not necessarily mean that the case is inferior. The case is slightly wider, (and shorter) has now finally support for 140mm fans.
To top it off, the Back fan spot now profits from this widening by being 120mm compatible.
These changes mean that there are a total of 5 Fan Spots, 2x140/120 in the Top, 2x140/120 in the Bottom, and 1x 120 in the Back.
Of course, each of these spots is also compatible with an appropriate radiator.
Because of all of these changes, the general Airflow path also changed quite a bit. Instead of multiple potential air inlets, the C-702 Diorama now follows a streamlined bottom-to-top approach. Intake at the bottom, outtake at the top. This paired with 140mm Fan support, which generally means way more air, could also end up creating a better cooling performance compared to the Panorama.
Design
In the end, the C-702 Diorama is a showcase. It's beautifully designed, covered with glass, and it is capable of showing off some RGB Fans as well as your braided cables. That being said, just like with the Panorama, inside a case like this, you will need to keep the front side as clean as possible as there is absolutely nothing to hide your mess behind.
Comparing the C-702 Diorama to the original Panorama, they may look like there was the same idea behind them, but the details surely make a difference.
Within the Diorama, the main focus now lies on Cable management. Having the Cable Cutouts so far away from the rest of the PC requires routing the cables through all of the cases, allowing them to be fully seen. But this also means that you absolutely want to use braided cables inside the C-702. Using the older Yellow/Red/Black cables may end up looking horrible.
All of the changes we've covered so far also had an impact on the case overall dimensions. Being now a bit shorter but wider, the C-702 Diorama now slightly reminds us of a cube when looking from above. This is by no means something bad or good, it is just different.
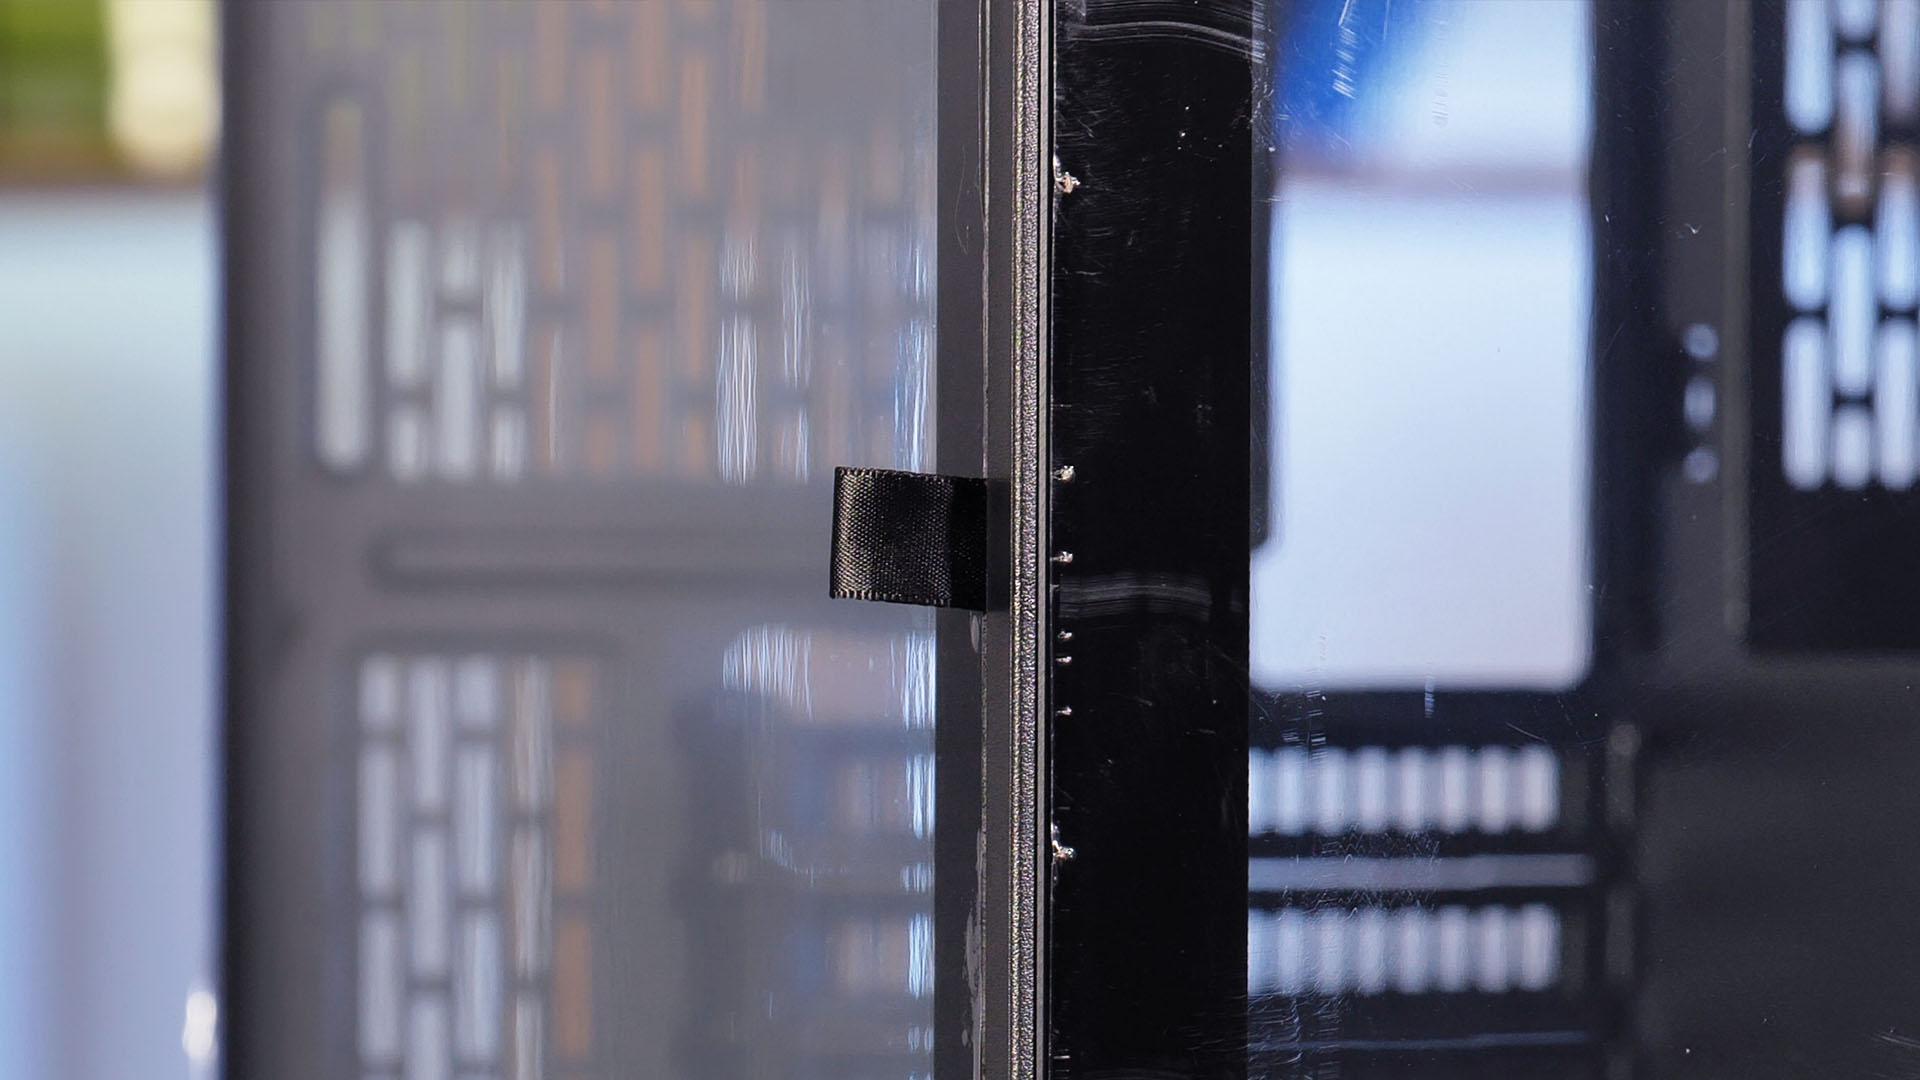
A very welcome change, however, is the improved glass installation mechanic. Instead of the cheap screws which were used before, Inter-Tech now uses a hinge system, assisted by a strap attached to the front part of the side panel. The actual front panel is now no longer removable. Though this may seem like a downgrade, we want to remember you that there is nothing to be installed in the front anymore. Making the front panel screws obsolete.
Installation
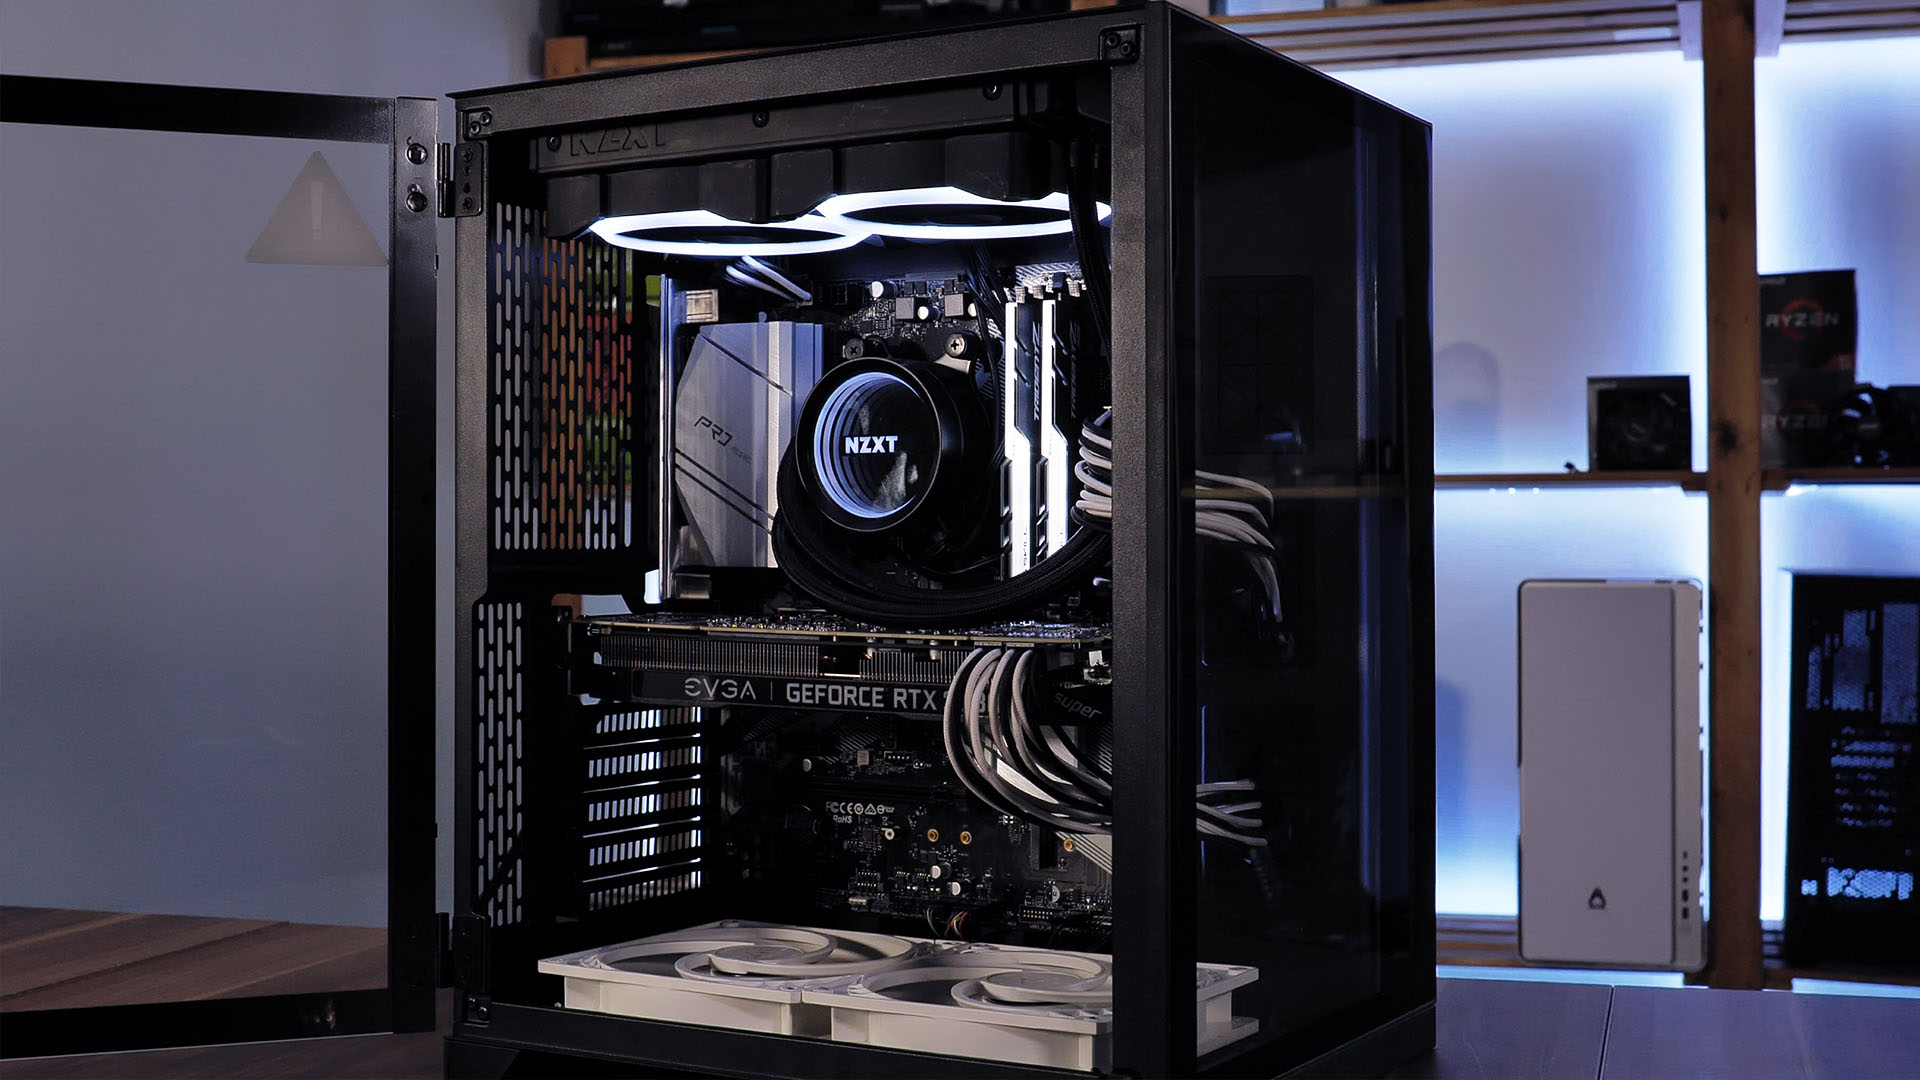
For this case, we used the following components:
- ASRock B550 Pro4
- AMD Ryzen 3700x
- EVGA 2080Super
- 2x GSkill Trient Z
- Be Quiet Pure Power
- NZXT Kraken X53 RGB
The installation process was one of the easiest we've had so far.
After removing both Tempered Glass panels, there was a huge amount of space inside the case, making it a very enjoyable experience.
There was no squeezing whatsoever, every component was directly accessible and we were able to install our system in personal record time.
But this is not only due to the immense space inside the case. The fact that there is so much space next to the PSU made it extremely easy to cable manage the finished system. Though we have to admit that due to us being able to just "jam" the cables in there, we were able to save a lot of time and effort.
The big Cable cutouts next to the Motherboard tray did improve the Installation experience quite severely. This does not only make it a lot easier to get the cable to the backside, but it also allows for easy upgradability later on. Within the C-701 Panorama, the Cable cutouts for e.g the 24-Pin connector were right next to the central Fan spots. This meant that if there were a Radiator + 3 Fans installed, it was an extremely tight fit, making it almost impossible to squeeze another cable through later on. Within the C-702 Diorama, however, there is nothing standing in your way.

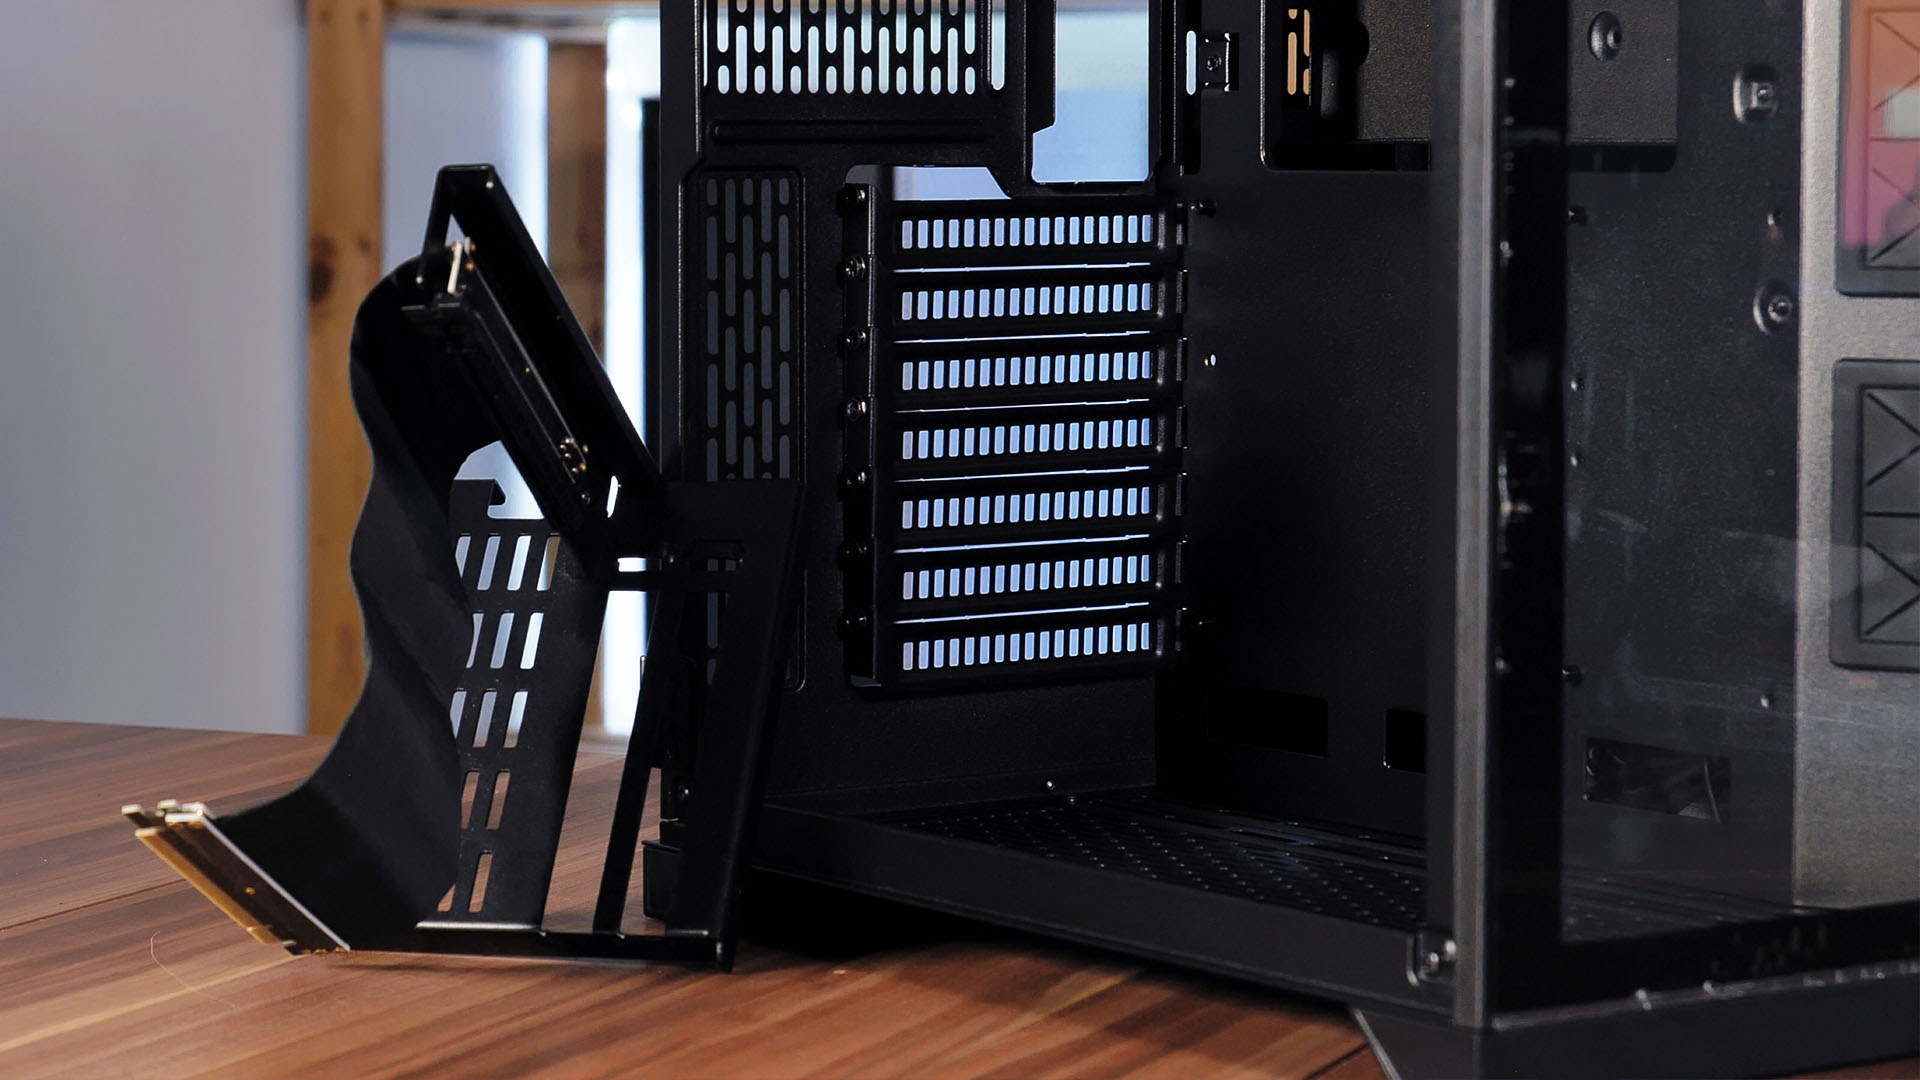
Inter-Tech offers an optional "Vertical GPU Kit" which allowed the GPU to be installed - who would have guessed - vertically.
In order to install it, you need to remove each PCI Bracket and place the Kit inside by aligning the kit's standoffs with the cutouts where the PCI brackets were.
After screwing in the 4 Screws (2 in the Front Compartment, 2 in the Back compartment) the Kit is ready to be used as intended.
Conclusion

Generally, we were very happy with the case.
Looking at the changes that Inter-Tech implemented in comparison with the original C-702 Panorama, we do think that there we quite a few improvements.
The inclusion of 140mm and 120mm Fan support was a very nice addition.
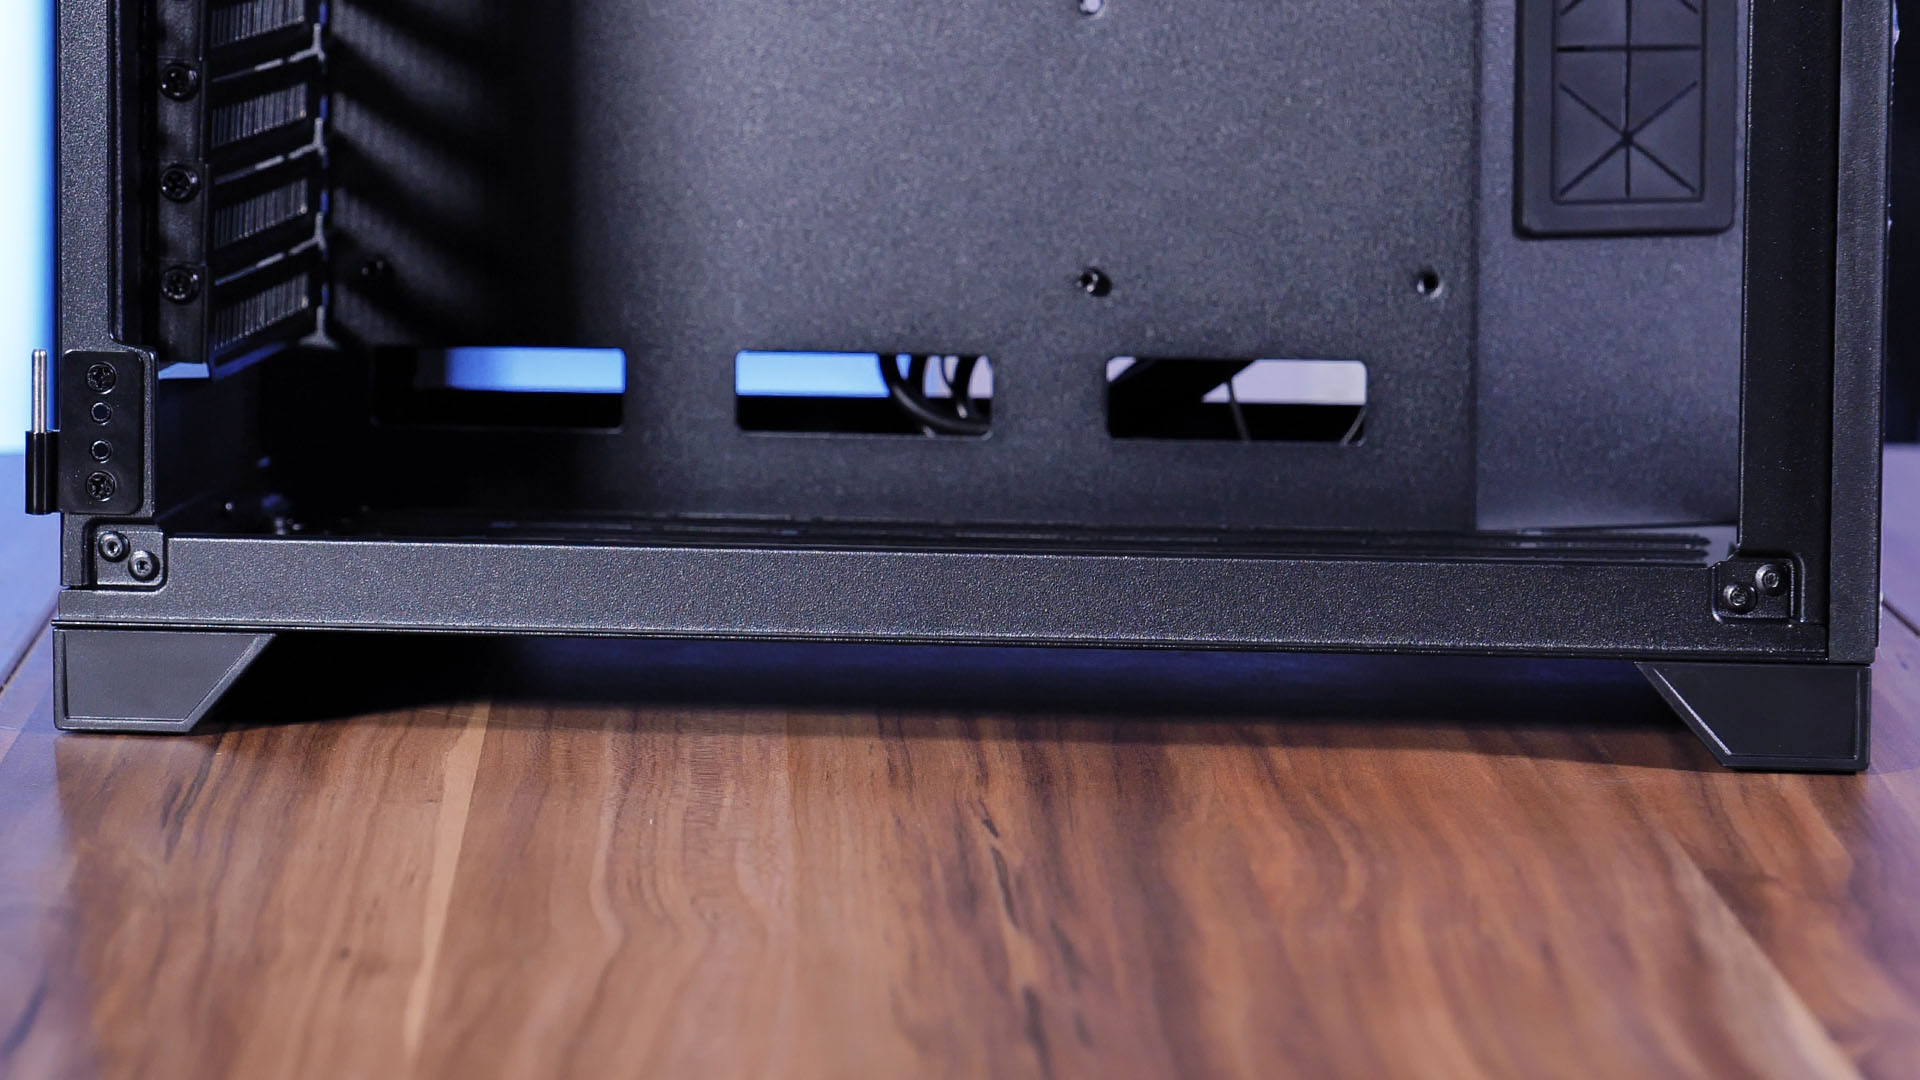
As the case now entirely relies on bottom intake, the feet got a major upgrade, making them span over the complete case, a bit bigger, but a lot more ridged.
The overall Cable Management improvements made it much easier to build in it and created an esthetically pleasing result.
And the change in overall Dimensions produced a number of welcome improvements. Ignoring the 120mm Fan support in the back which should have been there from the beginning, we can now use the biggest tower coolers available with a maximum of 160mm height.

But there is one thing that is still not like we would like it to be.
The removal of one USB 3.0 port is not fully understood. Especially because there are still 2x USB 2.0 left on the IO Panel. This paired with the lack of a USB Type C port makes the IO severely outdated. We would love to see that change.
But except for that, we are very happy with the case.
Right now the Diorama can be purchased for around 72€, placing it in the same category as the C-701 Panorama.
And as we already said in its review, considering the feature set, and especially the fact that the case actually a Showcase, this is a very affordable price.
This paired with the exceptional design achievable inside of the case and the newly added 140mm Fan support, we can absolutely recommend this case.

be quiet! Dark Base Pro 901 Review
be quiet! has made a name for themselves in recent years in the PC Case world thanks to innovative and high performance cases
Read More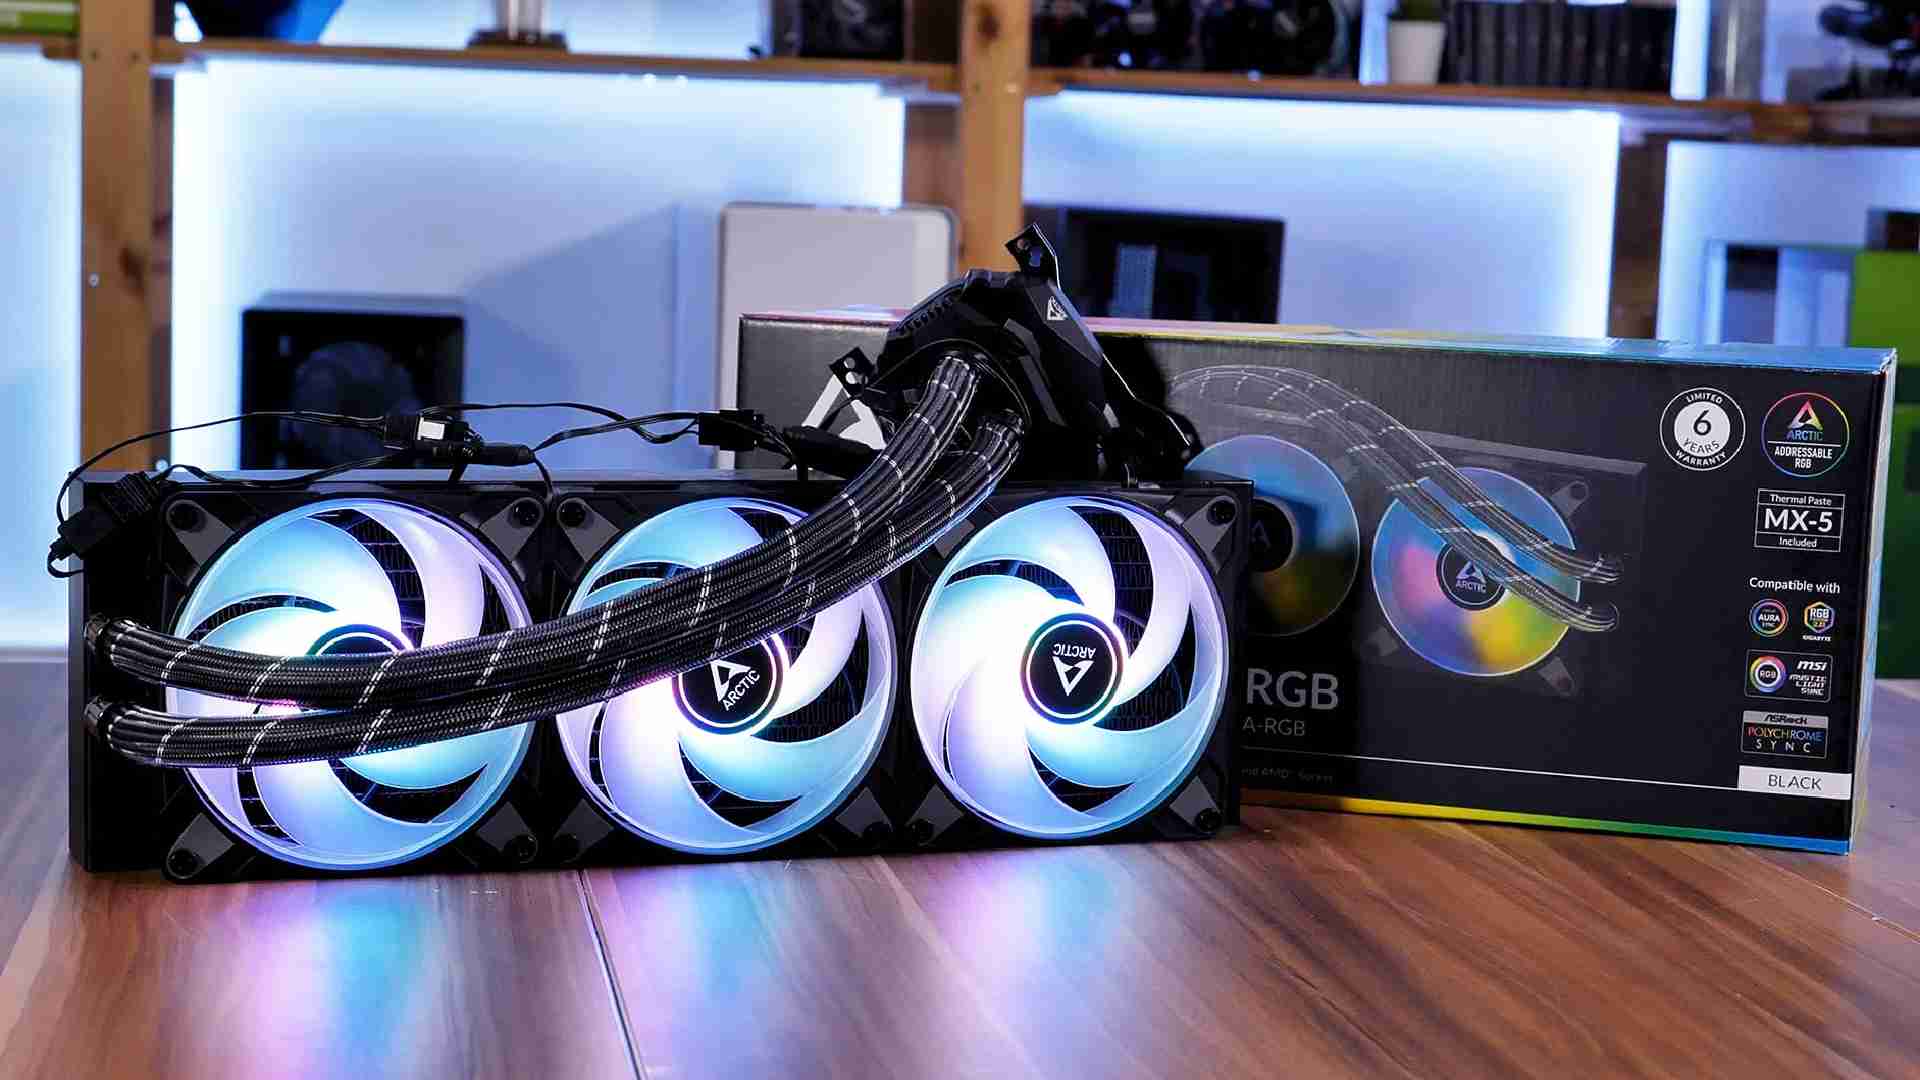
Arctic Liquid Freezer II 360 ARGB Review
Arctic finally went RGB on their Liquid Freezer Lineup! Lets take a closer look at this Arctic Liquid Freezer II 360 ARGB an
Read More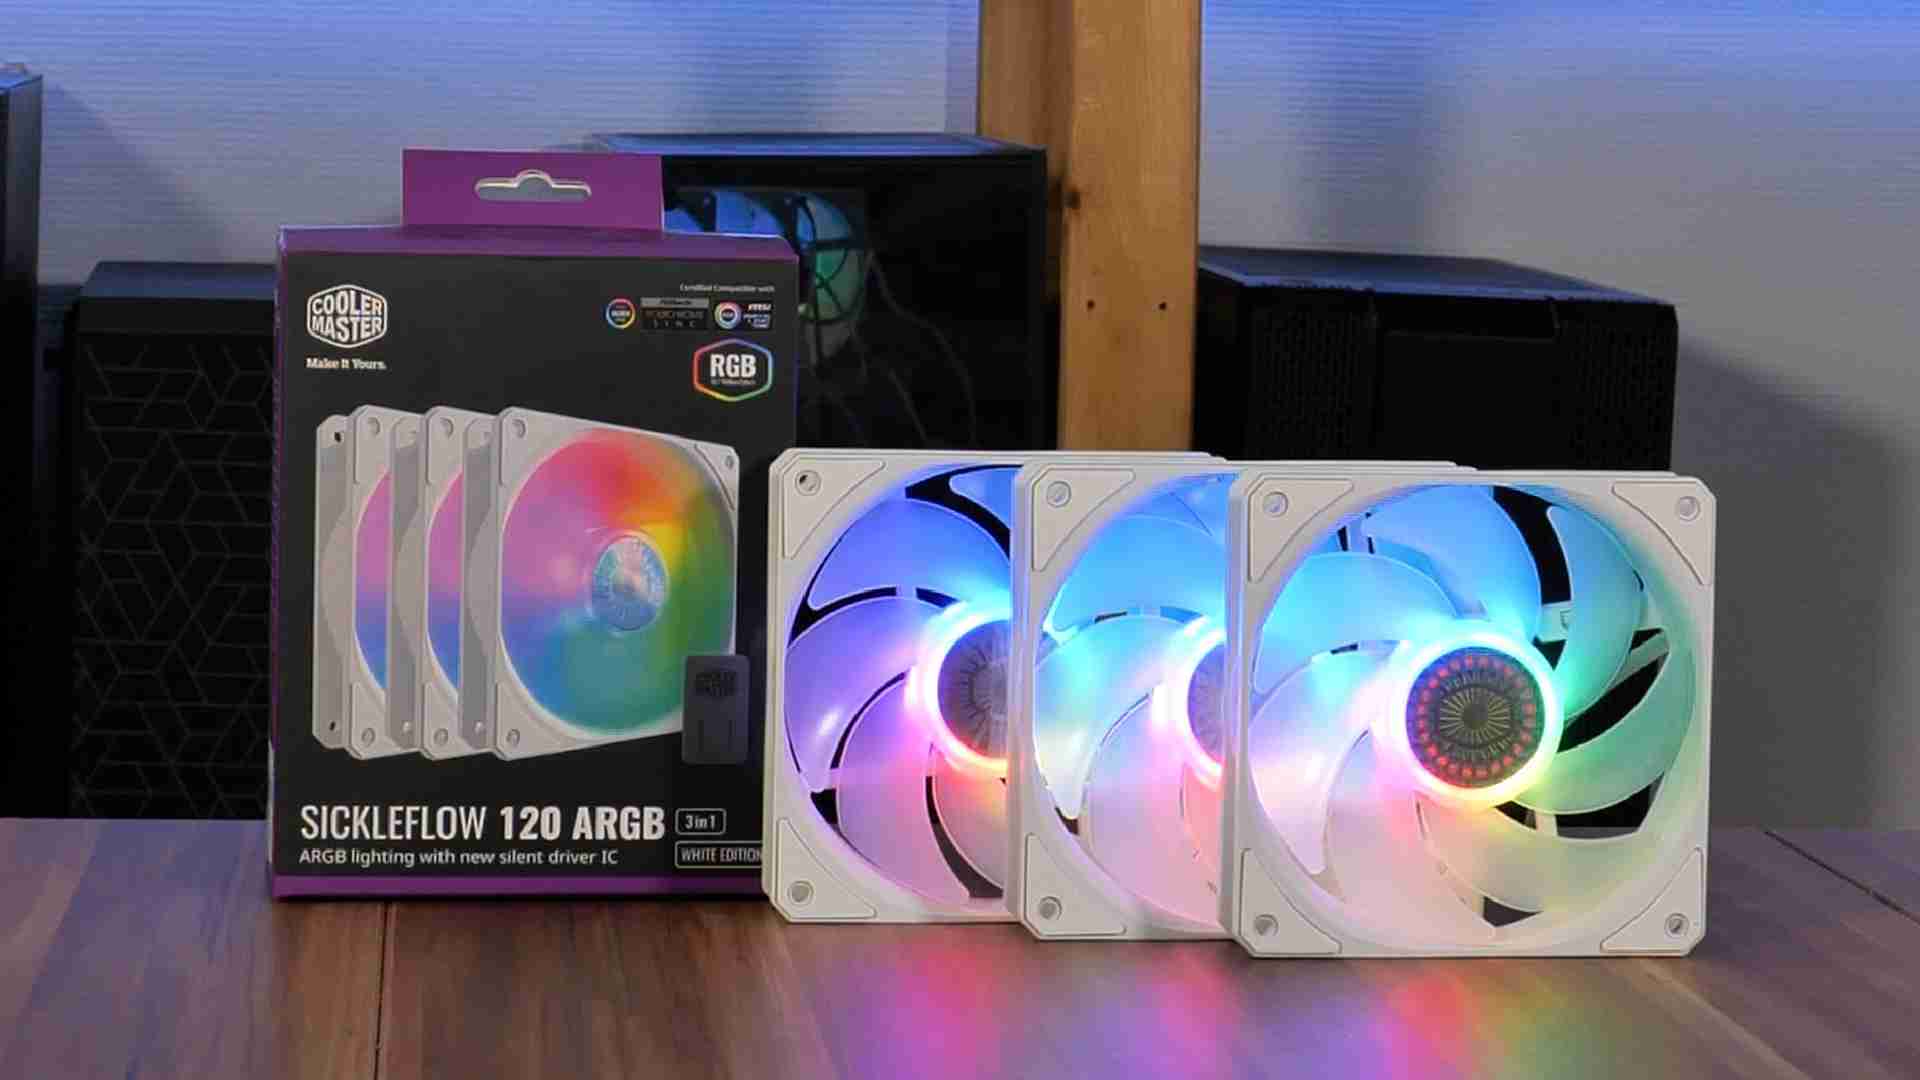
Cooler Mater Sickleflow 120 ARGB Review
After we had a look at the Cooler Master Masterliquid ML120L v2, we found that the Fan they used was pretty good. But now, Co
Read More
Cooler Master Mobius 120P
The new Mobius 120 Fan from Cooler Master had a pretty respectable noise-to-performance ratio. The Mobius 120P is trying to t
Read More