Azza Cast Review
Introduction
In the past, Azza showed its value with ... "unusual" cases, the Piramide, Optima, and Prism, just to name a few. But the past success did not stop Azza from getting back to the drawing board and invent a new "new" Case. Now with the newest Azza Cast, Azza tried to implement an Open Frame Design which is embedded in an exterior shell. Giving the User the possibility to customize the interior and style its exterior.
Let's dive deeper into the Azza Cast and make sure that "looking good" is not the only feature it has to offer.
Positive
- Exceptional Design
- Great Cooling due to open Frame
- Highly Customizable
- Up-to-date IO
- GPU can be installed in both orientations
- ARGB Fan included
Neutral
- Easy to Wrap/Spray
Negative
- No Top Fans
- Requires huge amount of space (for assembly)
- No GPU PCIe Riser included
What's in the box?
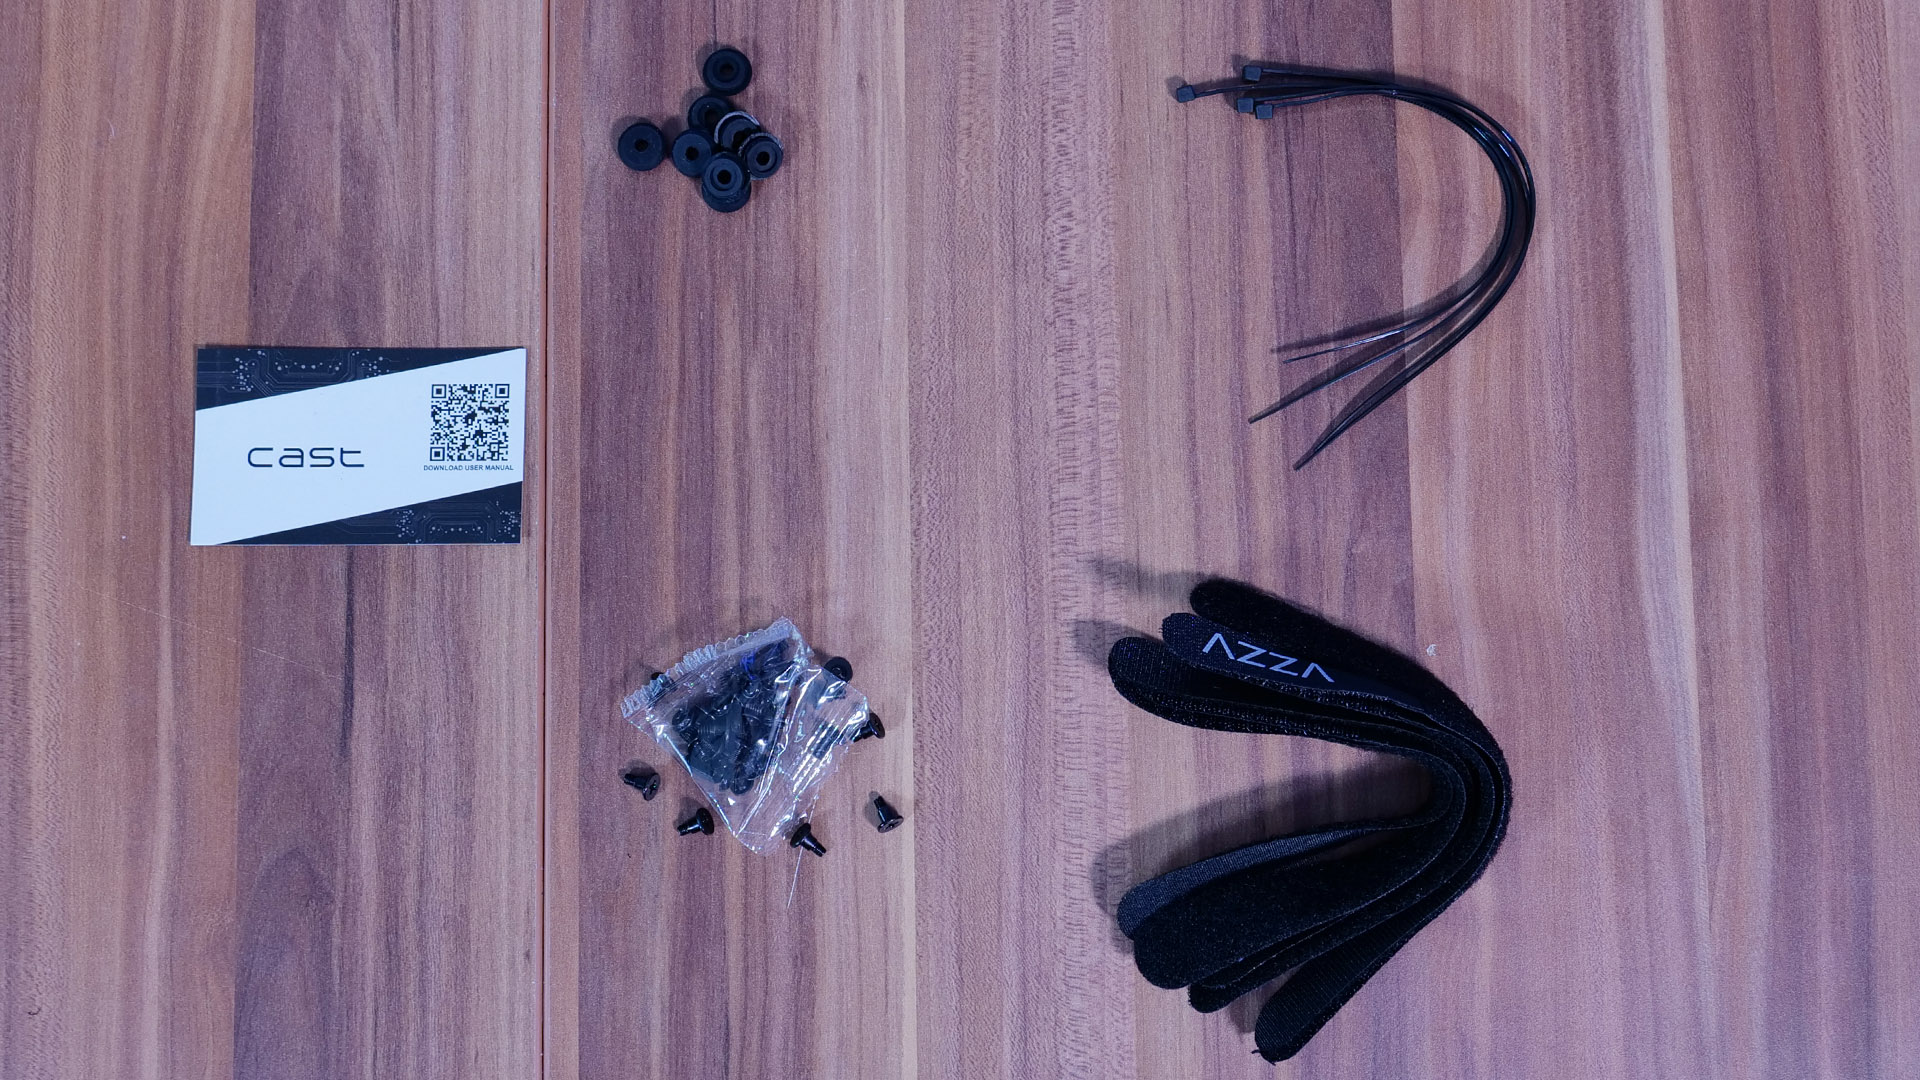
Once we open up the Package we will find 2 things, the Azza Hive Case and a big bag filled with goodies. Usually, cases come with a quite small amount of goodies, but Azza tried to offer as much as possible for the Cast-Buyers. Additionally, to the usual Zip Ties and bag with screws, the bag also includes a QR Code for the Manual, Velcro ties, a couple of rubber nobs to install the Harddrives, and 2 Plastic Cable holders which can be mounted wherever we need some cable management.
The unboxing experience of the Azza Cast resembles every other case, a Brown Carton box, some Plastic film, and a couple of Air pockets to keep everything safe, nothing exceptional here.
Specs
Even though you may think using the Cast would give you restrictive compatibility, Azza made sure to include as much as possible while also keeping the "customizability" as high as possible. Benight, you'll find an extensive Specsheet.
| Name | Azza Cast (CSAZ-808 B/W) |
| Type | ATX Mid Tower |
| Mainboard Sizes | ATX, mATX, ITX |
| Color | White / Black |
| Side Panel | Openable Wing |
| Front Panel | Full Aluminum Plat (Other Options available) |
| CPU Cooler Height | Up to 165mm |
| GPU Length | Up to 360mm |
| 2.5" Drives | Up to 3 |
| 3.5" Drives |
Up to 1 |
| IO |
Power, Audio In/Out, USB 3.0 2x, USB 3.0 Type C |
| Dimensions |
470x220x460mm |
| RGB |
Includes an Azza Hurricane 3 ARGB Fan |
| Fan Spots |
1x 120mm in Back 3x120mm / 2x 140mm in Front |
| Water Cooling |
Up to 360/280mm Rad in the Front (120mm Rad in Back if Fan installed behind Rad) |
| Extras |
Openable Wings in Top and Bottom of Case |
The Cast
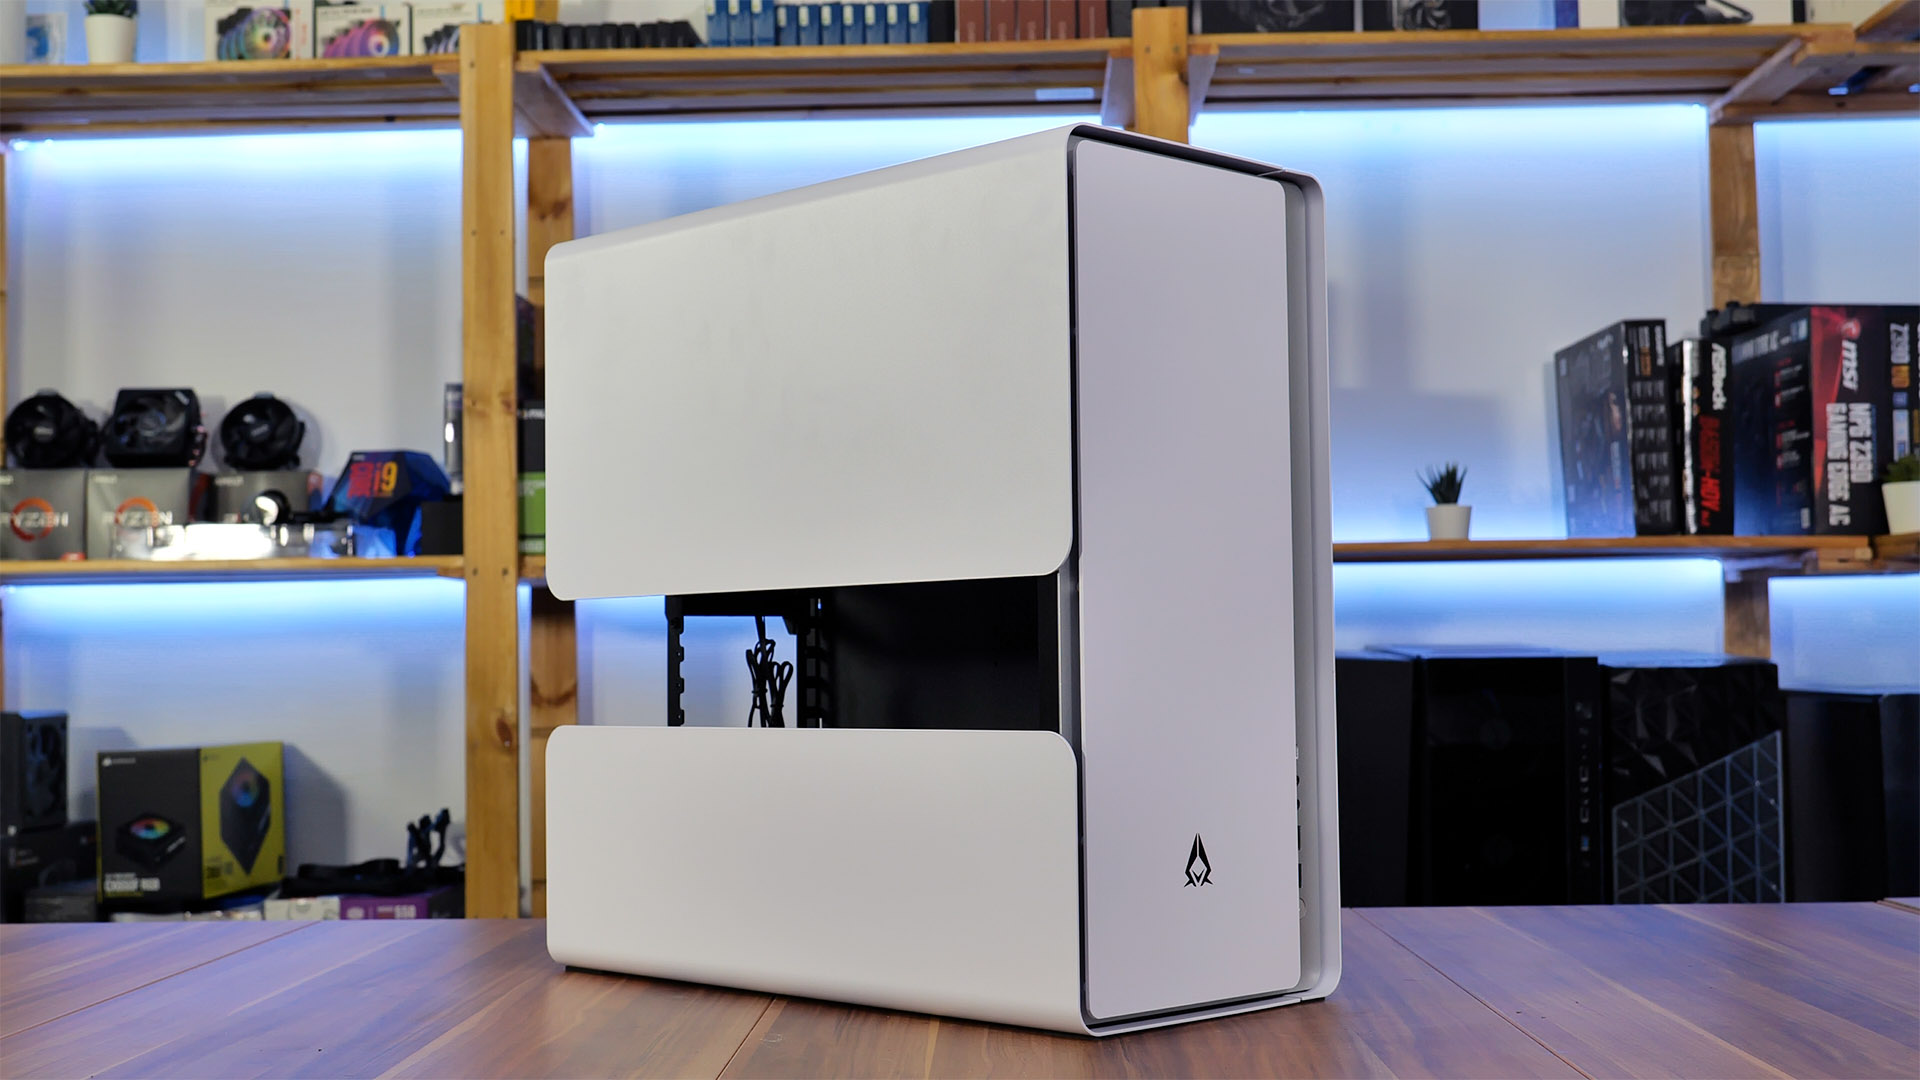
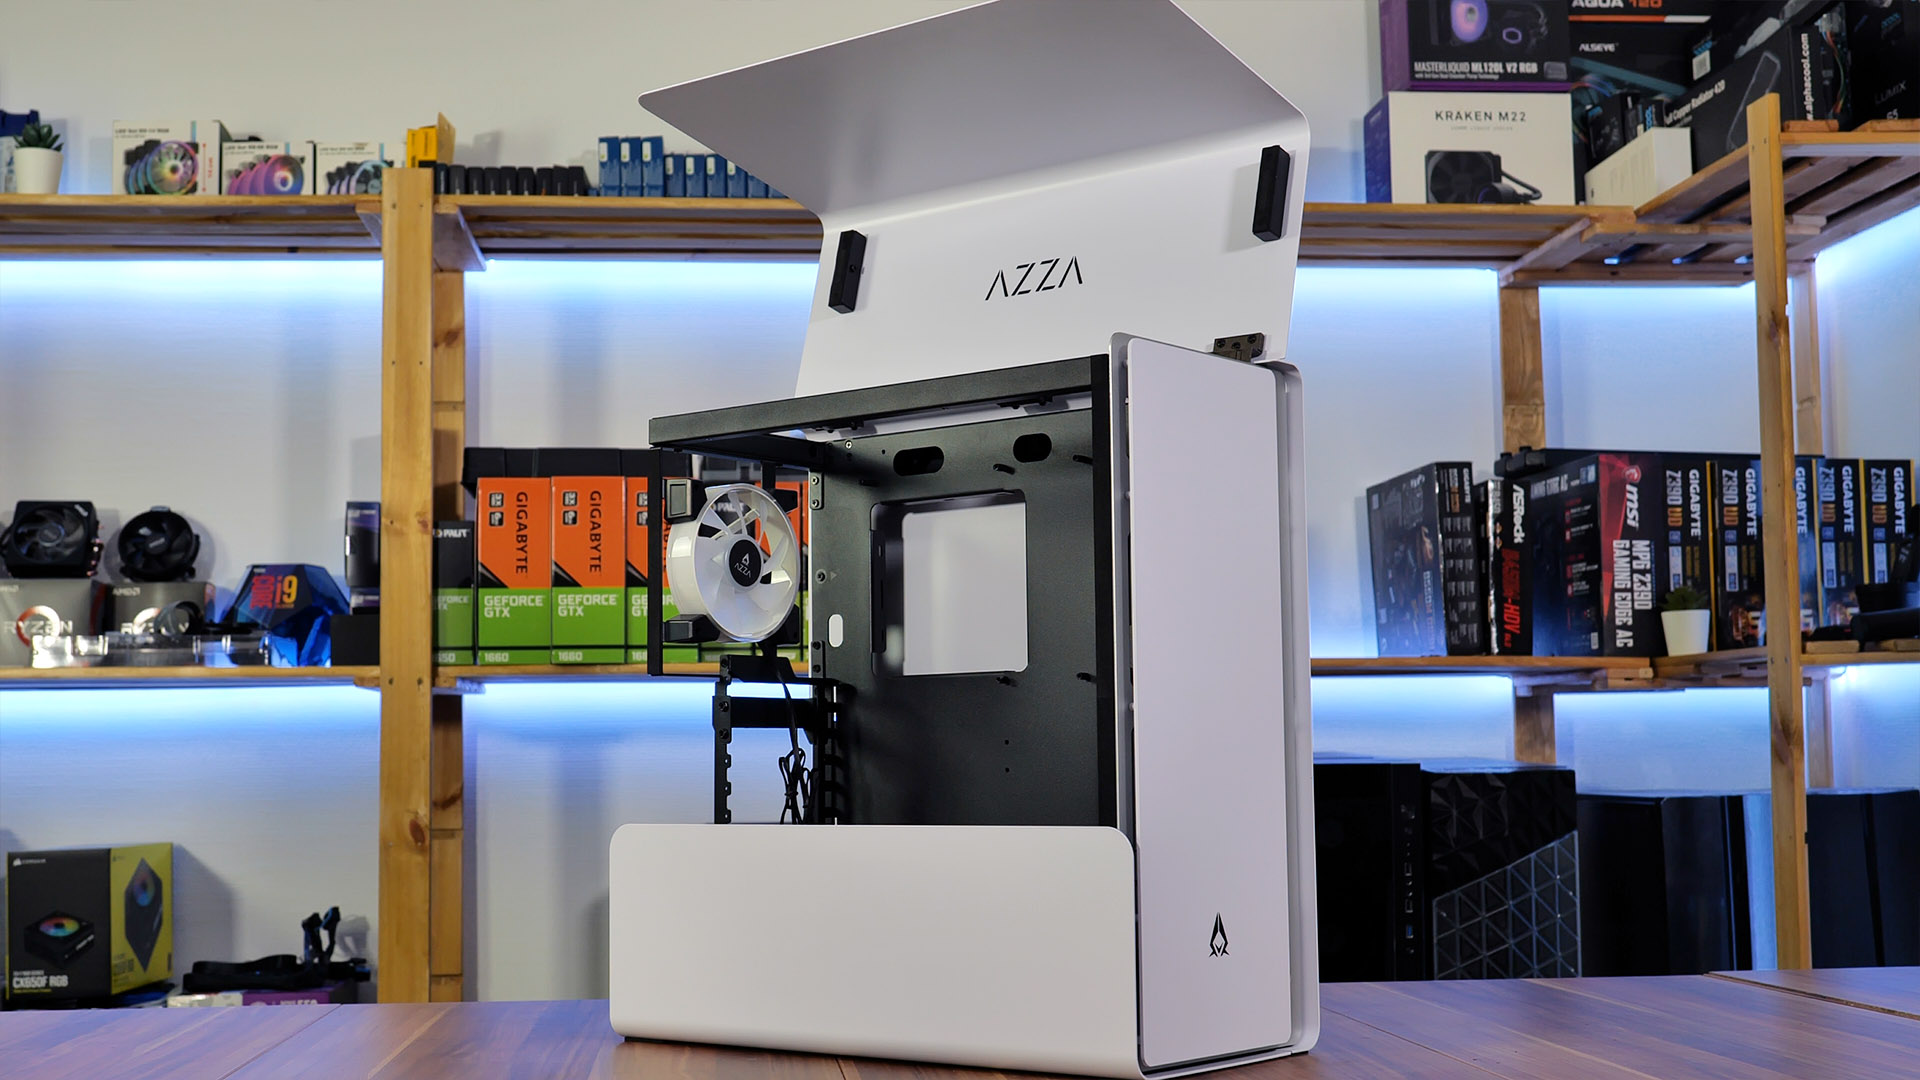
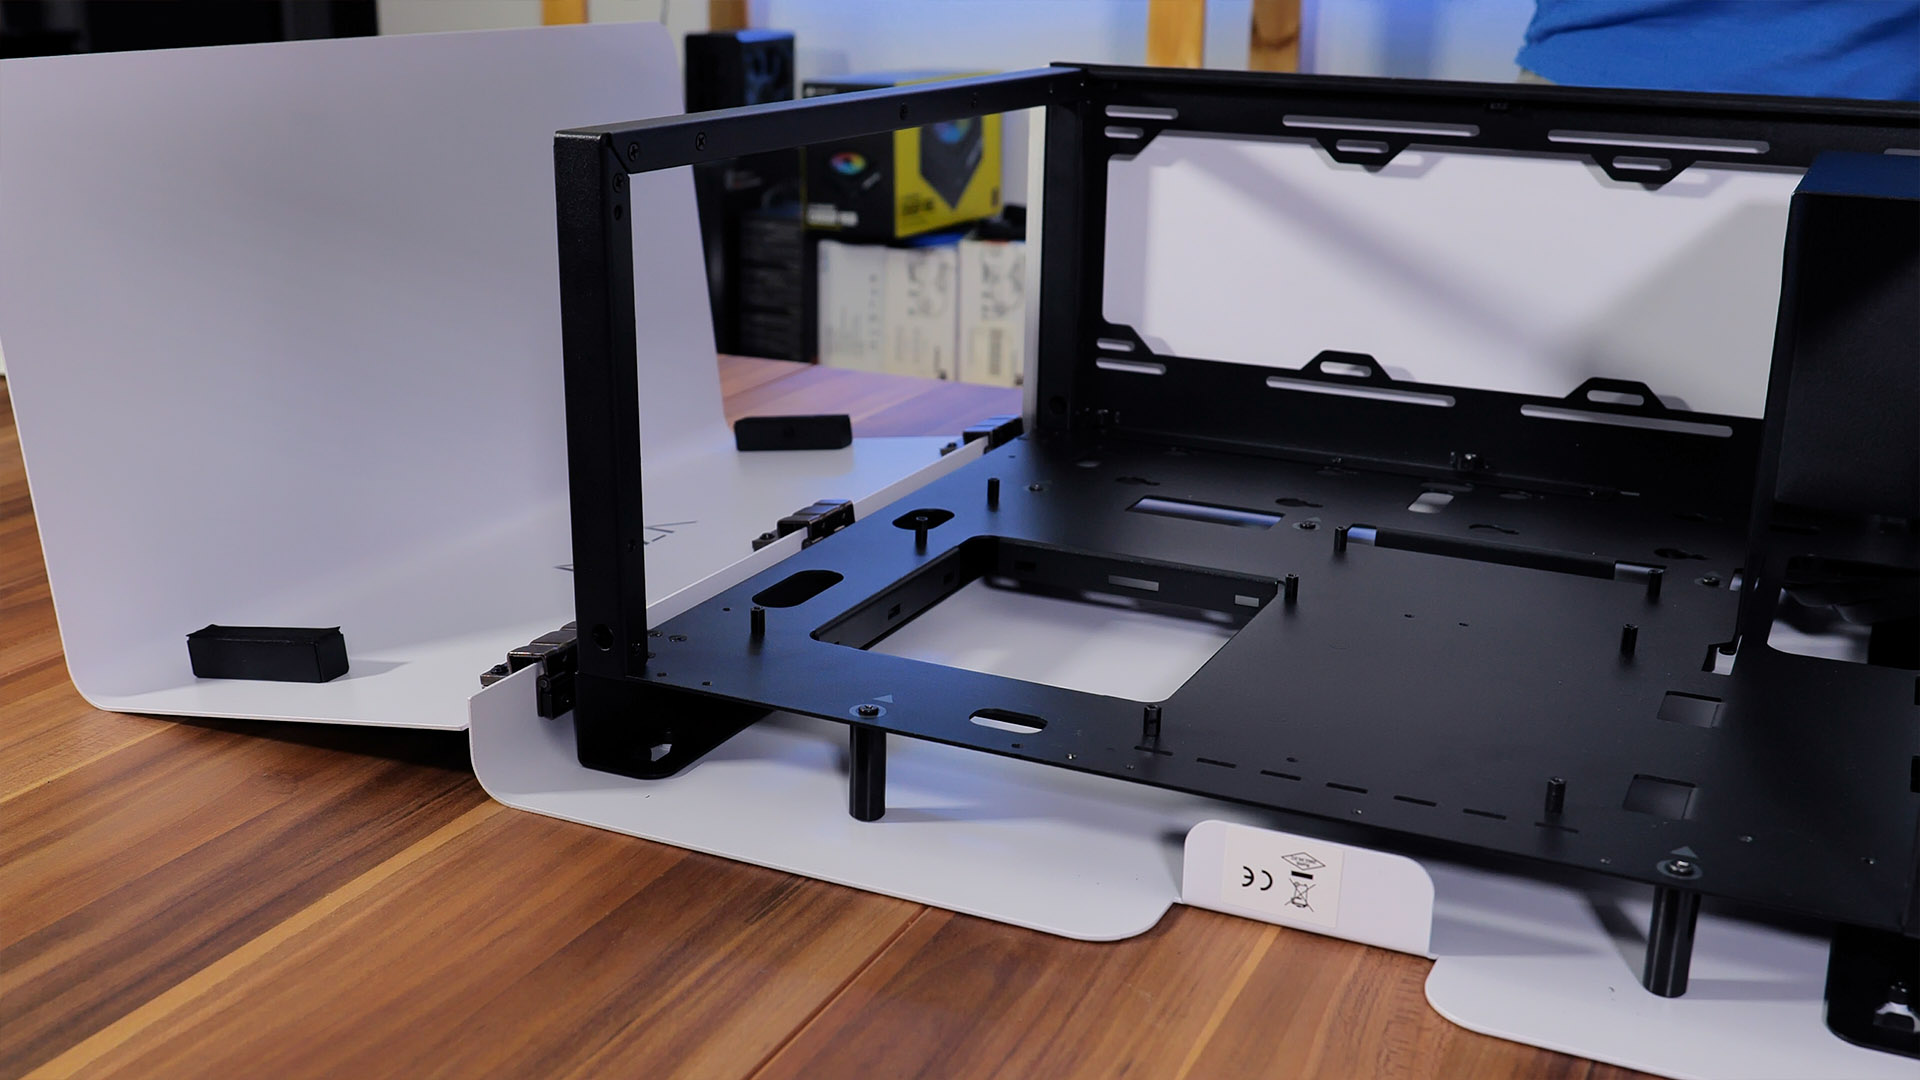
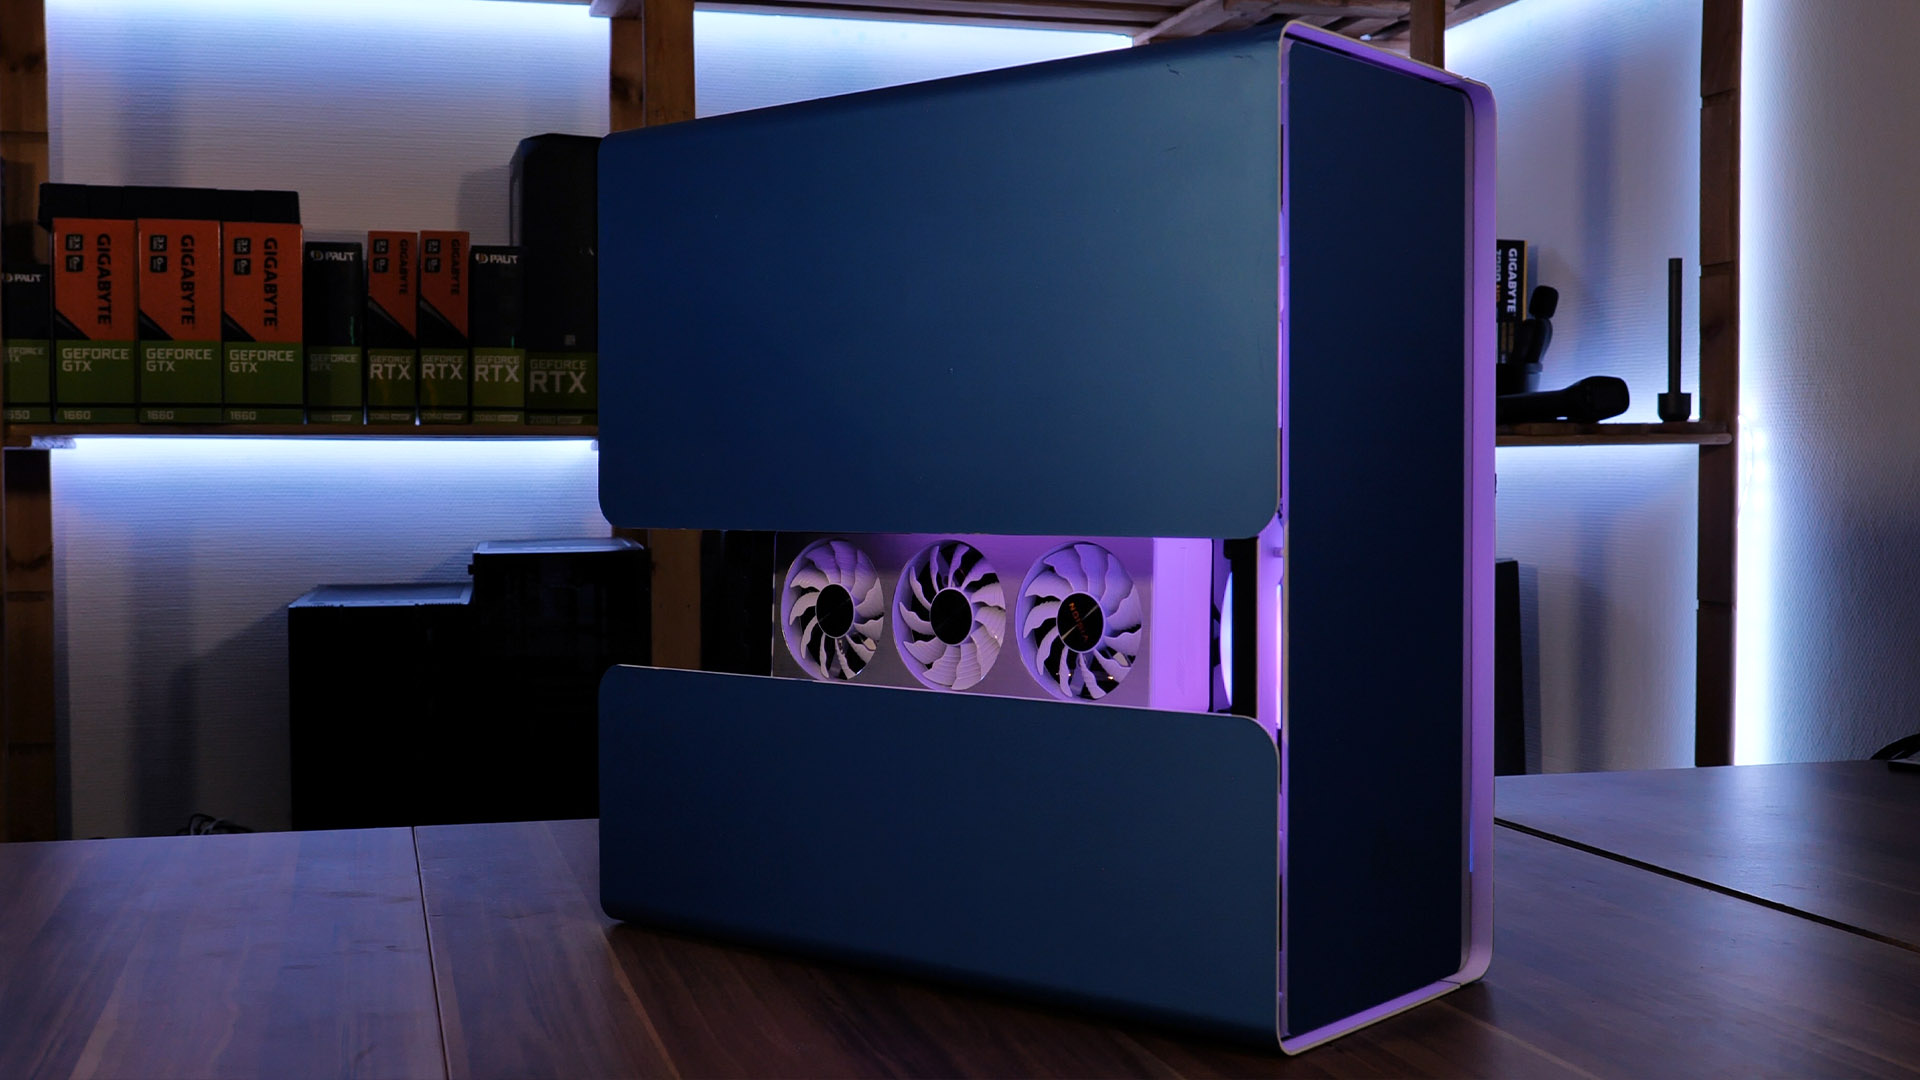
What makes the Cast such an exceptional case is the combination of the exterior Shell with the interior Frame.
The Shell which can be Back or White consists of a Big Steel Back Plate and 2 Aluminum Wings. Those Wings do not only look impressive, but the top Wing can also be opened at a moment, revealing even more of that beautiful hardware inside of the PC. While placing the Cast in a reverse Position (Front Panel Facing down) or by laying it on its back Panel, both wings can be opened. Note that the bottom wing is always "openable" but due to the Cast standing on it in its standing position, it cannot be adjusted.
In its completely closed setting, there is a +-10cm gap between the Wings, leaving the upper PCIe Slot of the mainboard, therefore showing a GPU.

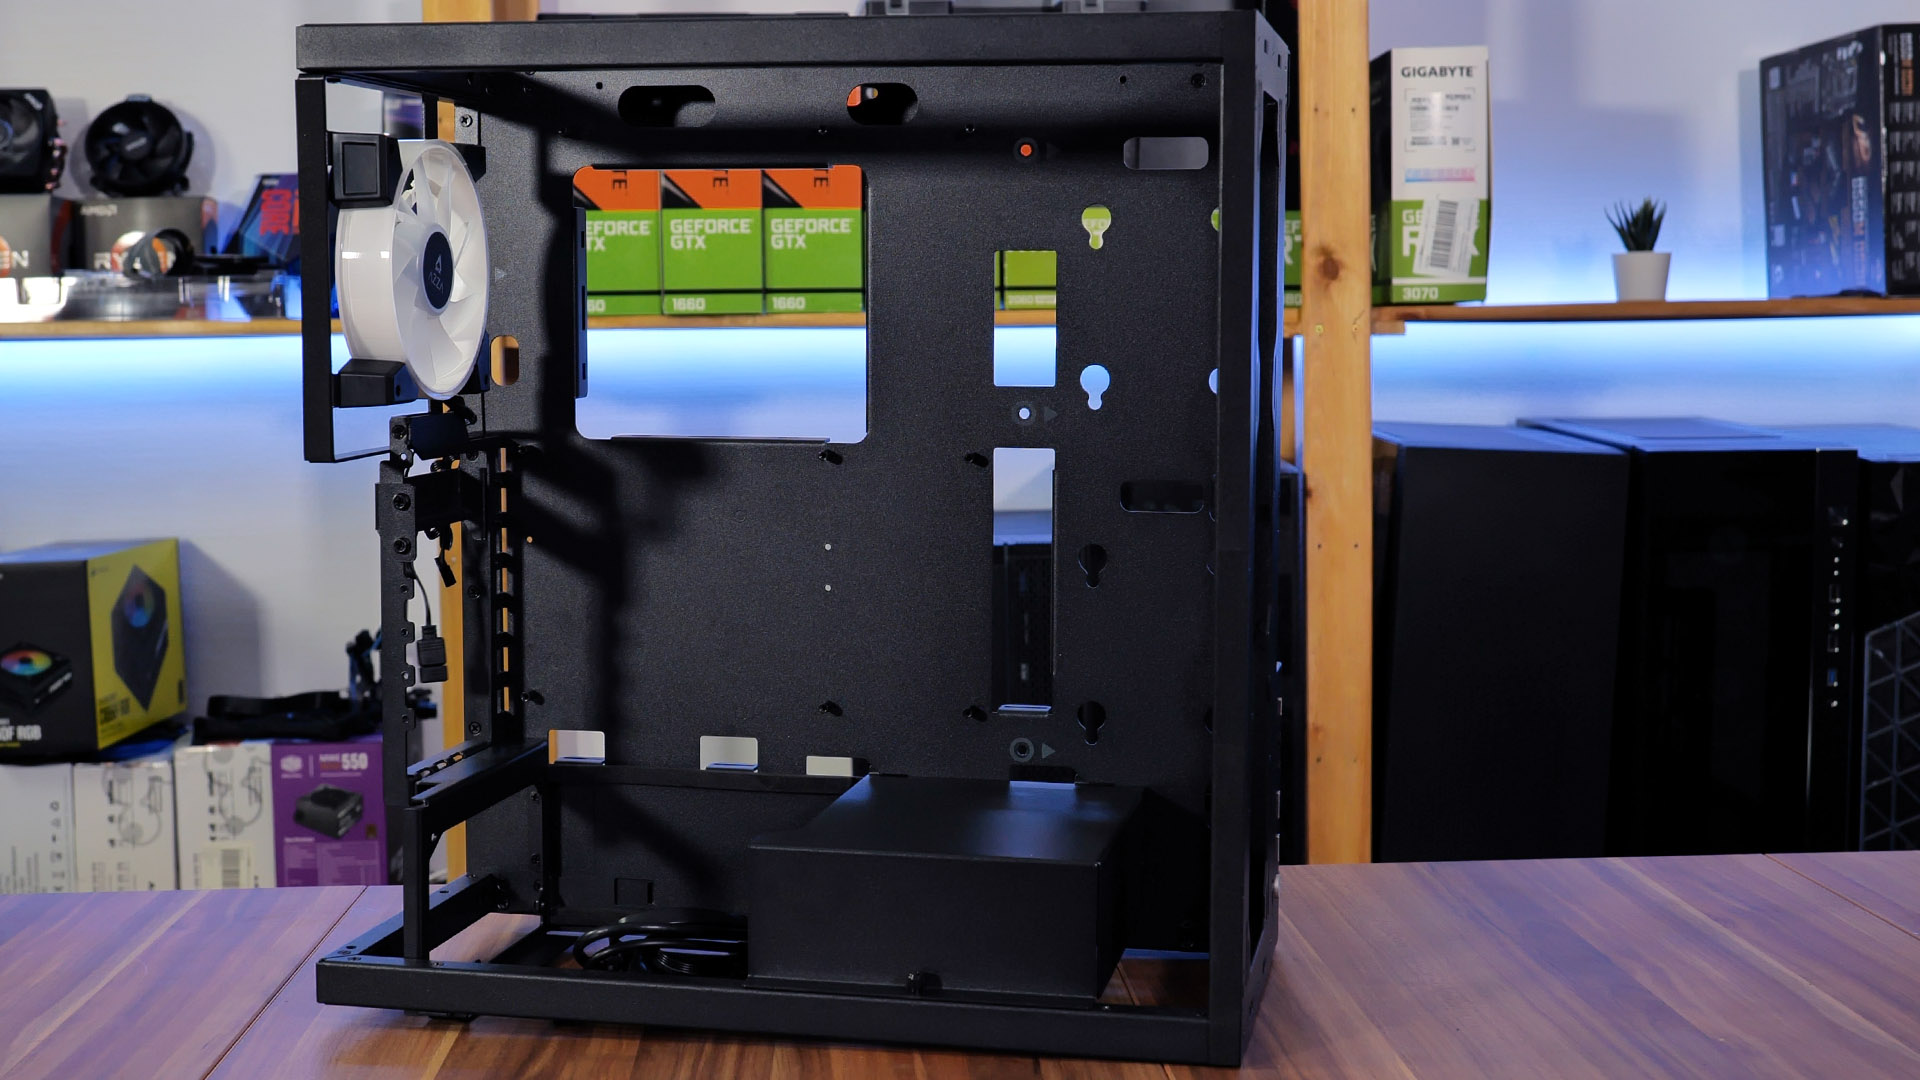
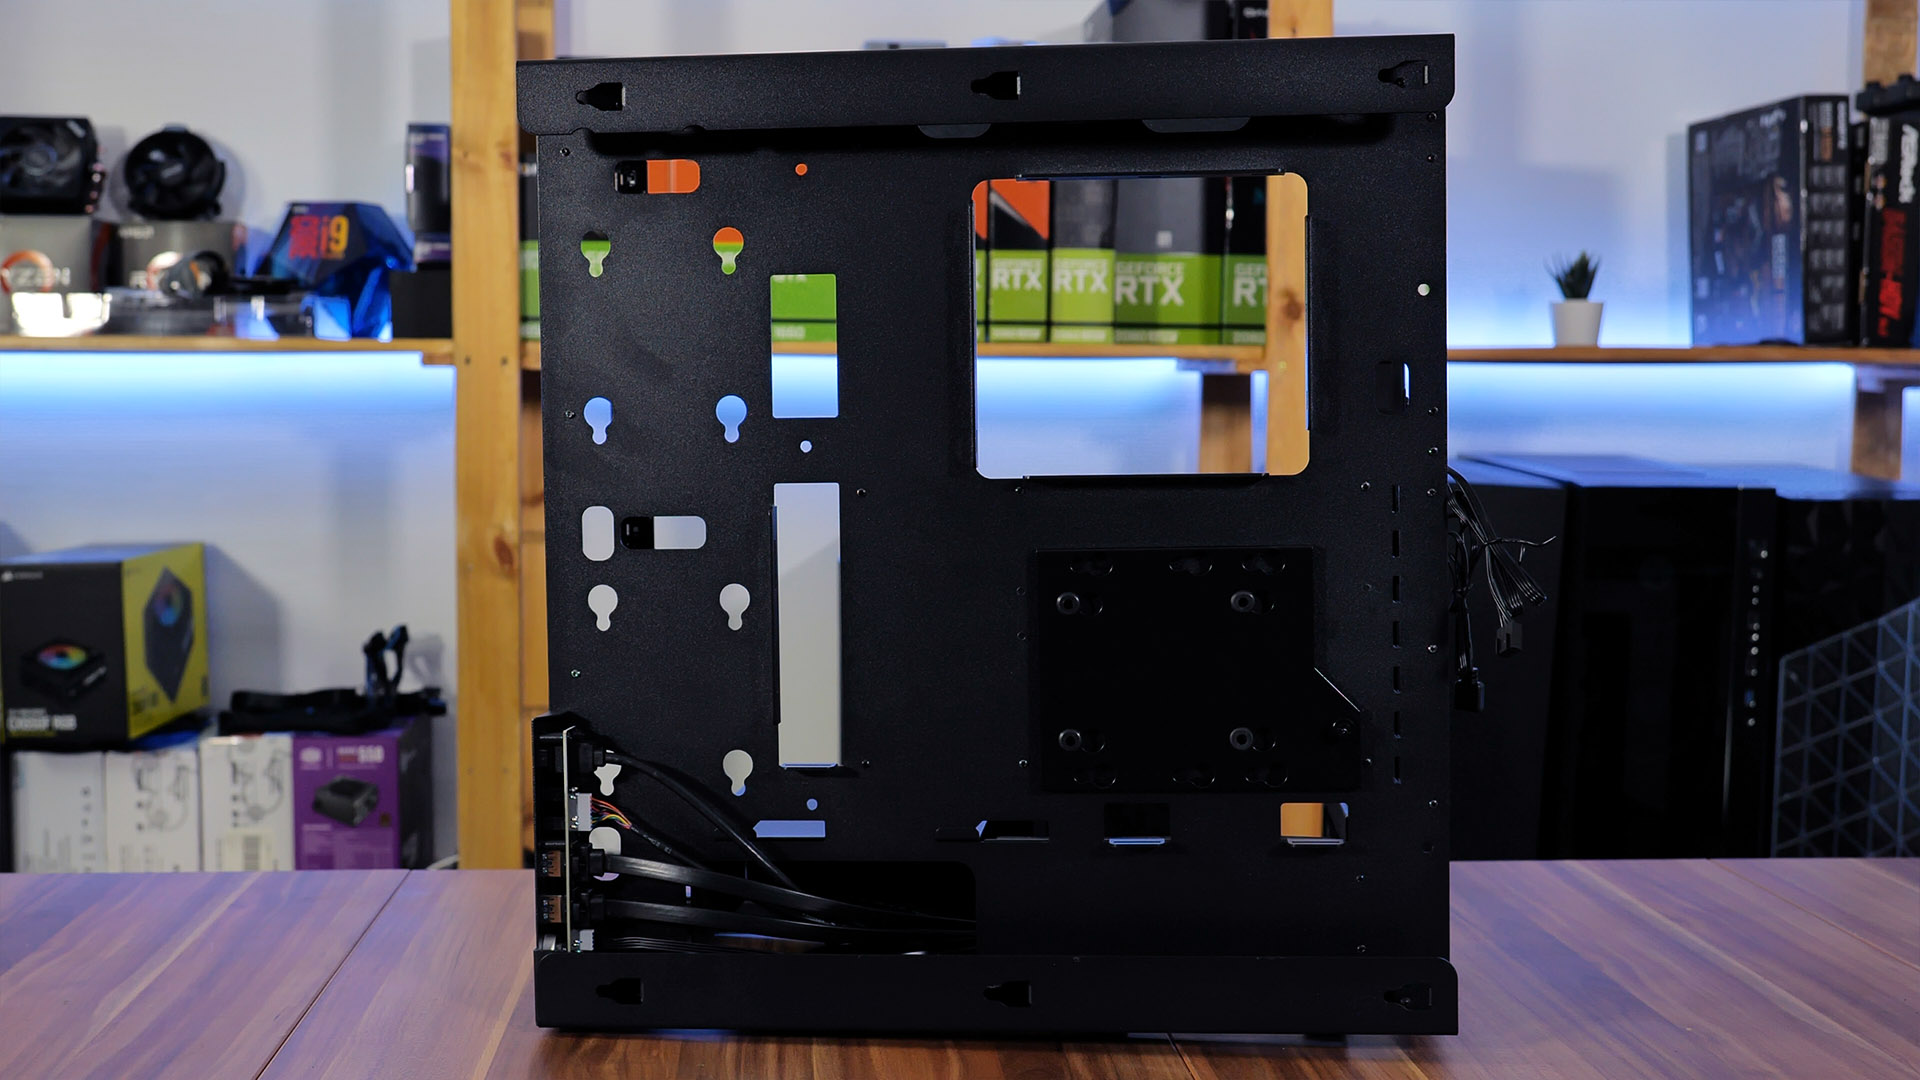
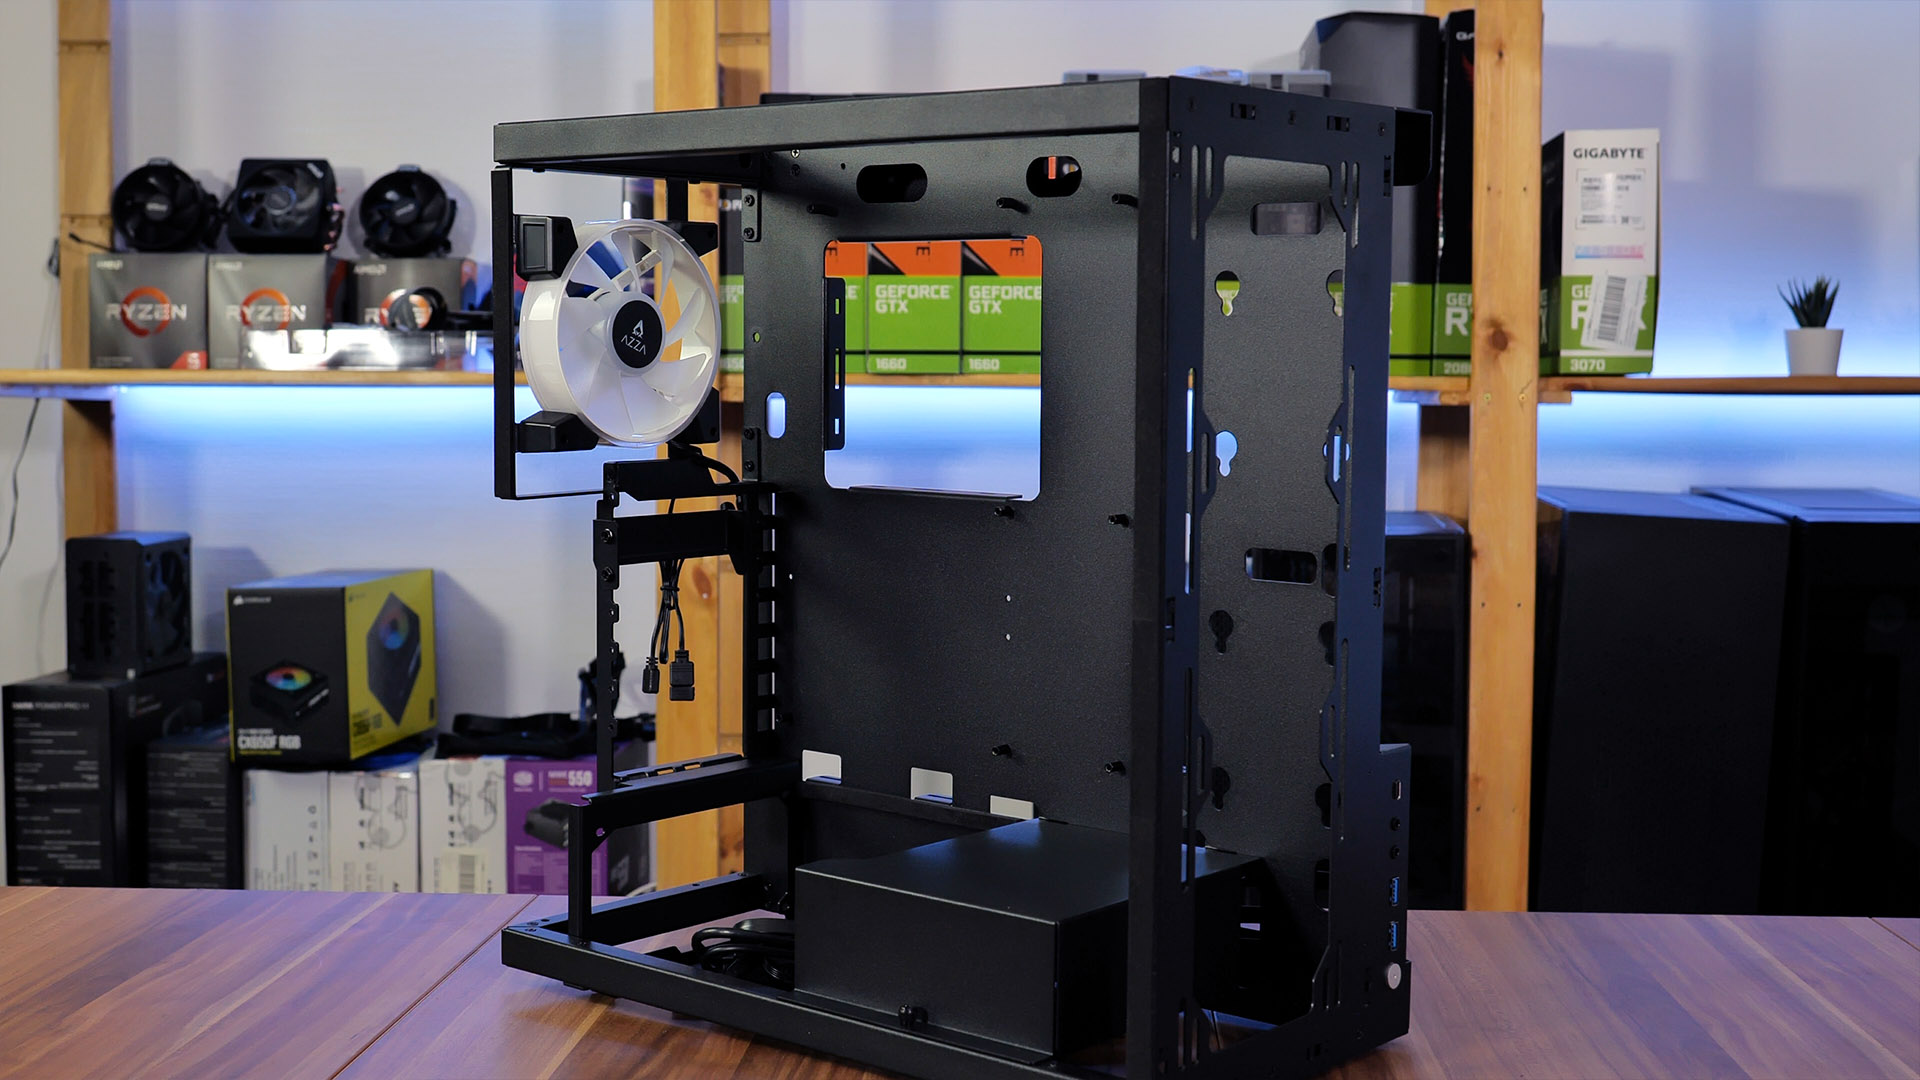
Installing Hardware inside of the Cast is made incredibly easy due to its inner Frame. That Frame is fixed to the outer shell by 5 strategically positioned screws, which are placed all around the mainboard. After removing those 5 screws the inner Frame can be removed from the outer shell. While the removing process may seem complicated, it's actually very easy once you know the steps. Place the Cast with the Front Panel Facing down, open both Wings, remove the 5 Screws and simply lift the outer shell out of its holders. It's that easy.
In order to re-attach both Cast Pieces together, it's just as simple, but we found another way to be easier. Place the Outer shell on a Table with the Back Panel facing down while having both wings open. Place the Inner frame inside of the shell and simply pull/push it into its holders. This way you can use the weight of the inner Frame + the hardware to your advantage.
Compatibility
While being compatible with up to ATX Motherboard size, the Azza Cast remains a "pretty"-small case. With 470x220x460mm, the Cast can easily be placed on the Floor or a Table. But being a showcase, it's probably a better fit to be placed in a higher position where its beauty can fully be seen.
Even if the overall size of the Case is pretty small, Azza tried to use as much space as possible for Hard Drive installations. By using the included Rubber nobs, 2 2.5" drives can be placed in the Front or the Back of the Case. Additionally, there is a Metal holding Plate in the Back of the case with pre-drilled holes to attach an additional 2.5" or a 3.5" drive.
In total, up to 3 2.5" or 2 2.5" + 1 3.5" Drives can be installed inside of the Azza Cast.
When it comes to Power supplies, the Azza Cast offers support for the usual ATX Size. But there is a small difference to most other cases. Instead of being mounted like usually, with the Fan facing outside of the case, the Azza Cast requires you to mount the PSU with the Fan looking inside of the case. This orientation stans from the Fact that the Outer-Shell Wing is directly underneath the PSU, creating very little Space to breathe. So make sure to choose a power supply that looks good on both sides. We used a Be Quiet Pure Power 11, whose Fan fit Perfectly into the Design.
IO
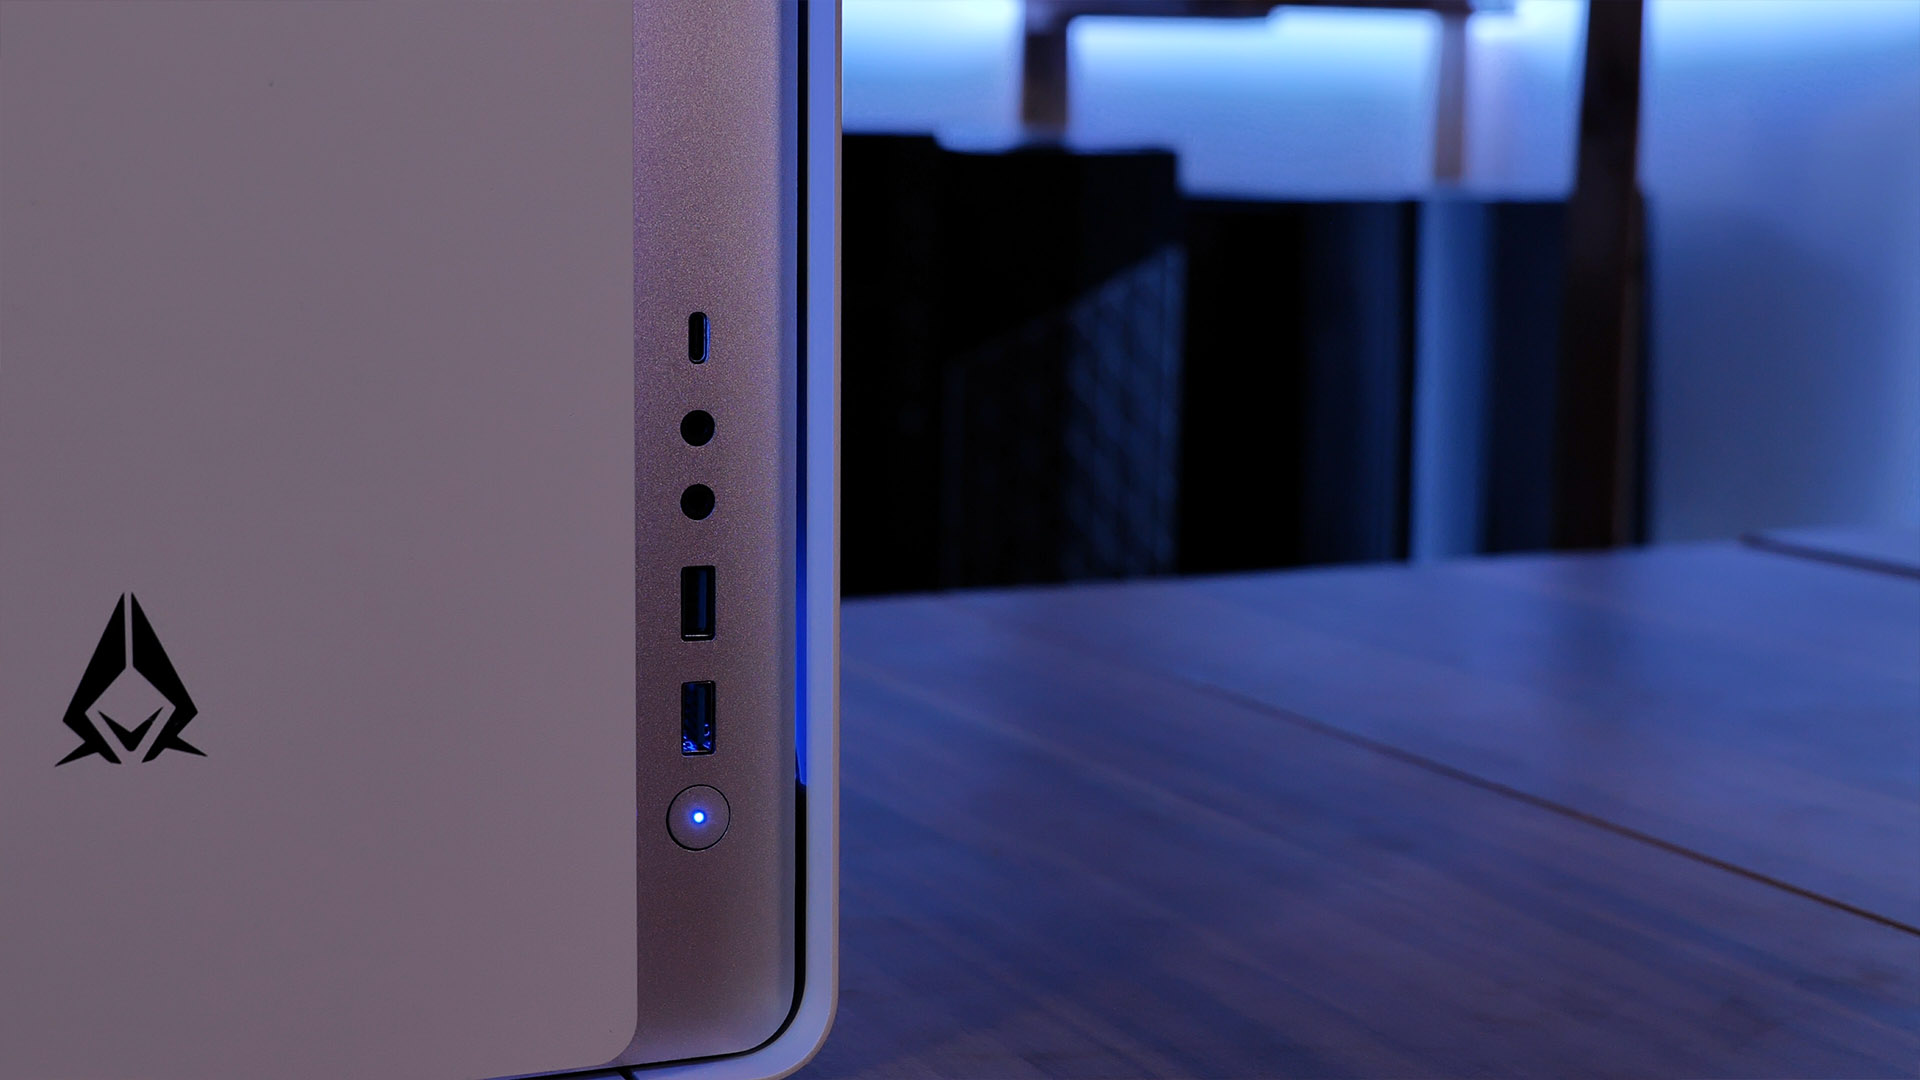
When it comes to the IO, the Azza Cast is both effective in its usage of space and up-to-date. With A Power Button, HD Audio In & Out, 2x USB 3.0 Type A, and 1x USB 3.0 Type C, the Azza Cast provides everything we need. The sacrifice of a Reset Button may not be something that we are used to, but we have not used this button for a number of years, making it almost obsolete for us.
As a small detail, we found something to be a bit irritating with the IO. Neither the Audio IN nor the Audio OUT is marked by a Symbol, color, or Text. This makes their distinction impossible. Even though there are soundcards that able to re-route Audio signals, we would have been happy to be able to know which is which.
Cable Management
The cable management inside of the Azza Cast is a bit of a stretch. Even though there are multiple Cable cutouts around the Mainboard, there is absolutely no indication of where or how you should route the cables. But this may also be one of the major features of the Cast. "Do what you want" is a principle that we found a lot while building in it. The included plastic Cable Holders have a double-sided 3M Tape attached to them, giving you the possibility to create a custom "permanent" routing for your cables.
While it may be tempting to pre-attach these Holders before the Building Process, we highly recommend first complete the installation and then place the cable holders. This way you can be assured that you didn't just place a cable holder where no cable will ever be.
In addition to the Permanent Cable holders, Azza included a couple of Zip and Velco ties which can be attached to numerous places behind the mainboard.
Cooling
Being an "Open" Case Design, the Azza Cast does not have to fight with restrictive airflow at all. The 3 optional Front Fans and included Back fans can pull their air from wherever they want and make sure that your components stay cool all the time.
Additionally to those 3 Fans, you have the possibility to install a Radiator in the Front.
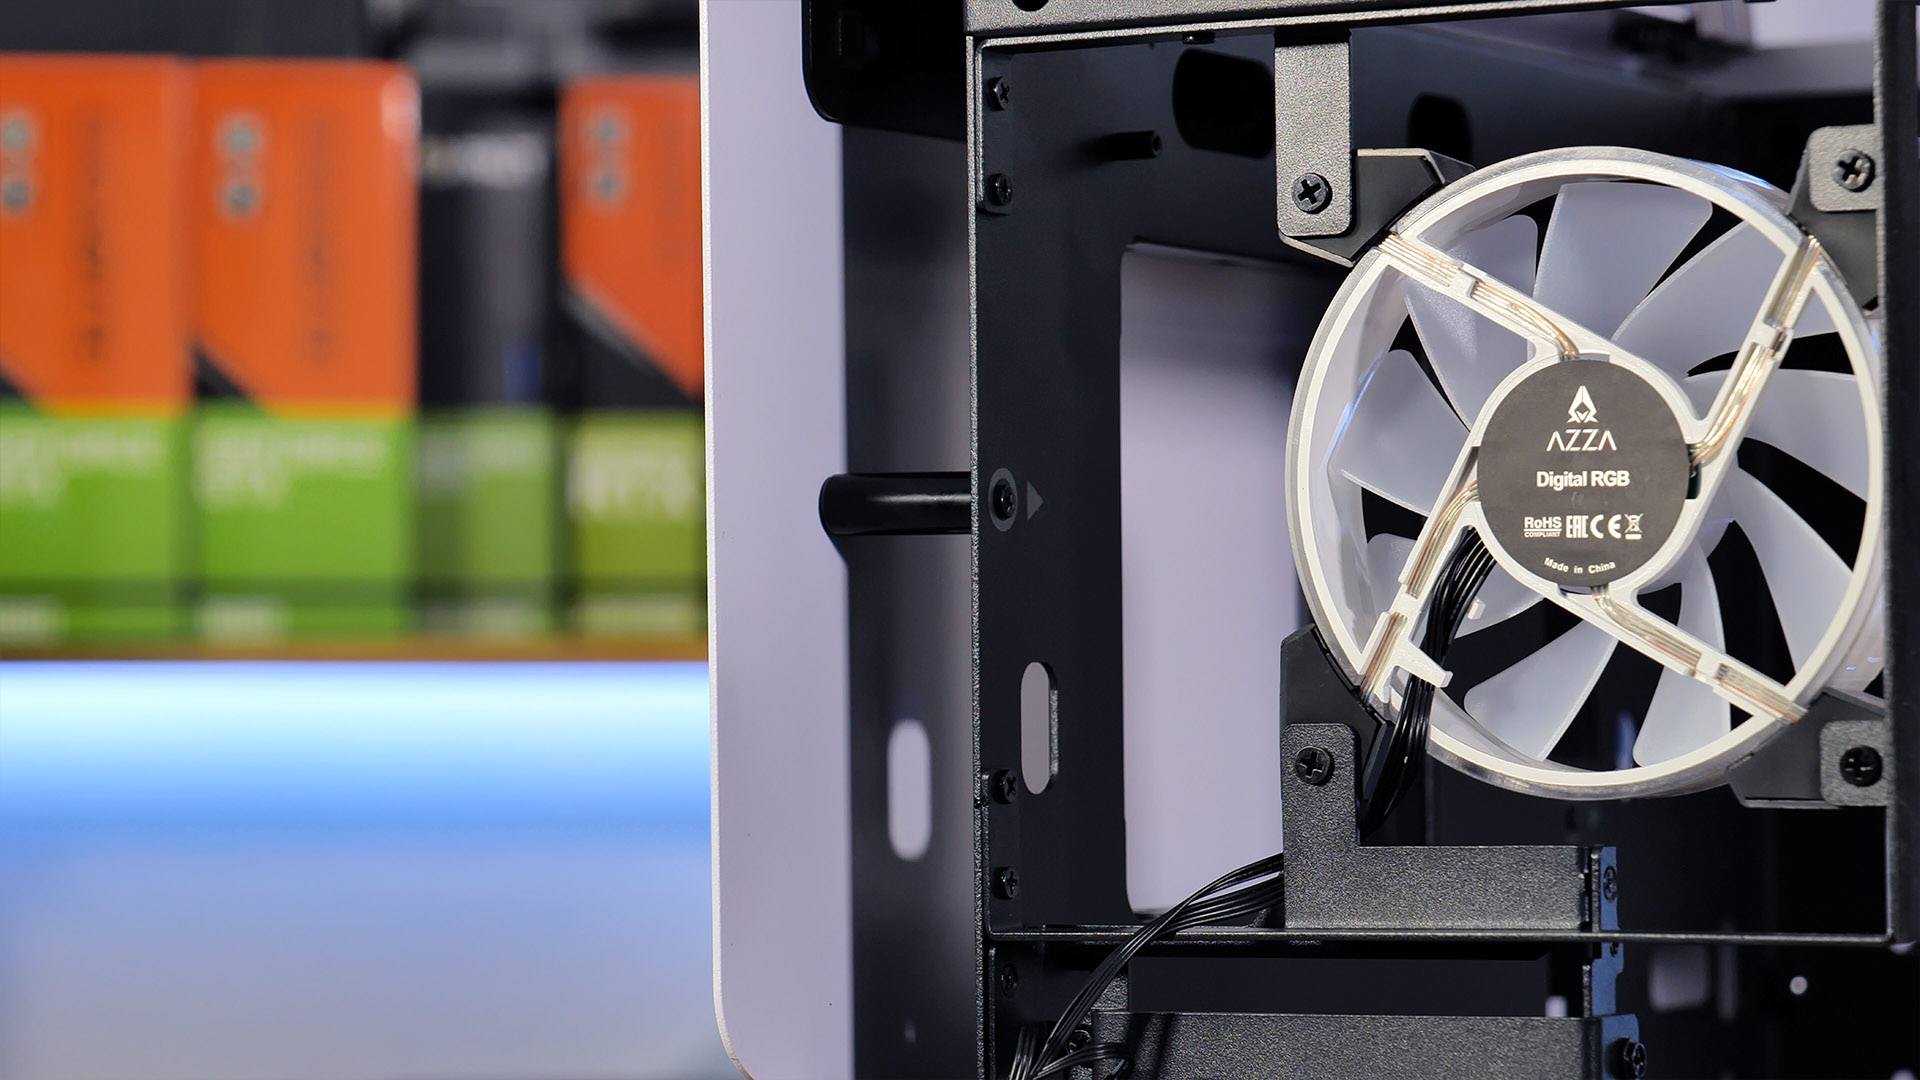
The Included ARGB (3-Pin Addressable) Azza Hurricane 3 Fan in the Back offers some nice RGB effects while also moving the air quietly. Is by no mean the best Case fan we have ever seen, but a included ARGB fan nothing that you should take for granted.
Even though the Manual and Specsheet does not specifically mention it, we found that you can mount a 120mm Radiator to the back of the case. There are a number of metal bars around the Fan that would end up in your Way if you would try to fit a Radiator in there. A simple fix is to first mount the Fan and the Radiator ontop. In our Build, we even sandwiched 1 Fan behind the Radiator and the Azza Hurricane 3 Fan on top, which not only created a great CPU Cooler but also let us still appreciate the RGB effects, while not obscuring any other part in the process.
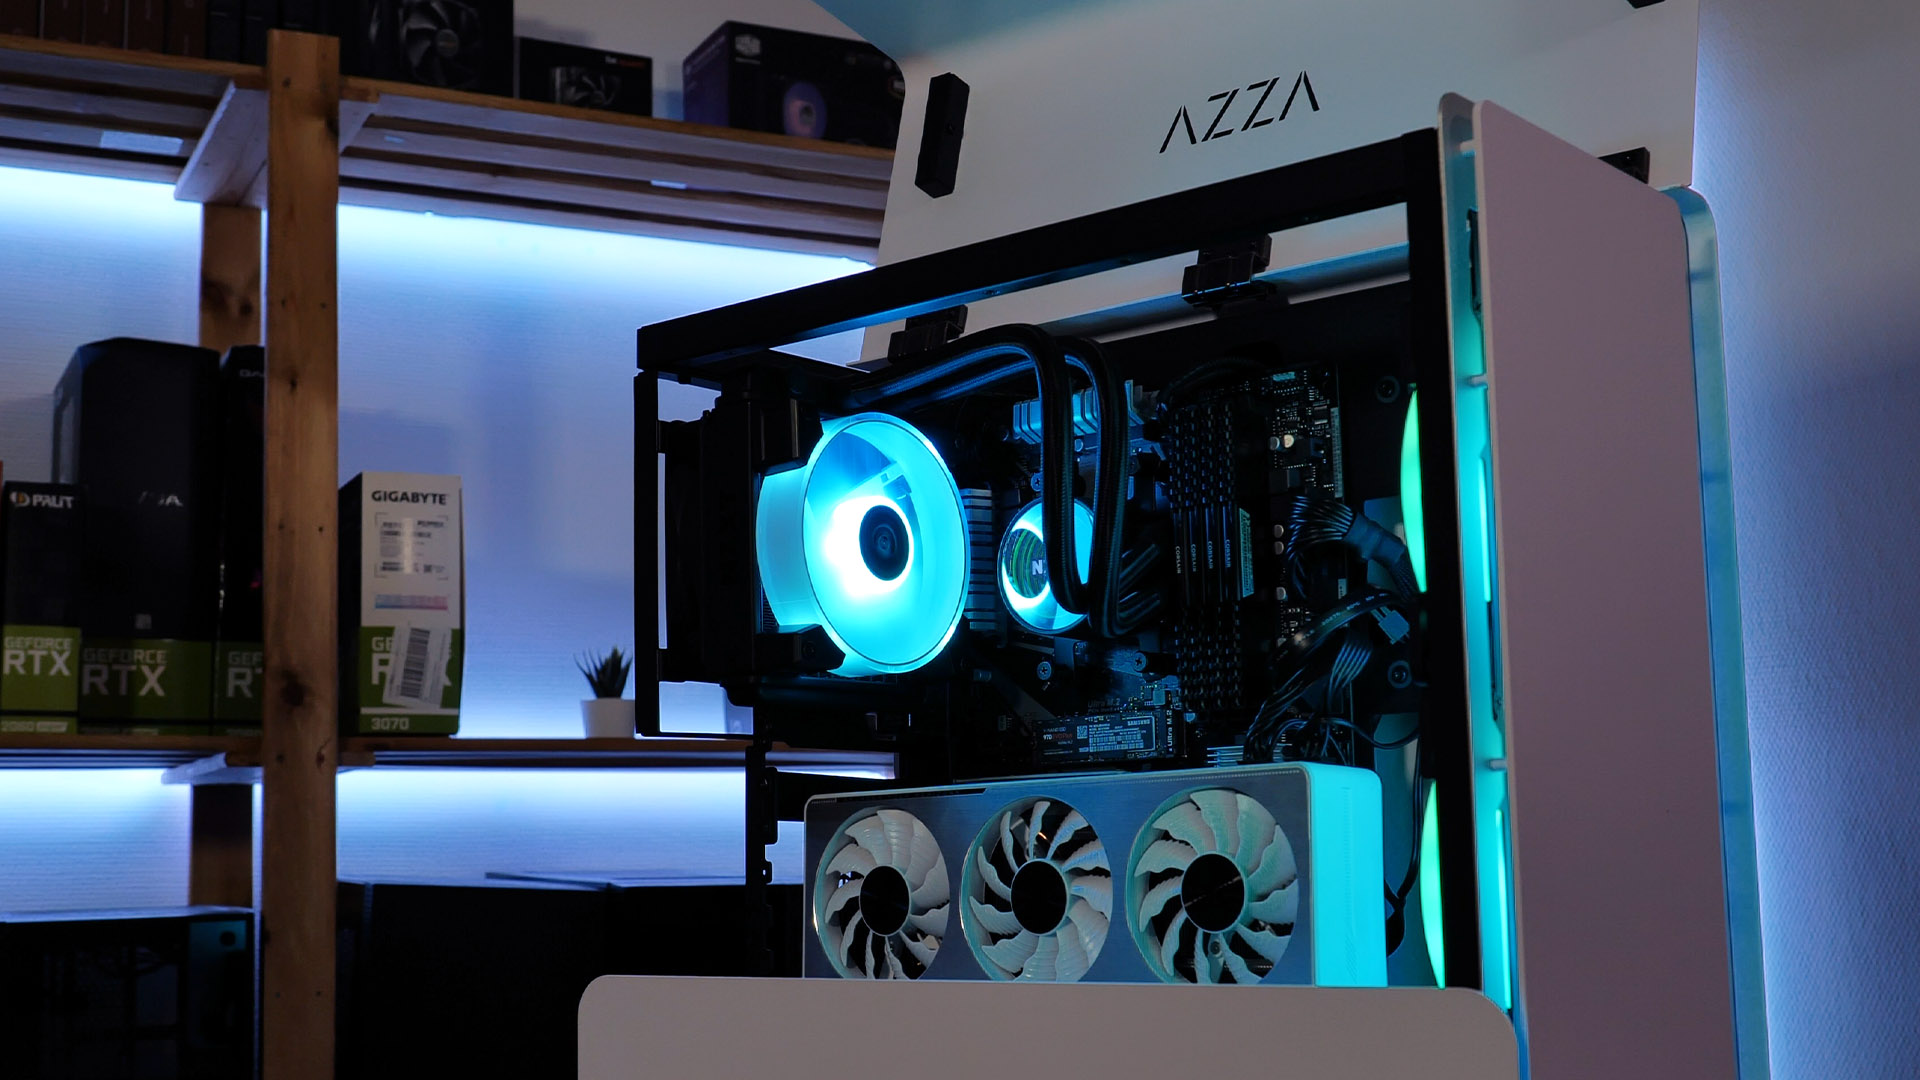
The optional Vertical position of the GPU also lets the Fans face the outside of the case. Not only does this orientation add to the esthetic of the case, but it also allows the GPU to pull air from outside, providing even colder air.
Even though the case is very openly designed and does not have any restrictions on its airflow, we would have been happier if there were fan Spots on the top of the frame too. We tested the Space with a couple of fans and it turned out that there was more than enough space to attach 3x 120mm or 2x 140mm Fans (even though without Radiator). These additional Fans would have been very helpful to cool the VRMs as Open Cases tend to have very uncontrollable Air Paths, sometimes resulting in the VRMs not being inside of that Path.
The Open Design also let Azza not using any Air Filters at all. Not that they tried to save any money, they just don't make any sense in a case like this. This being said, you need to make sure to not use this case in a highly dusty environment, as it will collect the dust more effectively than your vacuum cleaner.
Customization
Being Customizable is by far the biggest selling point of the Azza Cast. While still looking good, Azza tried to give the user as many possibilities as they can.
With many "unused" screw holes all around the Frame and on the Mainboard Plate, you always have the possibility to tinker something yourself.
A perfect example of this would be the top of the Frame, where we found 4 Pre-Drilled and threaded holes that conveniently create a Square that could fit 3x120mm or 2x140mm Fans. With a quick visit to your next Hardware store and some thin metal sheet, you could easily create your own Fan holder and enhance the Cast's cooling performance.
Additionally to its extensibility, Azza made sure that everything is detachable. With a couple of screws the PCIe Frame, Back Fan Frame, and PSU Holder can be removed. We do not fully understand why we would want to do such a thing, but this is part of the Cast's beauty, do whatever you want.
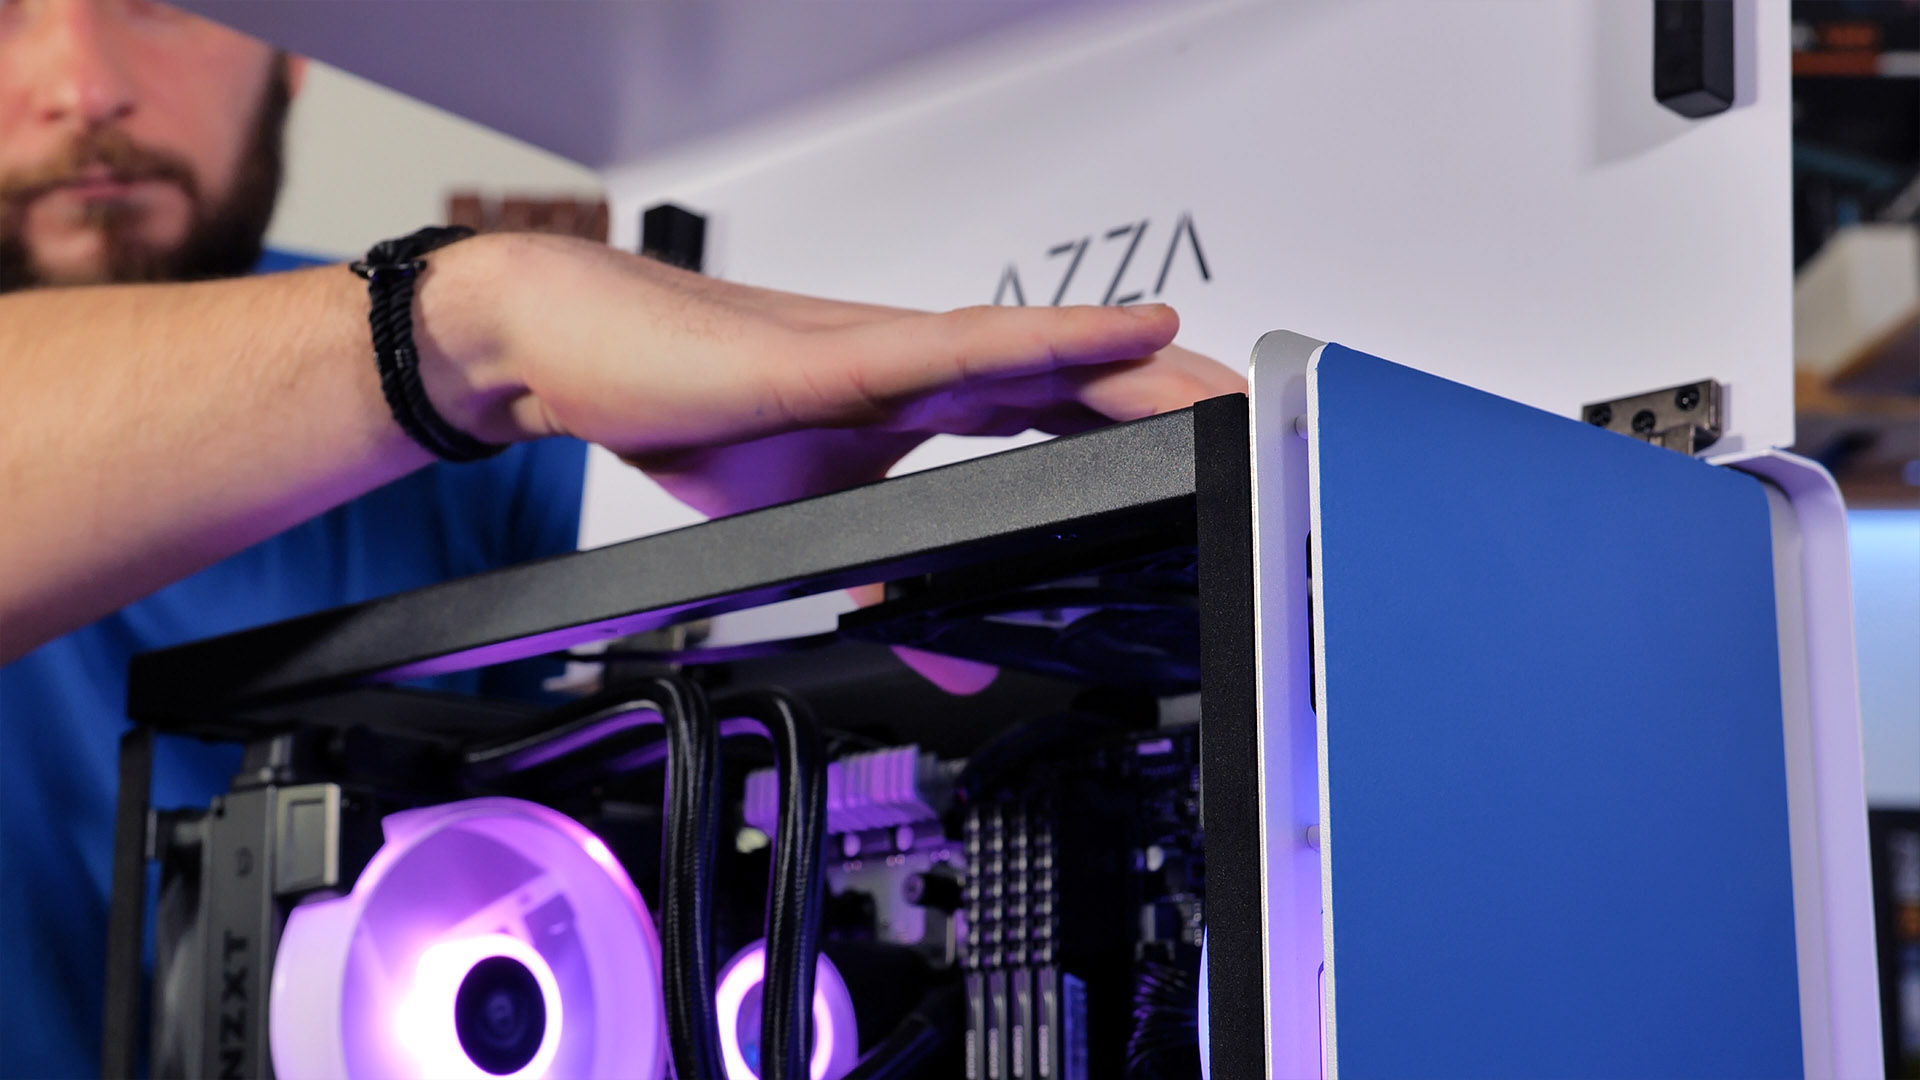
The possibility to tinker on the Frame is not the only "customization" option you have with the Cast. Azza also made sure that the Outer Shell is easily disassembled with a couple of screws. While having each piece of the Shell separately, we took the opportunity and wrapped the outer shell in blue foil, creating a completely different look. Even though we thought that the finish on the Outer Shell would create some difficulty for the Wrap to stick, it fits just perfectly. Alternatively, we could have also just spray-painted it.
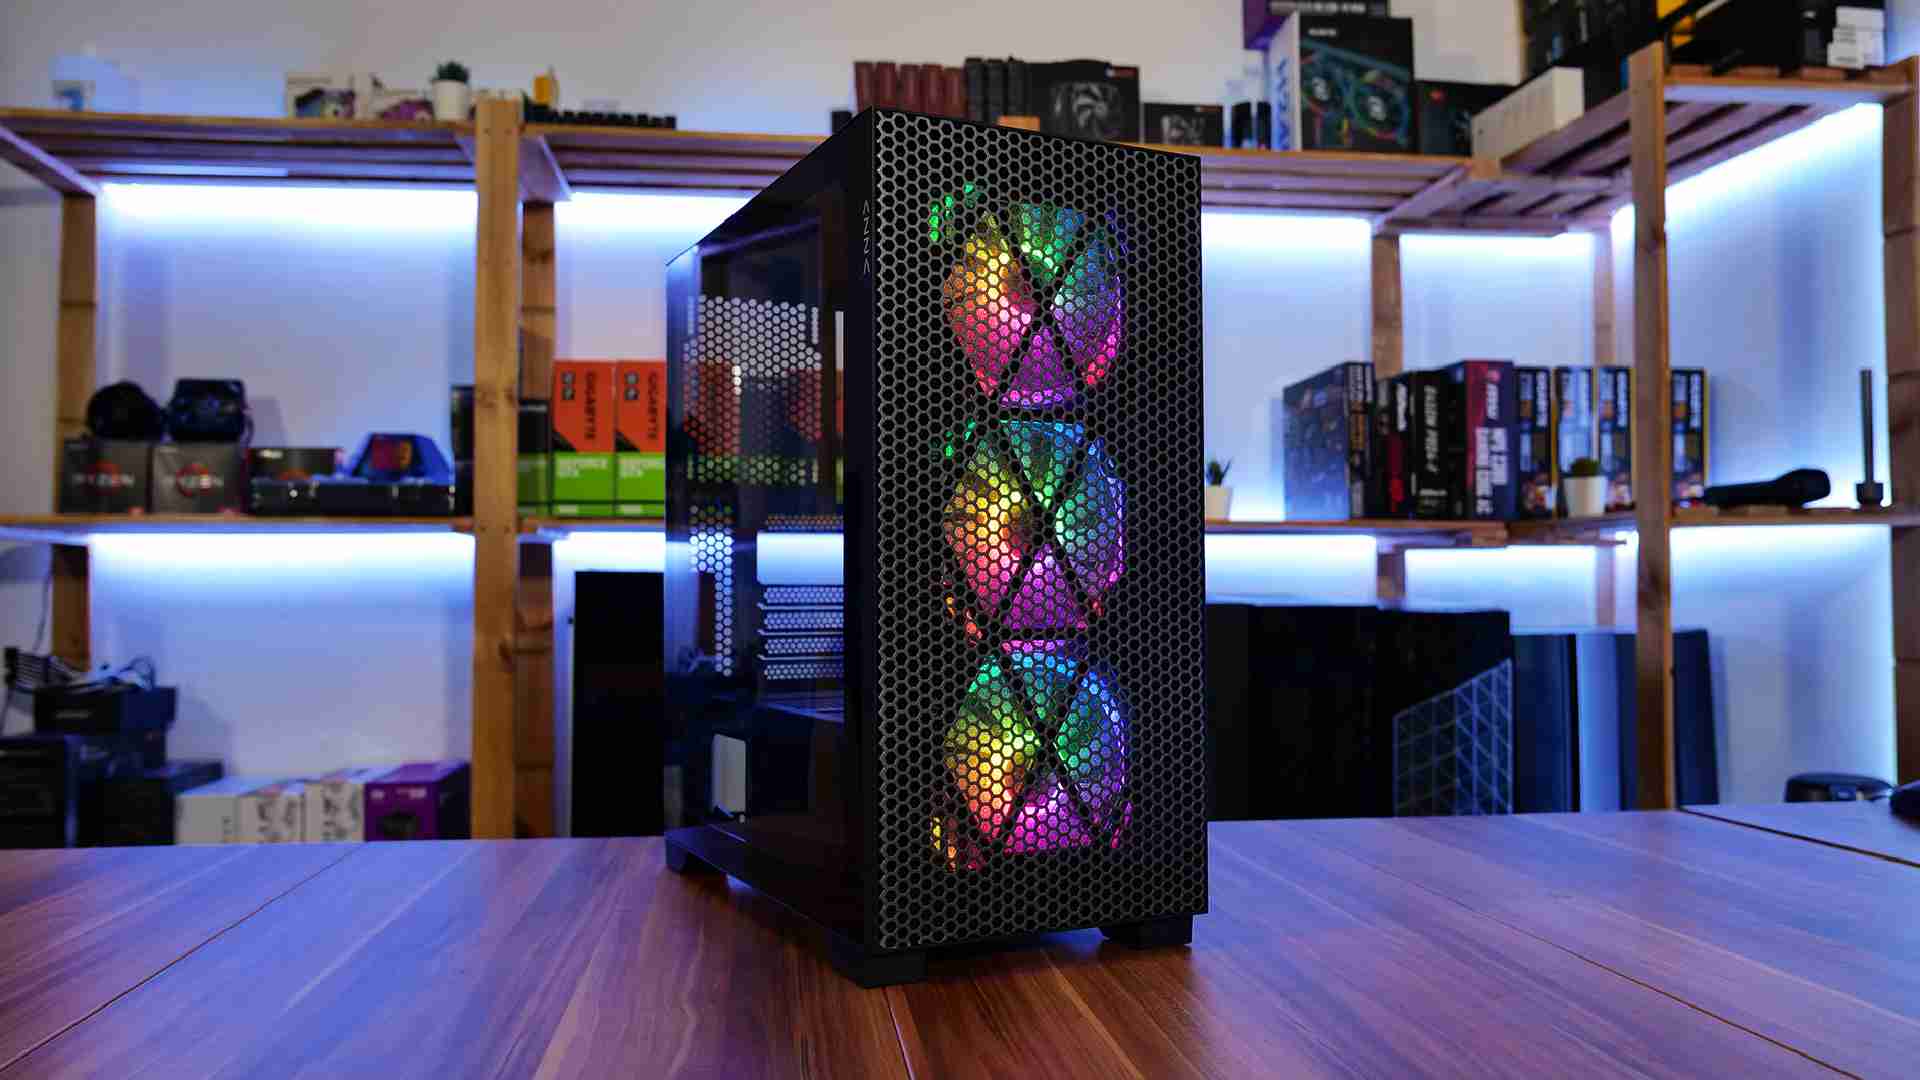
Design
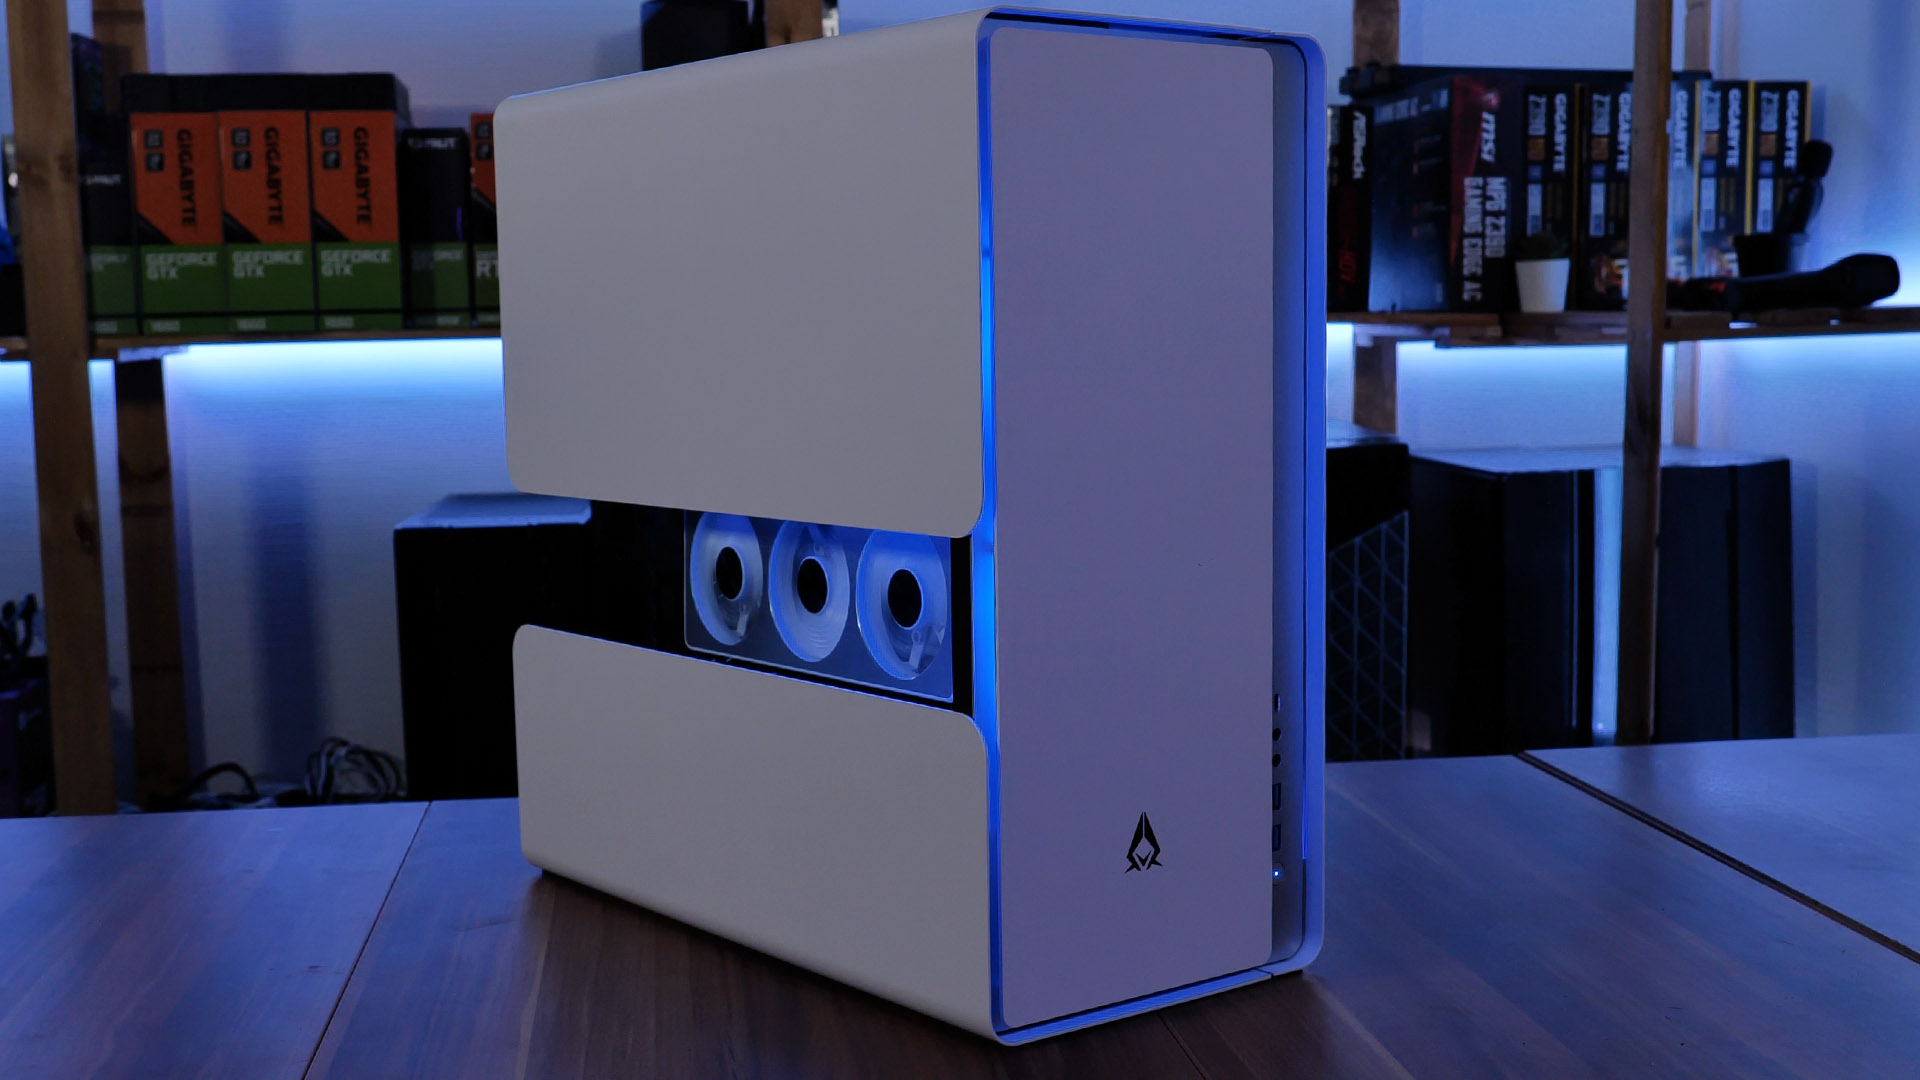
If Azza tried to win a category, it most definitely was Design. The Openable Wings make the Cast stand out next to any other case. The simple White of Black color creates a very minimalistic design that very much resembles Apple's Design approach, Simple and good.
On the Cast, Azza used its branding very conservatively, with a small company logo on the Front Panel and the Name inside of the Top Wing. This approach reminds us of the Azza Hive 450, which also included as little Company information as possible. An approach that we very much enjoy.
The removable Outer-Shell of the Cast also allows for some high customizability. Having both Parts of the Cast separated allows you to do basically whatever you want. Permanent Marker, Spray Paint, or Wrap, the sky is the limit.
Overall, the Design of the Azza Cast is an eye Catcher, highly unusual and stunning. Of course, the design and Open Case approach is not something for everybody, but we really enjoyed it.
Installation
For this case we used the following components:
- ASRock B-450M-HDV
- Ryzen 3700x
- 4x Corsair Vengence
- Gigabyte Vision RTX 3070
- NZXT Kraken M22
- Be Quiet Pure Power 11
At a first glance, installing a system inside of the Azza Cast may seem very difficult, but once you have the Frame out of the Outer Shell, it is easier than inside any other case.
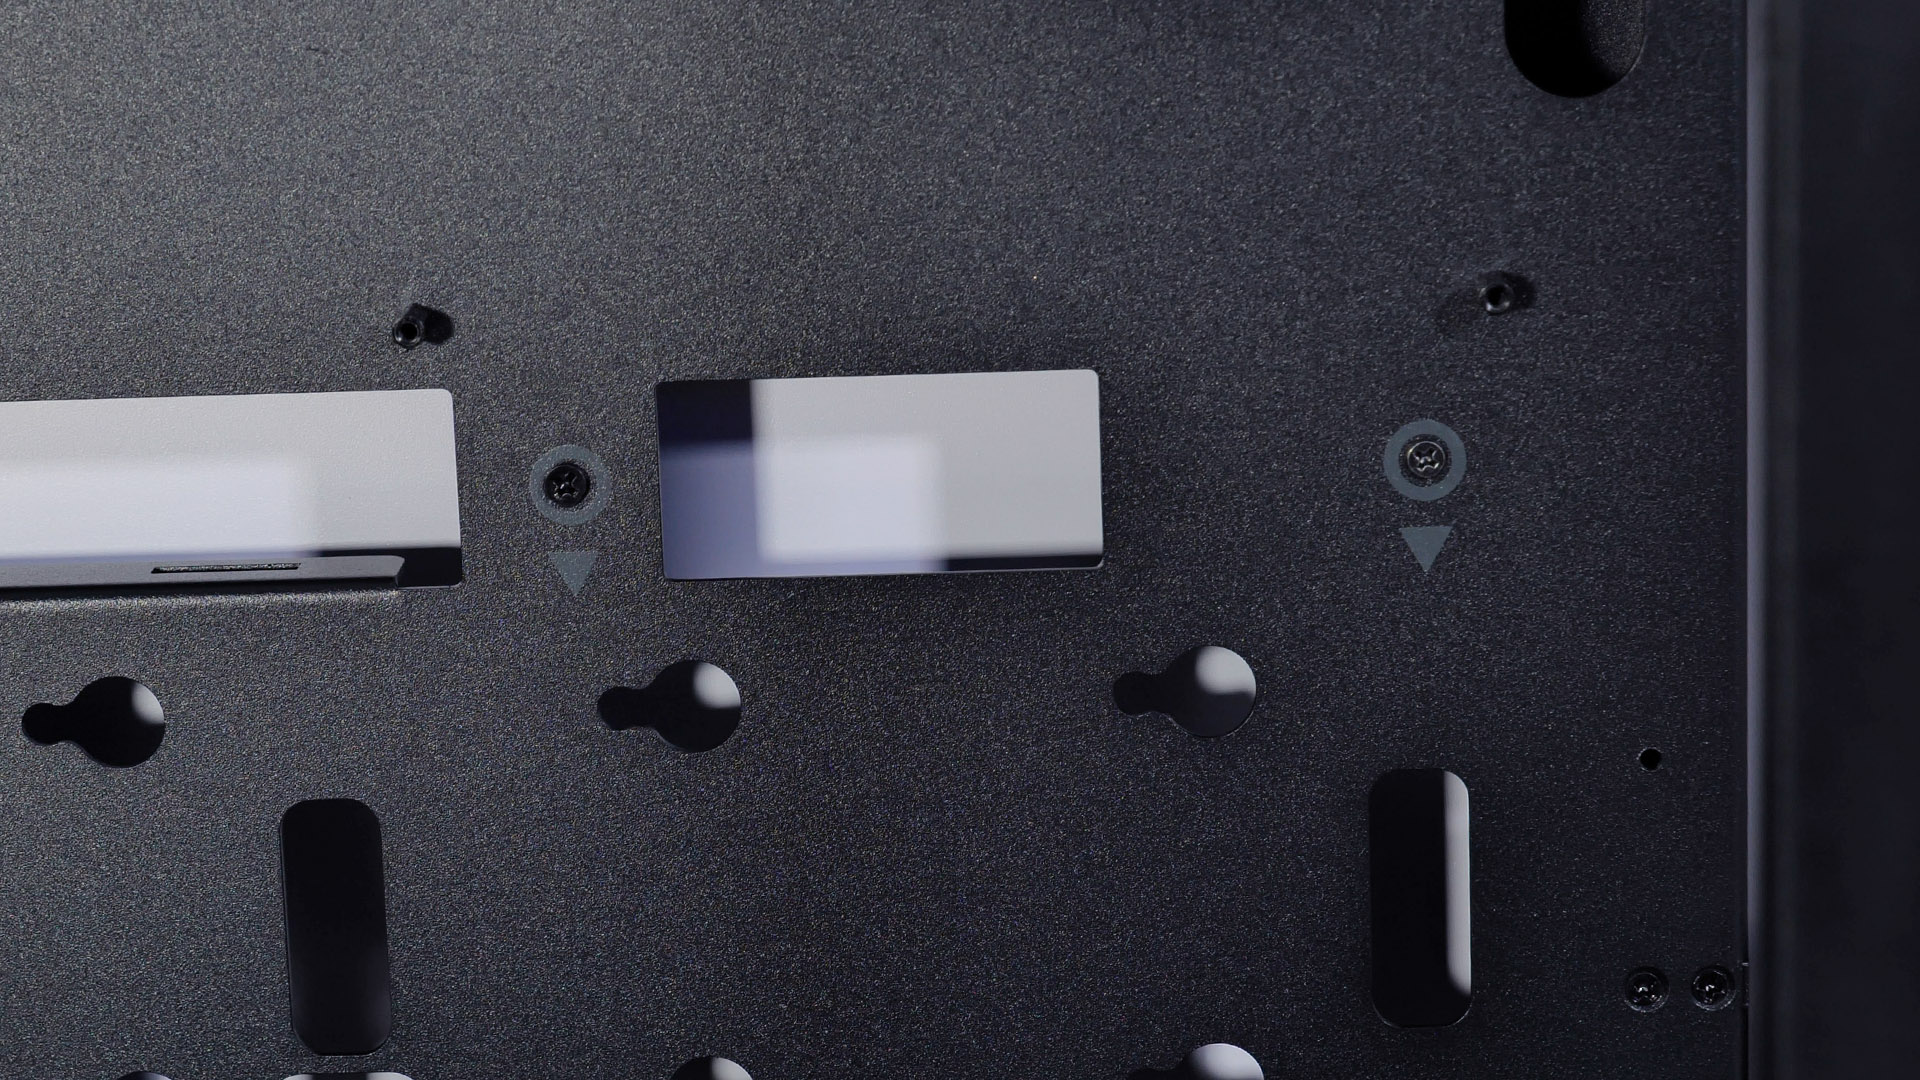
In the beginning, the inner frame is attached to the outer shell with 5 Screws. Place the Cast with the Front facing down, open the wings, unscrew the 5 Scrws which are indicated with a Grey Ring and Arrow, and simply lift the outer shell away from the Frame.
At this point, you're left with a simple frame, providing you as much space as possible.
From here, the installation process is as straightforward as it gets. Screw-in every component, use the numerous Cable cutouts to route the cables to their appropriate spots and you're good to go. The only difference to a normal installation would be the reversed PSU position, but this does not change anything within the Installation process.
Behind the PSU spot, there is a Black painted Metal gasket which is attached with a simple Thumb-Screw. This gasket's job is to hide the PSU cables. After removing it by unscrewing the screw, it is easy to get the Power Cables to the Back of the Frame.
Removing the gasket also opens up a ton of space behind the PSU. This may seem trivial, but if you ever had to install additional Cables on a Modular Power supply inside of a small case, you will appreciate the huge amount of space offers.
Once everything was installed, it was time for cable management. The provided cable holders can be glued wherever we needed them. This functionality did not make cable management an easy process, but it certainly helped a lot.
Inside of the Cast, the GPU can be installed in both a Horizontal and Vertical Position. We made sure to use every offered feature and installed our Gigabyte RTX 3070 Vision in a Vertical position. This required us to use one of our own PCIe Riser as Azza didn't include any. At this point, we realized that you cannot use any riser. We used the one that was included in the Thermaltake P5 Case. This riser has a little PCB attached to the end that fits the GPU. Because of that and the Positioning of the GPU, there were clearance issues between the GPU and PSU, letting the riser slightly press on the Fan Grid of our Be Quite Pure Power 11. If you're planning to use this Case and vertically position your GPU, make sure to use a riser whose end-piece does not include any not-flexible parts.
Conclusion
Overall, the Azza Cast is a hell of a case. It surely is not something for everybody. Being a Dust Catcher, requiring a ton of space for assembly, and having transformer-like openable Wings makes it the center of attention of any desk.
Even though we highly enjoyed its design, there were a few negative things that we noticed during our Review.
There are a couple of Cable cutouts around the Mainboard that do not make any sense. Behind the Back fan, there is a Cable cutout that is conveniently placed exactly where the included Hurricane 3's Power cable comes out. Naturally, it would make sense to use this hole to route the cable. But doing so ends up with the wire in front of the Motherboard IO, blocking the USB Ports. Something that just didn't make sense for us.
Some of the fundamental Screws inside the Cast are (very) inconveniently palaced. A perfect example of this would be one of the Screws that keeps the inner Frame attached to the outer shell. This screw is located directly behind the Back fan. Using a short screwdriver to loosen or tighten this screw resolves in pushing the Screwdriver inside the Fan, possibly damaging it. Using a long screwdriver ends up forcing you to use the screwdriver at a 30° angle, because the Fan Frame pushes the Screwdriver to the side, possibly making you damage the Screw. In the end, if you really want to screw in the screw correctly, you would need to remove the Fan, attach the inner Frame to the Outer Shell and reattach the Fan again. Something that was highly inconvenient (thus we chose the 30° method).
Even though the Cast does not have to fight with the Airflow, we would have highly appreciated the possibility to install a couple of fans in the Top. It may never be necessary, but we saw Open Cases in the Past where the VRM's would have enjoyed some additional cool air.
With these "could have been better" aspects said, we would want to focus on the Design. The Cast is directly aimed at consumers that want to have a showcase, and Azza definitely delivered here. The Case looks astonishing out of the Box, and with some spray paint, you can create whatever design you desire. The Build quality of the Cast is exceptional. Being almost completely made out of aluminum creates a highly premium feeling while opening and closing the wings.
In terms of Compatibility, there is nothing to nag, ATX Support, up to 3 SSD's is what we would expect from a normal case, and the Azza Cast did not make any cuts there.
Right now, the Azza Cast can cost you upwards of 200$US. Even though the price may seem high, it still fits right into the Showcase category, with the Thermal P5 being priced very similarly. We will include Affiliate Links down below.
Overall we were very happy with the case. Though we cannot recommend it to everybody. It is still a showcase requiring a lot of space and a dust-free environment. But for those who want something that creates an immediate "wow"-effect, definitely consider this Transformer-like case.

Azza Hive 450 Review
Azza-s Hive 450 Case is focused on Airflow while having a sleek design! Lets see if it can hold up to our expectations
Read More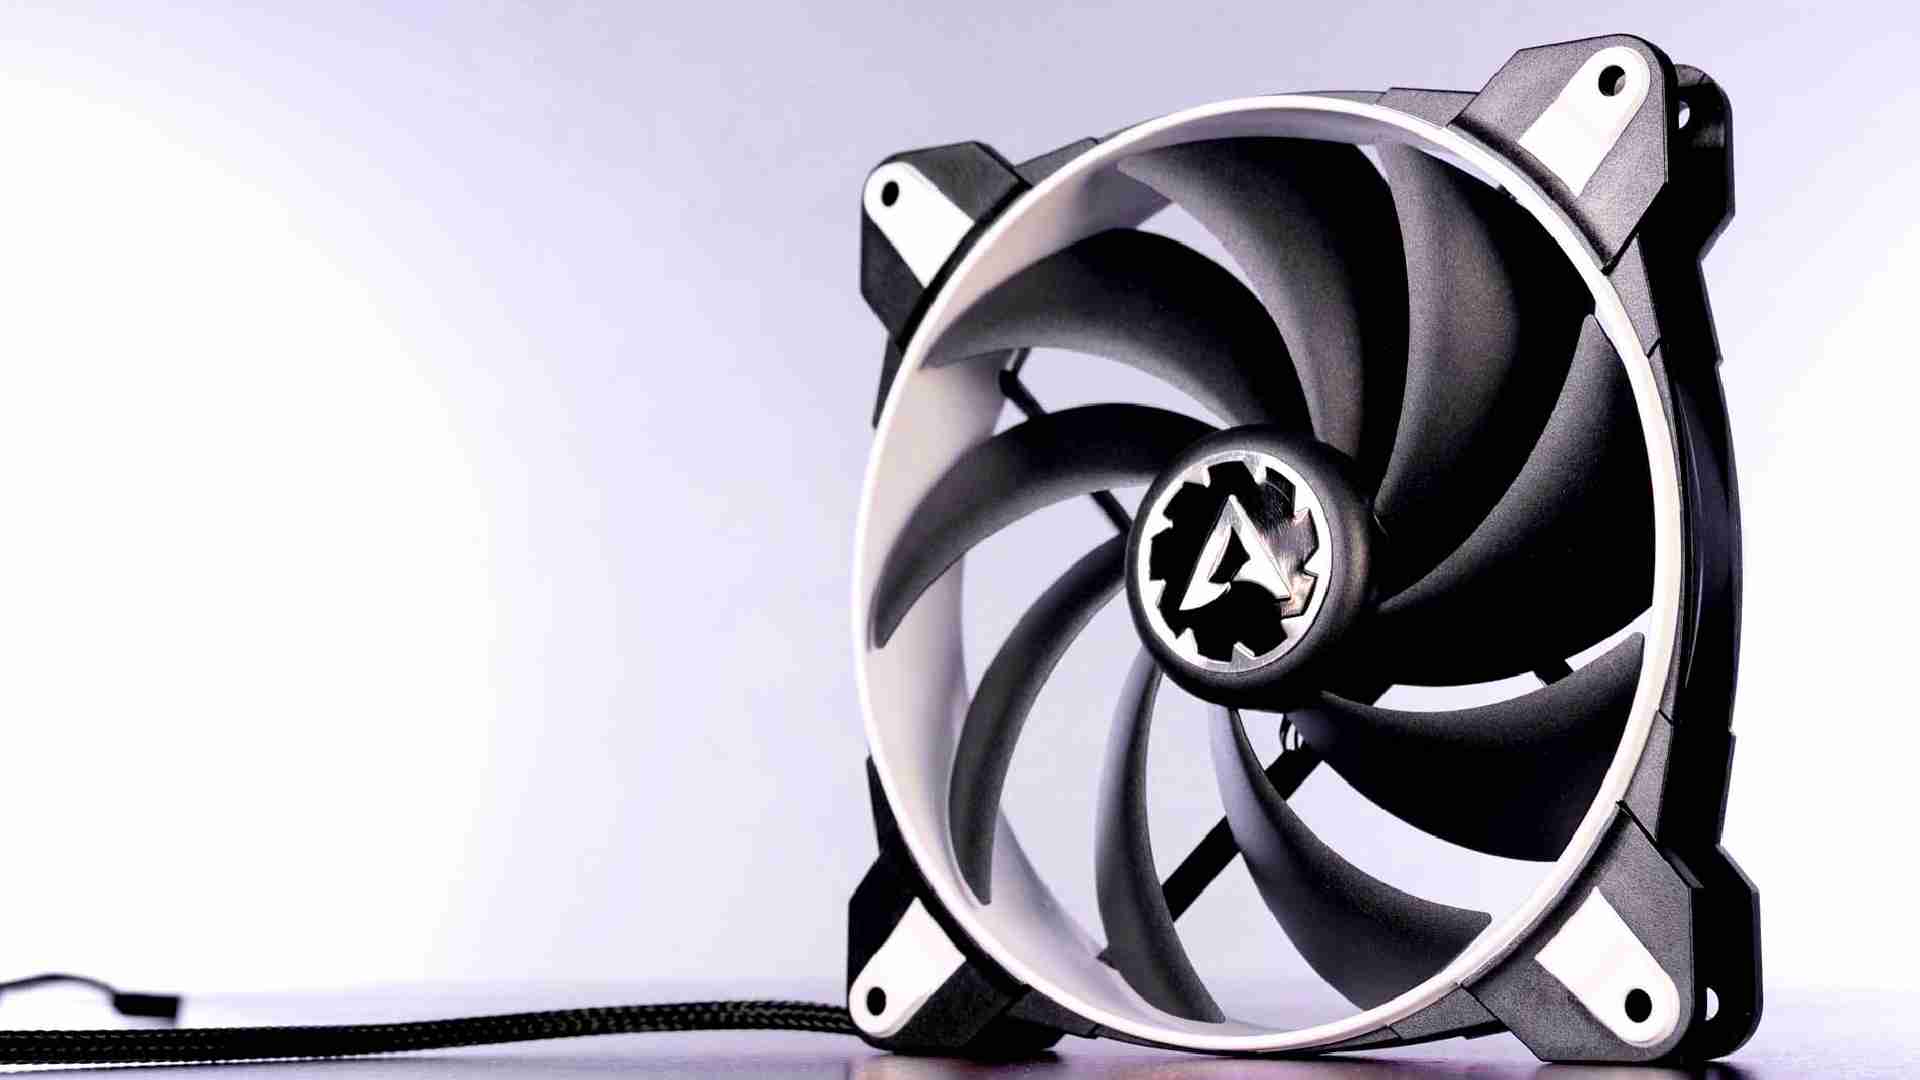
Arctic BioniX F140 Review
Arctics BioniX series already proved itself to be an overpowered version of their Normal P and F counterparts. Knowing that i
Read More
Alphacool Core 120 4000RPM Review
While the Core 120 2500 was mediocre, the 3000RPM version had at least some headroom. Now lets see if we can maximize it on t
Read More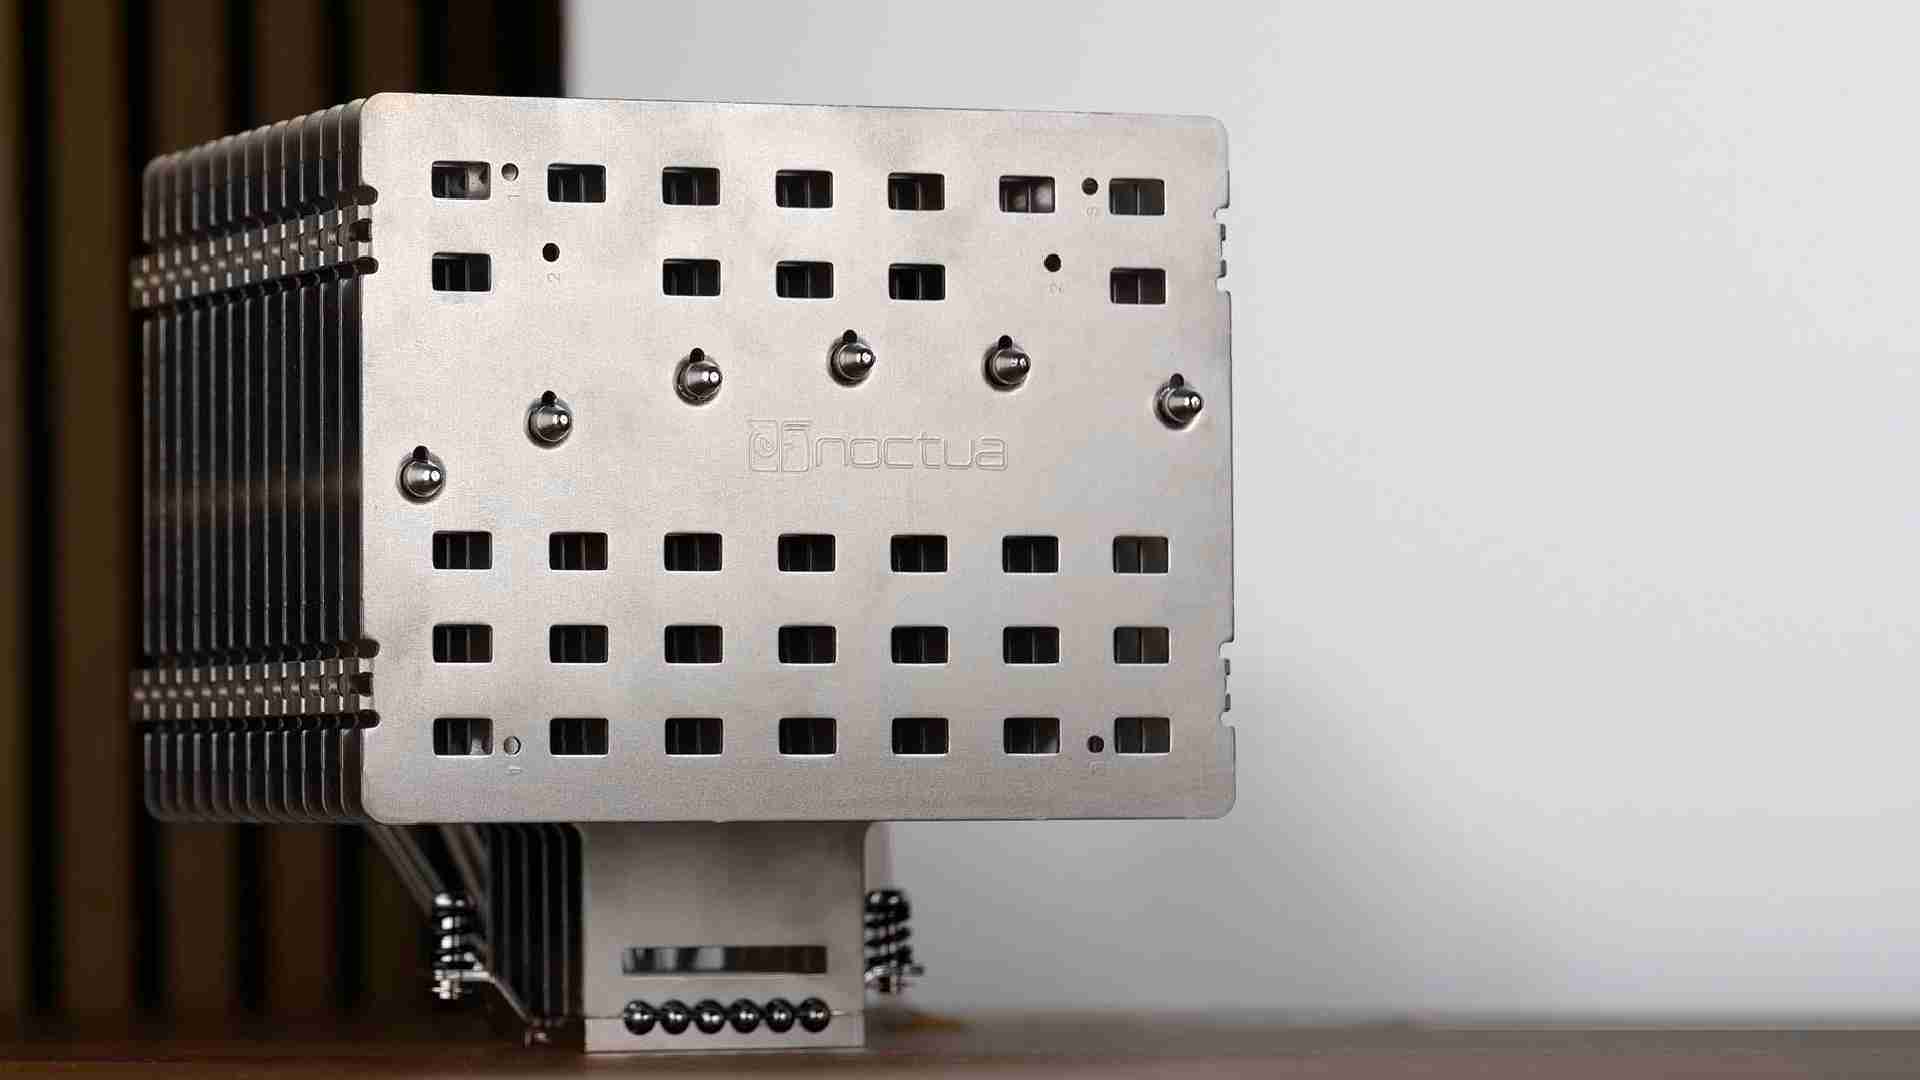
Noctua NH-P1 Review
Noctua has been known to develop some of the best air coolers of the last decade. But one of the reasons they were able to st
Read More