Be Quiet! Dark Rock Pro 4 Review
Introduction
Be Quiet! released quite a lot of impressive CPU Coolers. Their biggest and supposedly best is the Dual Tower, Dual Fan, Be Quiet! Dark Rock Pro 4! Let's see how it competes with the competition!
Positive
- Very Good Performance
- Best-in-Class Nouse
- Affordable
Neutral
- No RGB
Negative
- Fiddling Installation
- Fan Clips hard to install/remove
- Bad center Fan installation
What's in the Box?

Be Quiet!'s Dark Rock Pro 4 comes in the usual Be Quiet! dark-colored packaging.
Once everything is taken out of the box, we're greeted with the following items:
- Be Quiet! Dark Rock Pro 4
- Be Quiet! Silent Wing 3 PWM 135mm
- Be Quiet! Silent Wing 3 PWM 120mm
- Intel Installation Hardware
- AMD Installation Hardware
- Thermal Paste
- Manual in several languages
- Additional Fan Clips for a third fan
- 2-1 PWM Splitter
Additionally to the mandatory cooler-related pieces, Be Quiet! also includes a long Be Quiet! branded Philips-head screwdriver. It can easily be missed because it's pressed into the backside of one of the styrofoam panels keeping everything organized. Even though the installation can be done with every other normal screwdriver, make sure not to miss it as its length surely helps during the installation process.
The side of the cooler includes a short spec sheet which we summarized down below:
| Name | Be Quiet! Dark Rock 4 |
| Dimension | 146x136x163mm (LxWxH) |
| Fan Name | Be Quiet! Silent Wing 3 |
| Fan Speed | 1500RPM / 1200RPM |
| Fan Size | 135mm / 120mm |
| TDP | Up to 250W |
| RGB | No |
Compatibility
The Be Quiet! Dark Rock Pro 4 is compatible with every nowadays still relevant socket. Down below you'll find the complete list:
| Intel | AMD |
| LGA 1200 | AM4 |
| LGA 1156 | AM3+ |
| LGA 1155 | AM3 |
| LGA 1151 | AM2+ |
| LGA 1150 | AM2 |
| LGA 1366 | FM2+ |
| LGA 2011-3 | FM2 |
| LGA 2066 | FM1 |
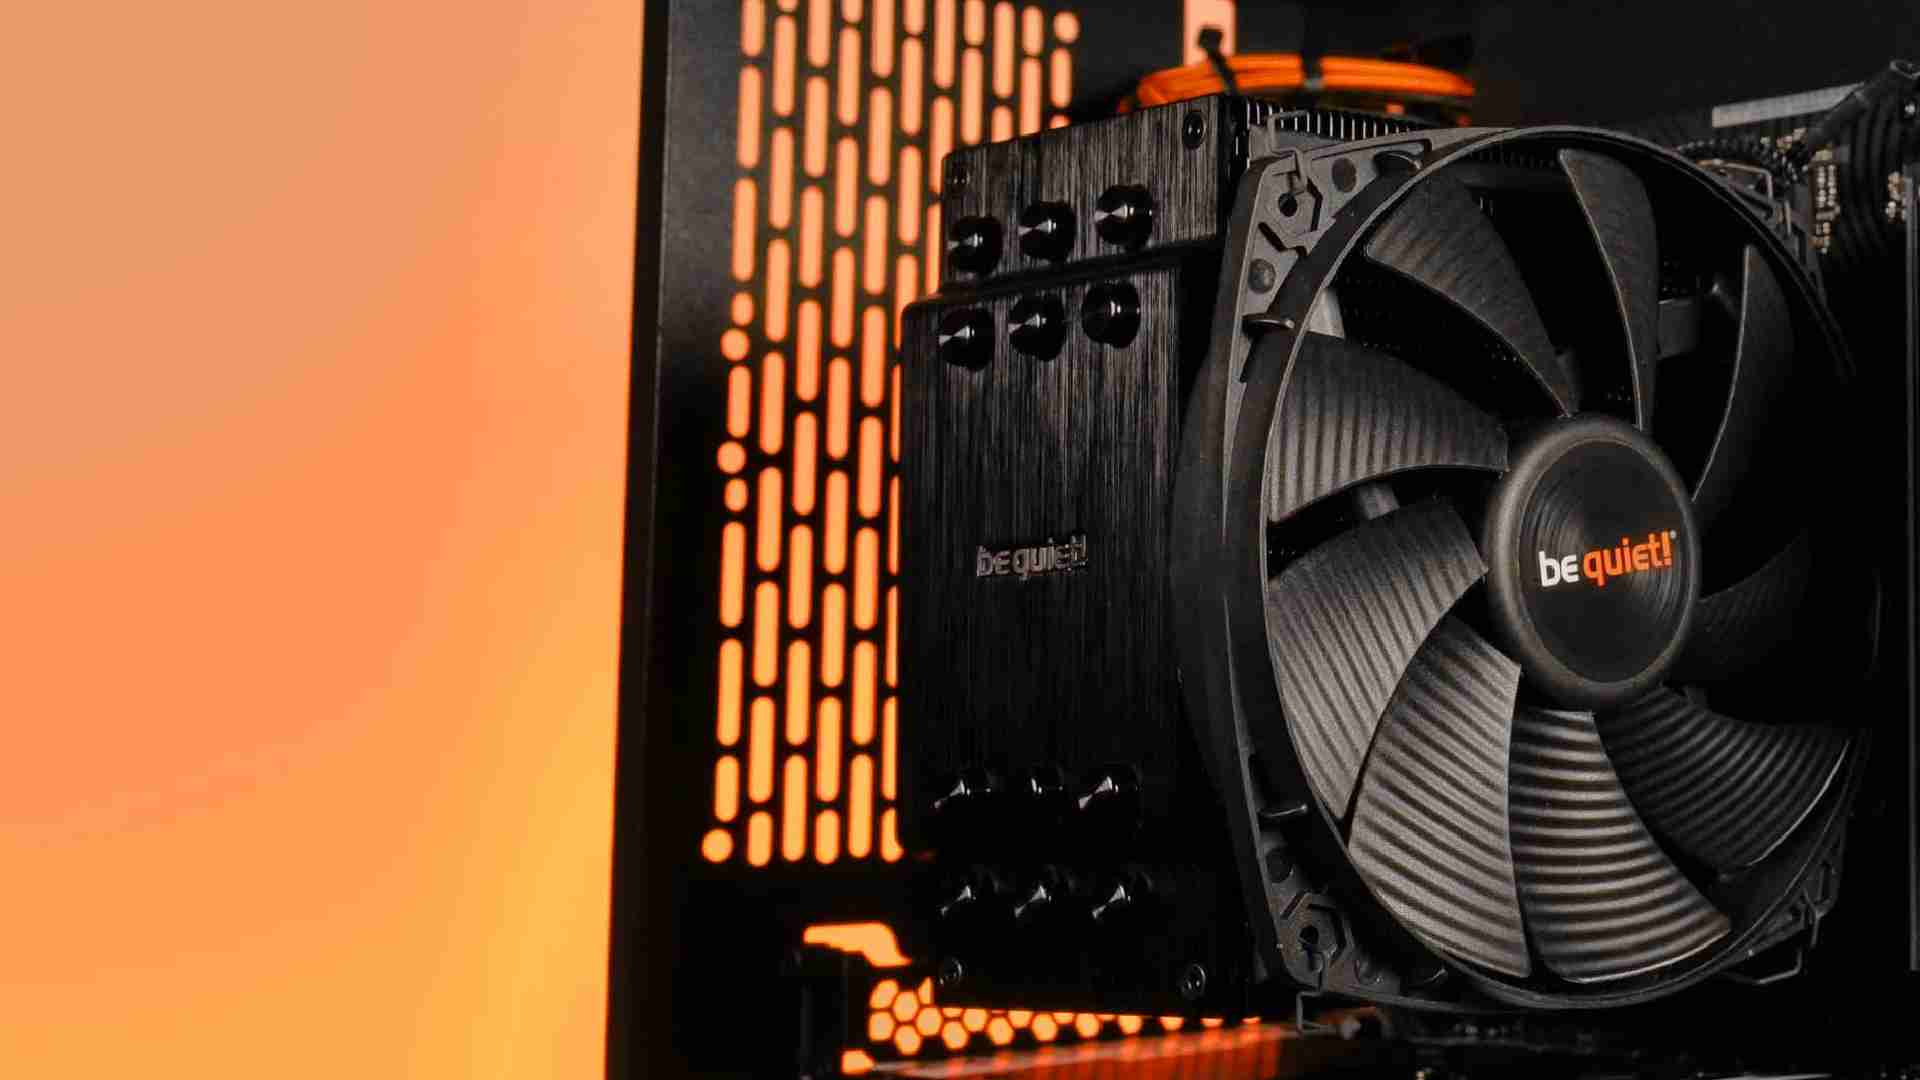
Individual Components
Fan
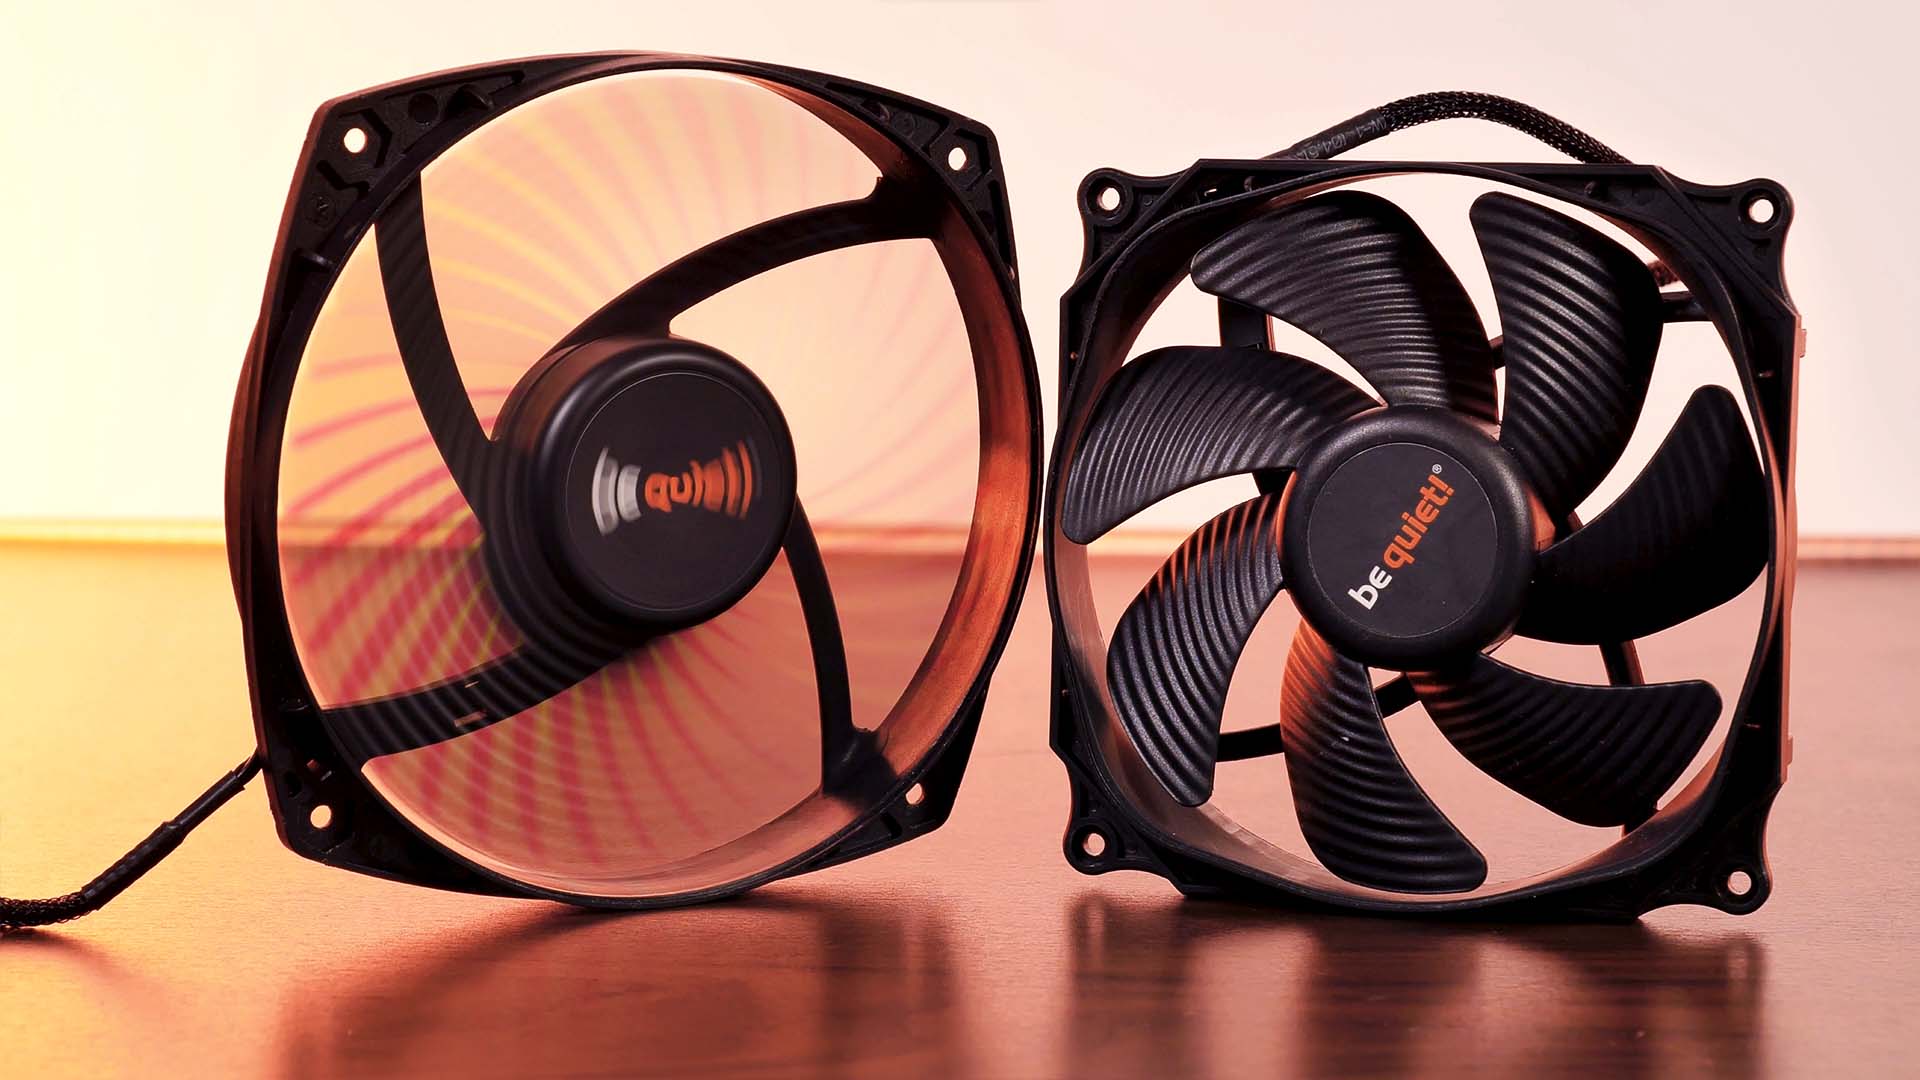
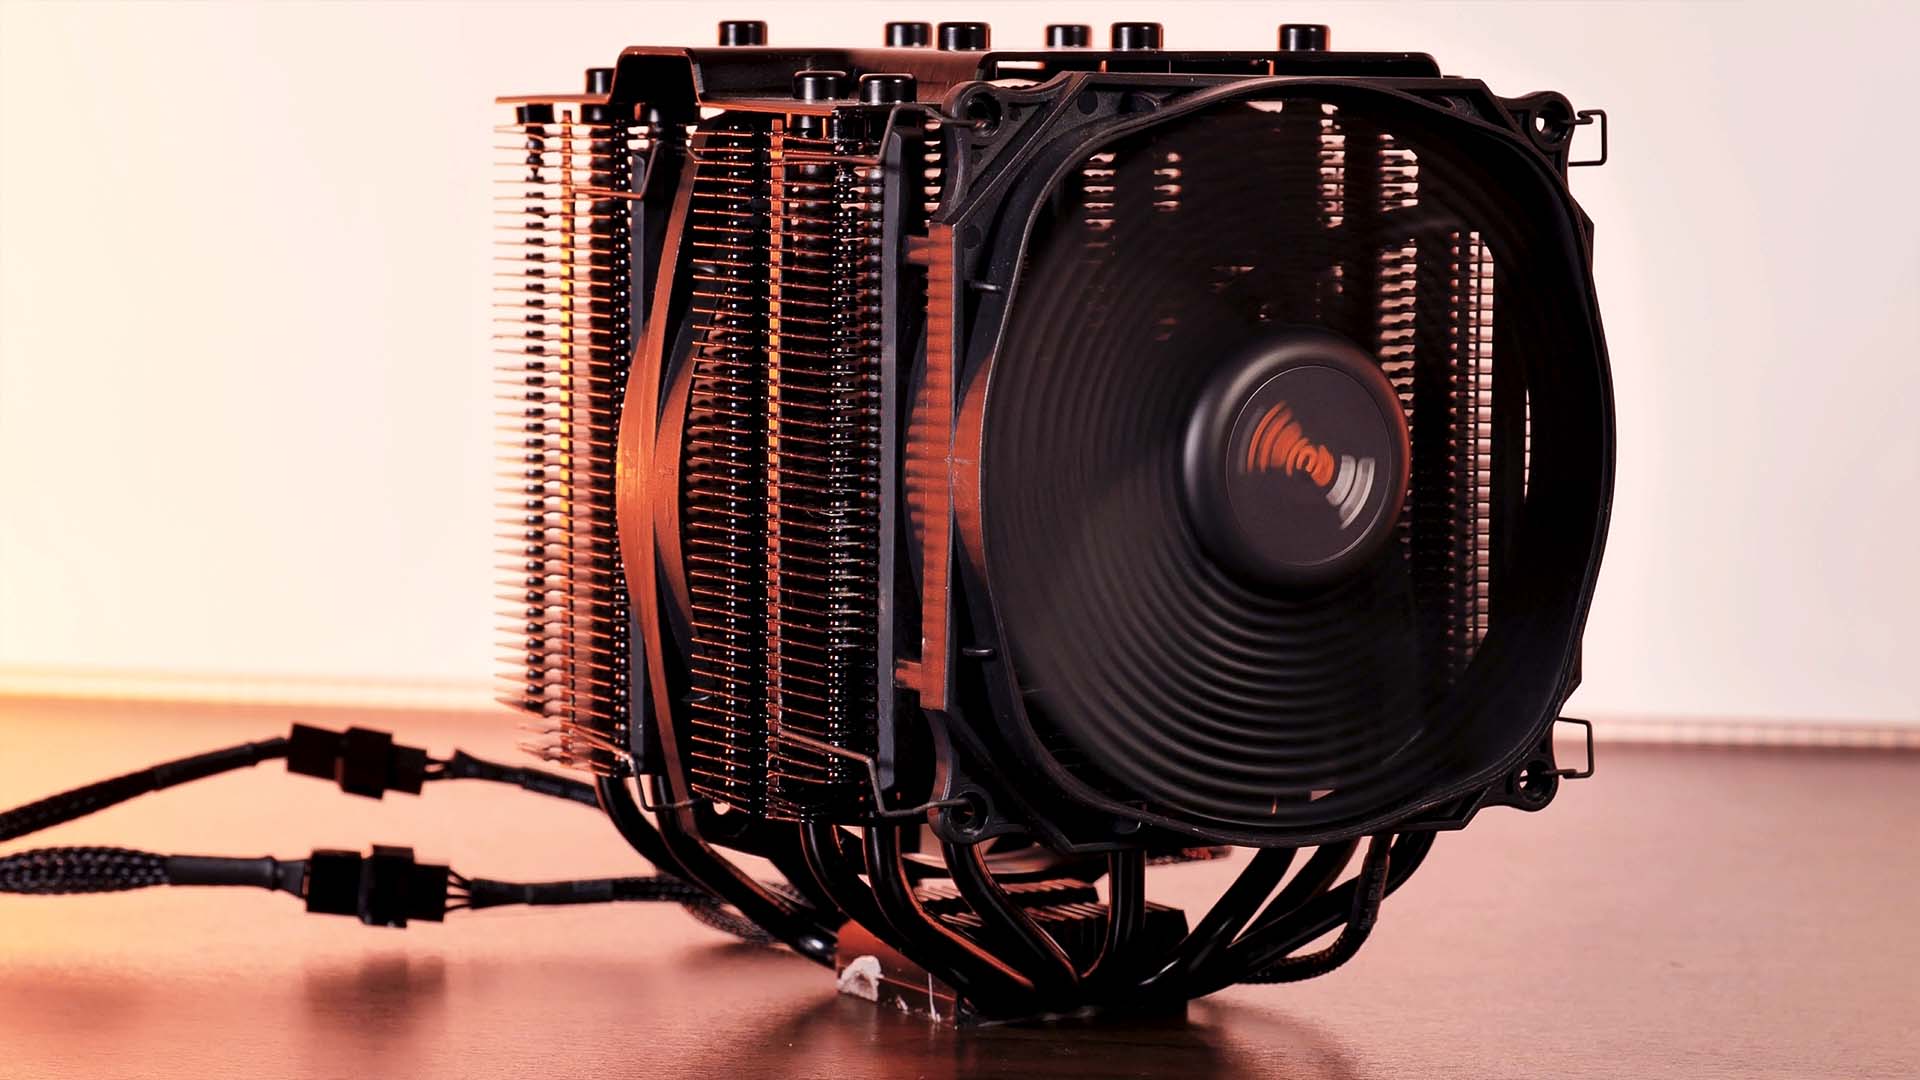
Responsible for heat dissipation, Be Quiet! made use of their own in-house produced Silent Wings 3 Fans.
In between the two heatsink towers, we have a 135mm Be Quiet! Silent Wing 3. On the Right Side, we are meant to install the 120mm Be Quiet! Silent Wing 3 Fan.
Unfortunately, there is not much known about both fans other than the 135mm Fan is spinning at 1200RPM and the 120mm at 1500RPM.
Both fans are powered using a PWM connection and can be connected to the same PWM header on a motherboard using the included PWM splitter.
Heatsink

The Be Quiet! Dark Rock Pro 4's heart is its 163mm high black ceramic coated Dual Tower heatsink. With 7 6mm thick copper heat pipes, the Dark Rock pro should be able to transport up to 250 Watts TDP to the Fans.
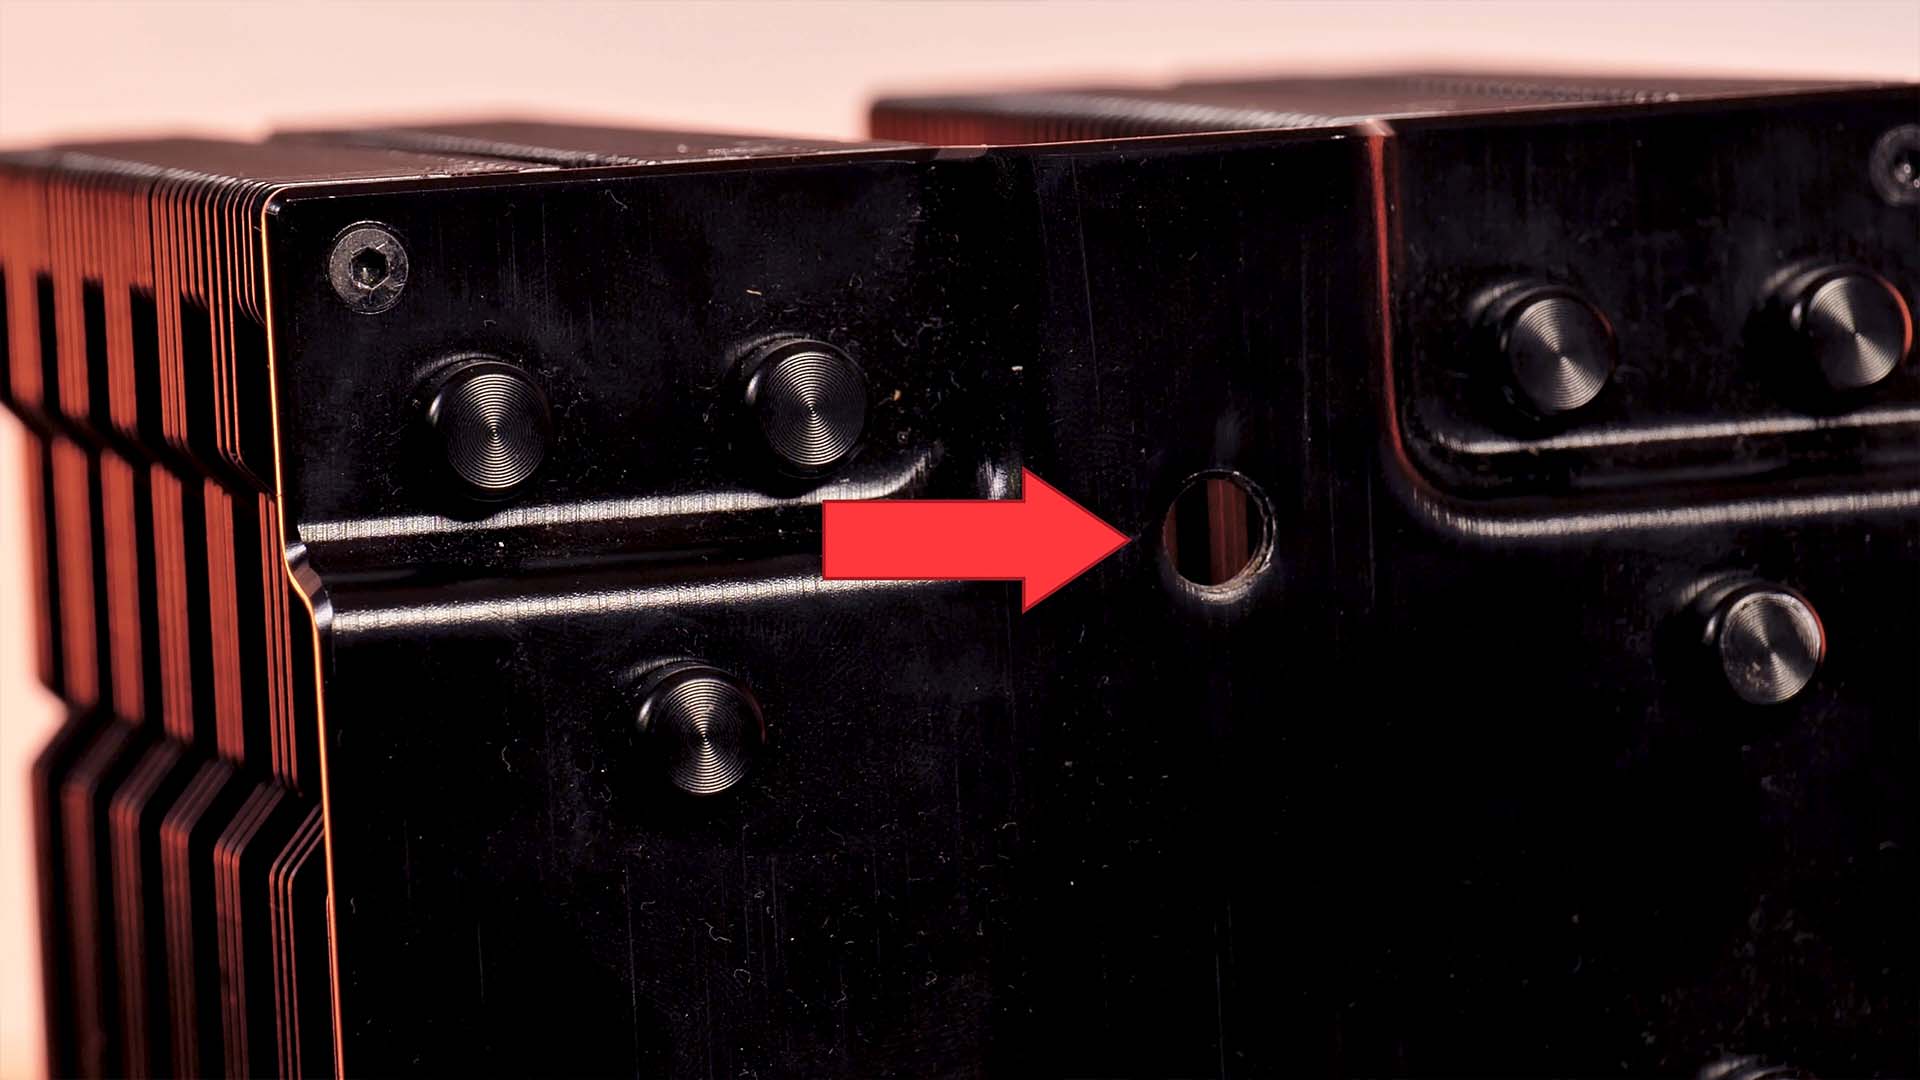
The Top of the heatsink is covered with a (not really) nonremovable top plate. Even though the Top plate features 4x Torx Screws which are allowing you to remove the top plate, we are not advising you to do so as the top fins and some of the heat pipes are hard-glued/permanently connected to the Top plate. Removing it might result in bending some of the fins (happened to us).
Installation
Installing a Be Quiet! Dark Rock Pro 4 is fairly similar to any other Be Quiet! cooler. Be Quiet! re-used their central bridge approach. Unfortunately, this also re-created a fiddly experience.
AMD
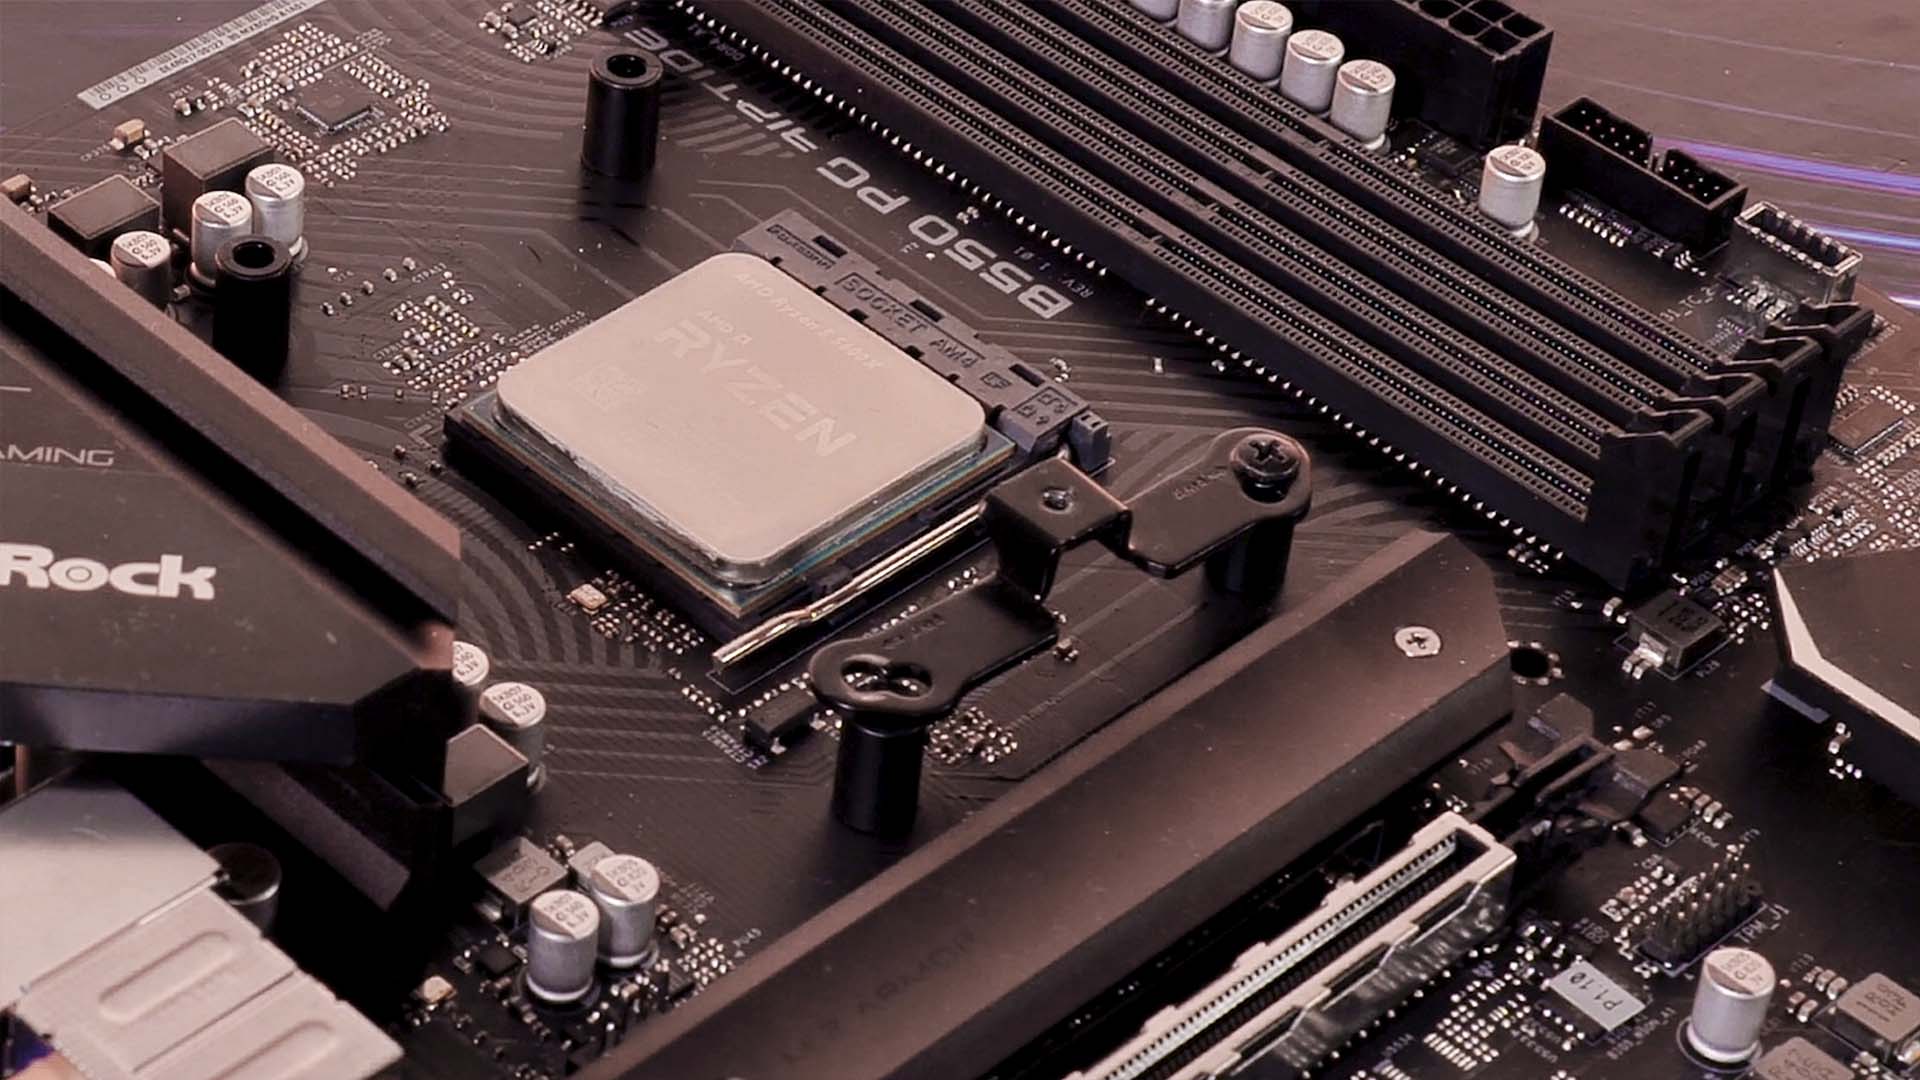
On an AMD platform Motherboard, we first need to remove the pre-installed black retention brackets.
After positioning the black spacers (with the more open side down) we can place the AMD retention brackets on top and screw them down.
Please make sure that the central piece of the retention brackets is pointing towards the CPU.
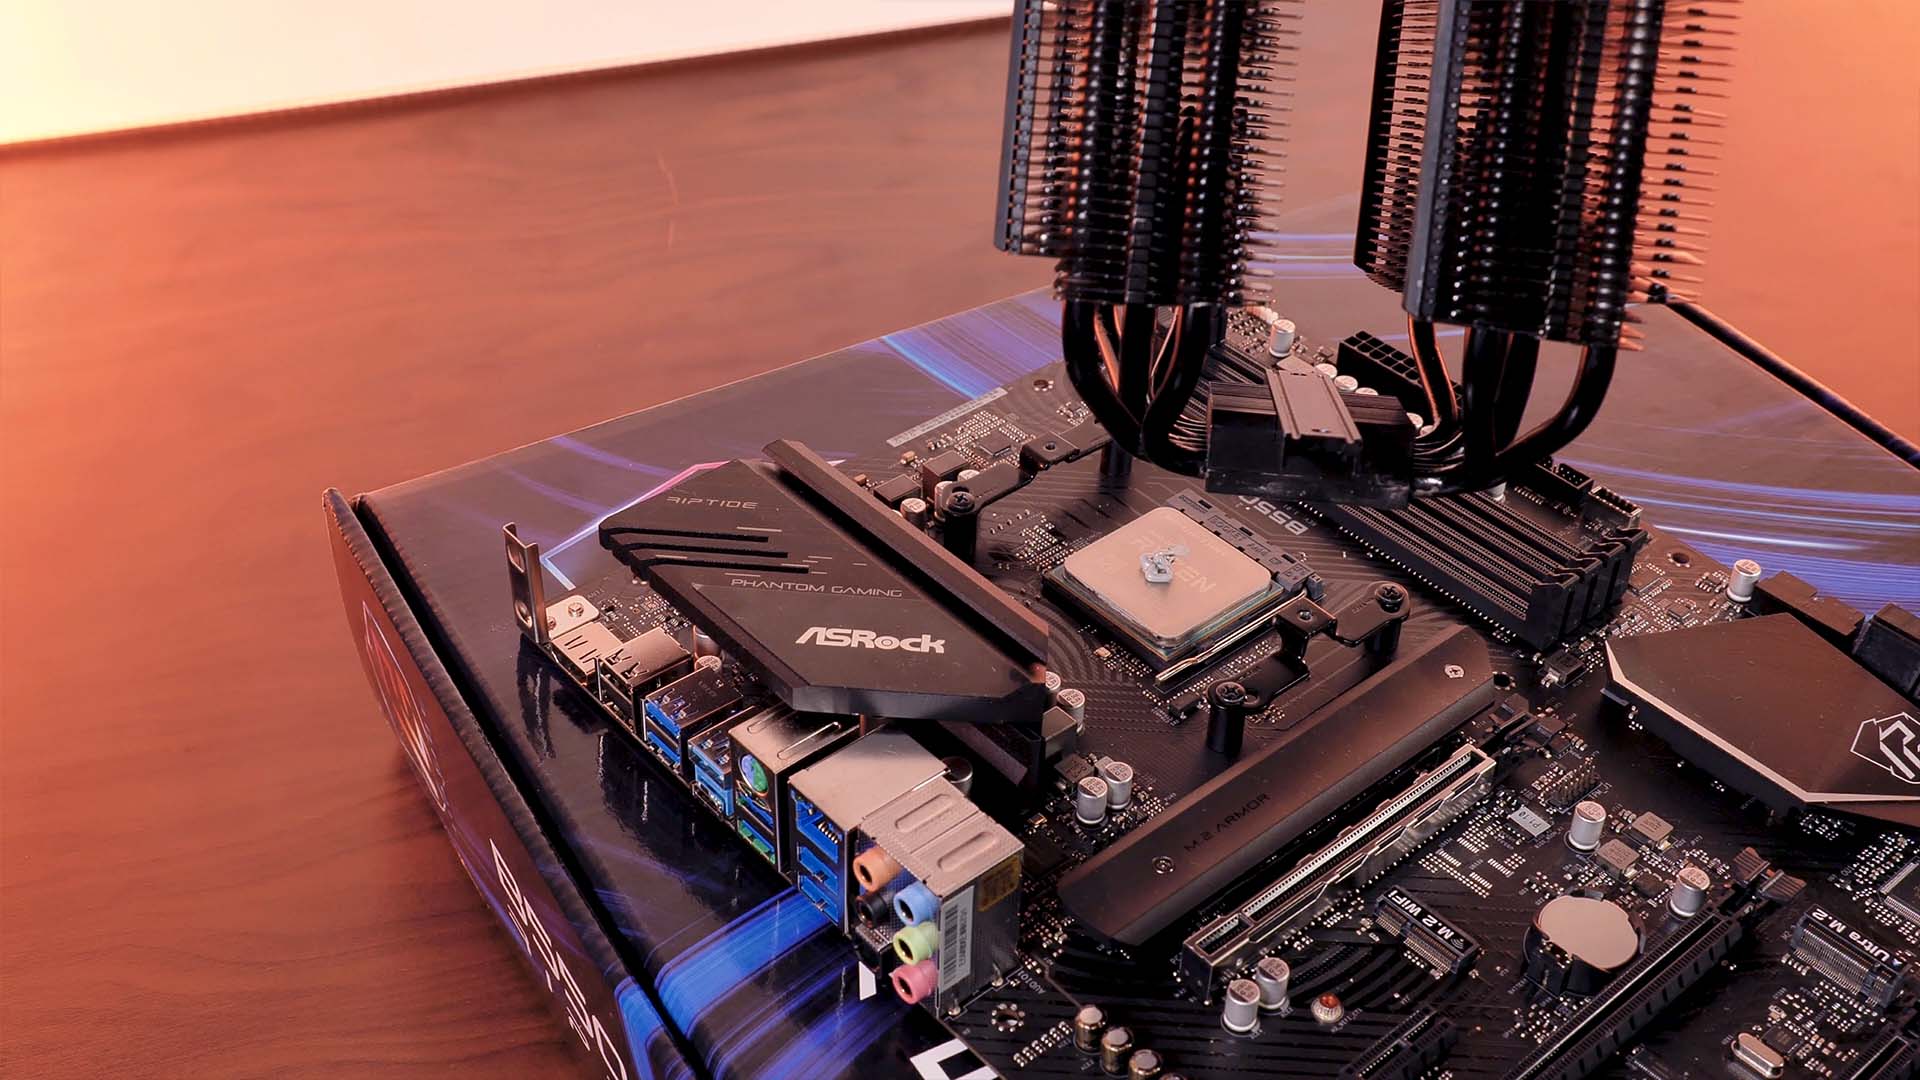
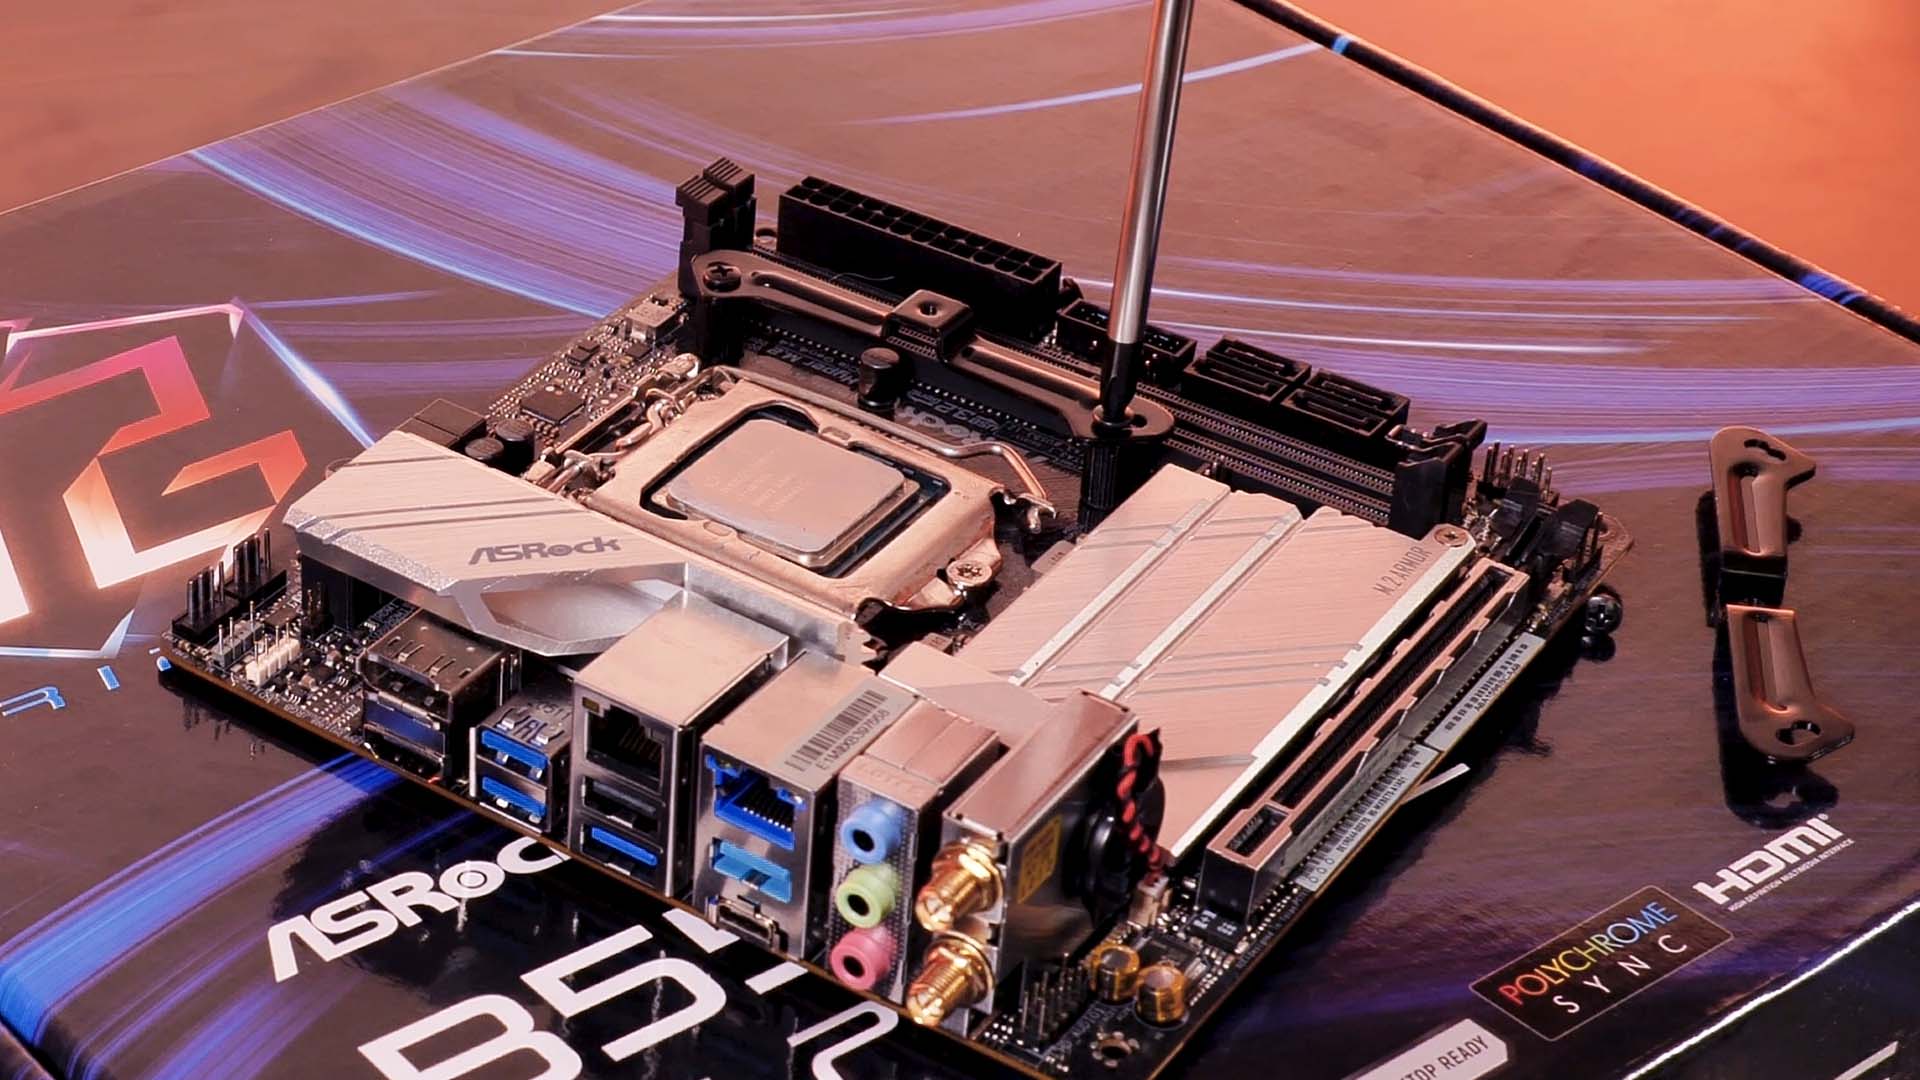
After applying some thermal paste, we can position the central mounting bridge on top of the Heatsink Base while making sure it sits flush.
Once the cooler is installed on the CPU while making sure that the holes in the bridge align with the holes on the retention brackets, we can screw it down.
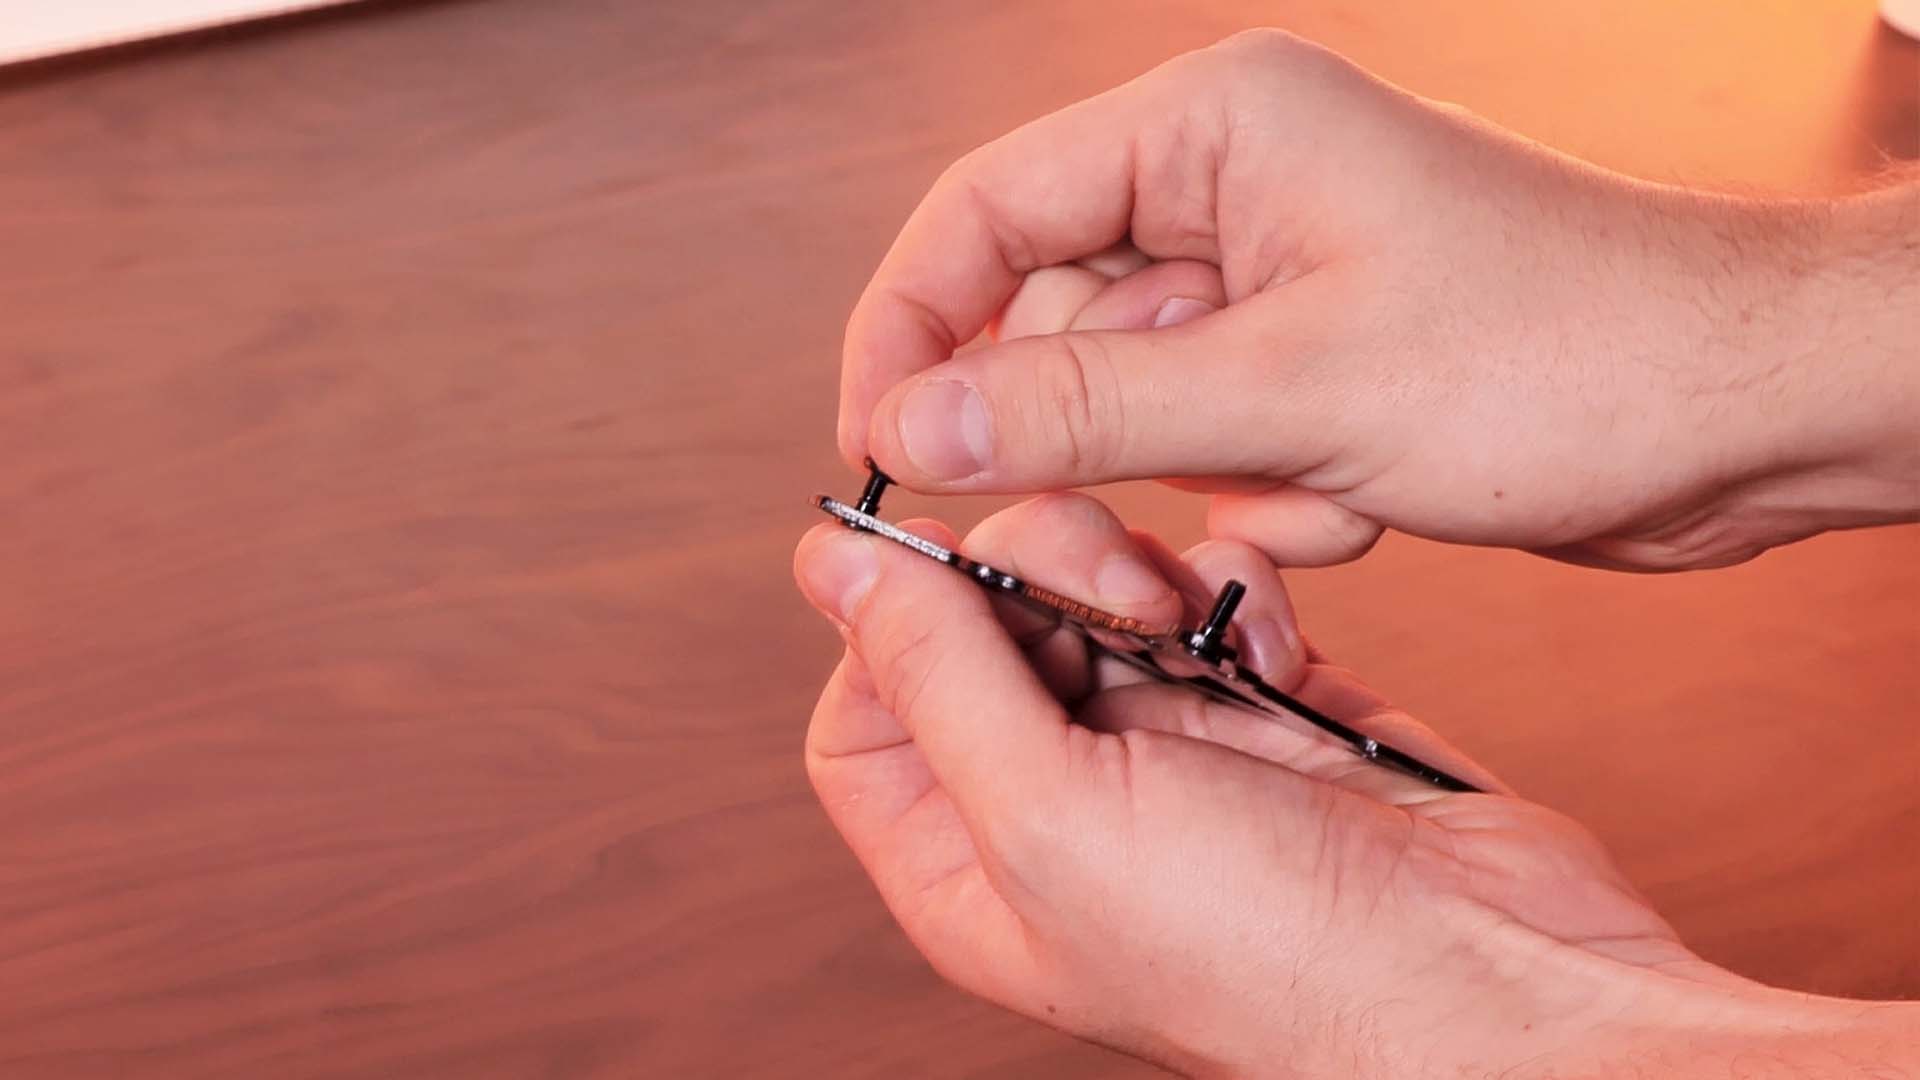
In order to do so, we need to remove 2 of the Thumbscrews on the top plate of the Cooler and show the long Be Quiet! Screwdriver through them.
Intel
While using an Intel Plattform Motherboard, the installation requires a few additional steps.
For the boards without a pre-installed backplate, we need to use the one provided by Be Quiet! and position the silver Intel screws in the holes of the backplate meant for the Socket in use while fixing them with one of the rubber o-rings provided in the Intel mounting bag.
Once the backplate is in position, we can screw in the spacers from the other side with the cross-Philips indentation pointing upwards.
For the boards with a pre-installed backplate, we can simply screw in the provided Intel Backplate screws.
Now we can install the retention brackets on top and screw them down.
Please make sure that retention brackets are screwed in while being in an out-ways pointing orientation.
After applying some thermal paste, we can position the central mounting bridge on top of the Heatsink Base while making sure it sits flush.
Once the cooler is installed on the CPU while making sure that the holes in the bridge align with the holes on the retention brackets, we can screw it down.
In order to do so, we need to remove 2 of the Thumbscrews on the top plate of the Cooler and show the long Be Quiet! Screwdriver through them.
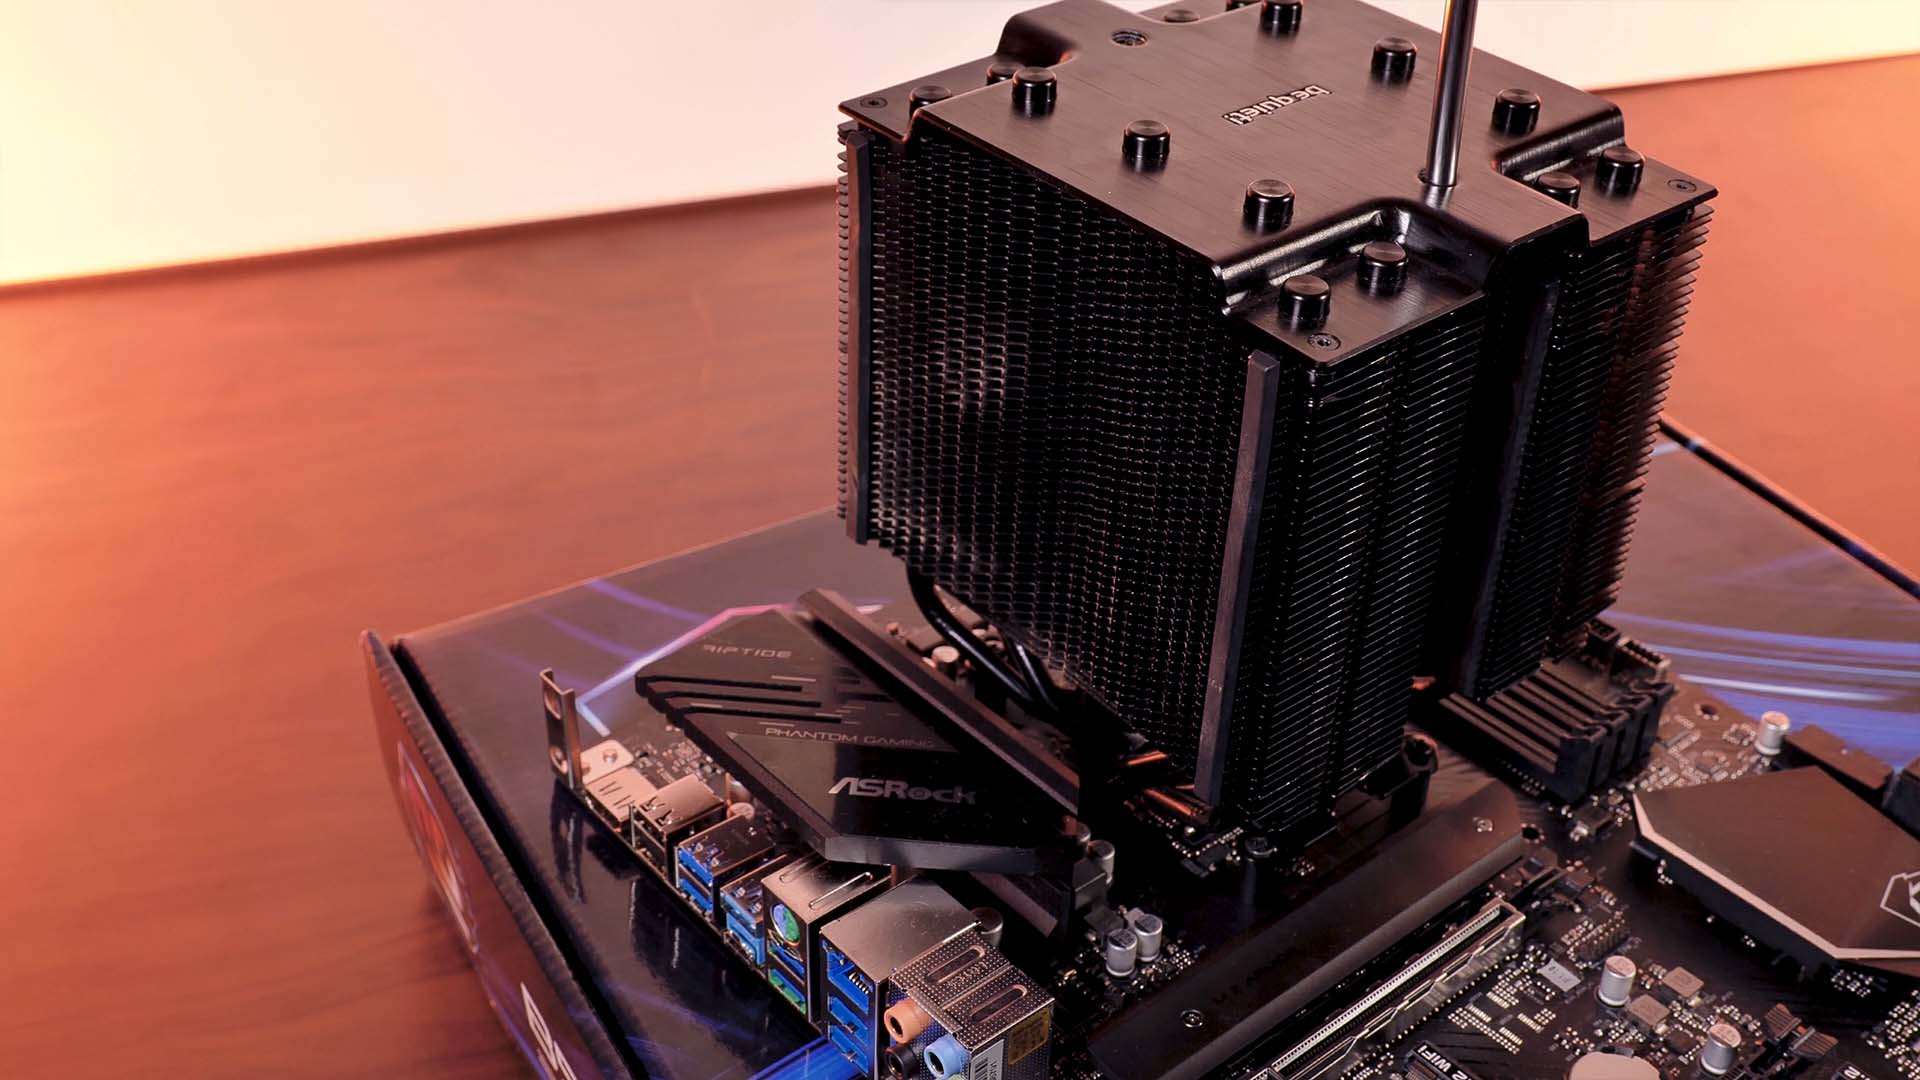
After having installed the cooler on the CPU, it's time to mount the fan. Unfortunately, installing and removing the fan does not seem to be the most enjoyable experience we've had so far.
After positioning the 120mm fan on the Heatsink side with the rubber pads, we have to position the clips in the Fan-Screw holes and press the clip into the heatsink while pressing on the sides.
Even though this might seem like a fairly easy process, removing the fan ends up being slightly more complicated. While others might recommend alternative ways such as fiddling something through the heatsink in order to remove the clip, we found it to be easiest to press on the fan (while holding onto the heatsink, you don't want to rip it off the motherboard) and remove the fan-clip-hook out of fan hole. This way you don't risk damaging the heatsink's coating.
The exact same procedure has to be executed for the central 135mm fan, just a bit harder. On the Dark Rock Pro 4, we need to slide the central fan from the side. Afterward, we need to try to somehow fiddle the fan clips into the fan holes.
Overall, installing the central fan is one of the most fiddling experiences we've had so far, which becomes even harder when trying to remove the fan.
Benchmark
We tested the Be Quiet! Dark Rock Pro 4 on our usual Ryzen 3900x locked at 4.36 GHZ and 1.4vCore.
While letting the Be Quiet! Dark Rock Pro 4's Silent wing spin at 100% of its Fan speed, it managed to keep the CPU at 53°C.
Being only 2°C behind the Arctic Freezer 50, we immediately noticed that their noise difference is much bigger.

While lowering the Fan speed in 10% decrements, the Dark Rock Pro 4 managed to keep its strong position across the whole spectrum.
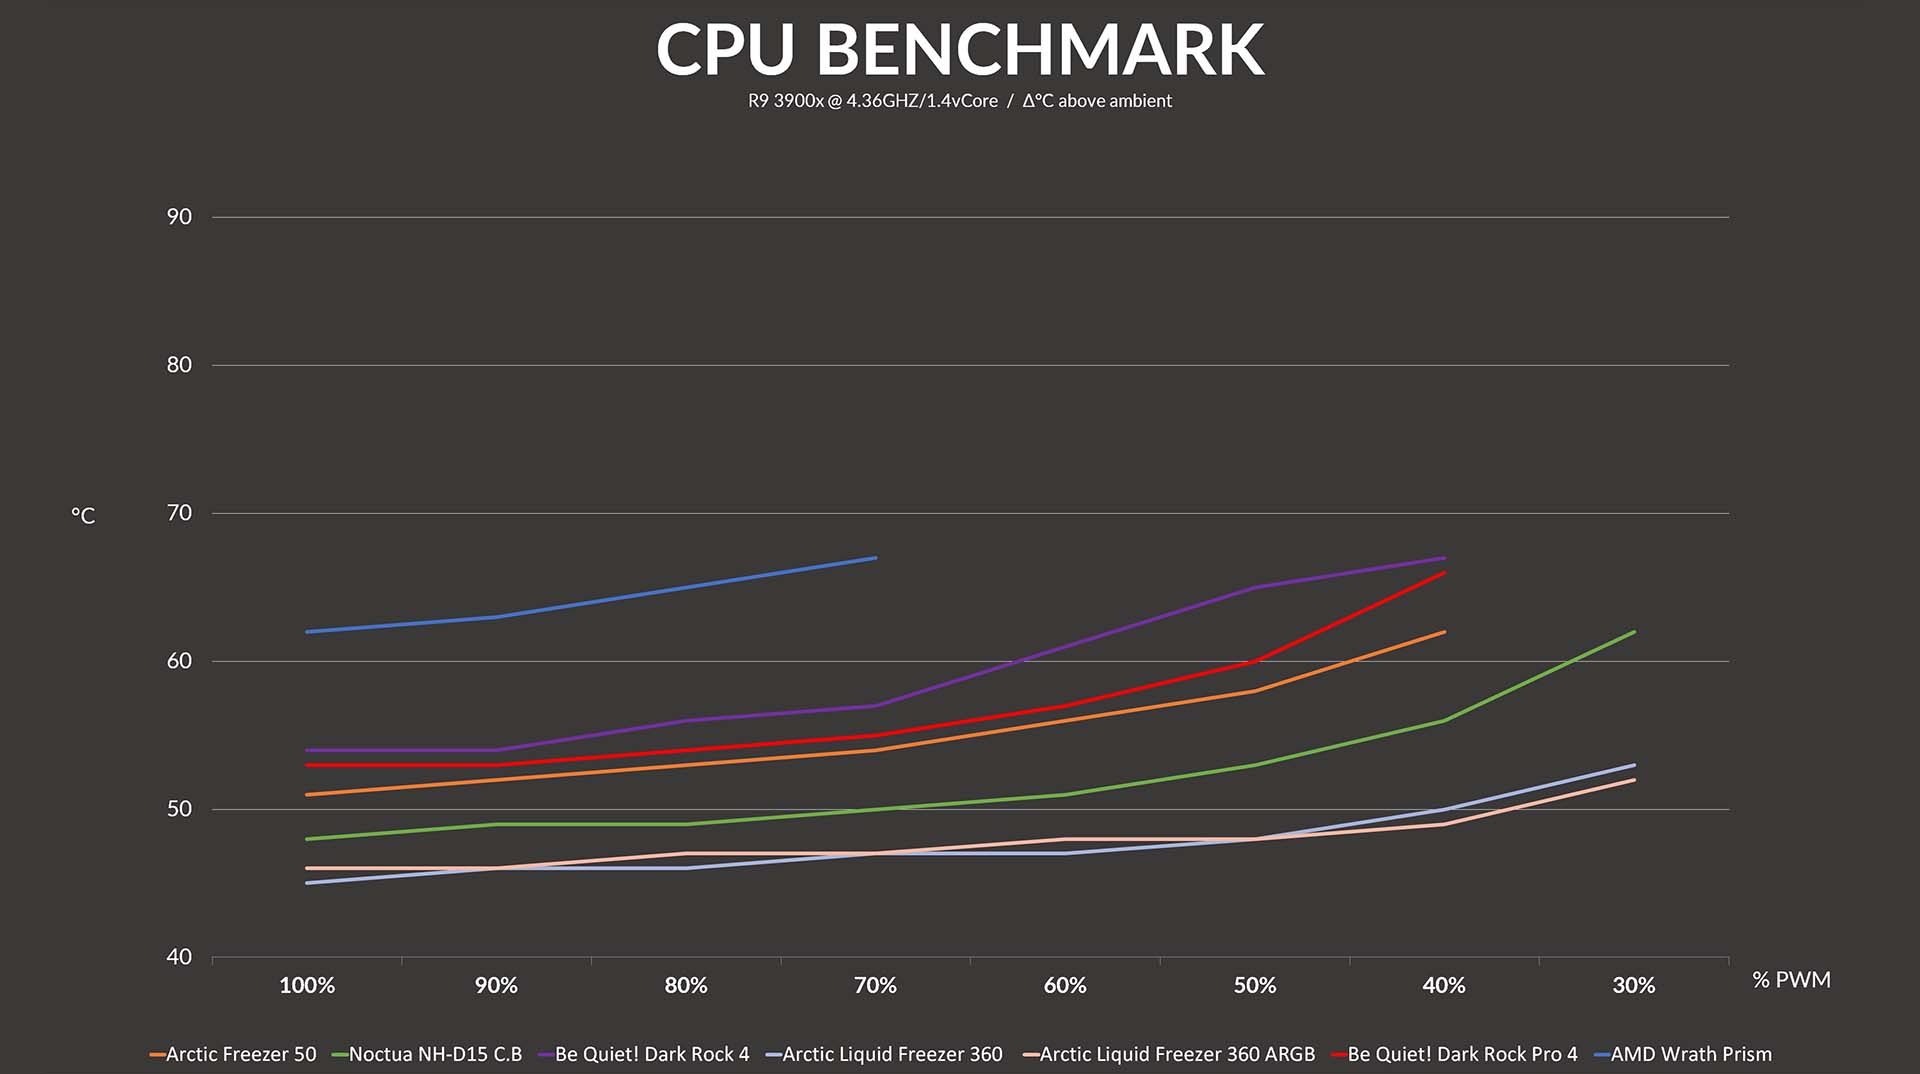
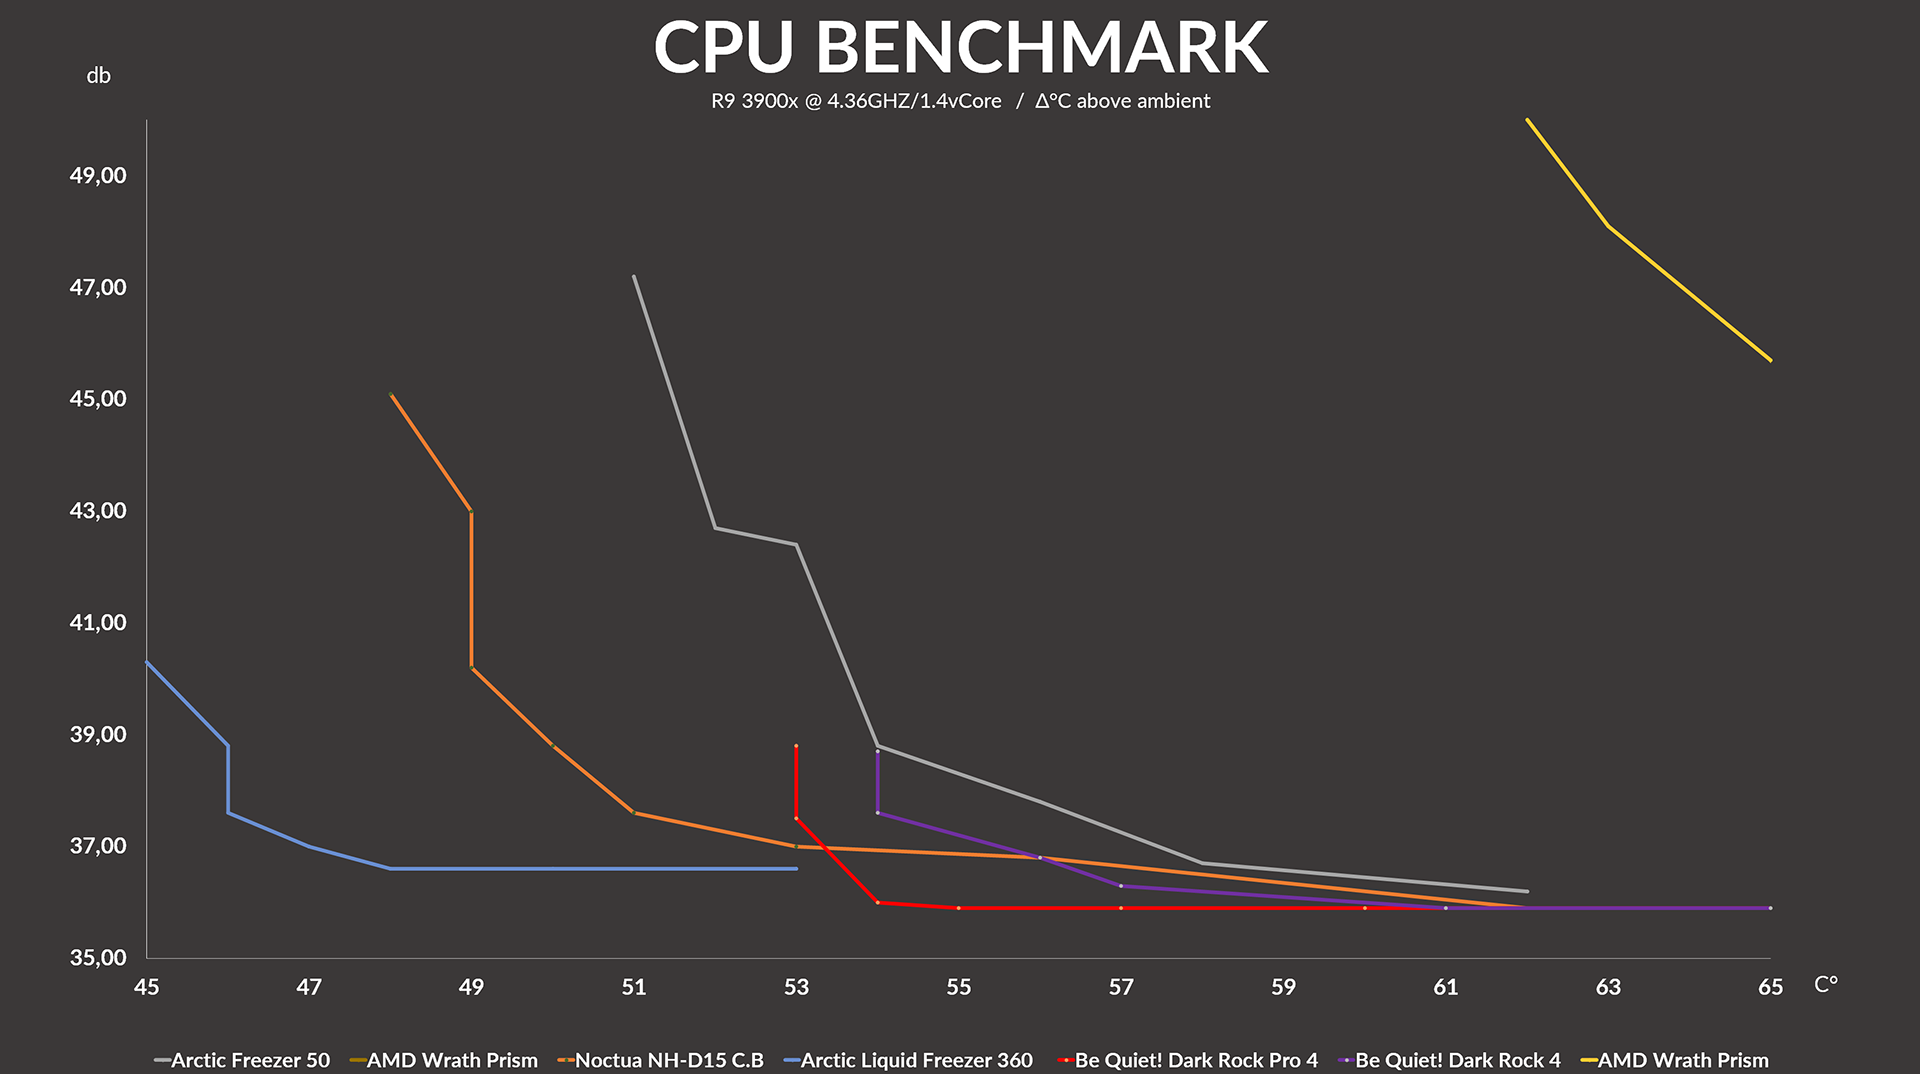
While looking at our Noise-normalized graph, we can see that when compared to its noise, there is no cooler that can keep the CPU cool as quiet as a Be Quiet!. The only moment at which the Dark Rock Pro 4 is outperformed is by the NH-D15 while keeping the CPU at 53°C. As soon as the target temperature is raised to 54°C, the Dark Rock Pro 4 jumps to the first (or last depending on how you see it) place and keeps it until the very end.
Conclusion

When it comes to performance, the Be Quiet! Dark Rock Pro 4 is an absolute beast. It might not be the absolute best in terms of raw cooling power, but as soon as noise is involved, it takes the lead and doesn't seem to back off at any moment.
But not everything that shines is gold. Although the Noise, Performance, and Price are very good, the installation procedure can be described "fiddly"- at best. Using the central mounting bridge turns out to be only easy as long as the motherboard is outside a case and lying flat on a table. The usage of Fan clips without anything to hold onto might not be the biggest issue while installing the fans, though removing them becomes quite a challenge.
Our biggest issue with the Dark Rock Pro 4 however, is the permanently attached top plate.
In our opinion, the top plate should definitely be changed to be removable using the same thumb screws as the two mounting holes. As of right now, installing the central fan requires you to slide the fan in from the side, which can be an impossible challenge if you are installing the cooler inside a case, like while performing a simple upgrade.

But as irritating as these little installation hick-ups might be, once the cooler is installed, it is a beast of a performer while also being in-auditable, even at full blast moments.
Due to it's incredible performance, we can absolutely recommend this Cooler for everybody who is looking forward to incredible hot overclocking experiences.
If however, you are planning to use your system for "normal" use-cases only (Gaming, Office Work), we would suggest taking a look at the Be Quiet! Dark Rock 4. Even if it operates with only a single Fan, its performance and noise are extremely close to a Dark Rock Pro 4 while being easier to install and slightly more affordable.

Be Quiet! Dark Rock 4 Review
Among all known CPU coolers, Be Quiet! is definitely one of the most important brands. Amazing performance, best in class noi
Read More
Lian Li AL120 V2 Review
After the success of their SL120 V2 refresh, Lian Li decided to give their AL120 a new coat of paint as well. Lets take a clo
Read More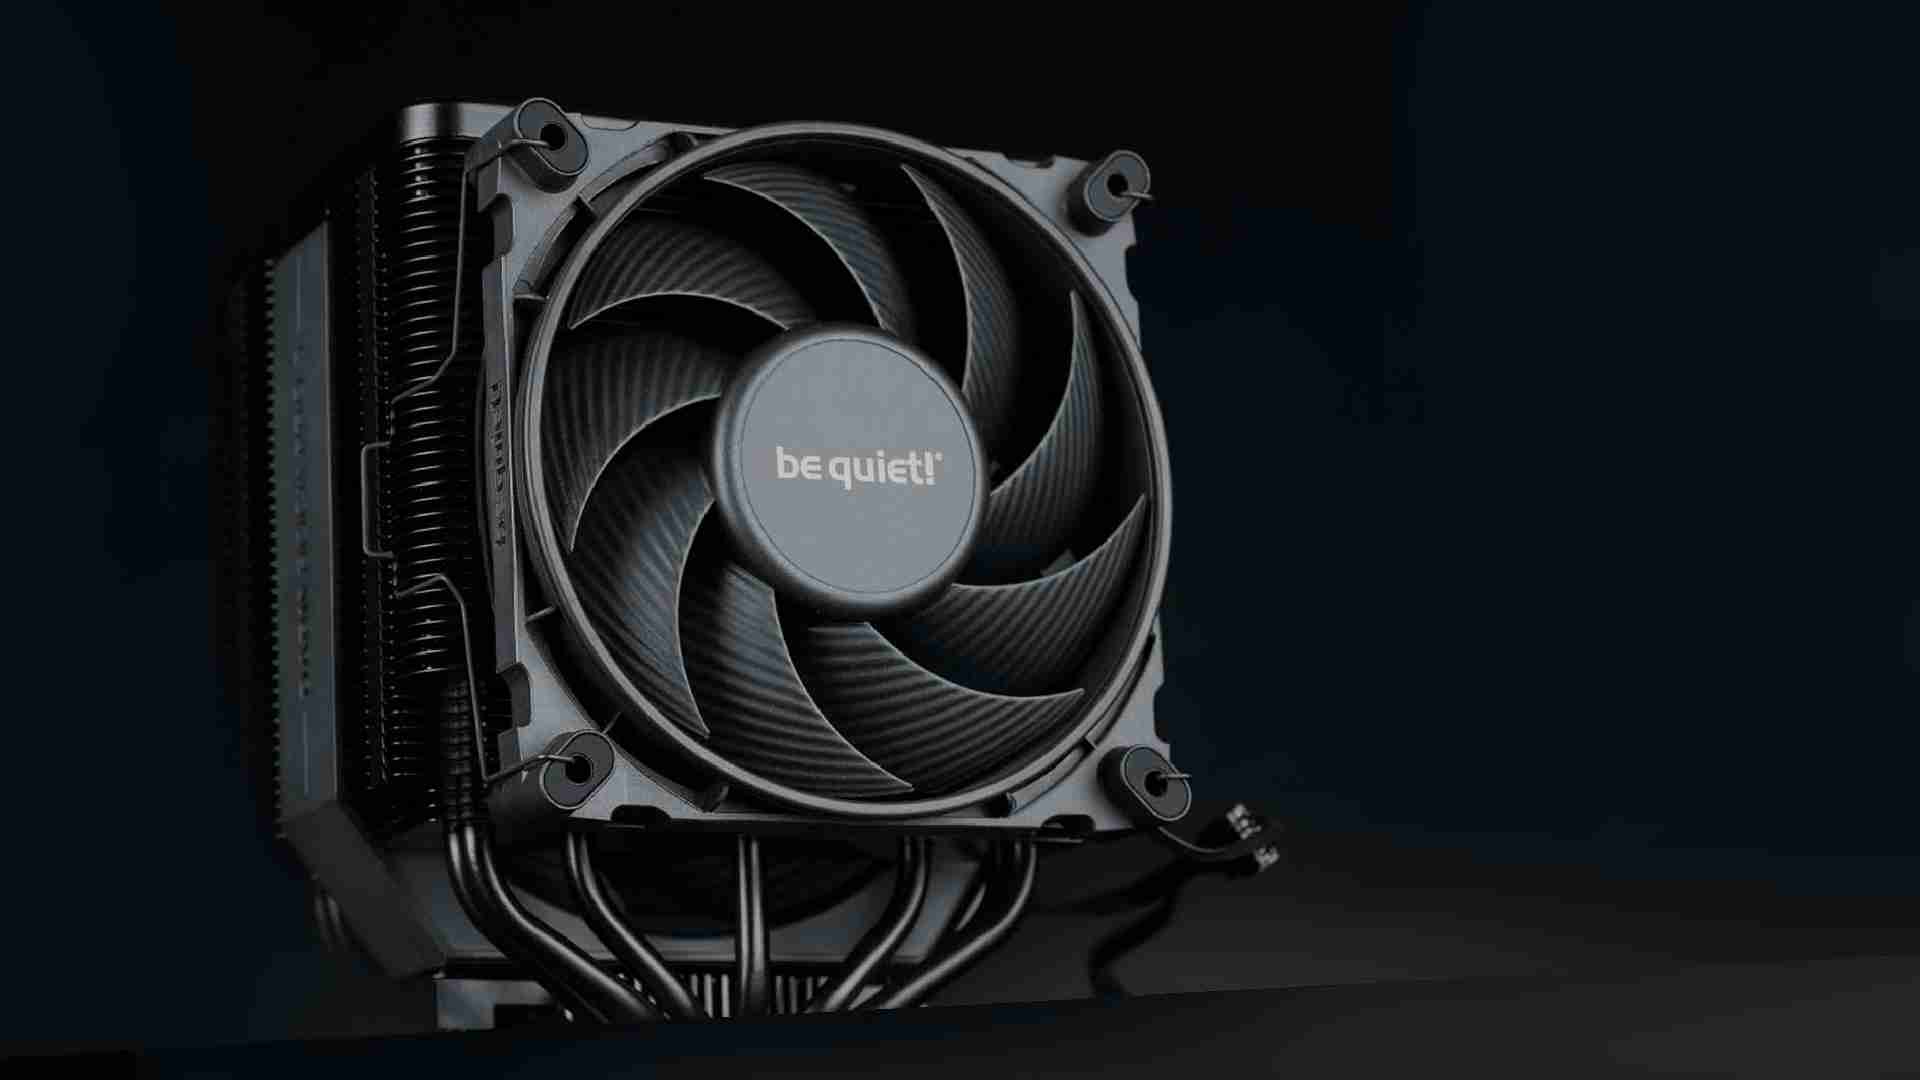
be quiet! Dark Rock Pro 5
After waiting for way too long, it is finally here, the next-gen Dark Rock Pro. Its time to take a closer look at the be quie
Read More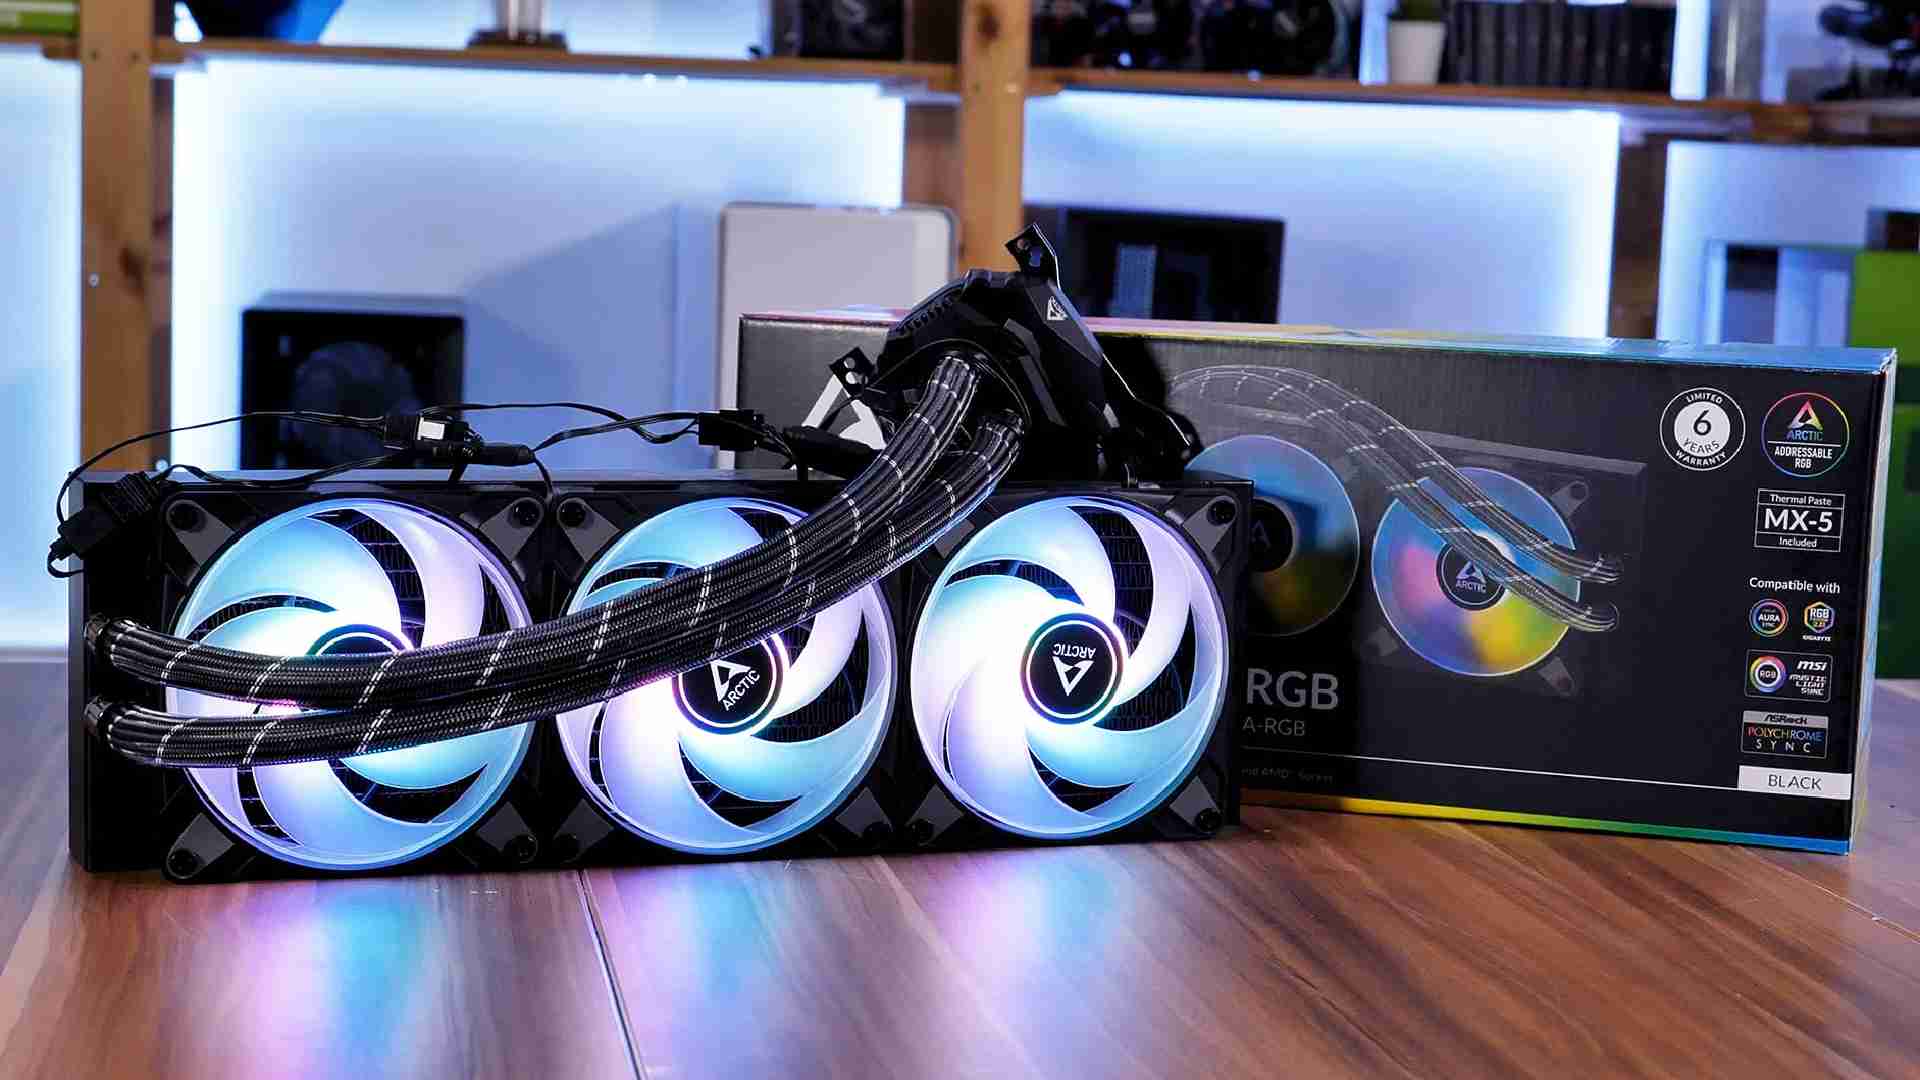
Arctic Liquid Freezer II 360 ARGB Review
Arctic finally went RGB on their Liquid Freezer Lineup! Lets take a closer look at this Arctic Liquid Freezer II 360 ARGB an
Read More