Azza Celesta 340 Review
Introduction
Nowadays where the feature set of a high-end case is basically predetermined and every newly released PC Case is resembling the old one like 2 grains of rice, it becomes harder and harder to create a Unique looking case that stands out. And with the Celesta 340, Azza is trying to offer a new and unique looking design that may catch your eye with its Glowing Front.
The Azza Celesta 340 is available on Amazon:
Positive
- Unique Looking Front
- Easy to install Side panel
- Tempered Glass
- Vast Fan/Radiator Support
- So much RGB
Neutral
- okay Cable Management
Negative
- A bit restrictive Front Airflow
- Standard IO
- Feet could be Bigger
- Break off PCI Brackets
What's in the Box?
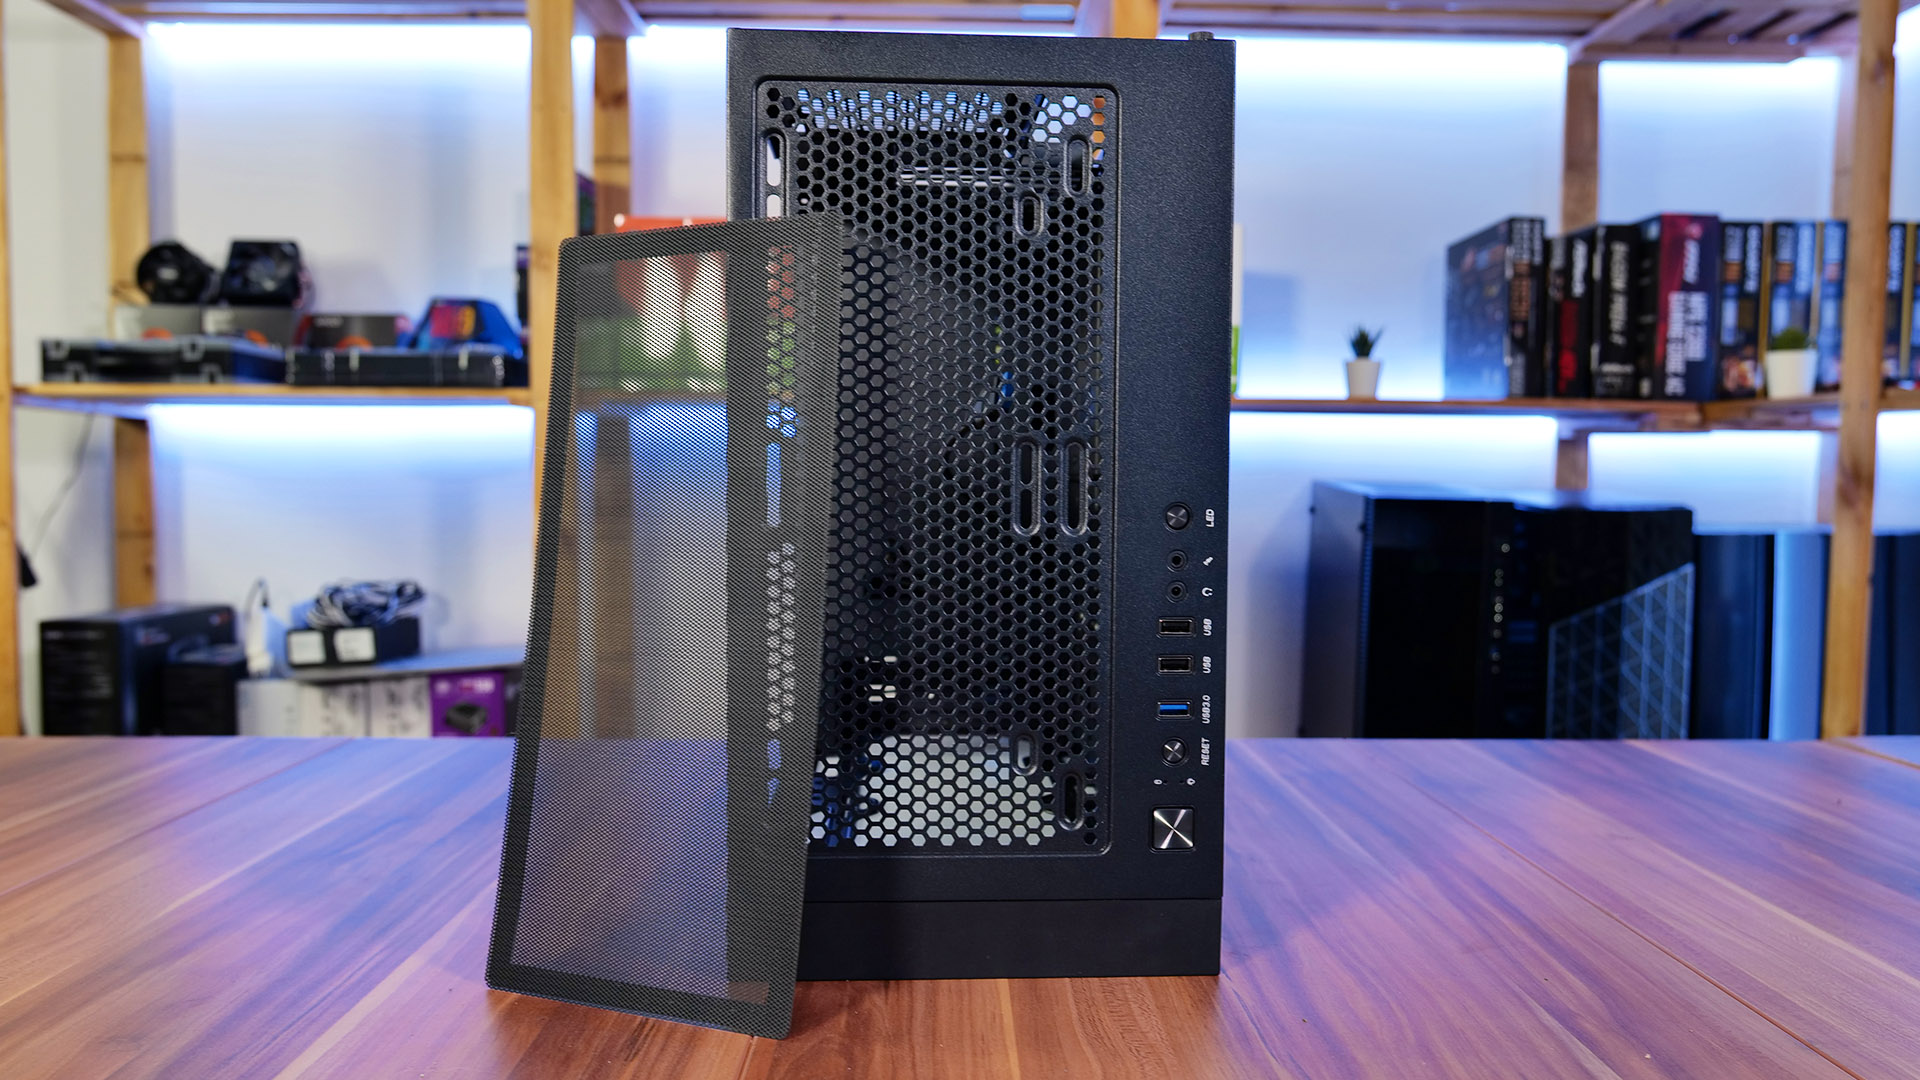
Once we open the Carton Box we find the Celesta 340 Wrapped in a Plastic Bag and nicely buffered with some styrofoam. As usual with cases, the Box does not contain any notable information or design and can be immediately passed to the recycling.
Once the celesta is removed from the Bag, we will find the assembled Case with some foil over the Tempered Glass side panel.
Inside of the Case is a little bag of goodies containing a couple of Mainboard Standoffs, Screws, Cable ties, and the optional Speaker for Audio Bios Error Codes.
Specs
The Azza Celesta 340 packs a rather long Spec sheet. For this reason, we combined the most important points inside of a List and proceed by focusing on individual points that we deemed important or interesting.
| Name |
Azza Celesta 340 |
| Type | ATX Mid Tower |
| Mainboard sizes | ATX - mATX - ITX |
| Color | Black |
| Side Panel | Tempered Glass |
| CPU Cooler Height |
Up to 160mm |
| GPU Length | Up to 350mm |
| 2.5" Drives | max 4 |
| 3.5" Drives | max 2 |
| PCI Extensions | 7 |
| IO | Power, Reset, LED, Audio in/out USB 3.0, USB 2.0 2x |
| Dimensions | 478x210x400mm |
| Weight | 6kg |
| RGB | Addressable RGB Strip in Front. Controlled by LED Button or Software |
| Fan (only in CSAZ-340F version) | 1 Black Fan included |
| Fan Spots | 3x120/140mm in Front |
| 2x 120/140mm on Top | |
| 1x120mm in rear | |
| Water Cooling |
Max 240mm Radiator on Top |
| Max 360mm Radiator in Front | |
| Extras | Separate Power Supply Tunel |
| Removable Dust Filter on Top | |
| Removable Dust Filer underneath PSU |
Compatibility
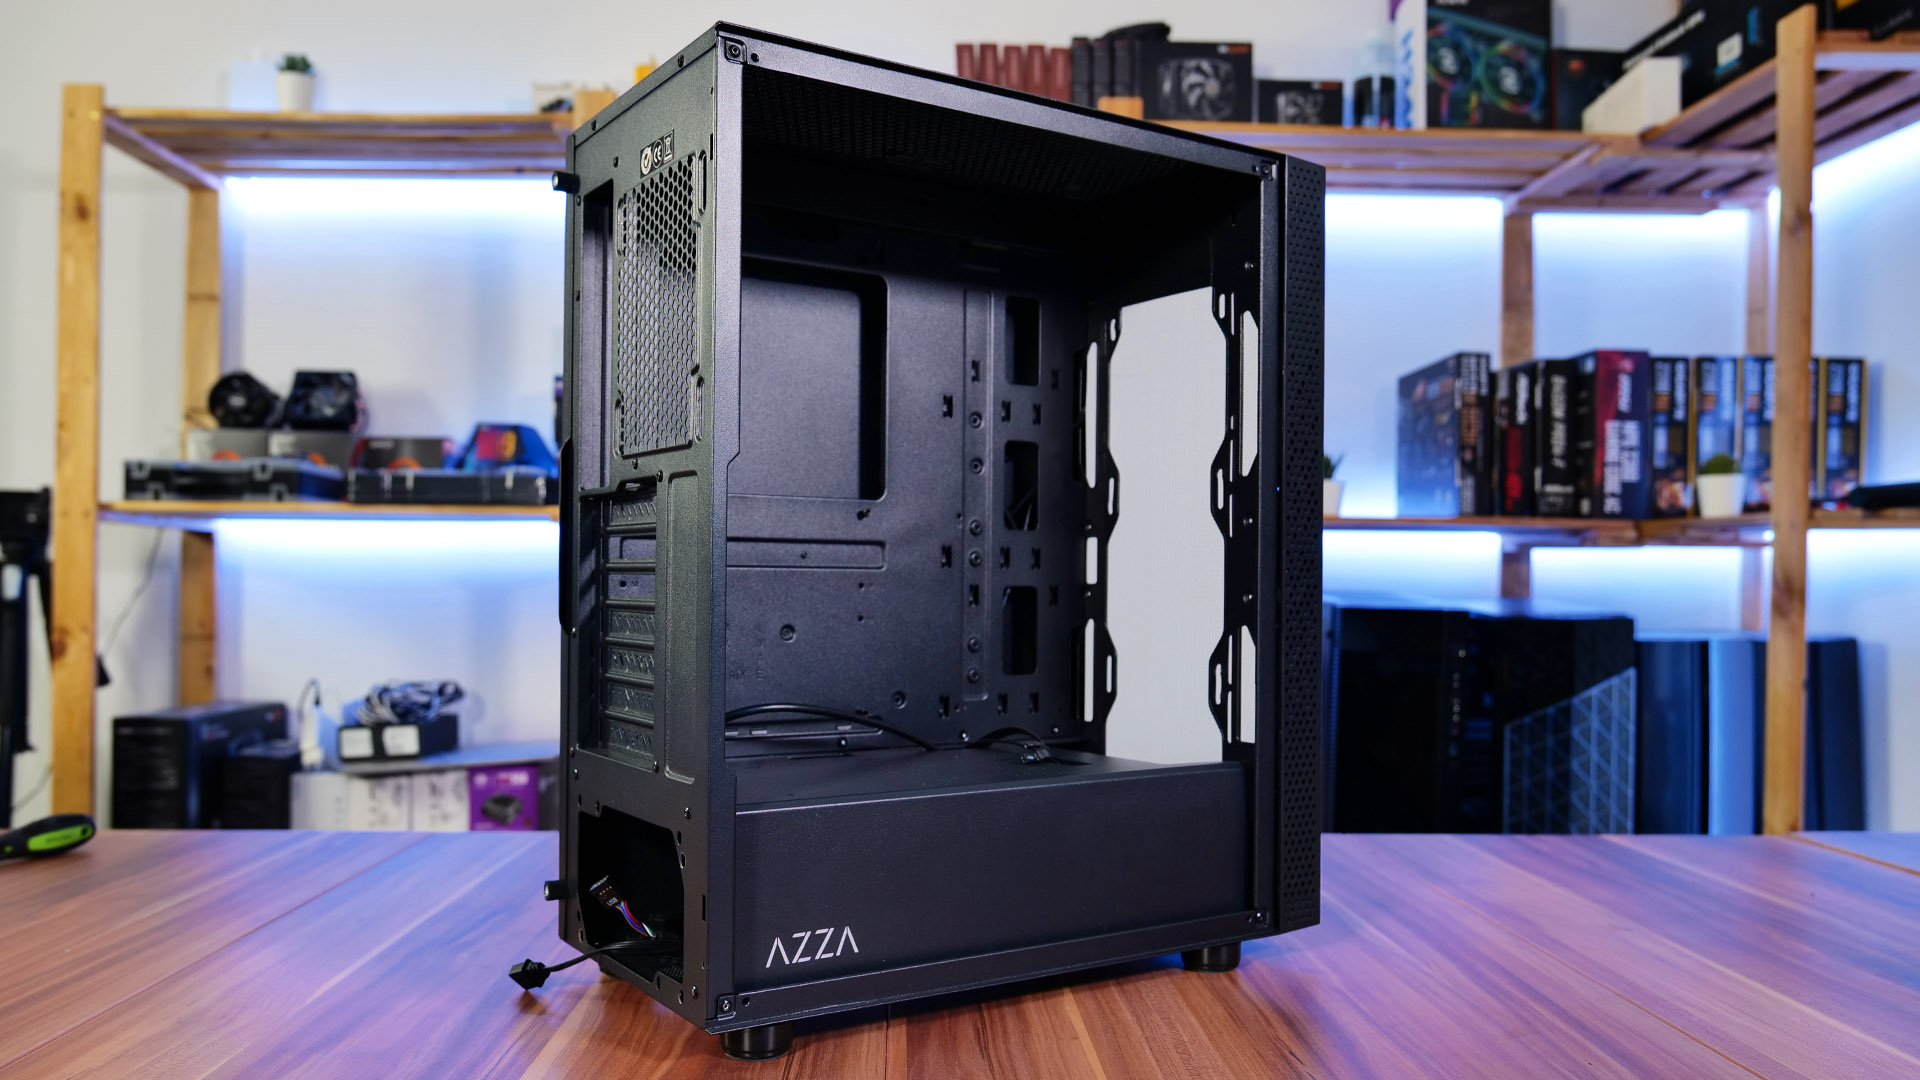
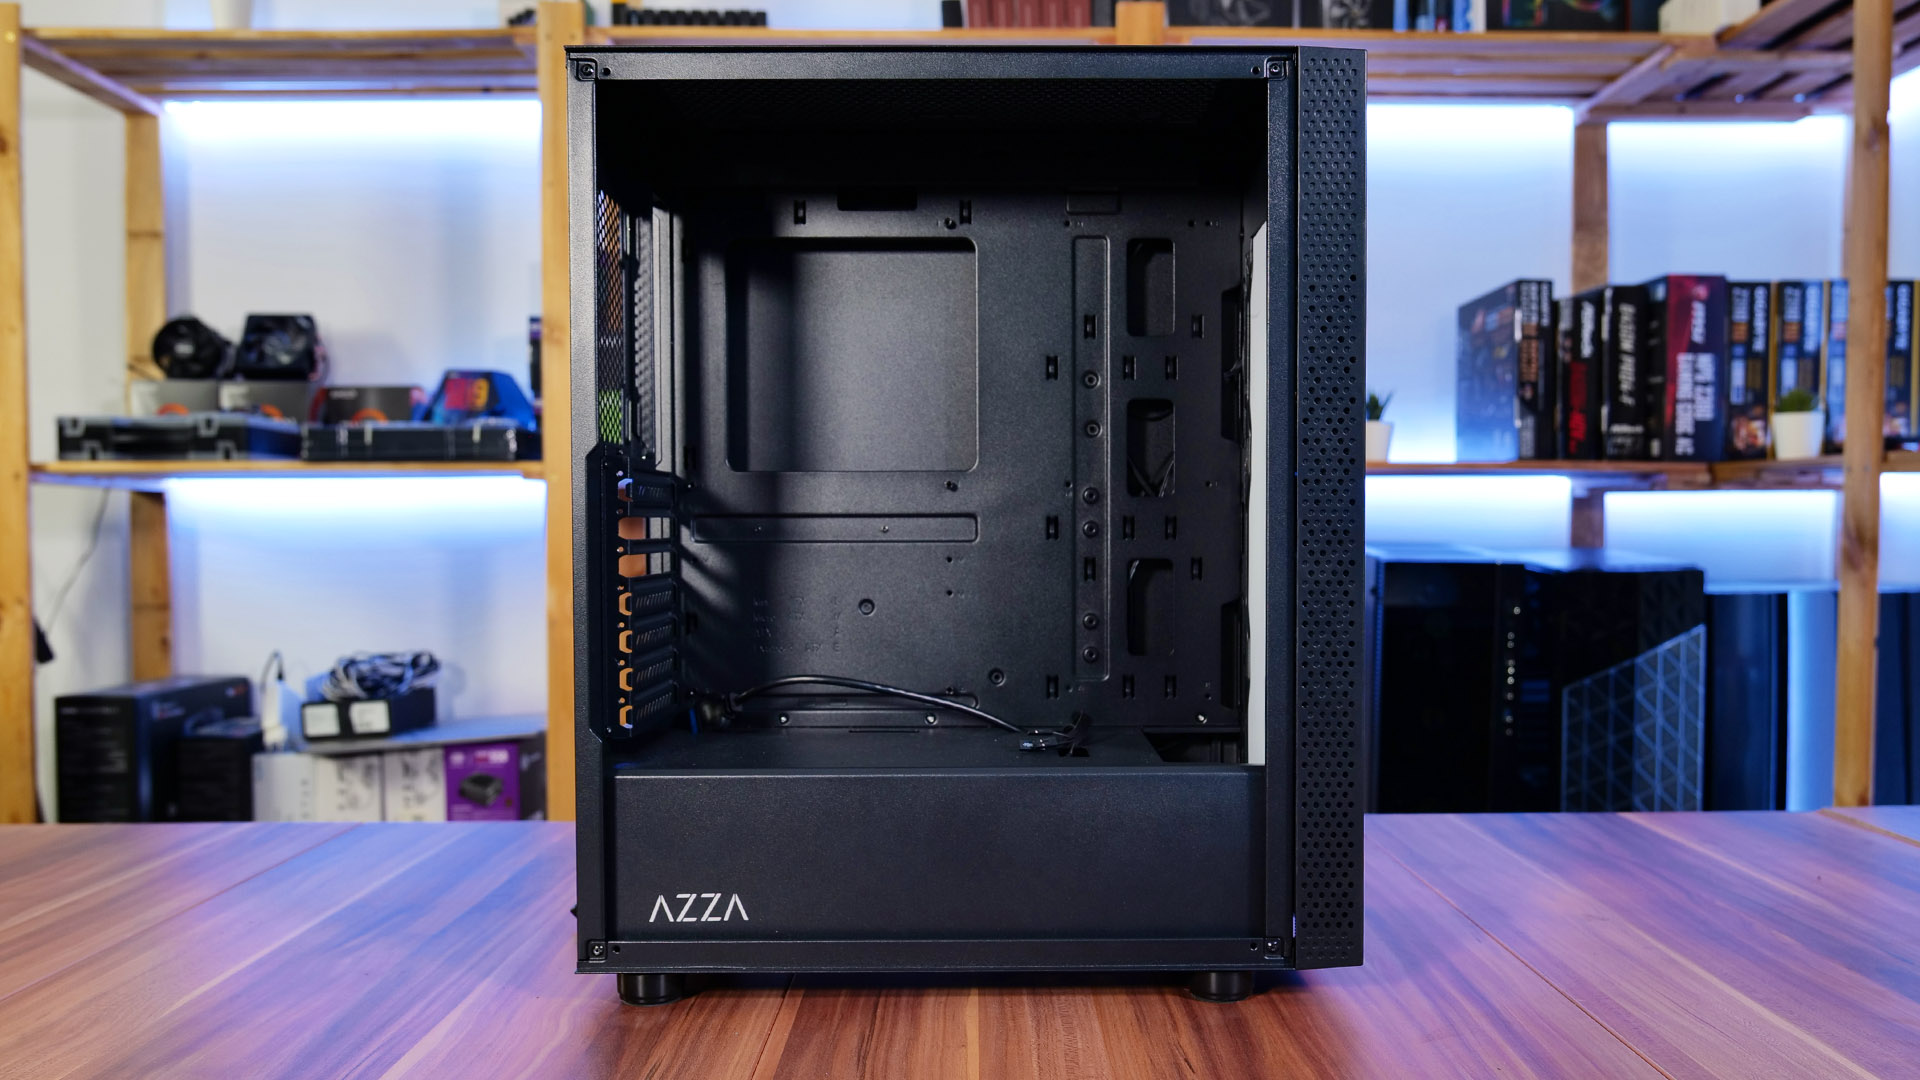
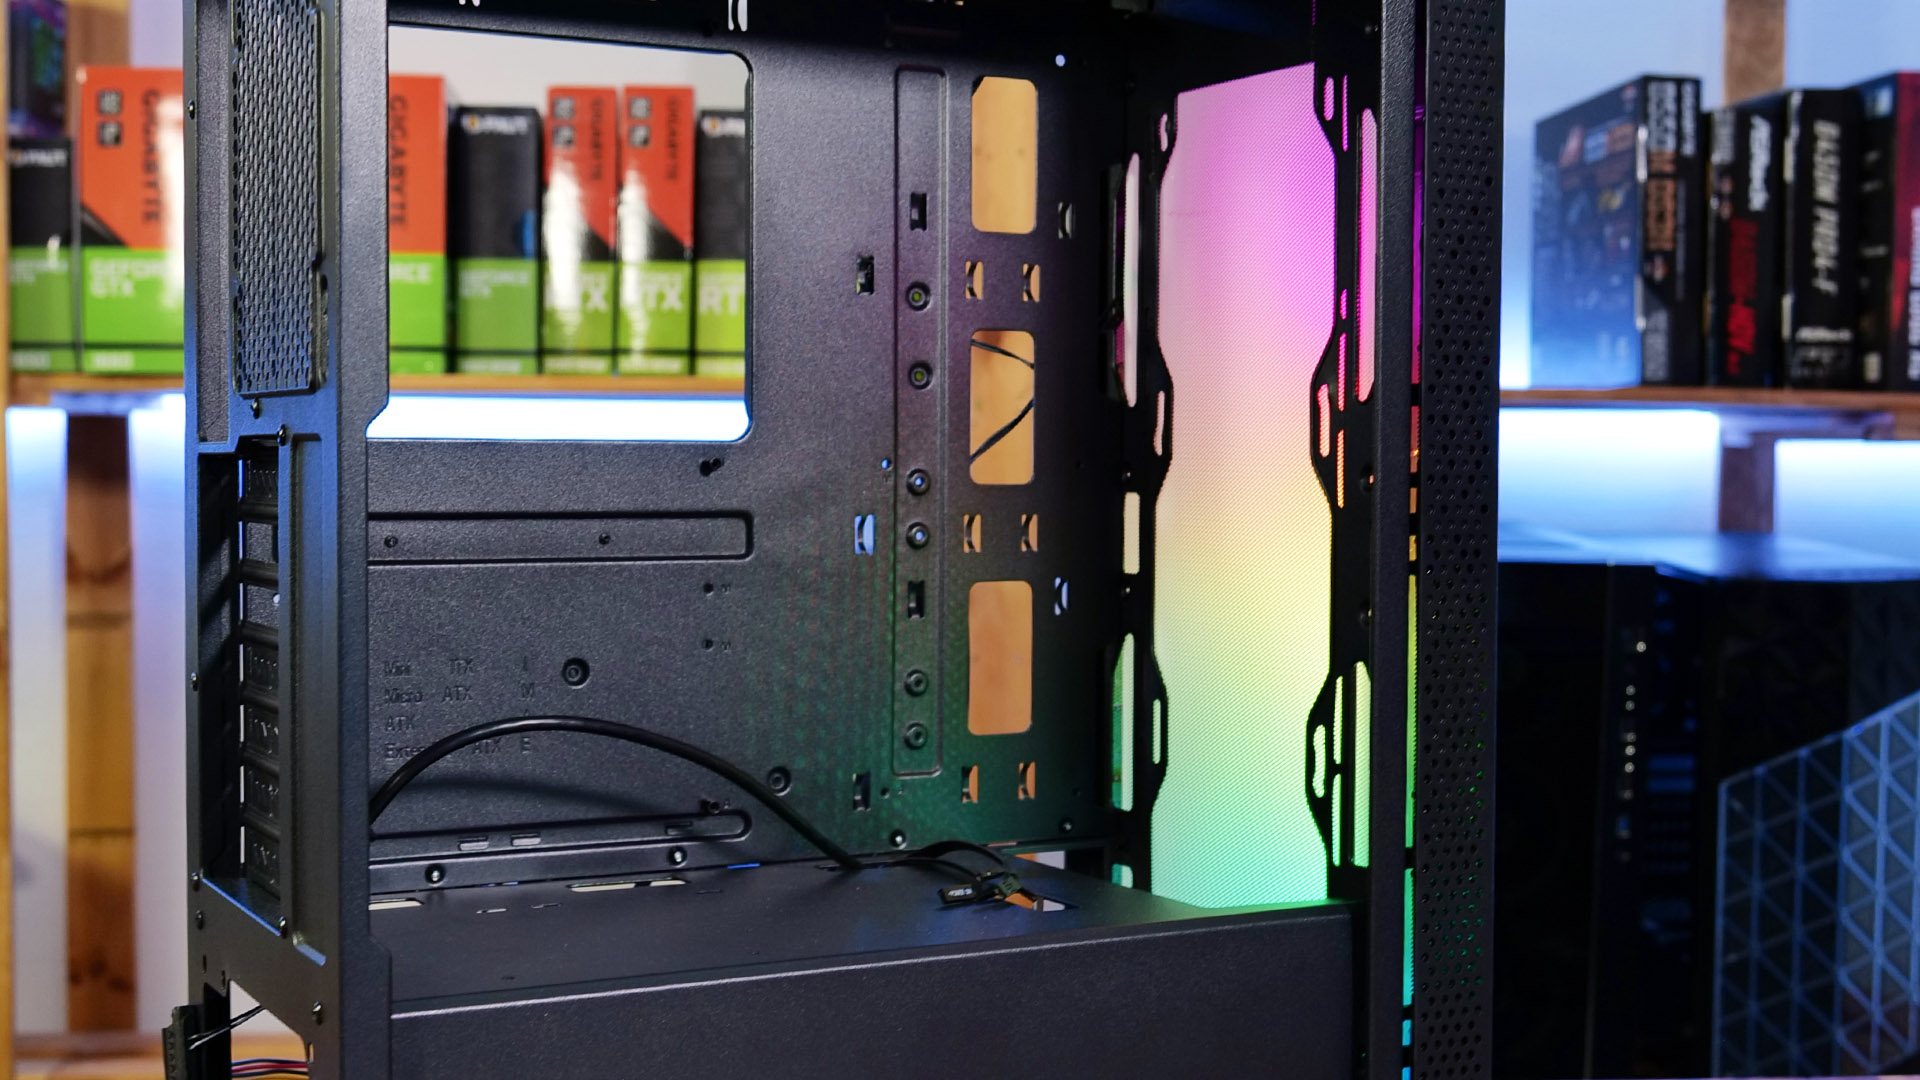
While being marketed as a Mid Tower Case, the Azza Celesta 340 maintains compatibility with almost every Build imaginable. The up ATX Motherboard size allows for to installation of every Consumer-oriented Motherboard and is of course compatible with both AMD and Intel (while specifying this seems silly).
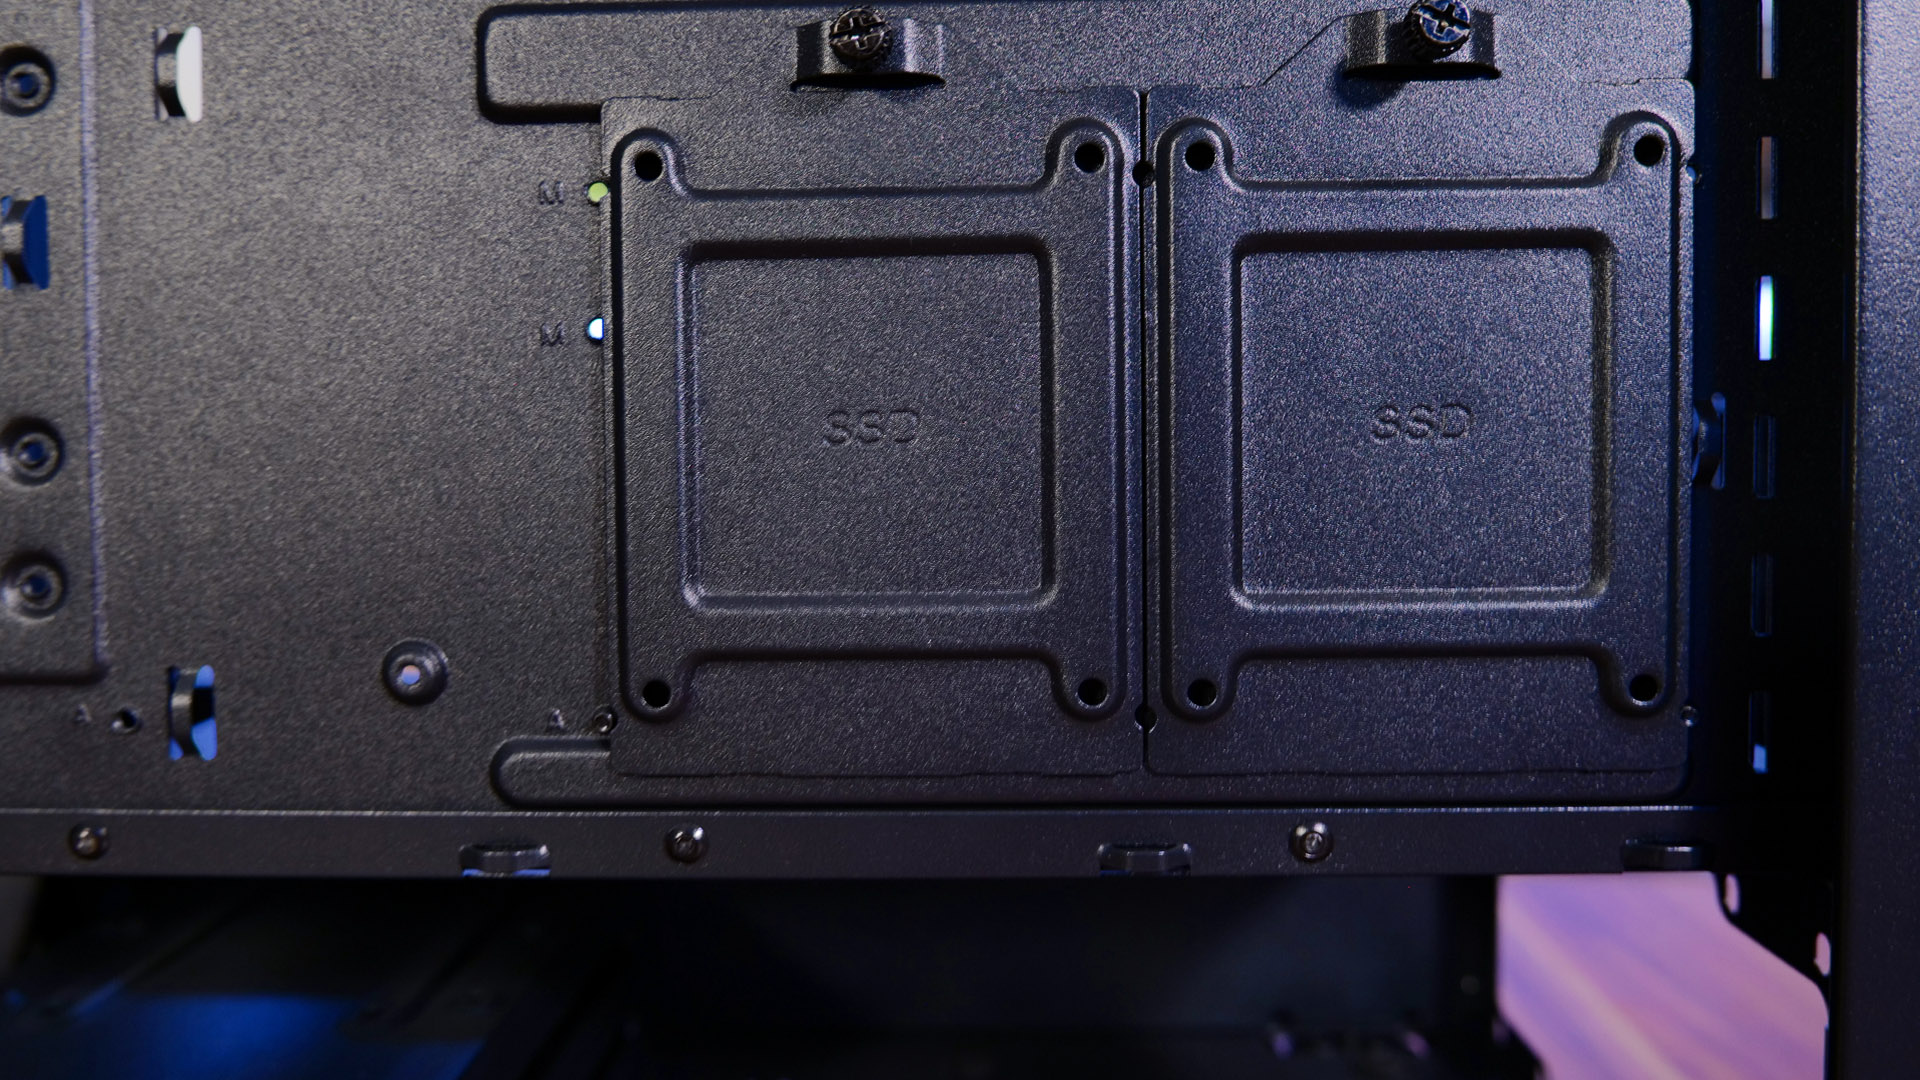
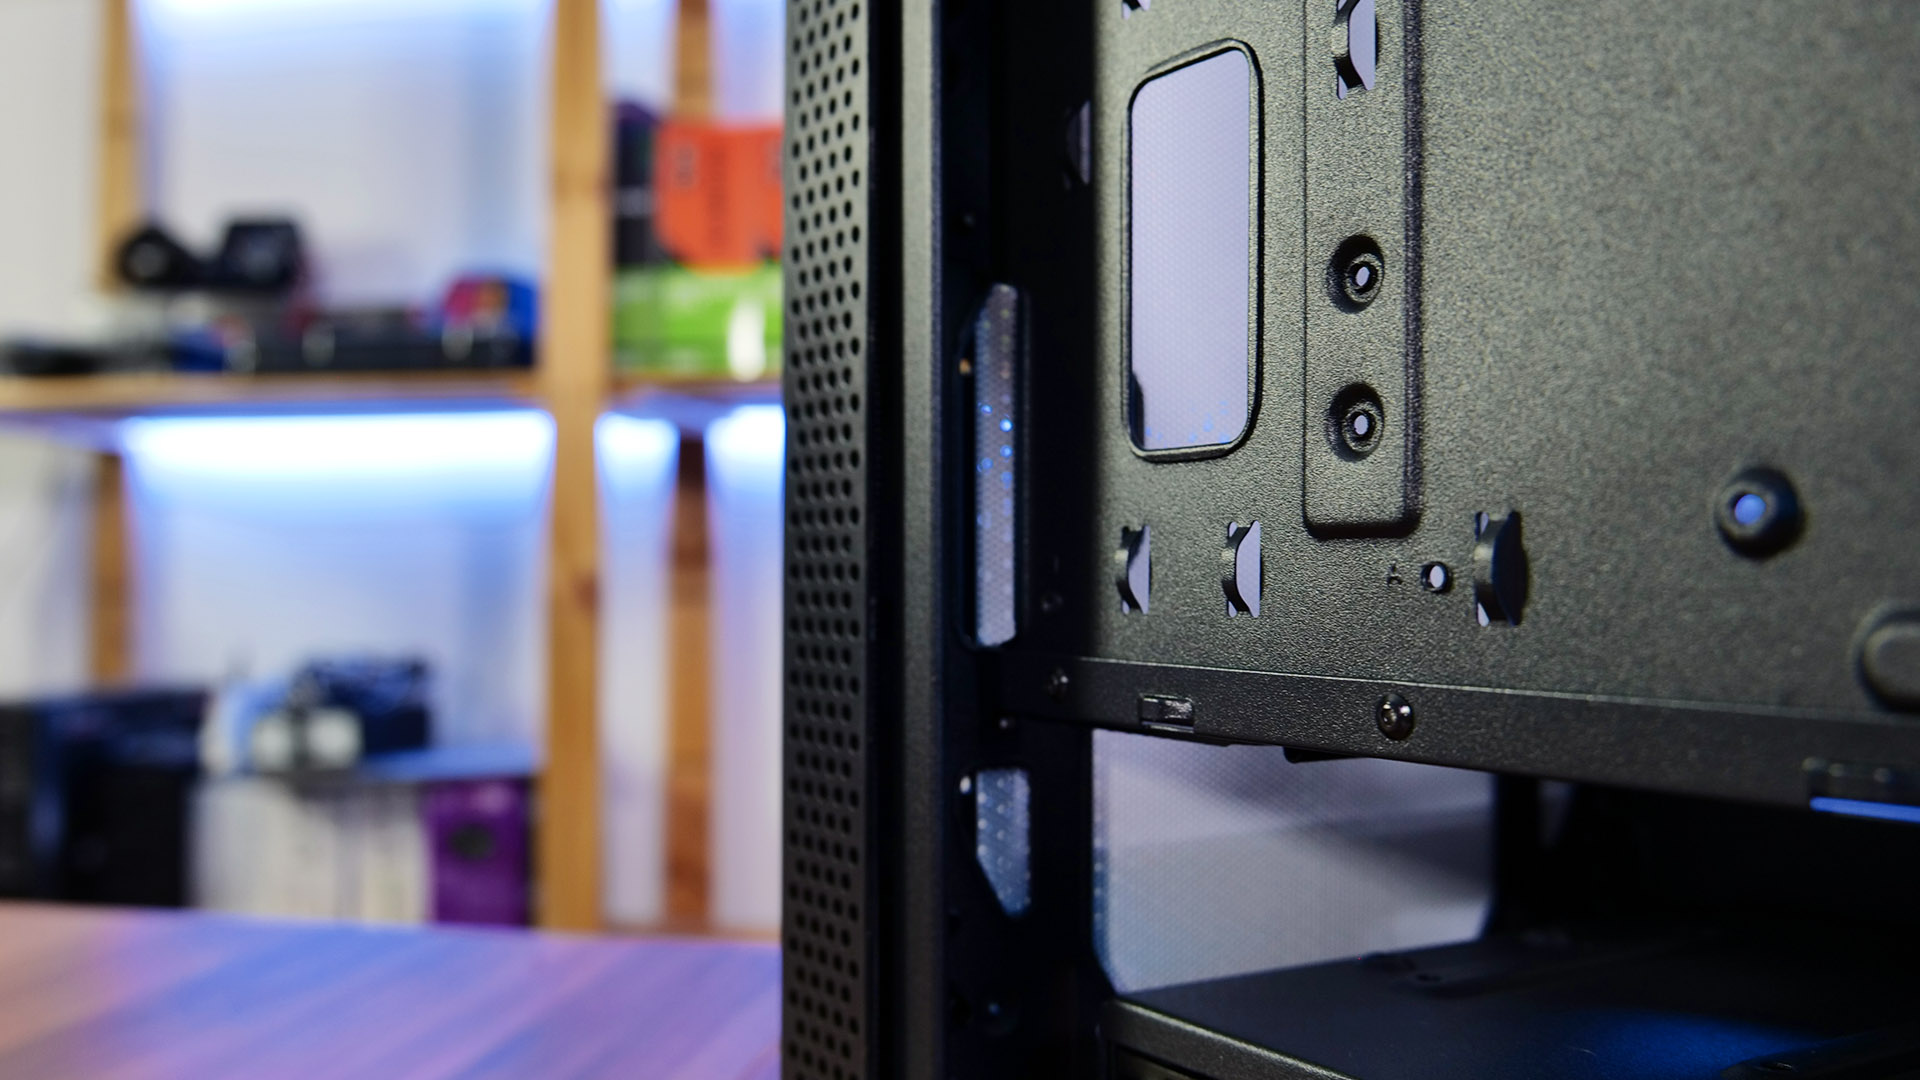
The Azza Celesta 340 supports up to 4 individual SSDs. The first 2 can be mounted on a Bracket that can either be mounted on top of the Power supply or behind the Mainboard. The last 2 can be mounted behind the power supply. There we will find a cage with slidable containers that can hold the 2 drives.
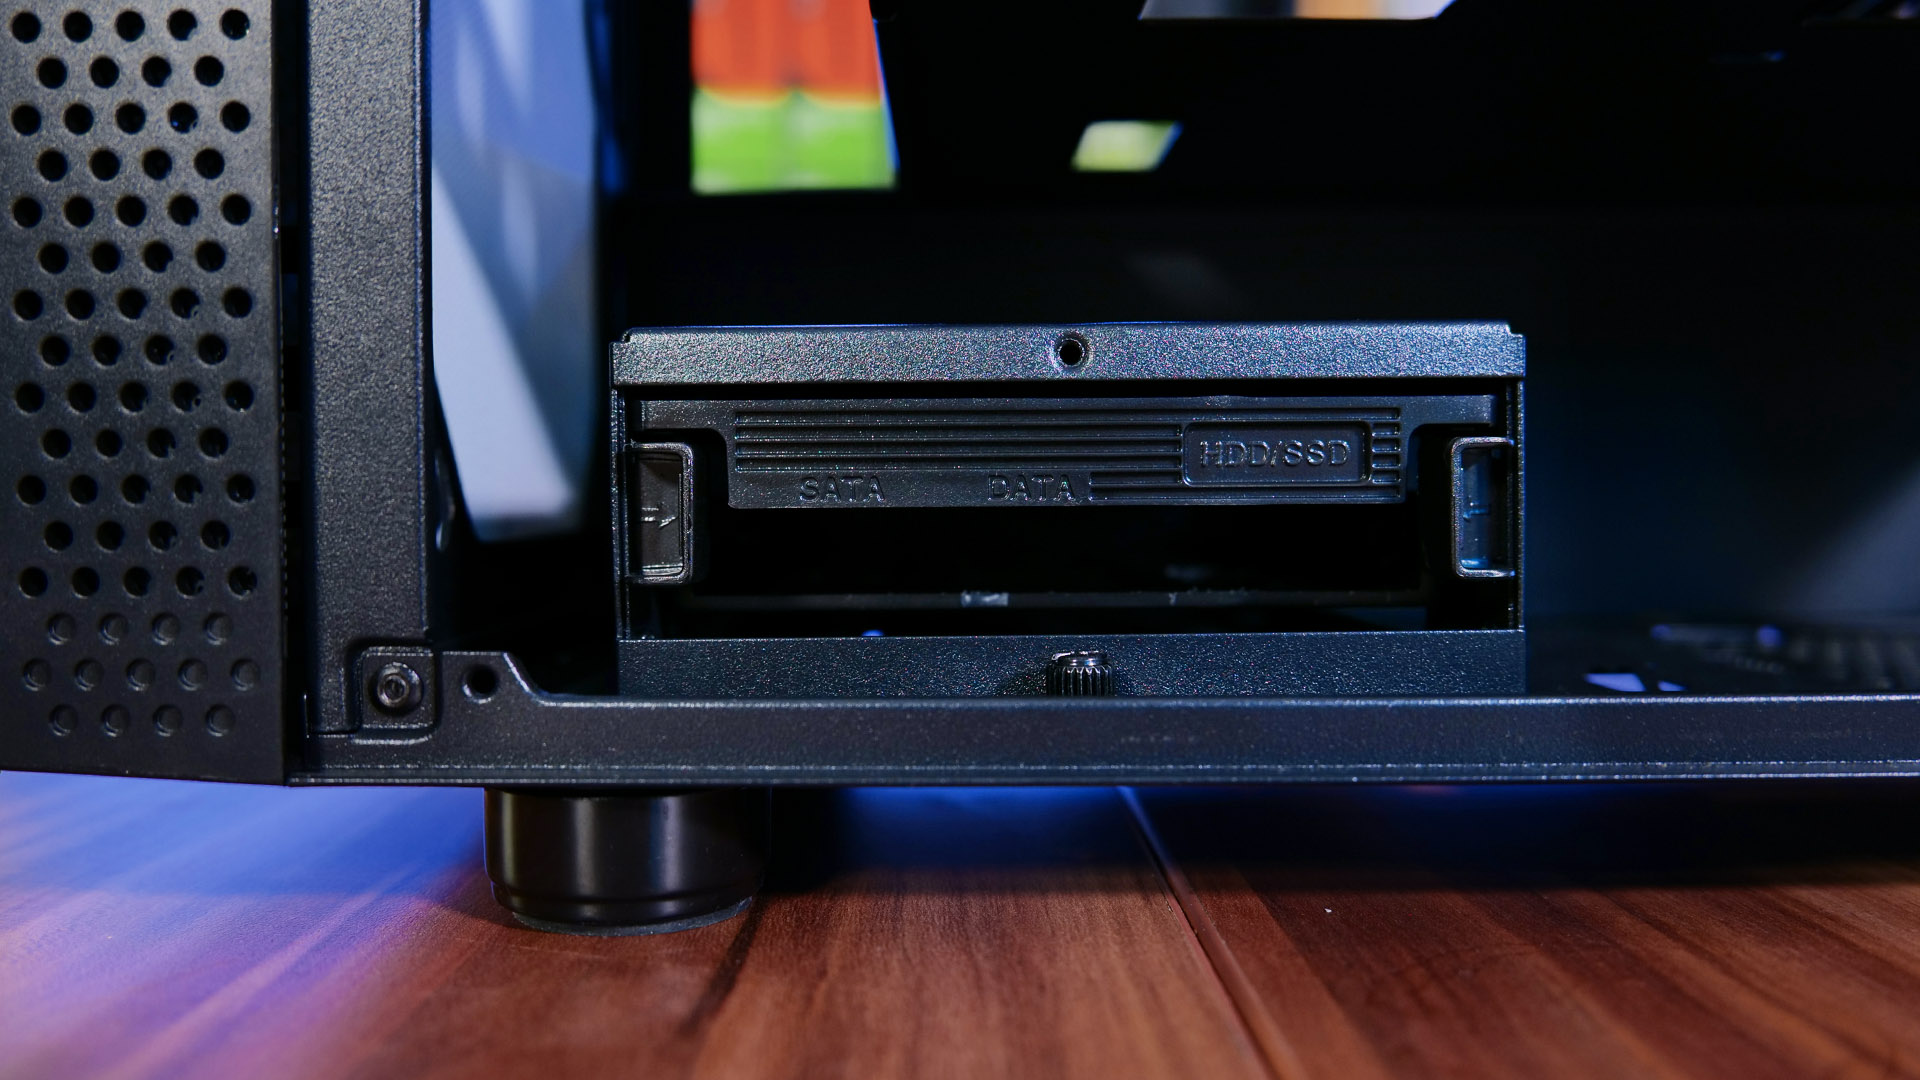
If necessary, the same cage can also be used to hold up to 2 3.5” drives. Fortunately, Azza has implemented a way to remove the cage completely from the Case. Just remove the Screw in front of it, hold onto the Cage, slide it forwards, and there you go!
IO
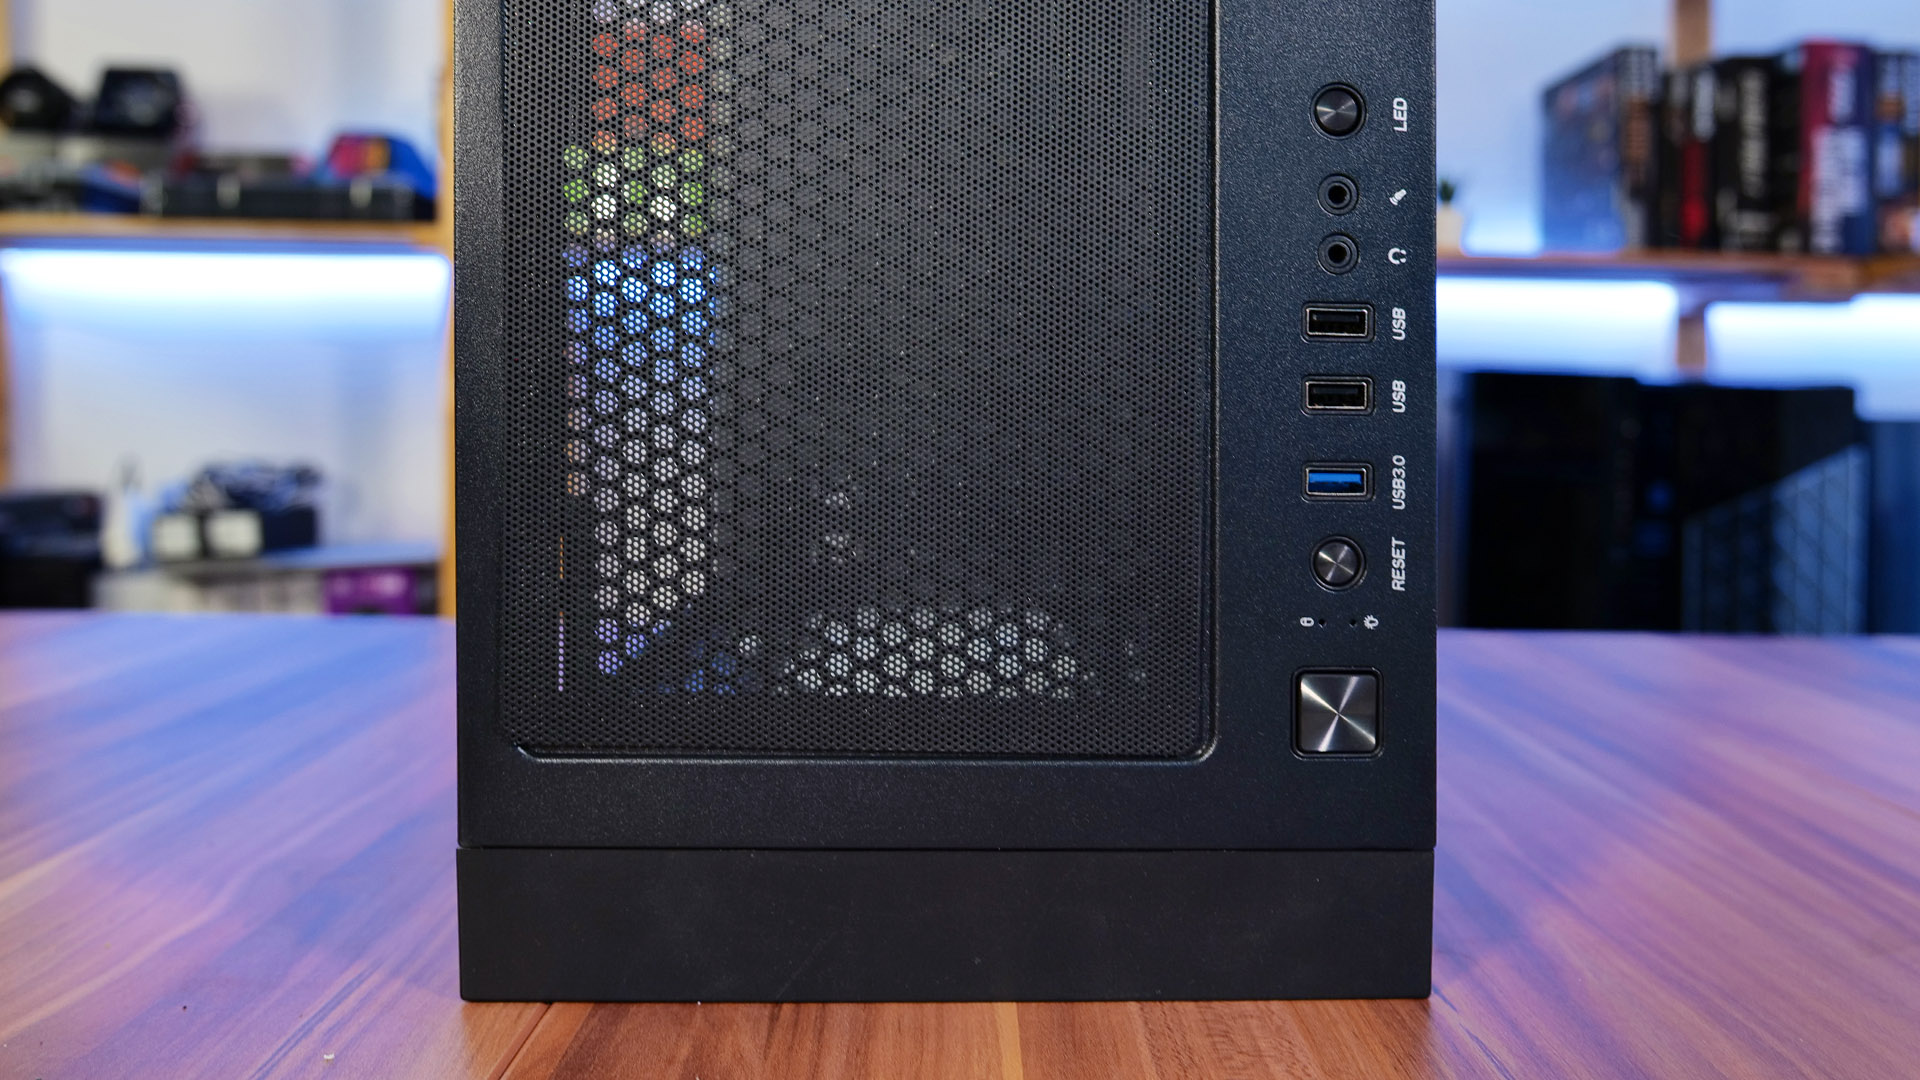
The IO of this Cage seems a bit outdated. On top of the Case, we can find the usual connections (Power Button, Reset Button, LED Button, Audio, USB 3.0, 2x USB 2.0). While lacking any USB type C or USB 3.1 support, the Case still maintains support for the outdated USB 2.0 which seems to be a remnant of the past. This is definitively a point that could have been improved.
Cable management
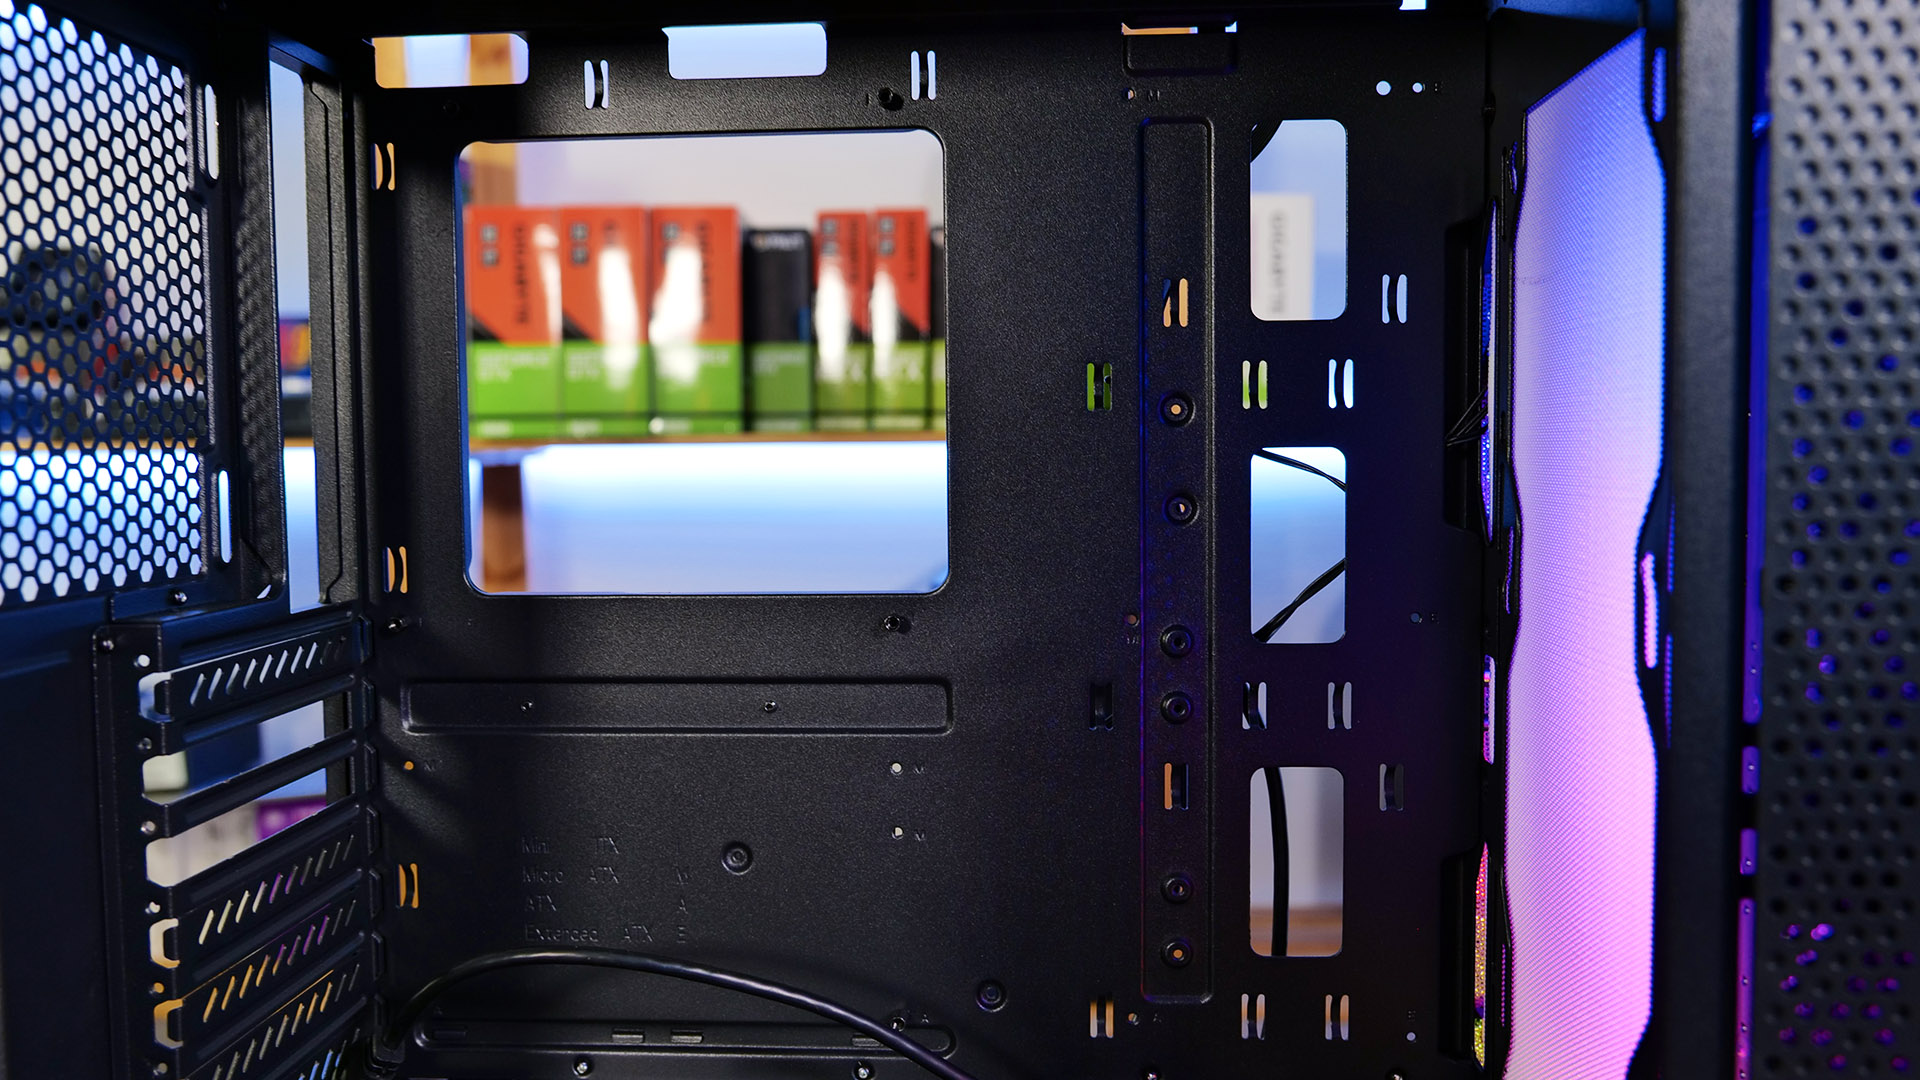
Even though the Azza Celesta 340 does not come with fancy removable Cable hiding Cages, the Cable management is decent for the Price Point. With cut-outs all around the Mainboard there will be plenty of space to route your cables to their connections, just keep in mind that you may want to buy Colorful extensions or at least a PSU with Black cables, as they can be seen.
But don’t assume that Azza hasn’t thought about their design. The whole Mainboard Area is lowered by a couple of cms which allows you to cleanly install your CPU Power Cables while maintaining support for Radiators mounted on top.
Once we look behind the Mainboard Plate, we will find 1 or 2 cm of space between the Mainboard and the Back Panel of the case. These 2 cms will allow you to cram your cables in there and hide them as well as you can in order to create that clean look that we all want.
Cooling
On the Cooling side, there is definitely something to see here. While the mandatory Fan Spot in the Back supports an up to 120mm Fan with or without a Radiator, whose position can be adjusted for around 5cm, the interesting part is in the front and top.
The Top Mesh Grill with Magnetic dust filter allows mounting 2 120mm or 2 140mm fans that can also be used to mount an additional Radiator for your Water cooling Builds. But unfortunately, the Radiator can only span a length of 240mm.

The Front allows for even more cooling, with 3 spots for 120mm or 140mm fans. The Radiator support for the Front also ends up being a bit shorter with a max length of 360mm
So we can sum the case to up to 5x 120/140 Fans and an impressive 600mm of total Radiator length.
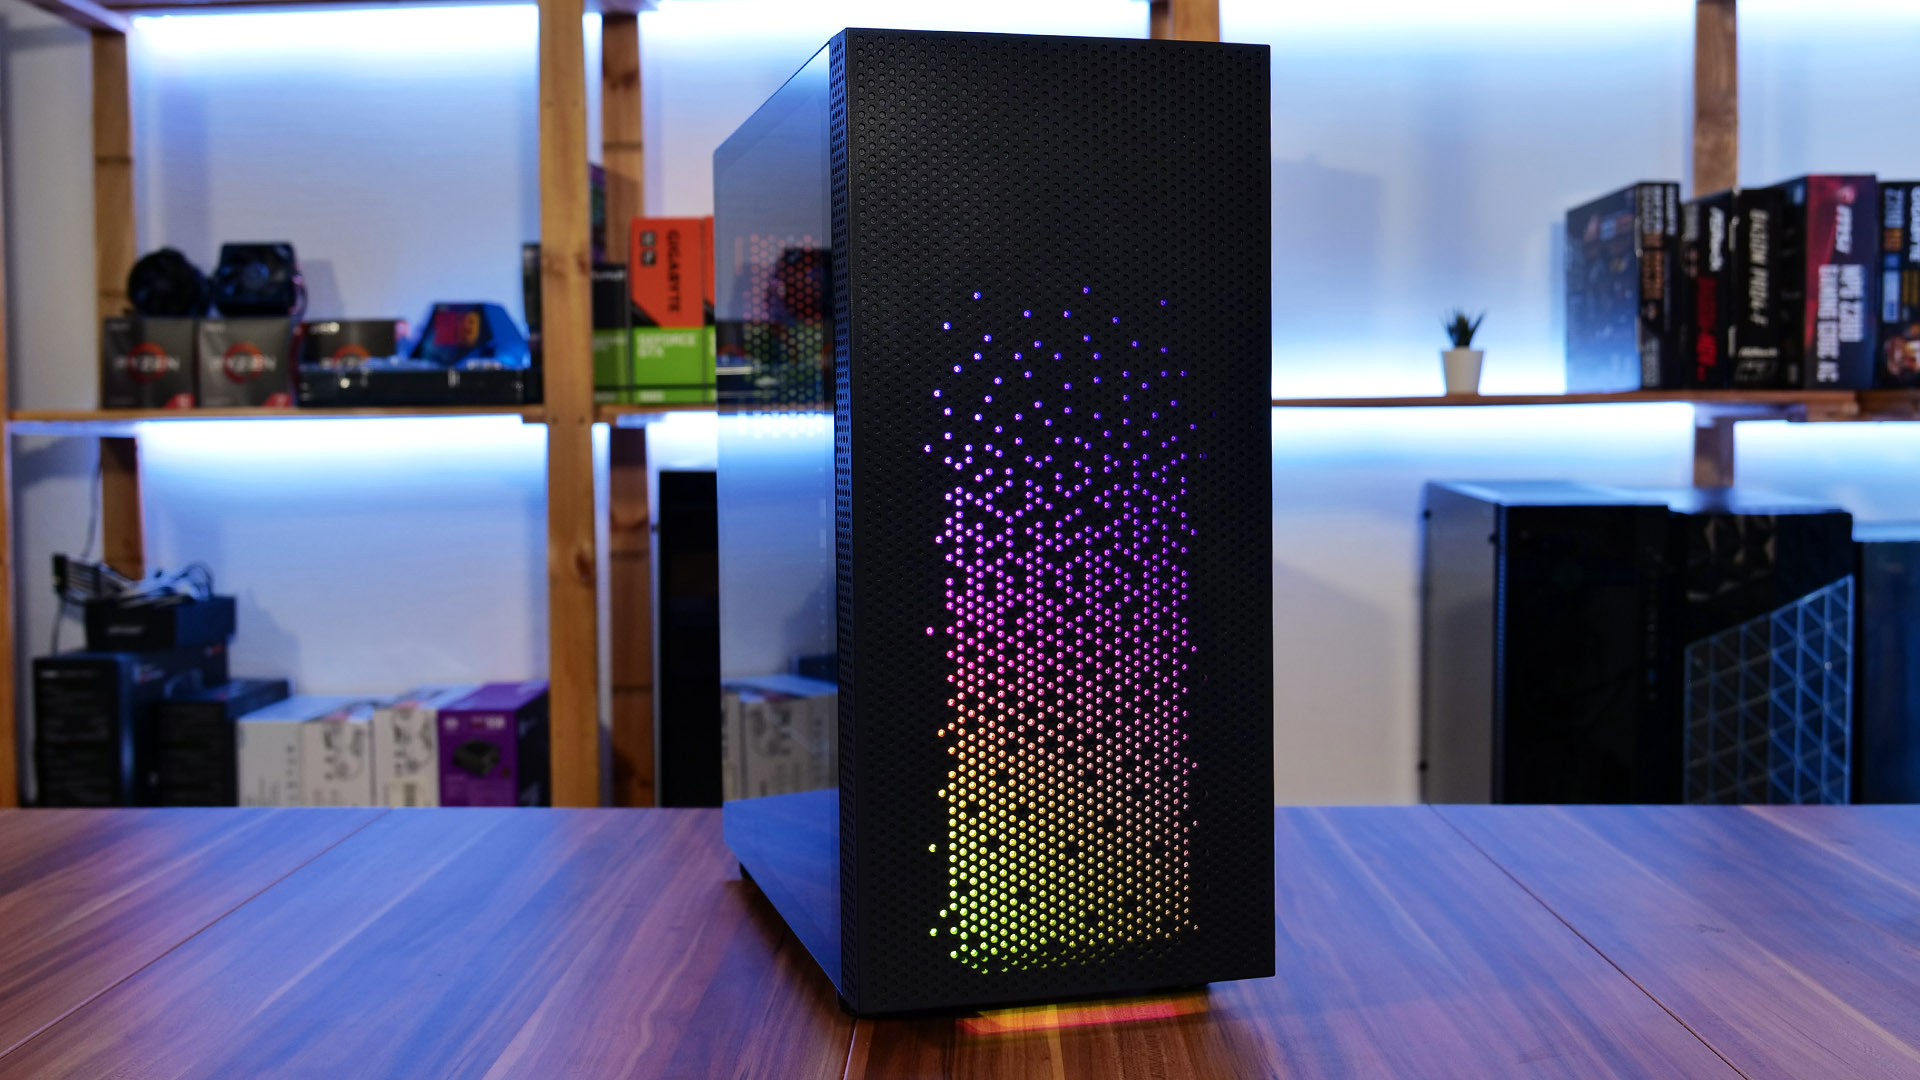
The Front
Finally, we can have a look at the most important part of the Case, the Front with its RGB Effects. While the RGB can be controlled with the LED Button or your mainboard Software, powered by an ARGB Header, the Front of the case shines in every color you desire and can generate stunning Rainfall like effects while giving you a couple of FPS for each LED.
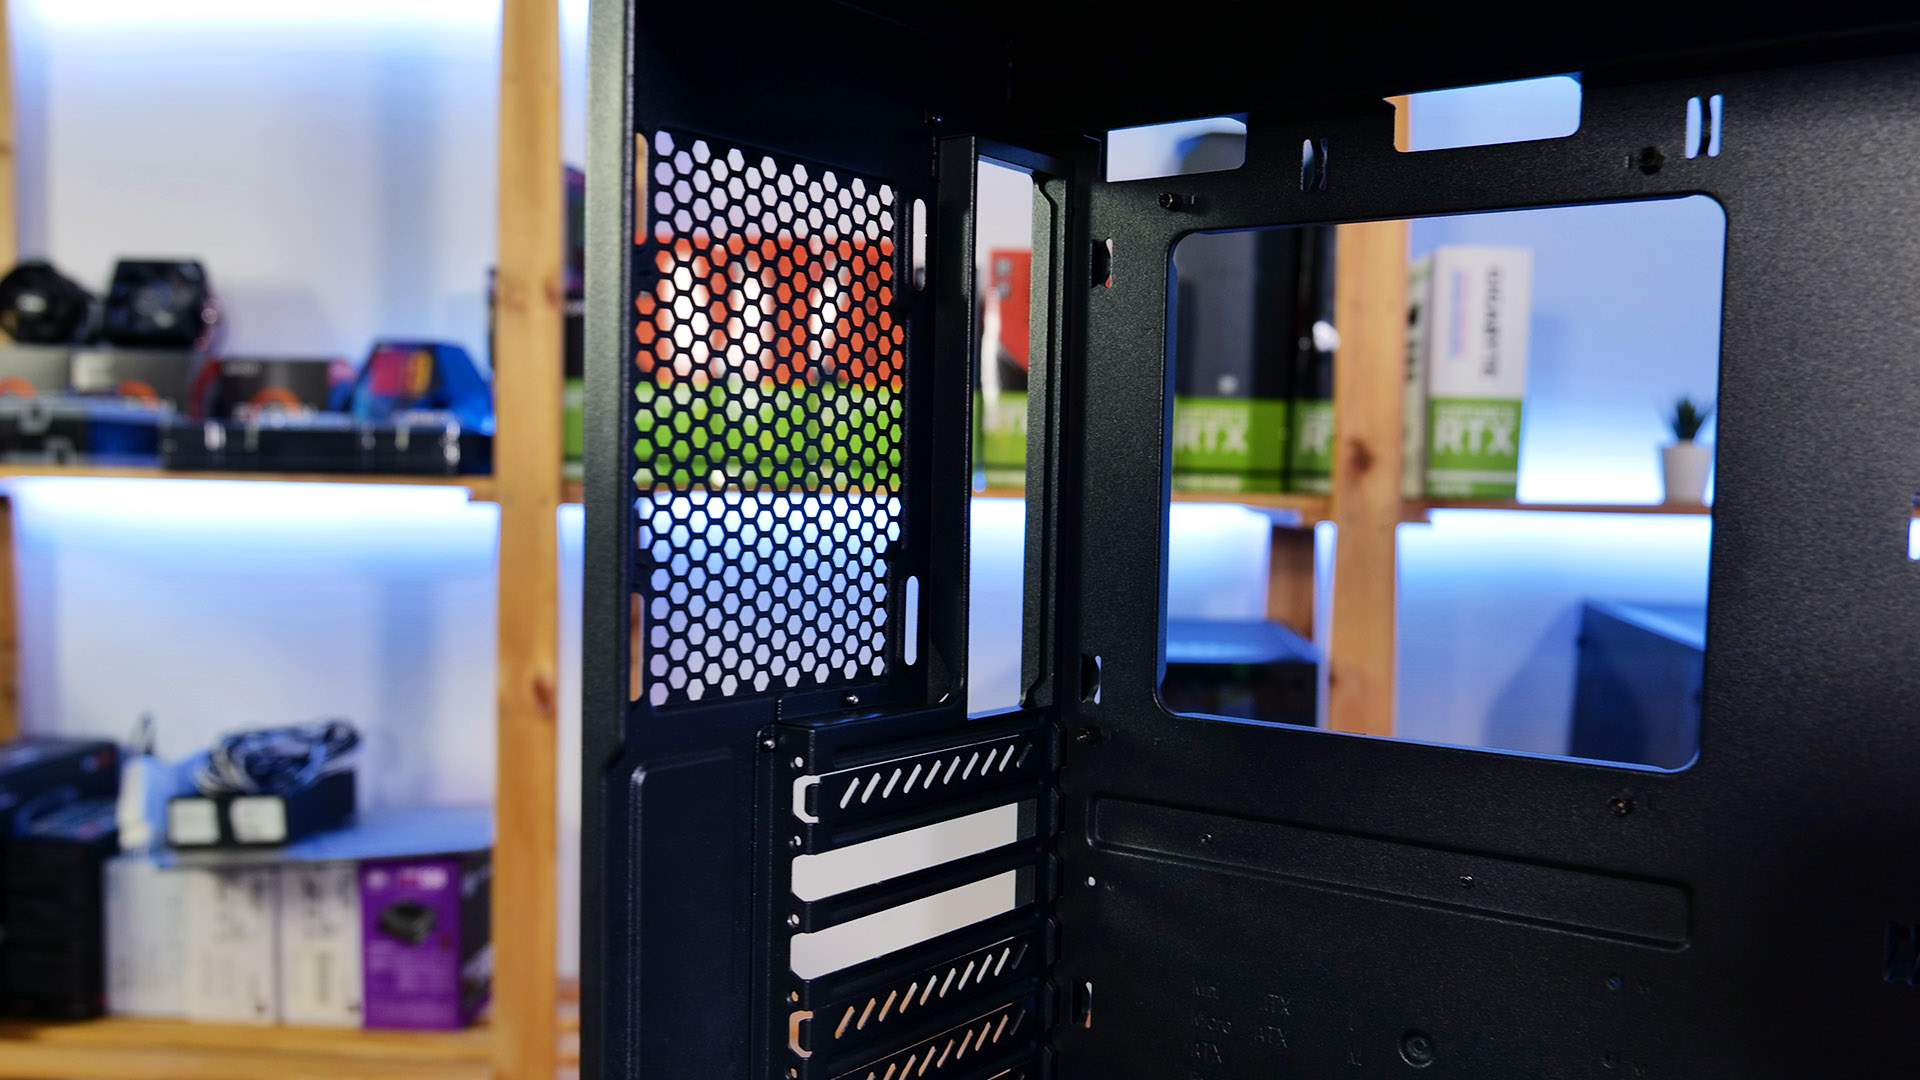
These Colorful Lights are emitted through little holes, in which the Front of the Case is crowded, and let you peek inside of the Case. But looking through a hole reveals the White Sheet that can also be seen from the inside.
Once the Front Panel is removed, we will find the white sheet attached to the Chassis of the Case with Magnets and held down with 2 Screws.
Additionally here it also is where you would Screw in the Front Fans and/or Radiator.
Inside of the Front Panel is an RGB Strip which shines on the White Sheet at a 90° Angle and because of the white color, allows it to shine in your desired color all across the sheet.
Once everything is assembled again, we can continue to appreciate the uniqueness of this design.

Installation
The Installation Process with the Azza Celesta 340 is a charm. Even though there are no exceptional Cable Management Systems in place, the holes around the Mainboard are more than enough and the lowered Motherboard placement allows to install of everything with ease.
The power supply is mounted in the Bottom of the Case within its own Tunnel and the possibility to remove the Hard Drive cage behind it makes it easy to route the cables or add additional ones if you’re using a Cable Managed Power Supply.
While Using this case, we have used a couple of different cooling options. But with its enlarged interior and support for up to 160mm Coolers, we had no issue with Mount AIO Water Coolers like the Cougar Aqua 120 or Cooler Master LiquidMaster ML120l v2 or extremely big Air Coolers like the Be Quiet! Dark Rock Pro 4. But do keep in mind that the Dark Rock Pro 4 will (almost) touch the Glass.
The Rest of the Build was a straightforward process. The 350mm GPU support allowed us to not care about which GPU we used and everything went inside within a couple of minutes.
Esthetics
Having a finished Build Ready it’s time to enjoy the looks. While the unique RGB-Full Front makes the Azza Celesta 340 definitely stand out, the Tempered Glass Side Panel and all Black Finish provide some maturity.
A small deduction will be made on the feet though. Even if they aren’t too small or wobbly, having them in a Square shape would have fit into the design. And they could be a bit higher. But we have to note that Azza made the effort to coat them in a Greyish-Black color, which matches the rest of the case.
For the Inside, there may be a possible problem. If there are no fans or Radiators mounted in the front of the case, the white sheet can be seen fully. This may not seem like a problem, but if you plan to do a minimalistic All Black build, you may need to consider this as there will be an all-white sheet covering the entire front and possibly destroy the esthetics of the inside.
Another important point would be the lack of any Cable Hiding System. Even if the Cable holes are okay, not having anything to hide your cables may force you to use Colorful Cable extensions or at least all-black cables, if esthetics is what you crave.
Benchmarking
While can provide an honest overall review about the Azza Celesta 340, we do not yet have the capacity to Benchmark cases to the fullest extent.
But nevertheless, we had our doubts about the performance considering the white sheet may block a lot of air coming from the front.
In order to test this, we did a separate benchmark investigating solely this matter.
For this Test, we used our ASRock B450M-Pro-4-F Motherboard, paired with a Ryzen 7 3700x locked at 3.7 GHZ and a Palit RTX 2060 Super.
For the Cooling, we used a Be Quiet! Dark Rock Pro 4, without any fans attached to it!
In the front of the Case, we placed 3 Noctua NF-F12 Fans spinning at 100% of its rated speed and let the CPU burn up with our CPU stress test of choice, Heavyload.
This suspicious Build allows us to Test how much restriction the White sheet causes by removing every variable which may affect that result, like CPU fan or back fan, and let the CPU be cooled by the Dark Rock Pro 4 which receives its cold air solely from the Front fans.
While performing this test, we will try 4 different scenarios. Once we have a Baseline with the white sheet, we will remove it. Then we will remove the Front Panel and repeat the same procedure without it.
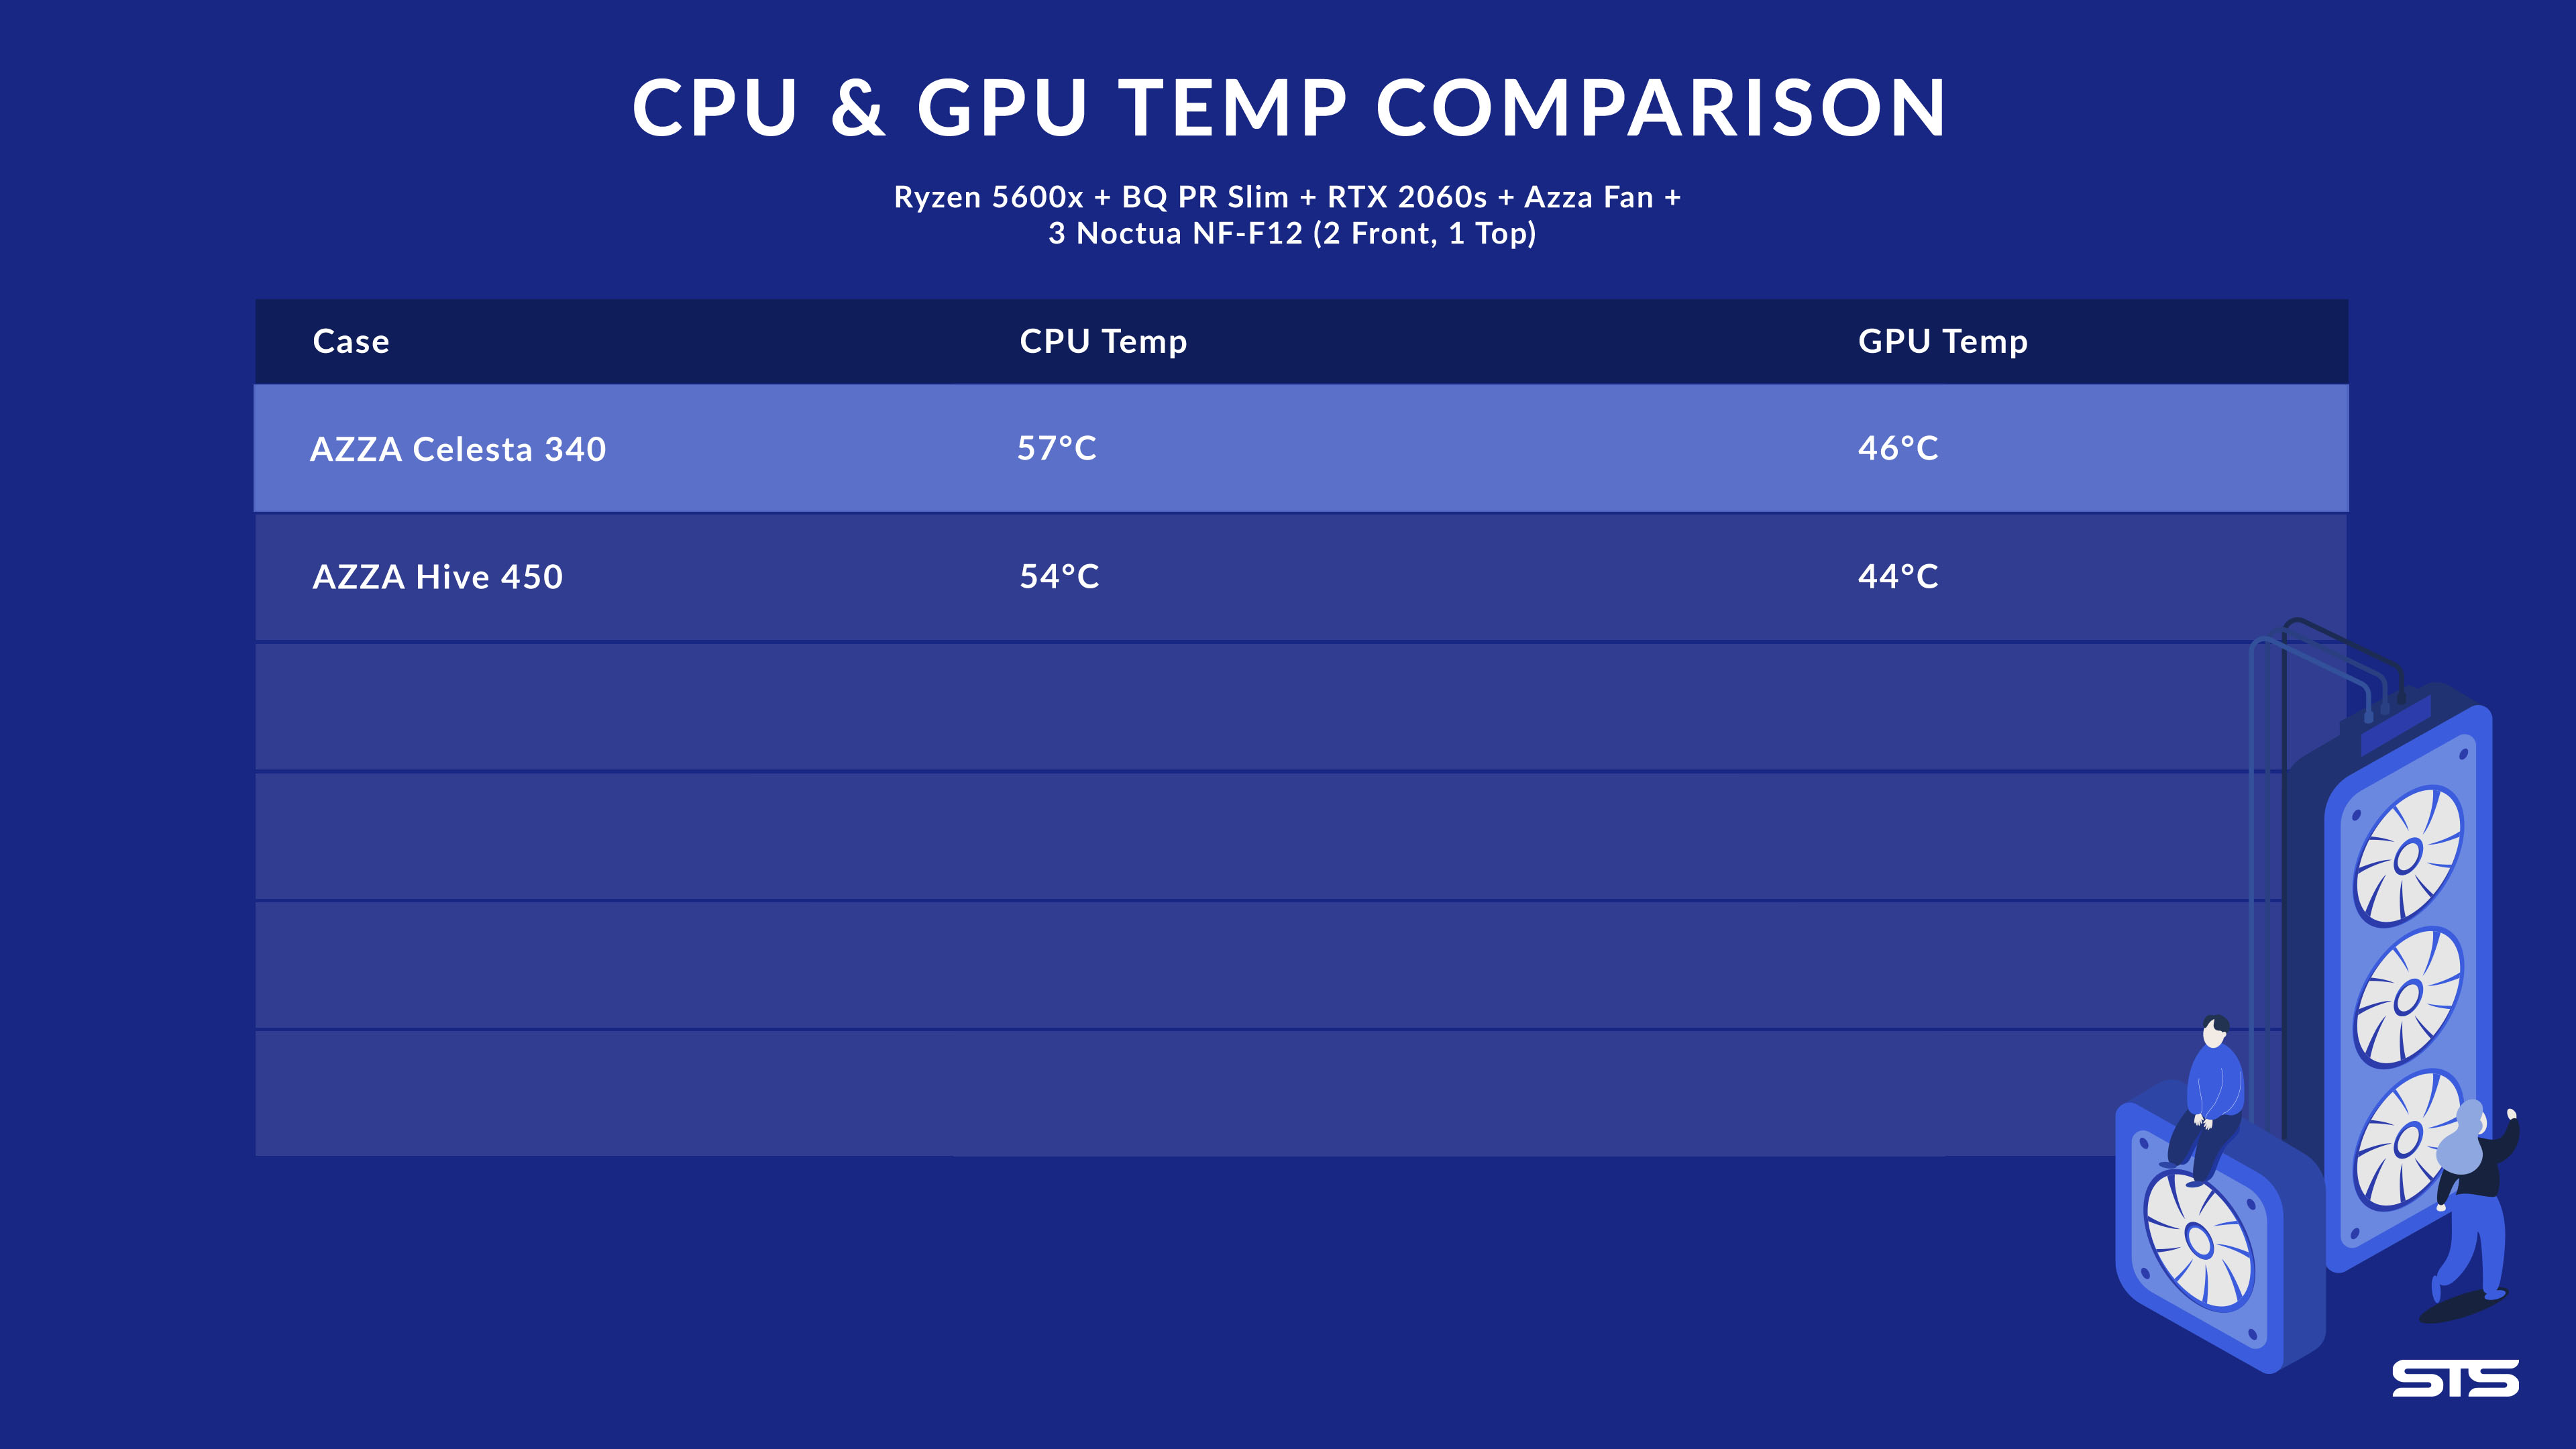
As the Results show, removing the white sheet allows the CPU to operate at 12-13°C lower than with the Sheet.
Even though this difference seems like a lot, we want you to keep in mind that we removed every variable that may affect this result. Letting the Dark Rock Pro cool the Ryzen 3700x with a Fan would have minimized the result to an extent that the difference could have been inside of the margin of error.
Removing the Front Panel entirely reveals another 13° difference, but the Same rules are applying in this case.
Looking at the results as a whole, the maximum difference between the Front cover & White sheet and Nothing at all is 26°C, which is not that much considering the circumstances, but if Min-Maxing is your goal, this may not be the option for you.
Conclusion
Looking at the Case overall leaves a positive impression, it is compatible with every platform, offers the usual amount of HDD/SDD spots, and gives you the option to use some decent water Cooling equipment. The Cable management is not bad, but also not impressive and the space inside of the case allows you to build basically whatever you want in there.
But the place where the Azza Celesta 340 shines the most is most definitely the Front Design. The Raindrop-like style shining in every color makes it a real eye-catcher and is by far the best selling point of this case.
The only real issue we have with the case is the IO, with USB 2.0 still on there, it just seems outdated and should get a refresh if Azza decides to give this case another coat, a few years down the line.
But before we can recommend or not recommend the case we have to establish who it is. If you are looking for the best performance, you should look at cases that do not offer any “uniqueness” as these traits are usually coming with some downside.
But if you want a Unique looking case that lights up your room, then we can definitely recommend the Azza Celesta 340.
The Azza Celesta 340 can be bought for around 60$ on most of the usual Retail sites.
We will include the affiliate links to the most known sites right below.

Alphacool Core Ocean T38 360 Review
With Alphacools new Core series of products, they are aiming to bring incredibly affordable cooling equipment while maintaini
Read More
Phanteks M25 120
Phanteks 140mm M25 line of fans already proved they are outstanding performers. But what about the 120mm counterpart? Its tim
Read More
Montech Sky One ARGB Review
Meet the Montech Sky One. Out of Montechs premium line of hardware, their Sky One Case offers excellent Airflow paired with a
Read More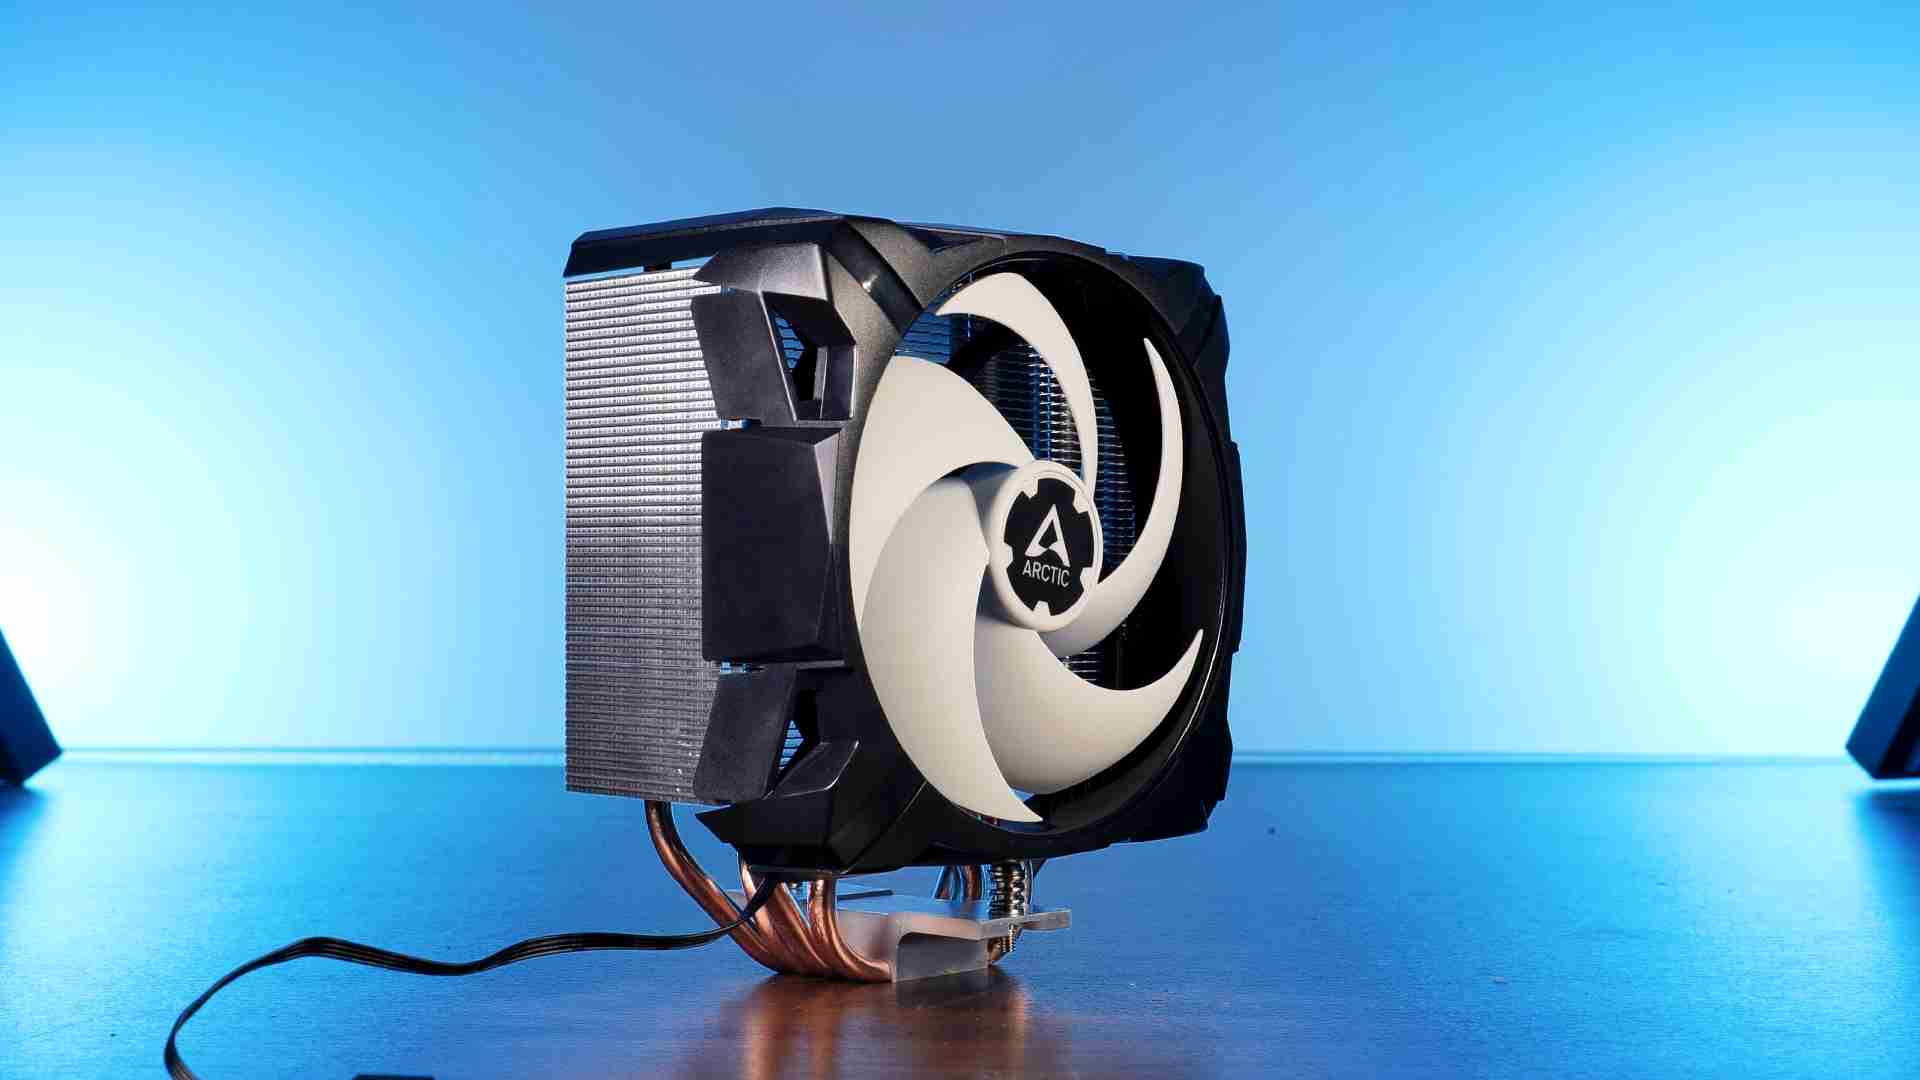
Arctic Freezer A35 / i35 Review
Arctics newest Freezer 35 lineup of CPU Cooler promises a tailor-made cooling experience for exactly the platform of your cho
Read More