NZXT H510i Review
Introduction
NZXT is not an unknown figure in the PC Case Game. With their H lineup spanning from small form-factor ITX Cases up to Big Full Tower Air Compressors, NZXT got all the corners covered. Additionally, NZXT introduced a special "i" subversion for their cases. This "intelligent" addition consists of some nice little perks here and there which may be interesting for the everyday builder.
Recently NZXT updated its Lineup to pack the newest Technology right in, USB Type C. Now with the new versions out, let's take a closer look at the NZXT H510i Mid-Tower Case.
Positive
- Great Cable Management
- Included RGB/Fan Controller
- Removable HDD Cage
- Huge Feet
- Up-to-date IO
- RGB Strips
- 2 Included NZXT AER Fans
- All the Case wires combined in a Single Header
Neutral
- NZXT CAM Support Build-in
Negative
- Only 1 Fan in the Top
What's in the Box?
Usually, Case unboxings are quite unimpressive. But NZXT didn't seem to want to fit in and delivered the same Box-Style that we're used to. Just like the Kraken Line-up, the H510 Comes in a White Carton with NZXT-Purple accents. The Front features a Frontal Image of the case while the Sides reveal more information like the Specsheet and a short introduction to the NZXT Cam Software. Even though we are perfectly aware that the Box a product comes in does not in any way make it perform better or worse. But having a nice-looking painted box instead of the Brownish carton does in fact give you a Premium-Product vibe from the start. We really appreciate these little efforts.
Once the Carton is opened, we can find the H510i wrapped in a plastic sheet and surrounded by the usual styrofoam.
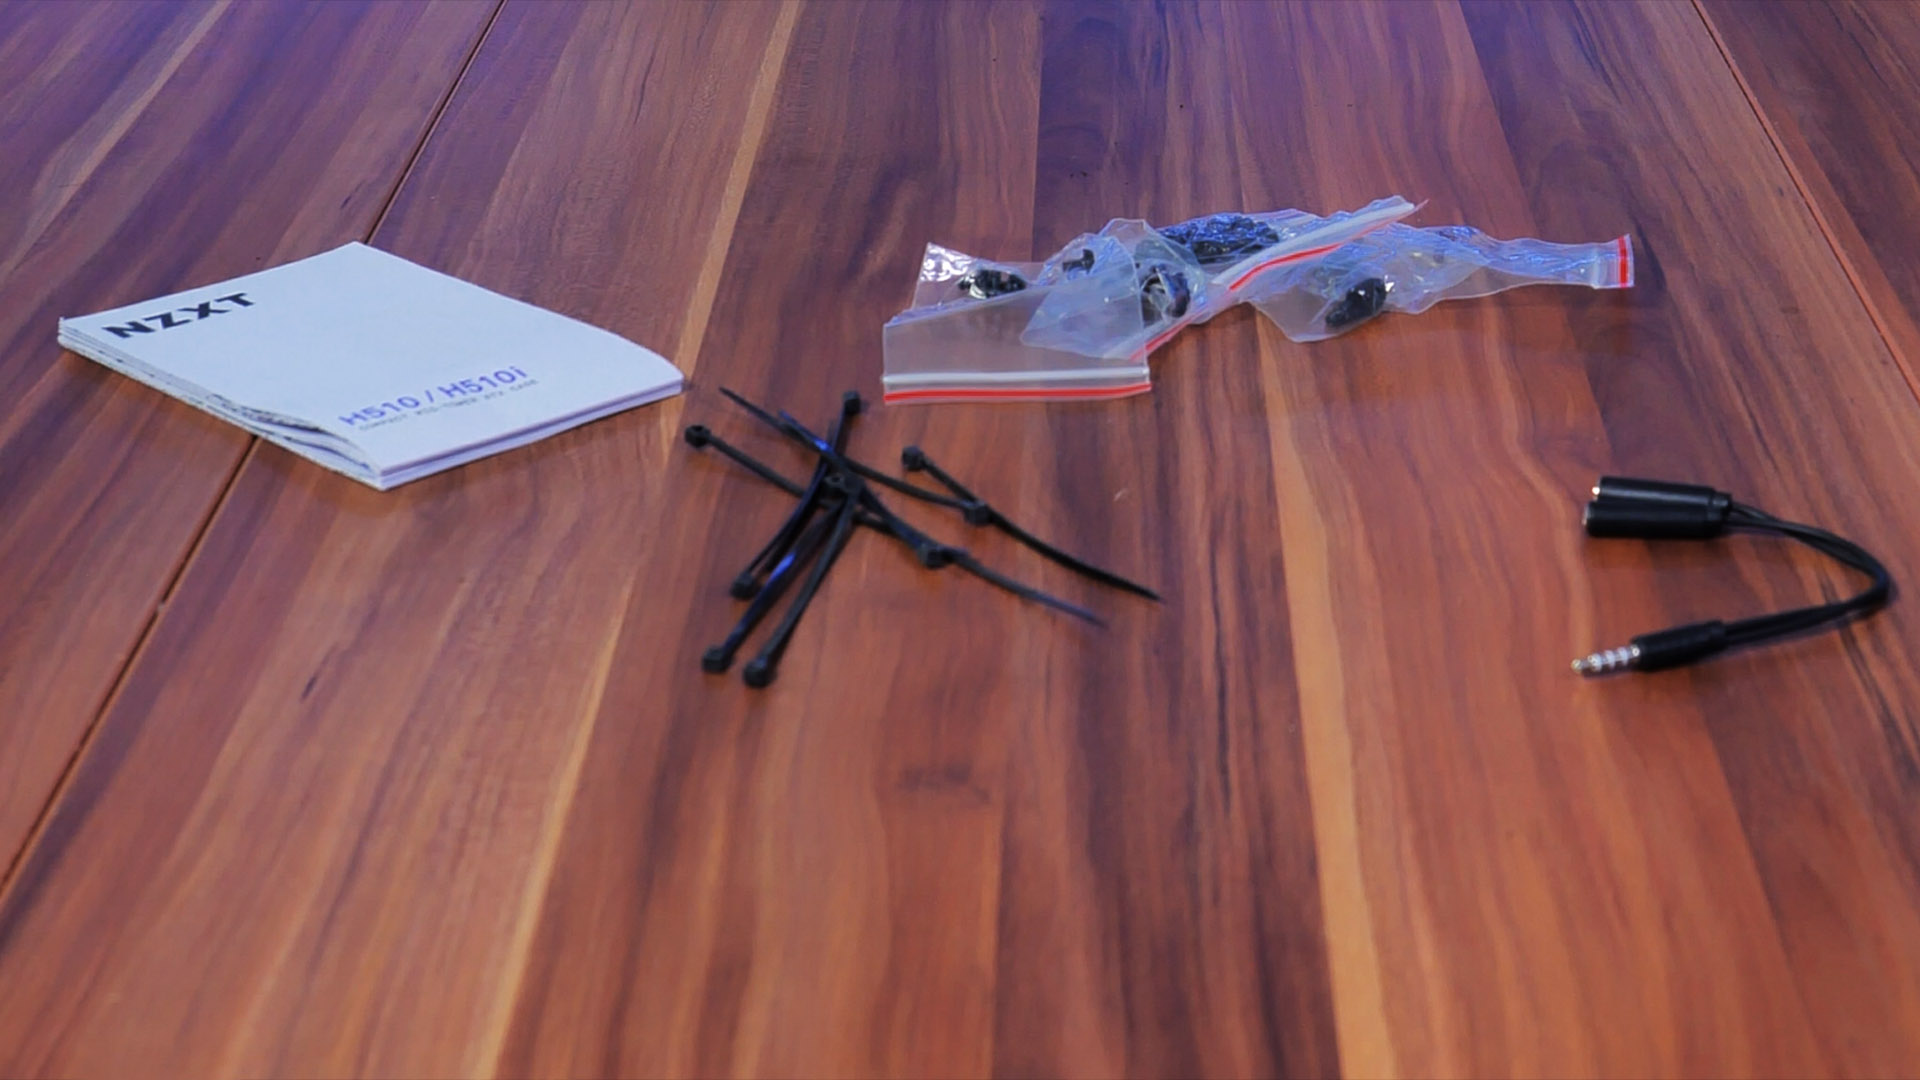
Inside the case, we can find the included Goodies. Hidden inside the Harddrive Cage in the Back of the Case is a little carton box with NZXT written on it. Inside this box, we will find the Instruction Manual, a Pack of screws (PSU Screws, Mainboard Screws, Spacers...), and some Zip Ties.
Additionally to the standard things, there are 2 items that we're not used to. First would be a 4-pole to 2x 3-pole Audio Jack adapter. This may be useful because the case features only 1x 4-Pole Audio In&Out Jack in the Top. By using this adapter, you'll be able to separate the plug back into a single Audio In and a single Audio Out.
The last extra addition is a weirdly looking adapter that ends with all the usual Case Input/Output Wires (Power Switch, Reset Switch, HDD LED, Start LED). We will cover this particular topic later in the Review. Just before that, NZXT did not go the usual route with separate Headers for each Information, but combined everything in one easy-to-use header. Naturally, this adapter can be used to reverse NZXT's decision back to the (annoying) little headers.
Specs
NZXT's H510i does offer a rich feature set on which we will go over in-depth in this review. But beforehand, we summarized the most important Points inside of a list.
| Name | NZXT H510i |
| Type | Mid-Tower |
| Mainboard Sizes | ATX, MicroATX, Mini-ITX |
| Colors | Black / White / Black with Red Accents |
| Side Panel | Tempered Glass |
| CPU Cooler Height | Up to 165mm |
| GPU Length | Up to 325mm |
| 2.5" Drives | 3 |
| 3.5" Drives | 3 (only if max. 2 SSD's) |
| IO | 1x USB 3.1 Gen 2 Type C / 1x USB 3.1 Gen 1 Type A / 4-Pole Audio In&Out |
| Dimensions | 210x435x438mm (Width,Height,Depth) |
| RGB | 2 Addressable RGB Strips |
| Fans | 2x NZXT AER F120 (Back+Top) |
| Fan Spots |
120mm in the Back 120mm in the Top 2x 120mm/140mm in the Front |
| Water Cooling |
1x 120mm in the Back 2x 120/140mm in the Front (or 240mm) |
| Extras |
Included (smart) CAM controllable Fan/RGB Controller (2x RGB 3x 4-Pin Fan) (includes a Fan splitter for additional Fans) Cable Routes in the Back |
Compatibility
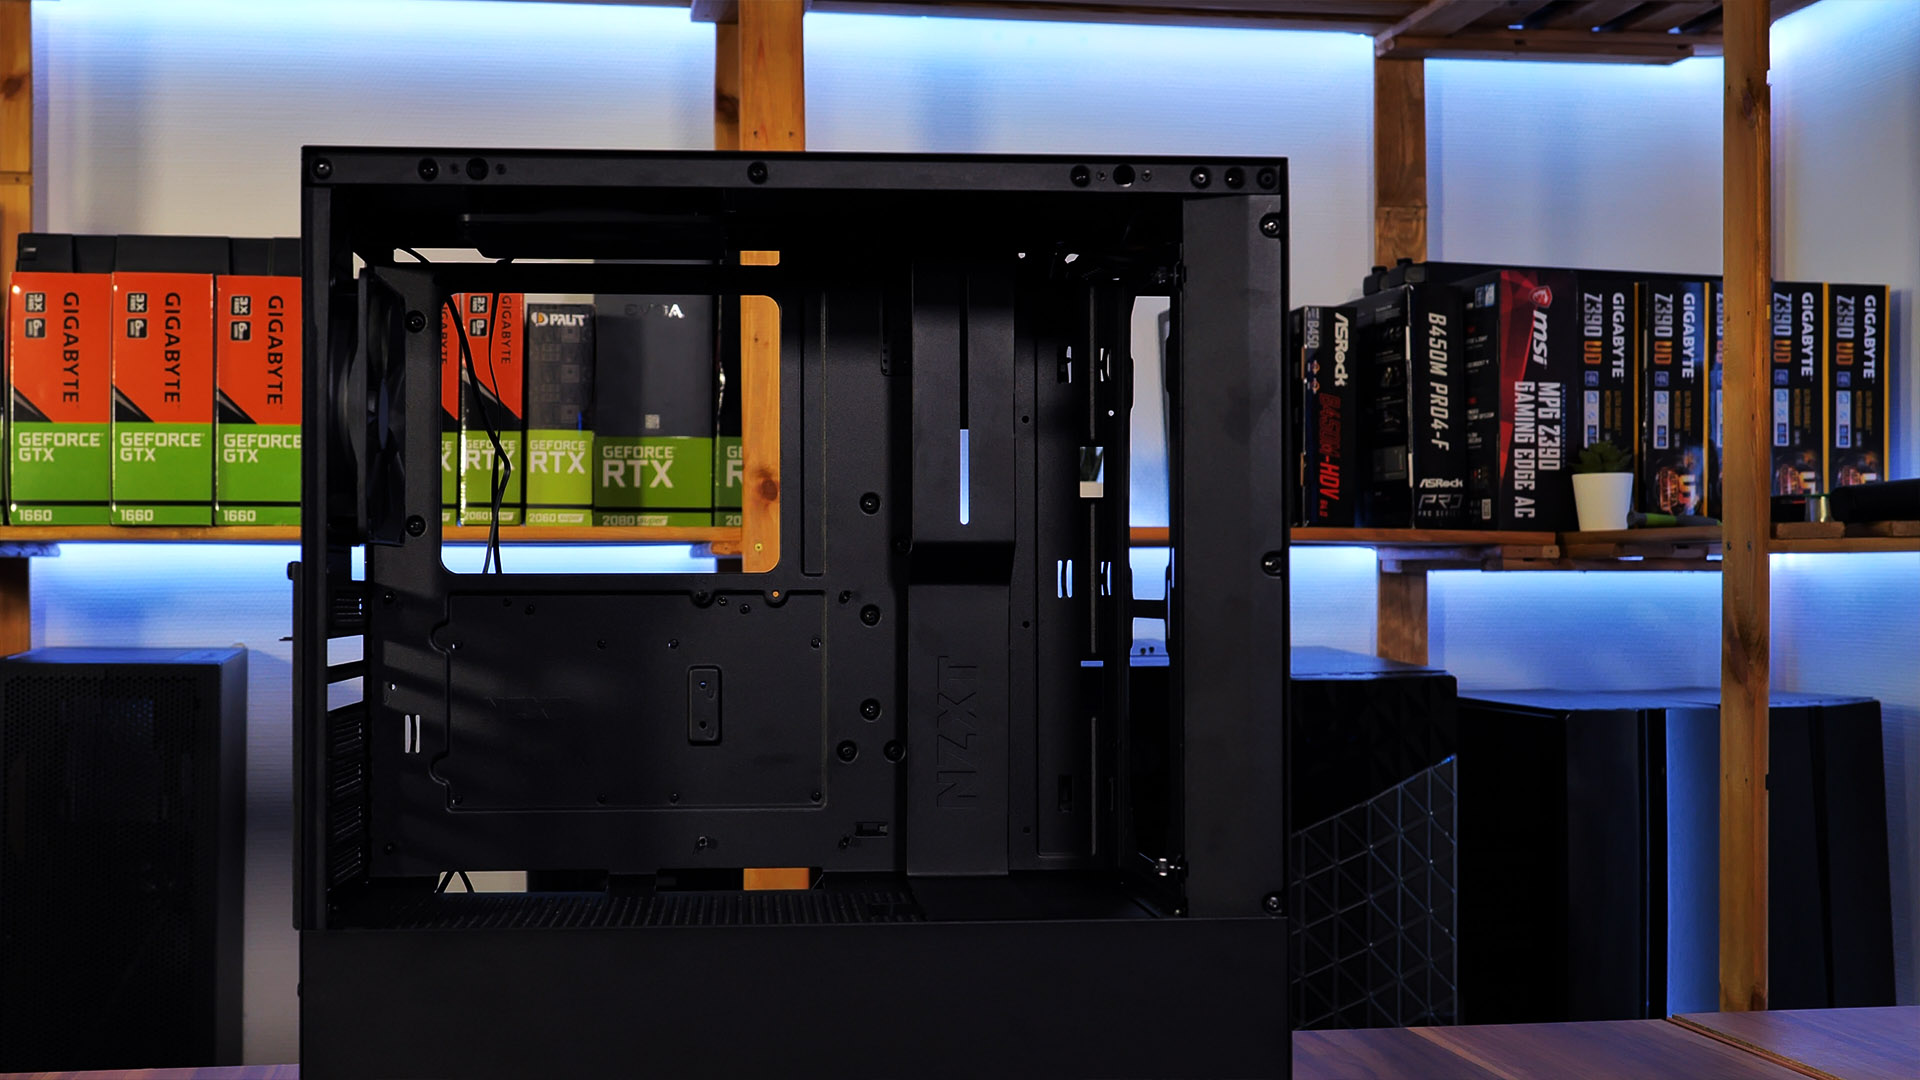
The NZXT H510i is compatible with almost everything a Next-Gen PC should be. While being 210x460x428mm (Width/Height/Depth) big, the H510i still counts as a Mid-Tower Case with support for up to ATX sized Motherboards.
Inside, the H510i also ticks every item on the checklist. 2+1 SSD's or 3 Full are nothing usual for Mid-Sized Cases. In the Back of the Case, we will find 2 SSD brackets attached to the back of the Mainboard tray. Behind the PSU placement is a Hard Drive cage, here you can install 2 3.5" Drives and an additional 2.5" or 3.5" Drive ontop.
In terms of power supplies, the H510i provides support for the ever-so-used ATX size in a separate Power Supply tunnel. While the place behind the PSU is not 'small' by any means, the H510i allows the removal of the Hard Drive cage, providing even more space.
IO
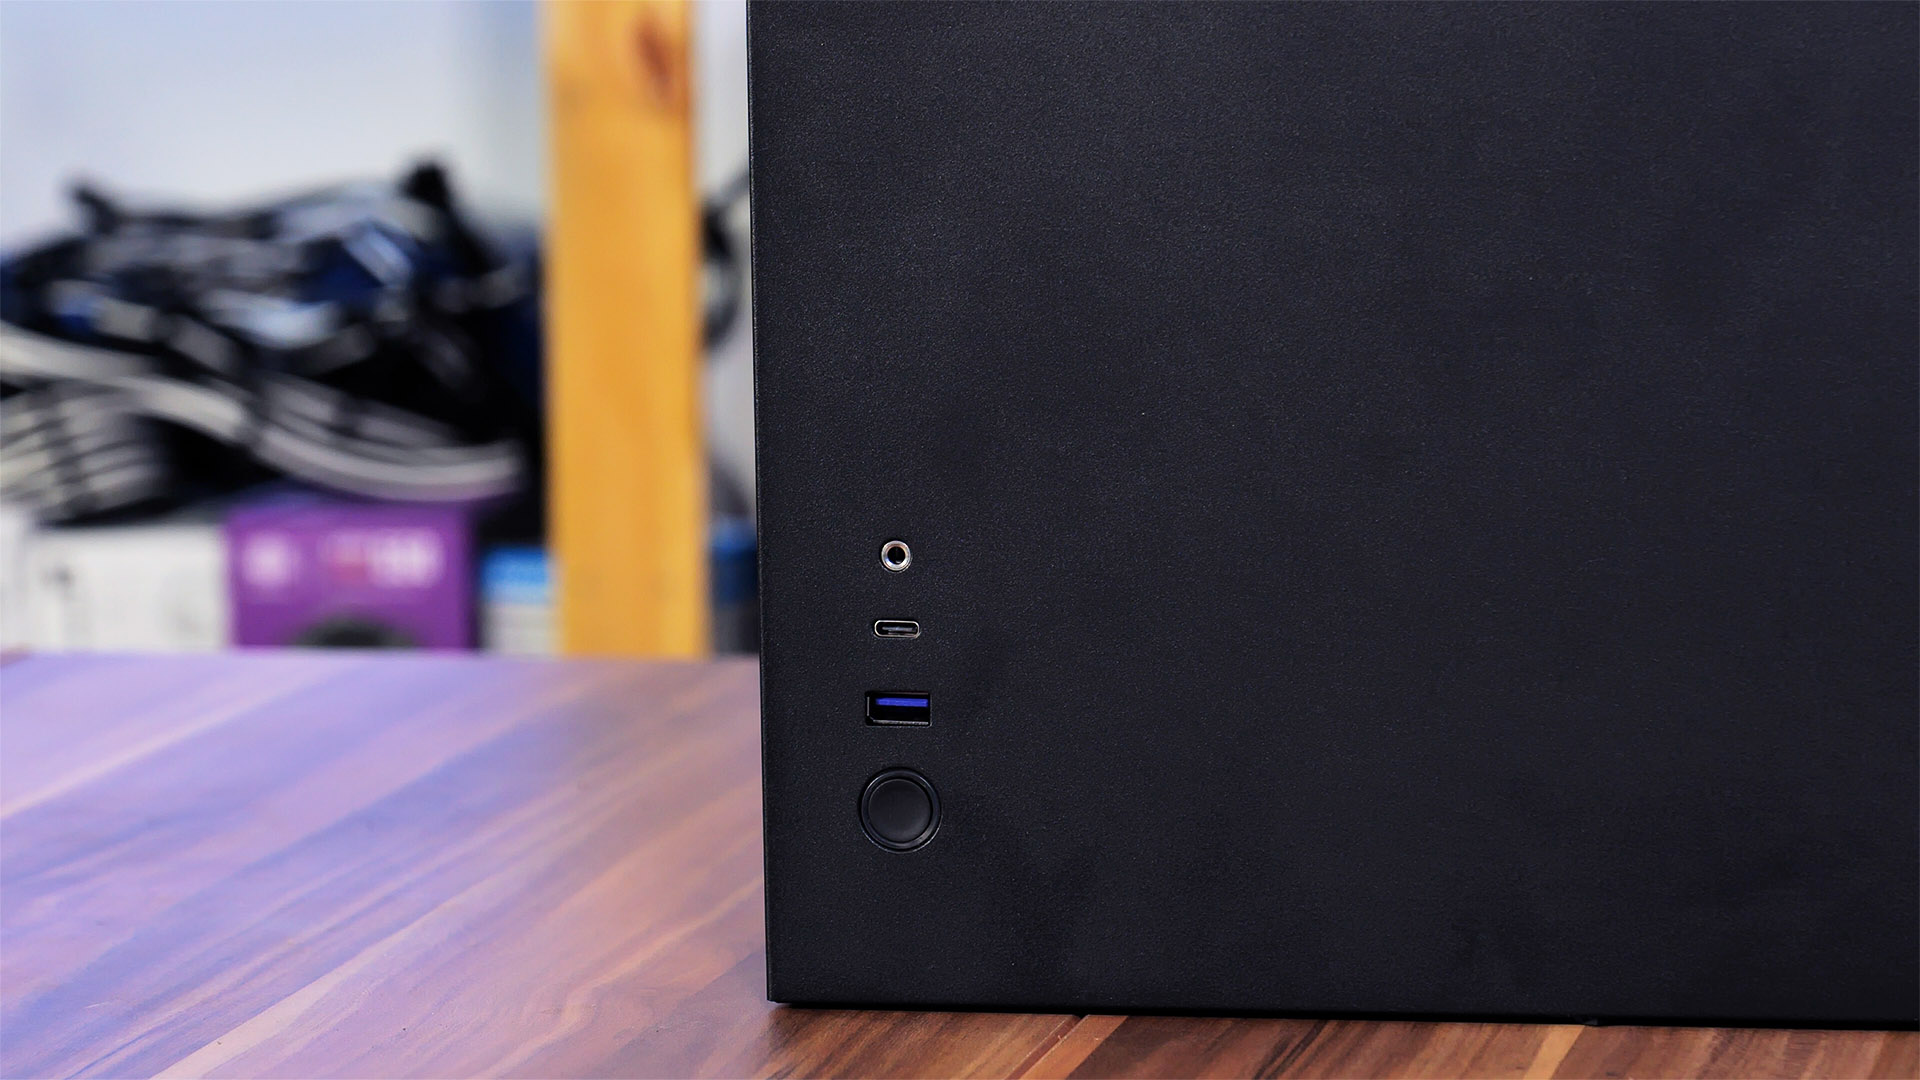
In the IO Section, NZXT managed to be up-to-date. A USB 3.2 Gen Type-C, a USB 3.1 Gen 1 Type-A is exactly what we expect a 2021-Case to feature. NZXT decided to combine the Audio-In and Audio-Out port into a single 4-Pole Jack, but did not forget to include a 4-Pole to 2x 3-Pole Adapter in the bag of goodies.
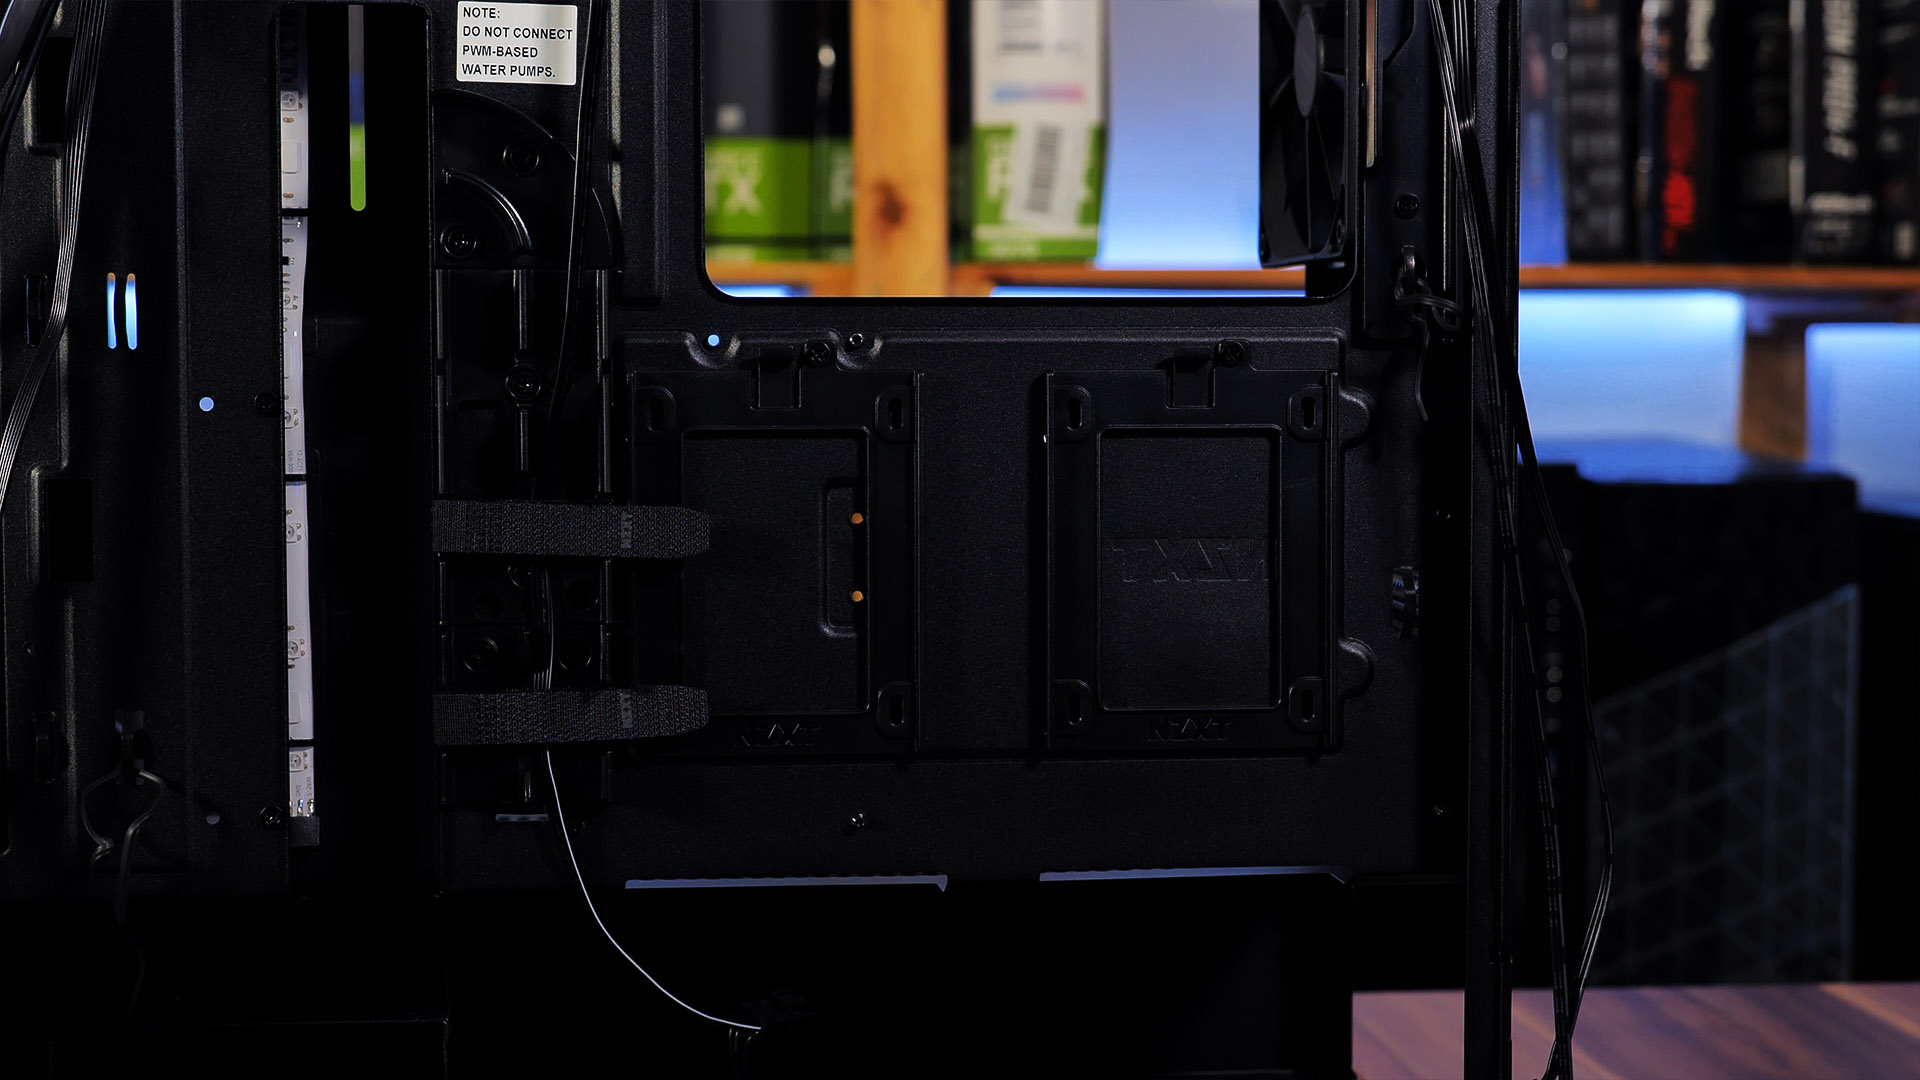
Cable management

The Cable Management is exactly where the NZXT H510i shines the Most. Additionally, to the usual Cable-Cutouts around the Mainboard, the Interior of the H510i releases a Cable-Hiding-Bracket that spans from top to bottom, allowing to hide the usual Cable-Management problems, like the 24-Pin, USB Headers, or Case Fans. Conveniently, by removing 5 screws in the back, this Bracket can be moved a couple of centimeters to the right or left, allowing for more clearance in case your Custom Braided 24-Pin is really thick.
* But beware, the H510i hides an RGB Strip in this exact bracket, this means that moving the Bracket left or right is no issue, but removing it forcibly may damage the wire attached to the Strip.
The most delightful moment in our initial Build inside of the H510i was the discovery of Cable routing channels. NZXT attached separate channels for the 24-Pin, additional USB/Fan/RGB Wires, and CPU Power connector. This small yet powerful addition made the creation of a Cable-managed Build easier than ever. To top it all of, there are Velcro-strips attached to the Channels, holding the wires where they're supposed to be.
RGB-/ Fan- Controller
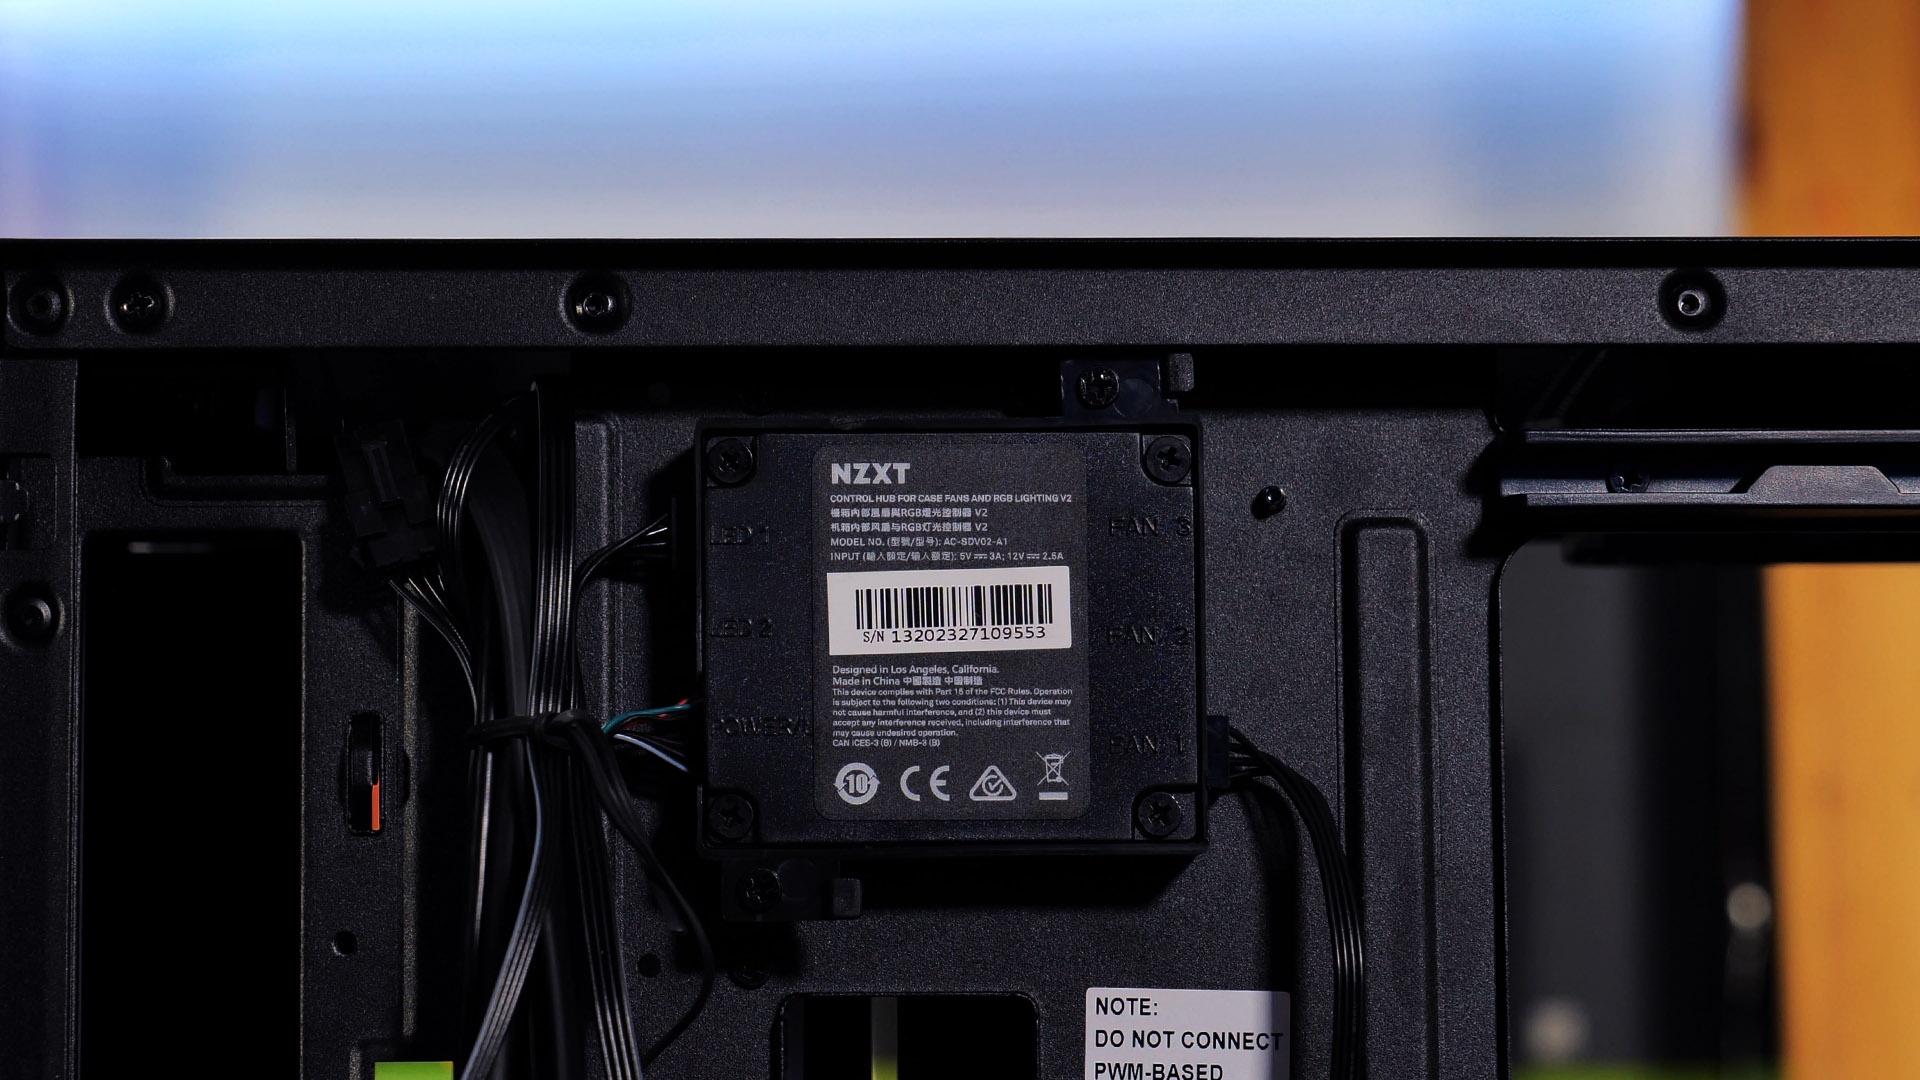
One of the main differences between an NZXT H510 and an H510i is the addition of the so-called "Smart Device v2", a small little helper placed in the Top of the Case, behind the Motherboard Tray.
This little Helper allows to Power 2x RGB (Hue) addressable Strips or 5x AER RGB Fans. Additionally, the "Smart Device v2" doubles as a Fan Controller with 3x 3-Pin PWM Ports. Conveniently, NZXT already pre-attached a 3-1 PWM Splitter which allows connecting 5 Fans out of the box. (though there are 2x Fans included, thus leaving 3 Empty spots)
Powering the "Smart Device v2" is just as convenient as we are used to by NZXT. A SATA-Power for ... power, and a USB Header for the Control. Using an internal USB-Header in order to connect this device, allows Users to not rely on an RGB Header on their mainboard, meaning that (to our best knowledge) every Motherboard will get RGB Functionality with this case.
NZXT Cam Software
As this review is focused on the H510i Case and not on the NZXT Cam Software (even if it is a part of it) we will try to keep this segment as short as possible.
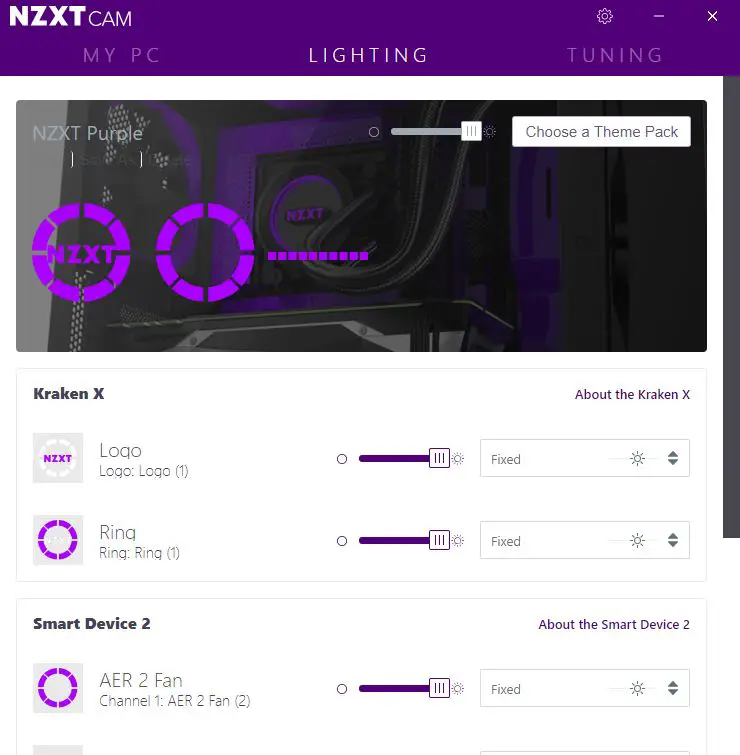
After the Installation, the NZXT Cam Software will scan the Mainboard USB ports for Connected CAM-compatible devices (NZXT Cases, Kraken AIO, Strips ...). Once the process is complete, the User will have the possibility to manage everything centralized in CAM. While using the Menu-point "Cooling" we can adjust the fixed Fan Speed, set our personal Fan curves, or use one of NZXT preconfigured Fan Modes.
The "Lighting" Tab allows controlling each CAM-Device Separately. If only the H510i Case is used, there will be 1 Device in this Section that is controlling the 2x RGB Strips. If additional NZXT Hardware has been used, the list will fill with every individual device.
Cooling

The NZXT H510i features a rather moderate Cooling approach. With 1x 120mm in the Back, 1x 120/140mm in the Top, and 2x 120/140mm in the Front, the cooling compatibility is far from being endless. But, NZXT made sure to include some options for Watercooling enthusiasts, with a 120mm Radiator in the Back and an up-to 280 Radiator in the Front, everybody should be able to build a decently cooling machine.
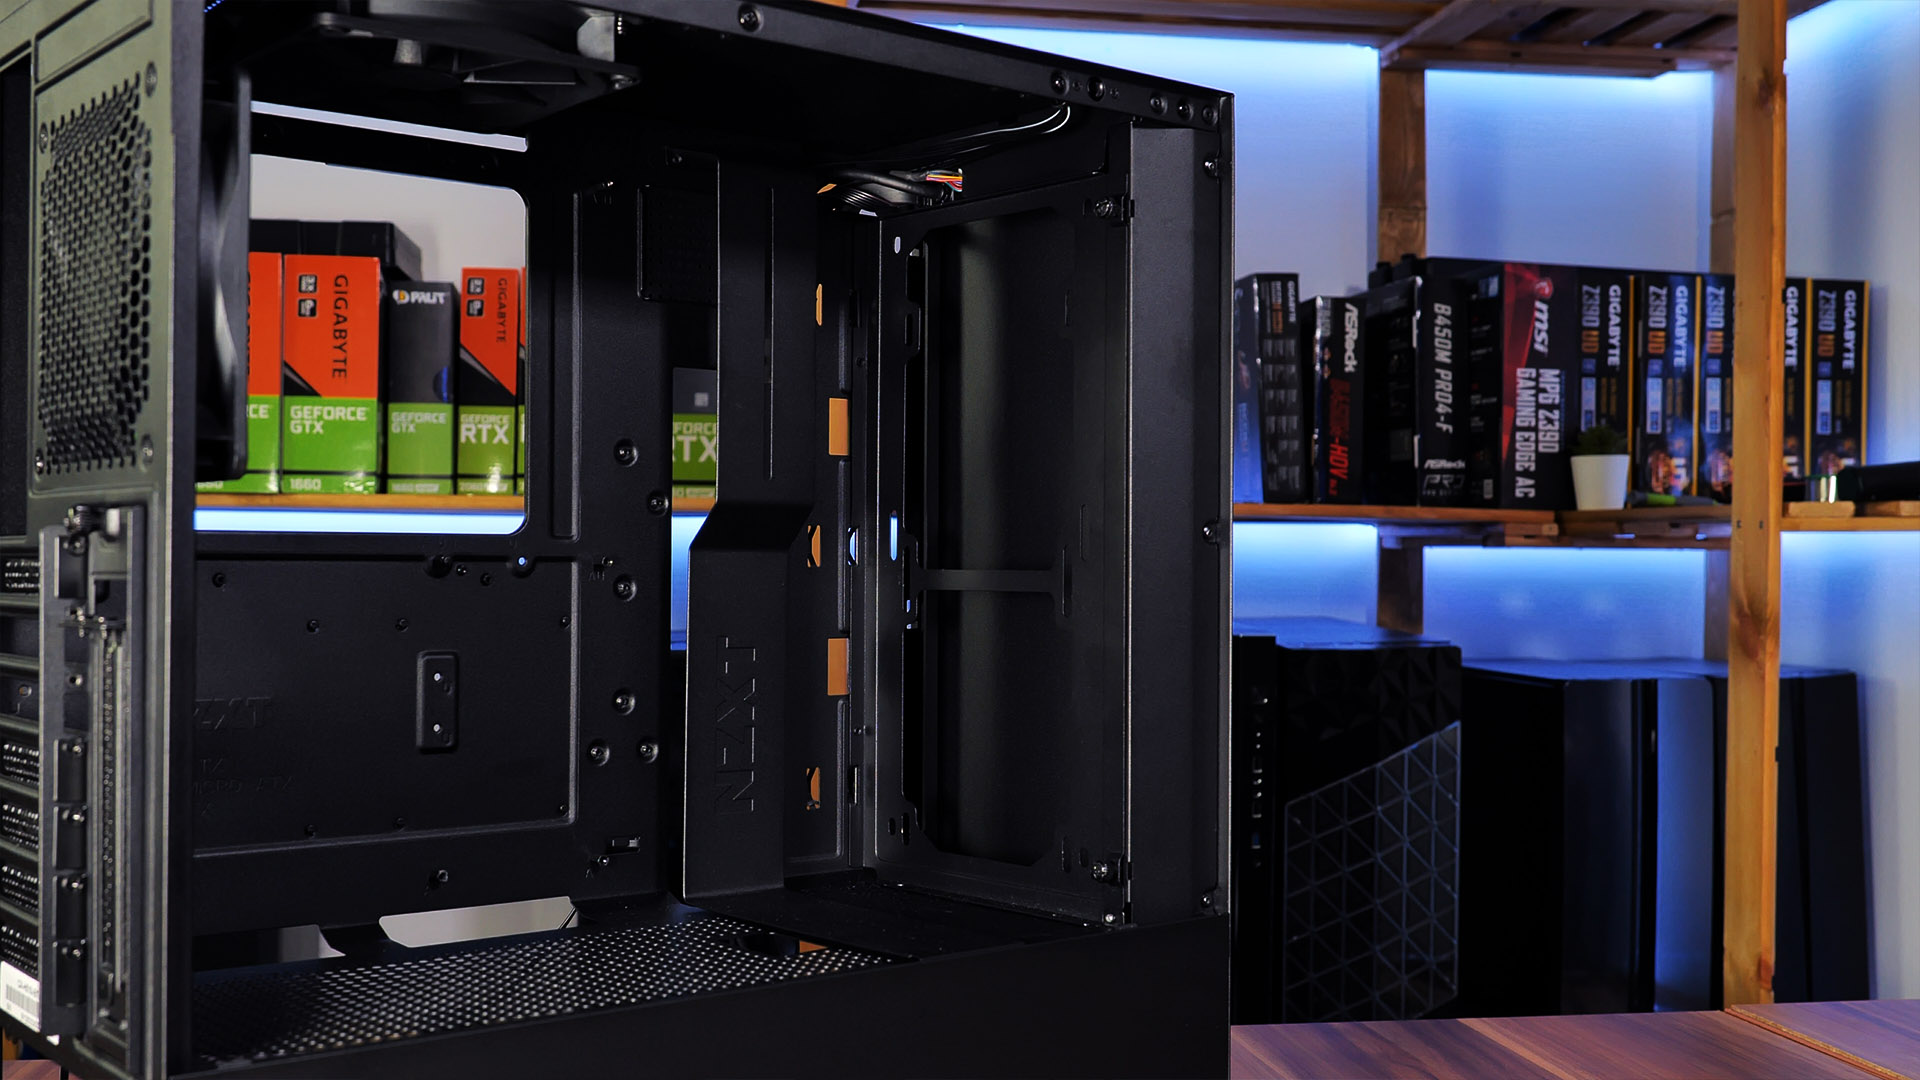
While many cases feature a (somehow) frontal Airflow design, NZXT took a different approach. The Front Fans are pulling air from the Side Panel or from the bottom of the case, already creating a friction point at the very start, but we will see how this performs in the Performance section.
While the Top and Back Fan spots are composed of simple cutouts, the PSU, and Front Air Vents have a (very) high-quality Mesh filter attached, which are easily removable with a simple clip.
Even though we were not impressed with the H510i cooling setup until this point, we have to give credit where credit is due. Instead of the "Budget" approach of a (brutally) removable front panel, NZXT decided to form the Top and Front of the case out of a single sheet of metal. This also means that there is no way of mounting the Front fans like we're used to. In order to circumvent this issue, NZXT has separated the Front fans to be mounted to a separate Fan-Panel. This Panel can easily be removed from the inside of the case, allowing for an extremely easy Fan installation, followed by re-inserting the Fan-Panel. We really liked this approach.
Another +1 for this case comes in form of included Fans. NZXT did not just throw a pair of cheap 1€ Fans into the H510i, just to fill the Spots. No, NZXT used their in-house AER F120 fans which, even though not the best-in-class, are very capable Case Fans, providing the buyers with the privilege of not having to replace them because they are bad.
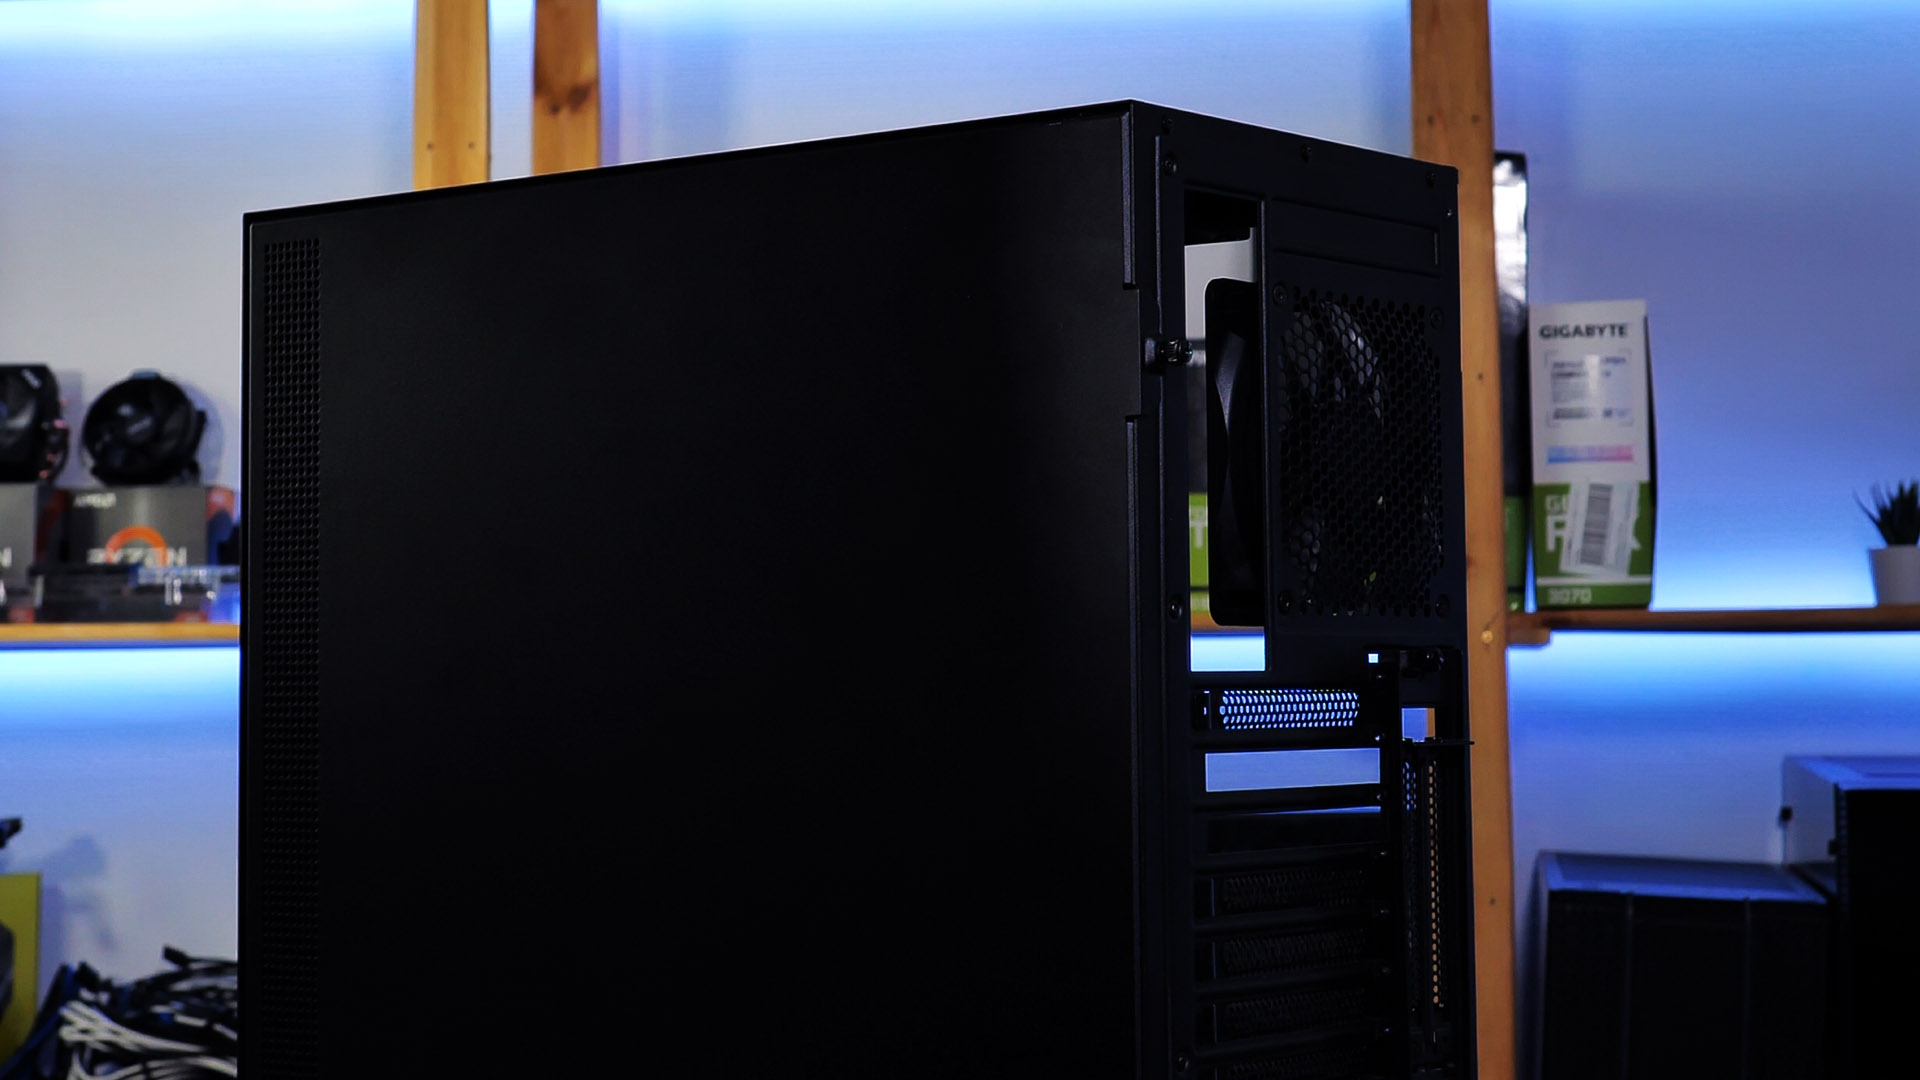
Design
As usual with the Design of Products, the NZXT is a Hit or Miss as in the end, the Taste is up to the buyer. In our opinion, the H510i reflects the usual NZXT-Style. Clean, Not too much of anything, but what is there, should be there. This approach resembles what Apple is producing, and we can really get behind that.
Usually, NZXT Products are just clean-looking and have a Mature design. The H510i is no different in this regard. For us, the Design works, it Sleek, simple and looks good with any setup, but as mentioned before, this is up to you.
Installation
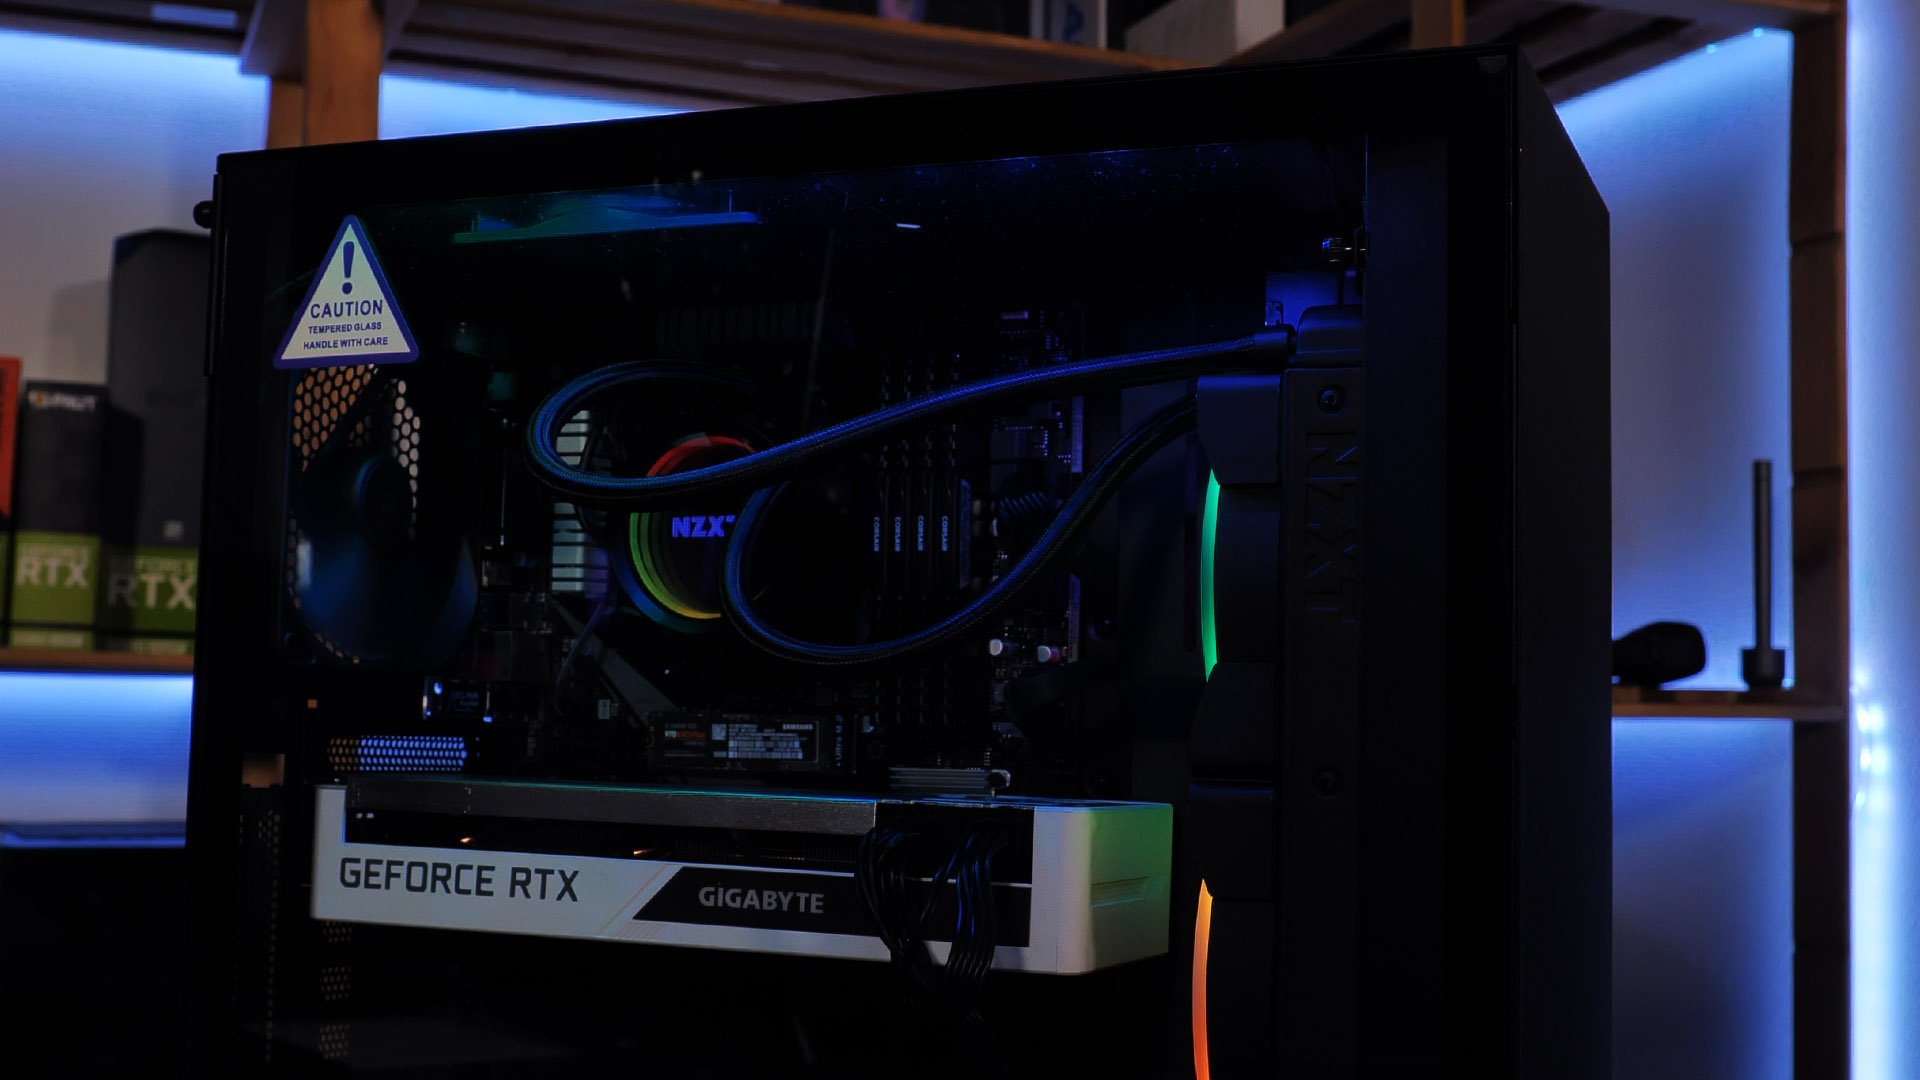
For this case we used the following components:
- Gigabyte B550M DH3H
- Ryzen 3700x
- 4x Corsair Vengence
- Gigabyte Vision RTX 3070
- NZXT Kraken X53 RGB
- Be Quiet Pure Power 11
Building a PC inside the NZXT H510i was (for now) the most enjoyable ride we've had. There was more than enough space to fit all the components in. The Cable management Options in the Back and Front of the case made it easy to create a clean Setup. Buying into the NZXT CAM-Universe allows using of all the NZXT devices, which are not only easy to use, but also to connect. No RGB-Headers, no Fan-Headers, no outdated Molex Cables, just clean, simple, SATA & USB.
Using a separate Fan/Radiator Bracket for the Front Fans is nothing unheard for us, but we have yet not encountered a case that actually comes with one of them. Yet, we found it (unsurprisingly) easy to use and relieve compared to the traditional approach. As we used an NZXT Kraken X53 RGB in this build, we usually would have to fondle around to keep the radiator in place while we try to fit the screws through the Case, Fans, and then Radiator. But using NZXT's bracket made it extremely easy by allowing us to place everything on the Table and simply attach everything while enjoying a straight (and un-wobbly) surface.
Usually, this section is used to explain unexpected findings, but building inside of the NZXT H510i was as easy as it can be, and there were no issues down the road.
Performance
As we already mentioned, Frontal Airflow Cases tend to be better when it comes to cooling. This stems from the fact that there are fewer friction points as the air does not have to travel around corners. But in this case, something surprising happened.
Just like we always do, we tested the H510i with our no-CPU-Fan test. For this, we use our Ryzen 3700x at 4.2Ghz 1.2vCore, slap a Be Quiet Dark Rock Pro 4 on there (without any fans), attach 2 Arctic P12 in the Front and 1 in the Back, grill the CPU with HeavyLoad, and see how the Fans are able to keep the CPU cool.
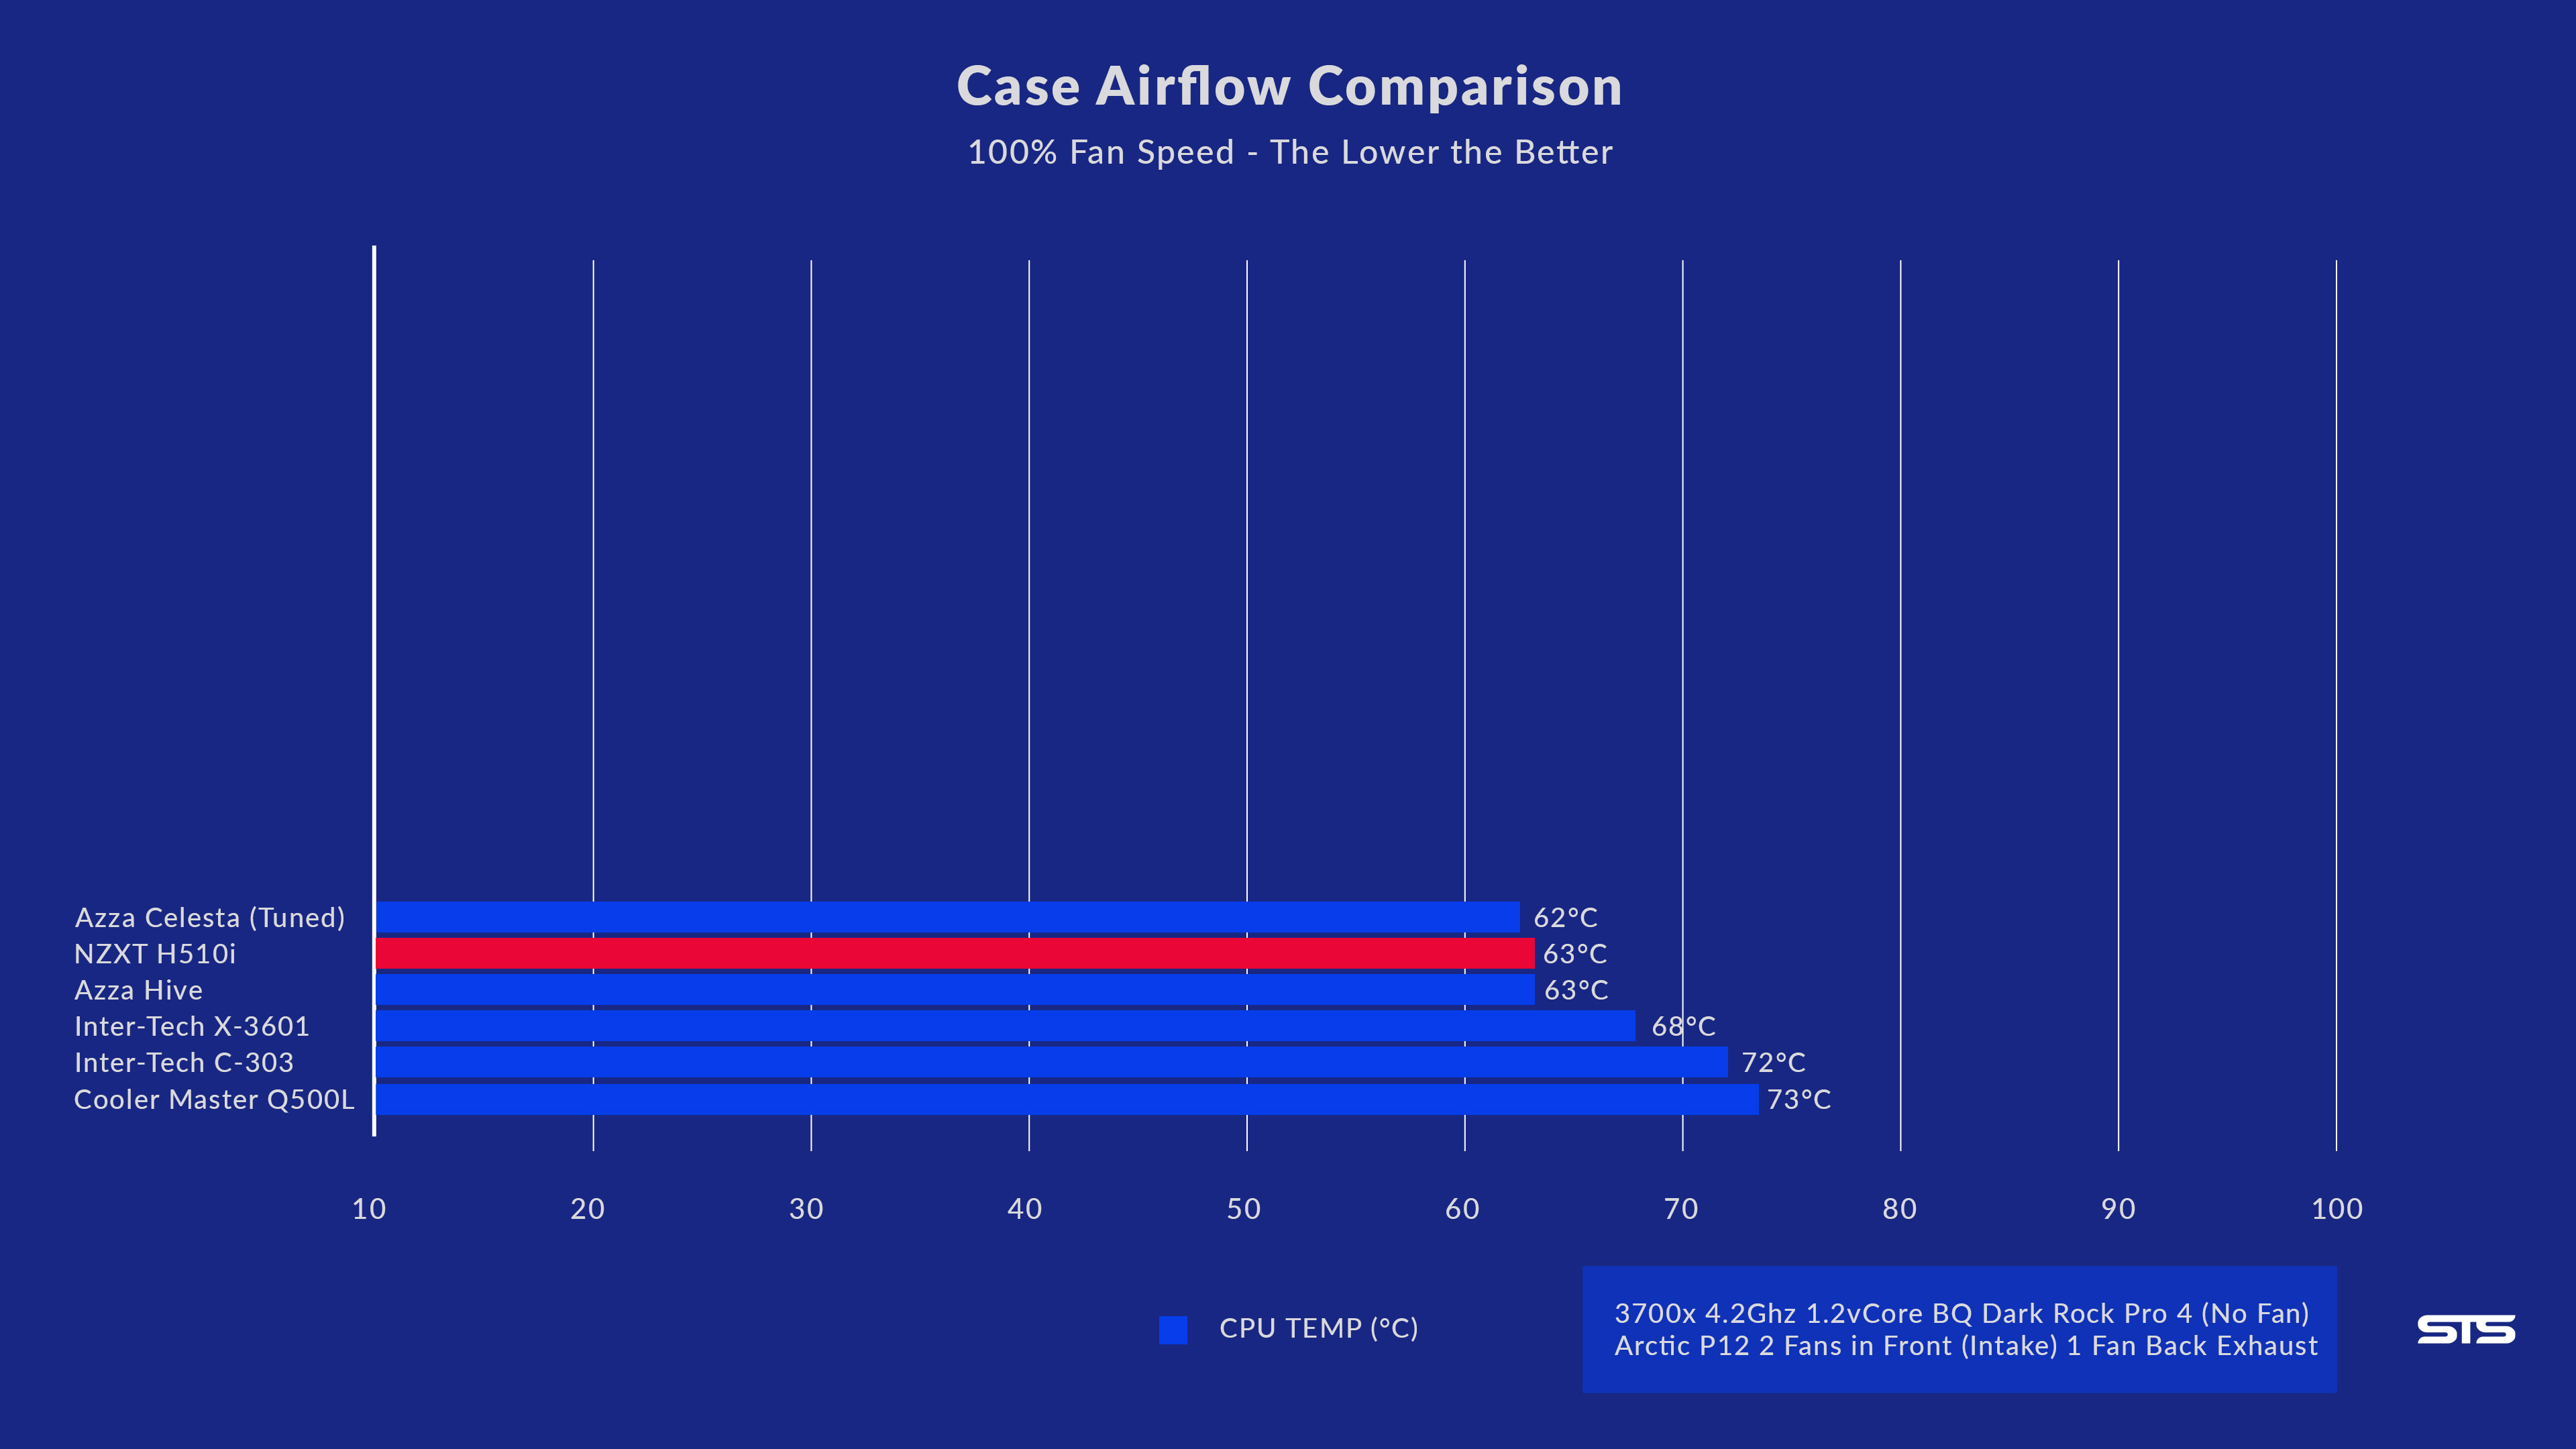
To our very surprise, the H510i managed to keep the CPU at 63°C, placing it just behind the (tuned) Azza Celesta and just next to the Azza Hive, both Frontal Airflow cases.
This means that even though the Air has to travel around a corner, NZXT managed to perfect the Airflow inside this case to the degree of a Frontal Airflow Case.
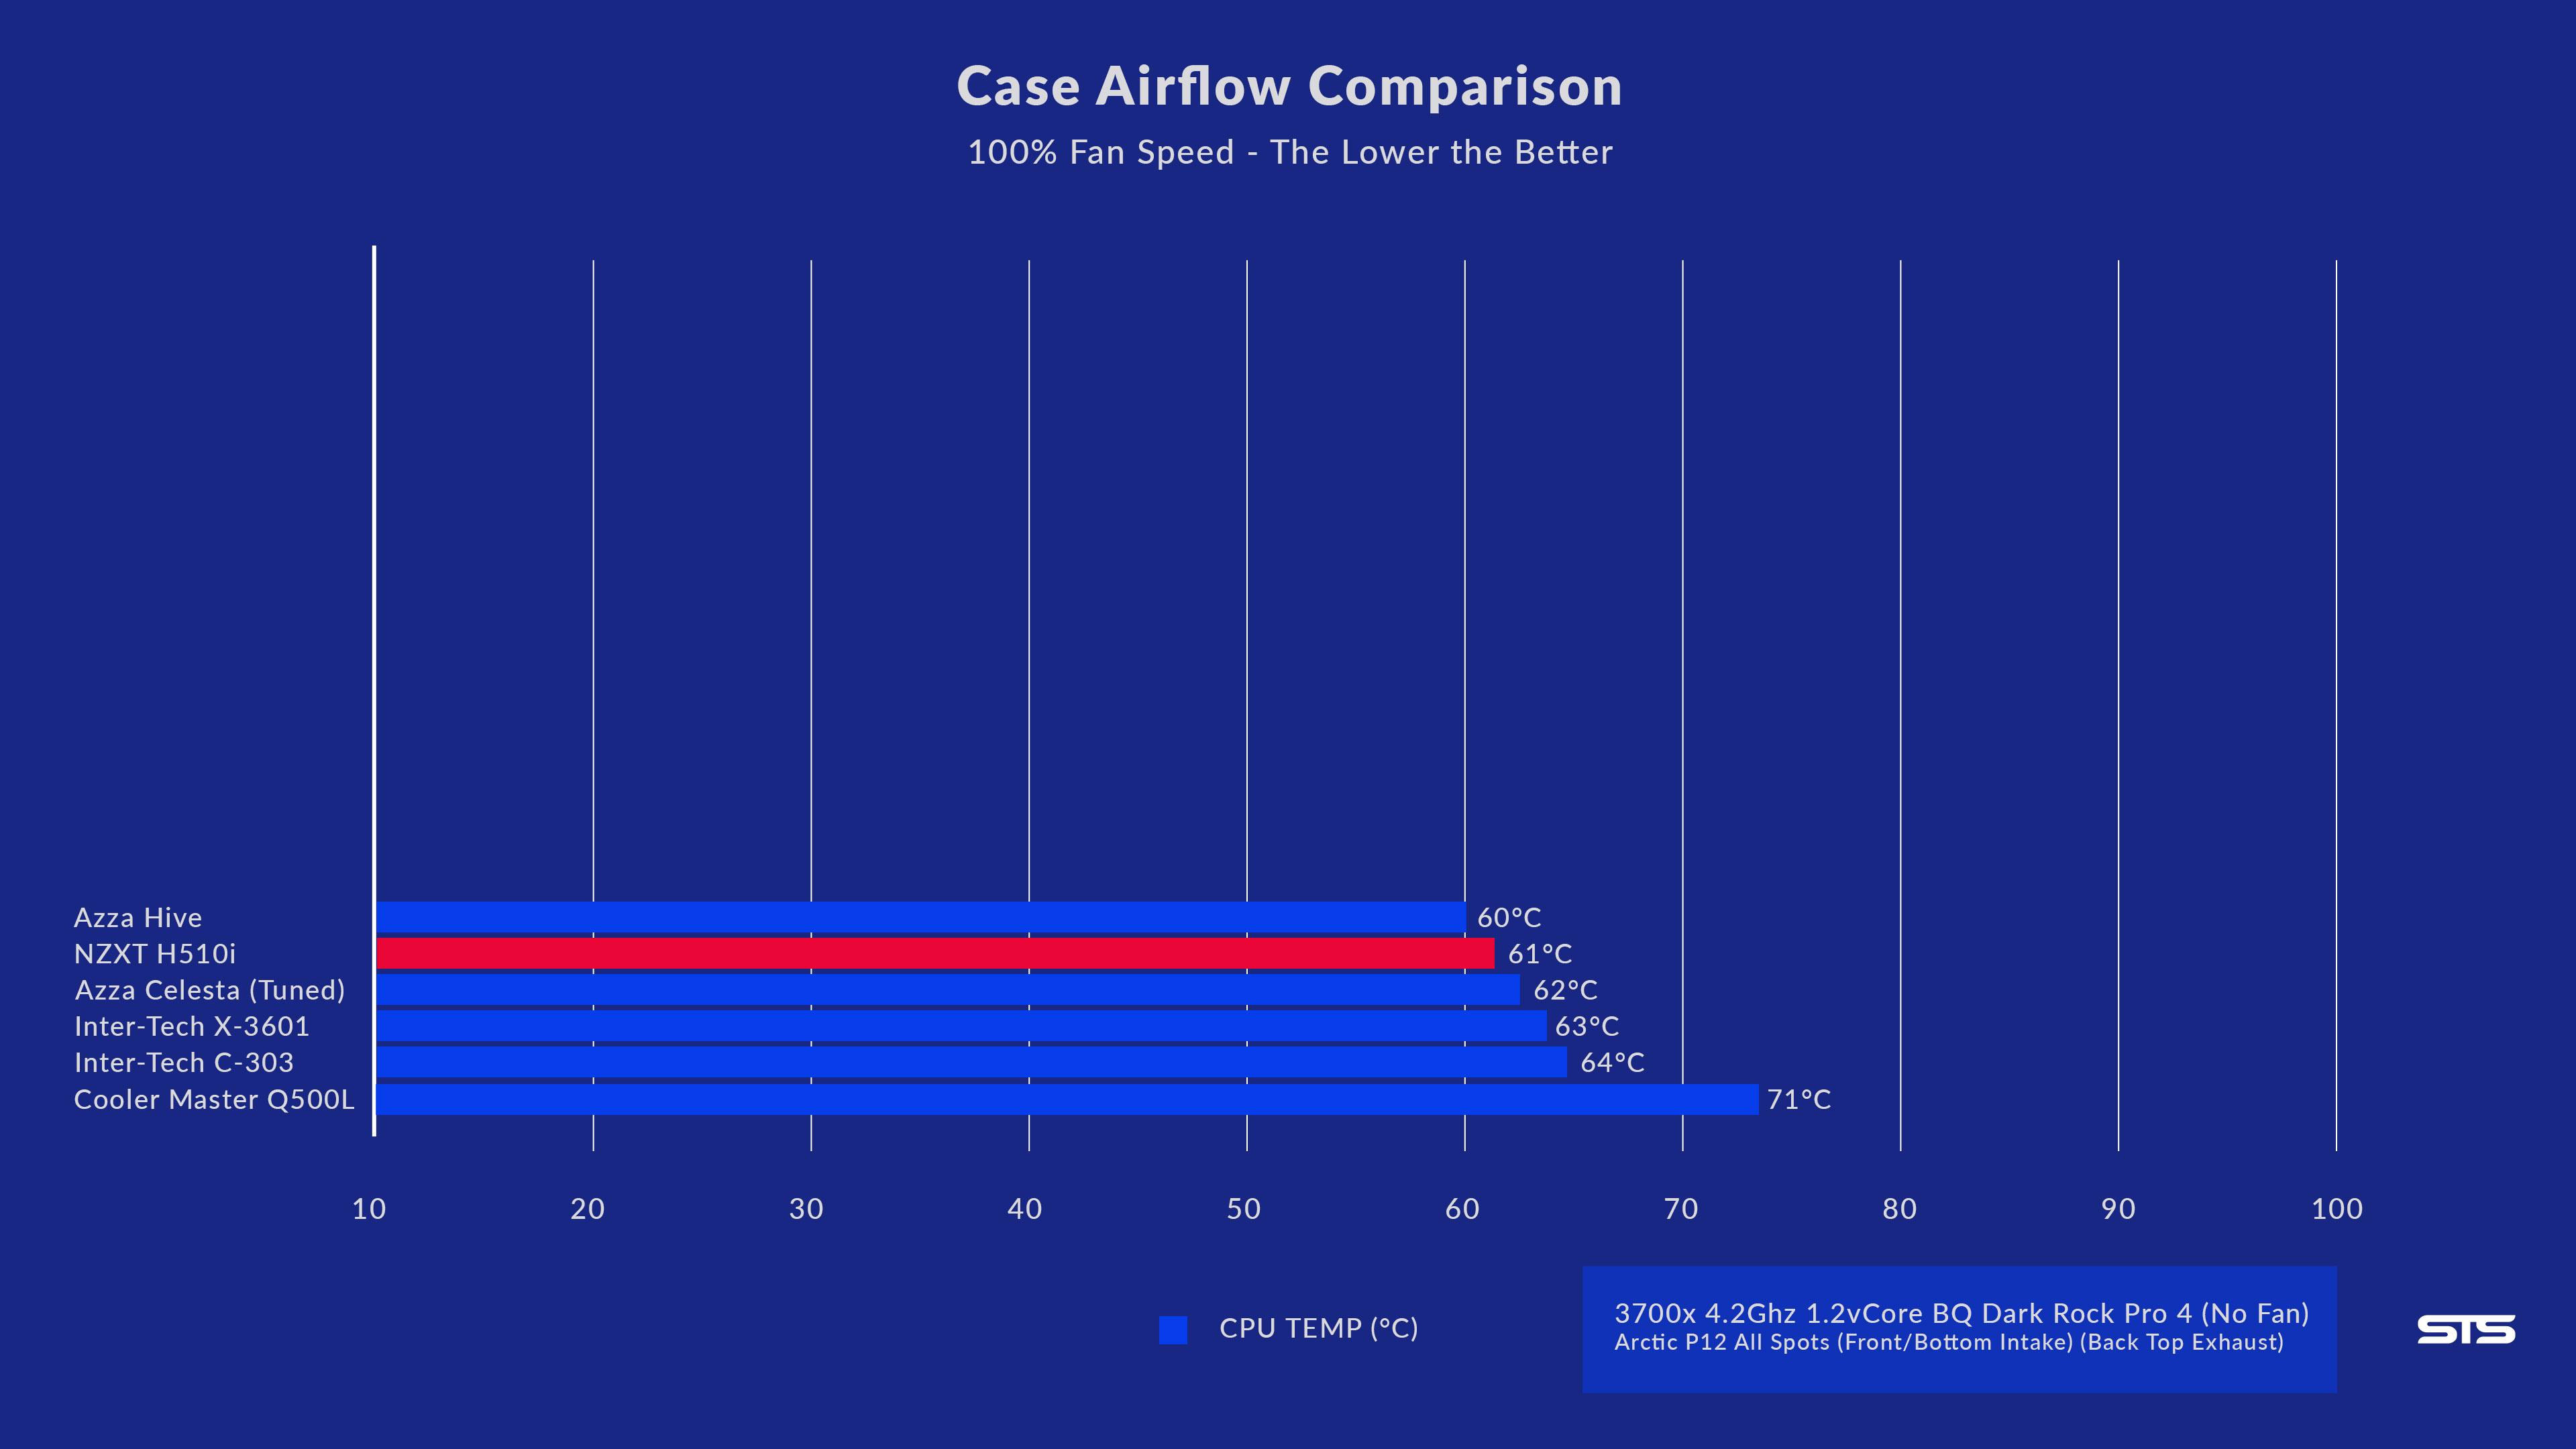
For our second test, we simply fill all the Fan Spots inside a Case, with the Front and Bottom Spots being Intake and Top and Back Spots being Exhaust.
In this category, the NZXT H510i managed to surprise us again. With 61°C, the H510i managed to out beat the Azza Celesta and place itself just behind the Azza Hive 450.
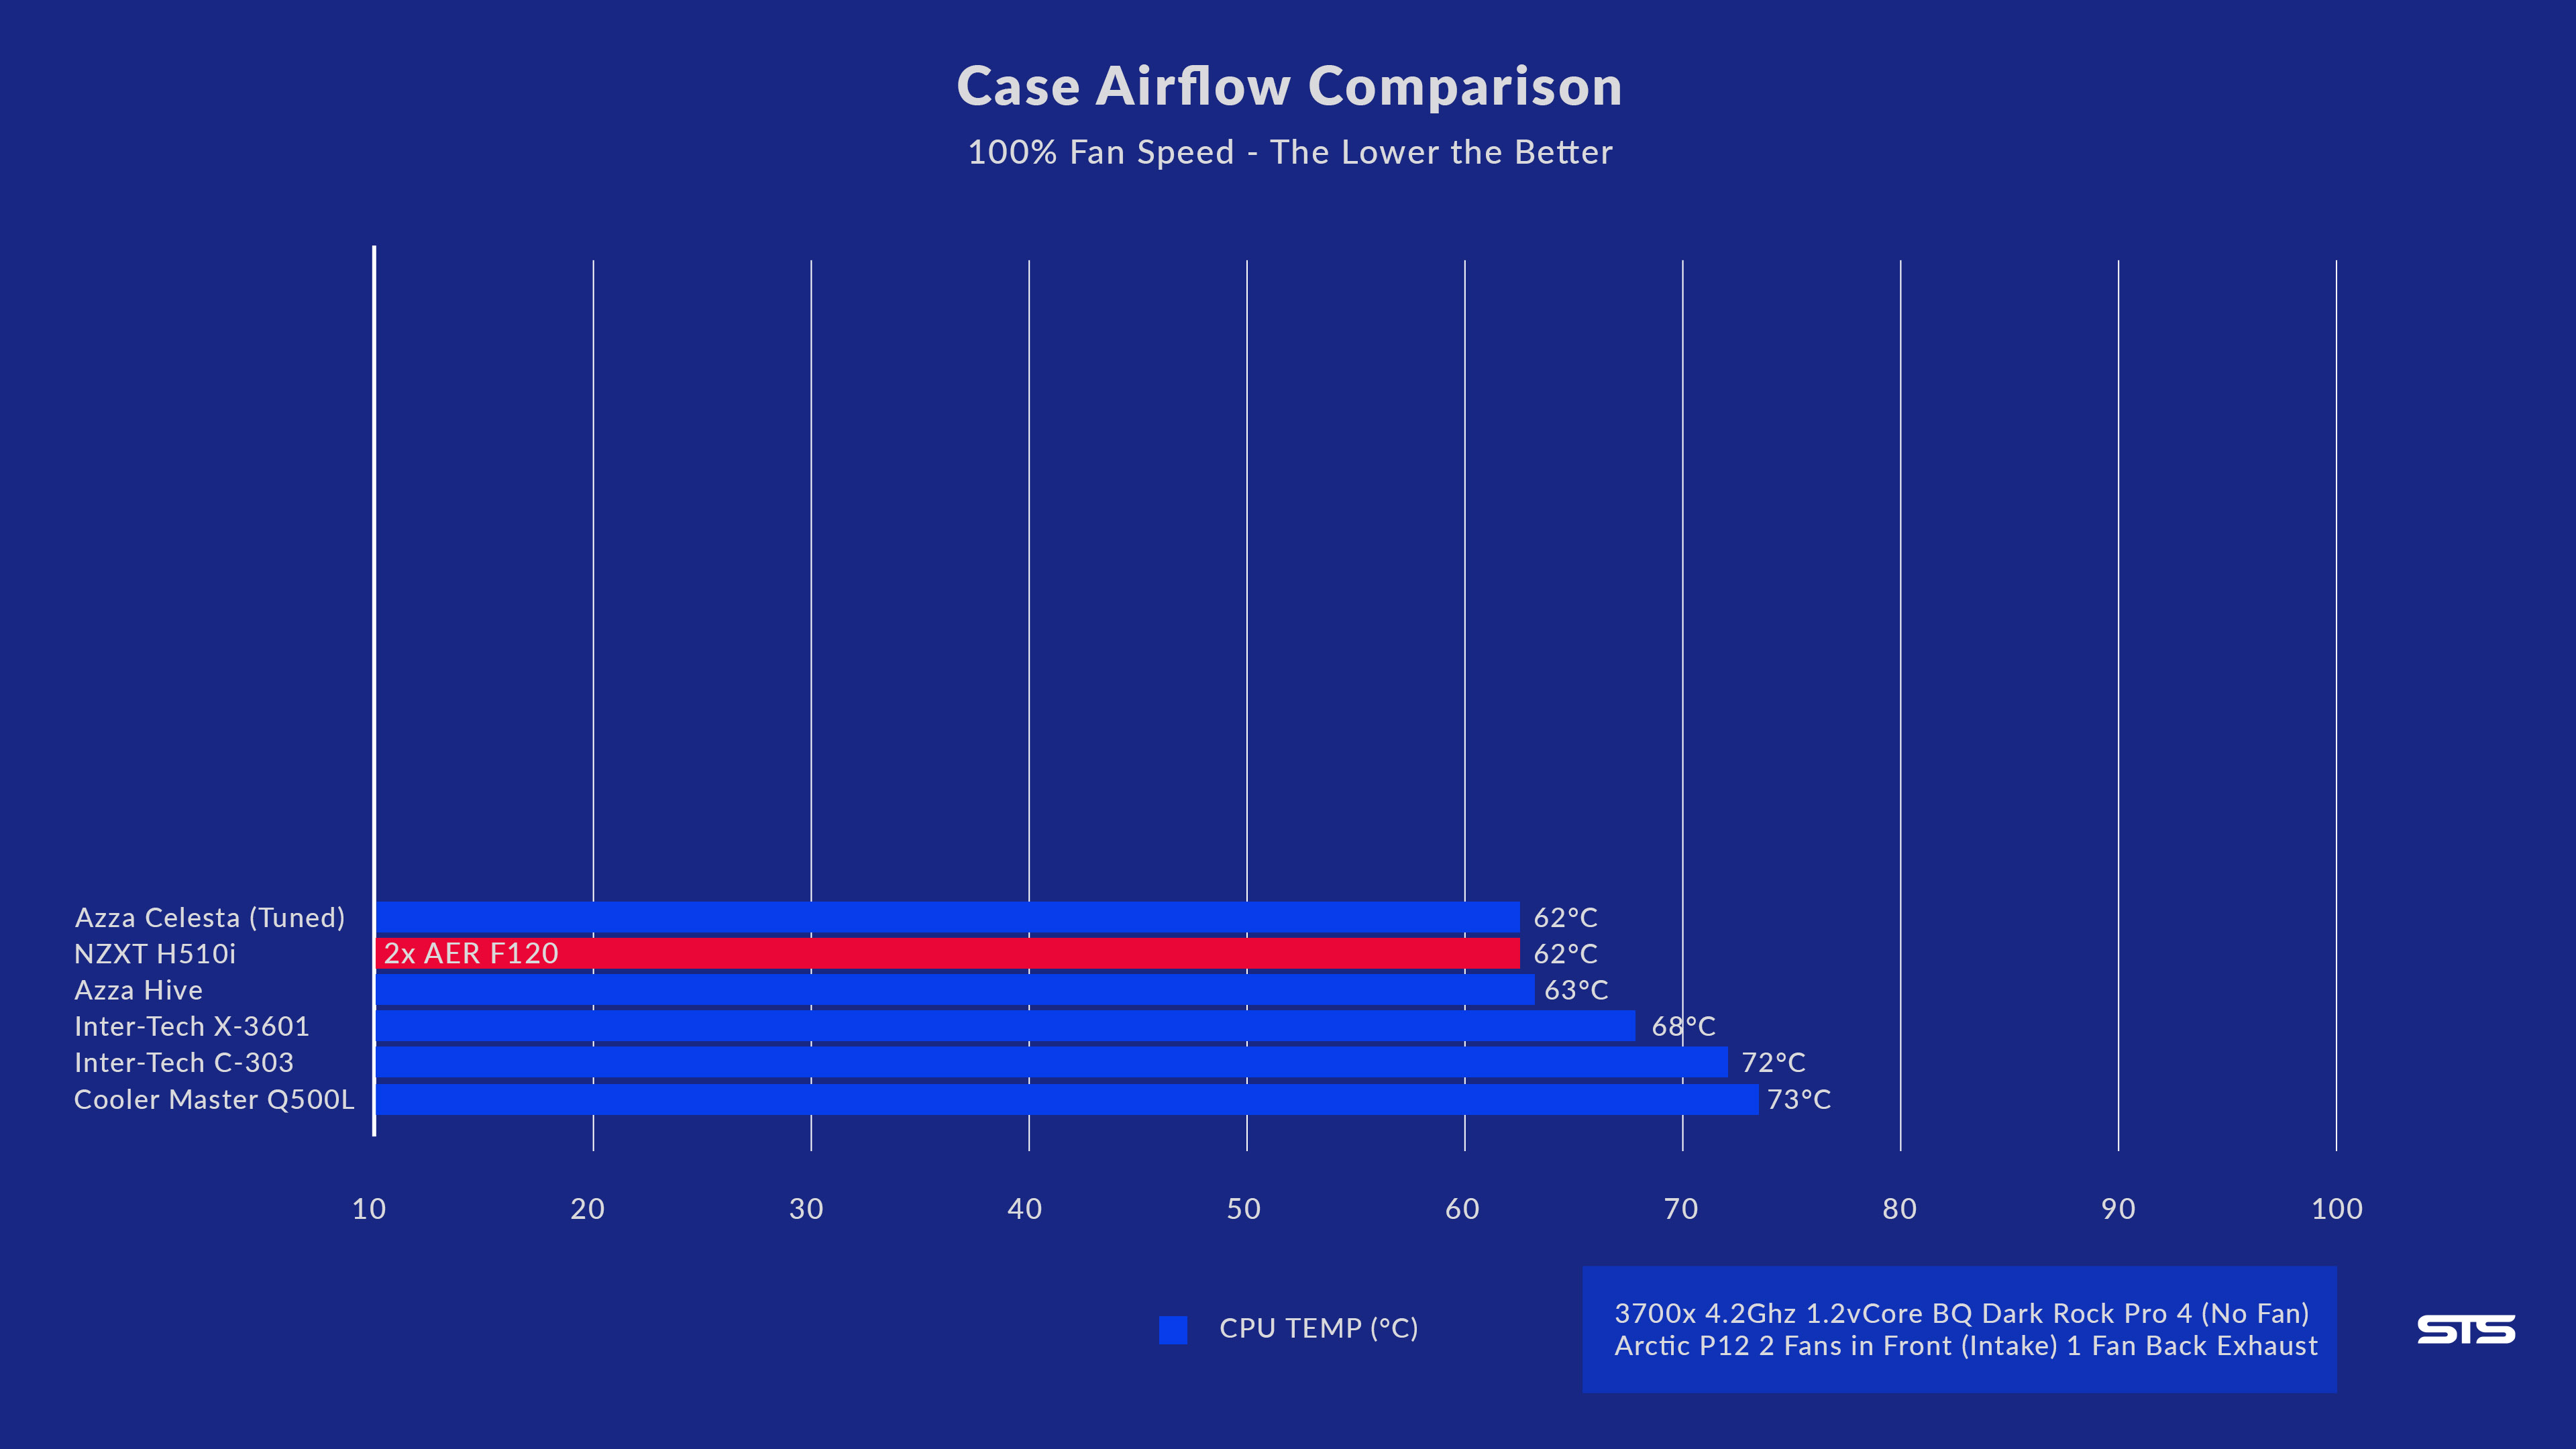
Because the NZXT H510i comes with 2x Preinstalled AER F120 Fans, we decided to put them to the test.
Compared to our Normalized tests, the H510i (original) managed to keep the CPU at 62°C, indeed not a bad result.
Overall, the results of the H510i are incredible. We did not expect such good results with a Side-Facing Airflow. NZXT did an excellent job here.
Conclusion

Overall we are very happy to have our Hands on the NZXT H510i. The Case has a lot to offer, Perfect Cable management, (astonishingly) great cooling, compatibility with everything relevant, great IO, included RGB, included (intelligent) RGB and Fan Controller, a glass Side-Panel, strong rigid feet, great Mesh-Dustfilters, amazing build quality and and and, the list just goes on.
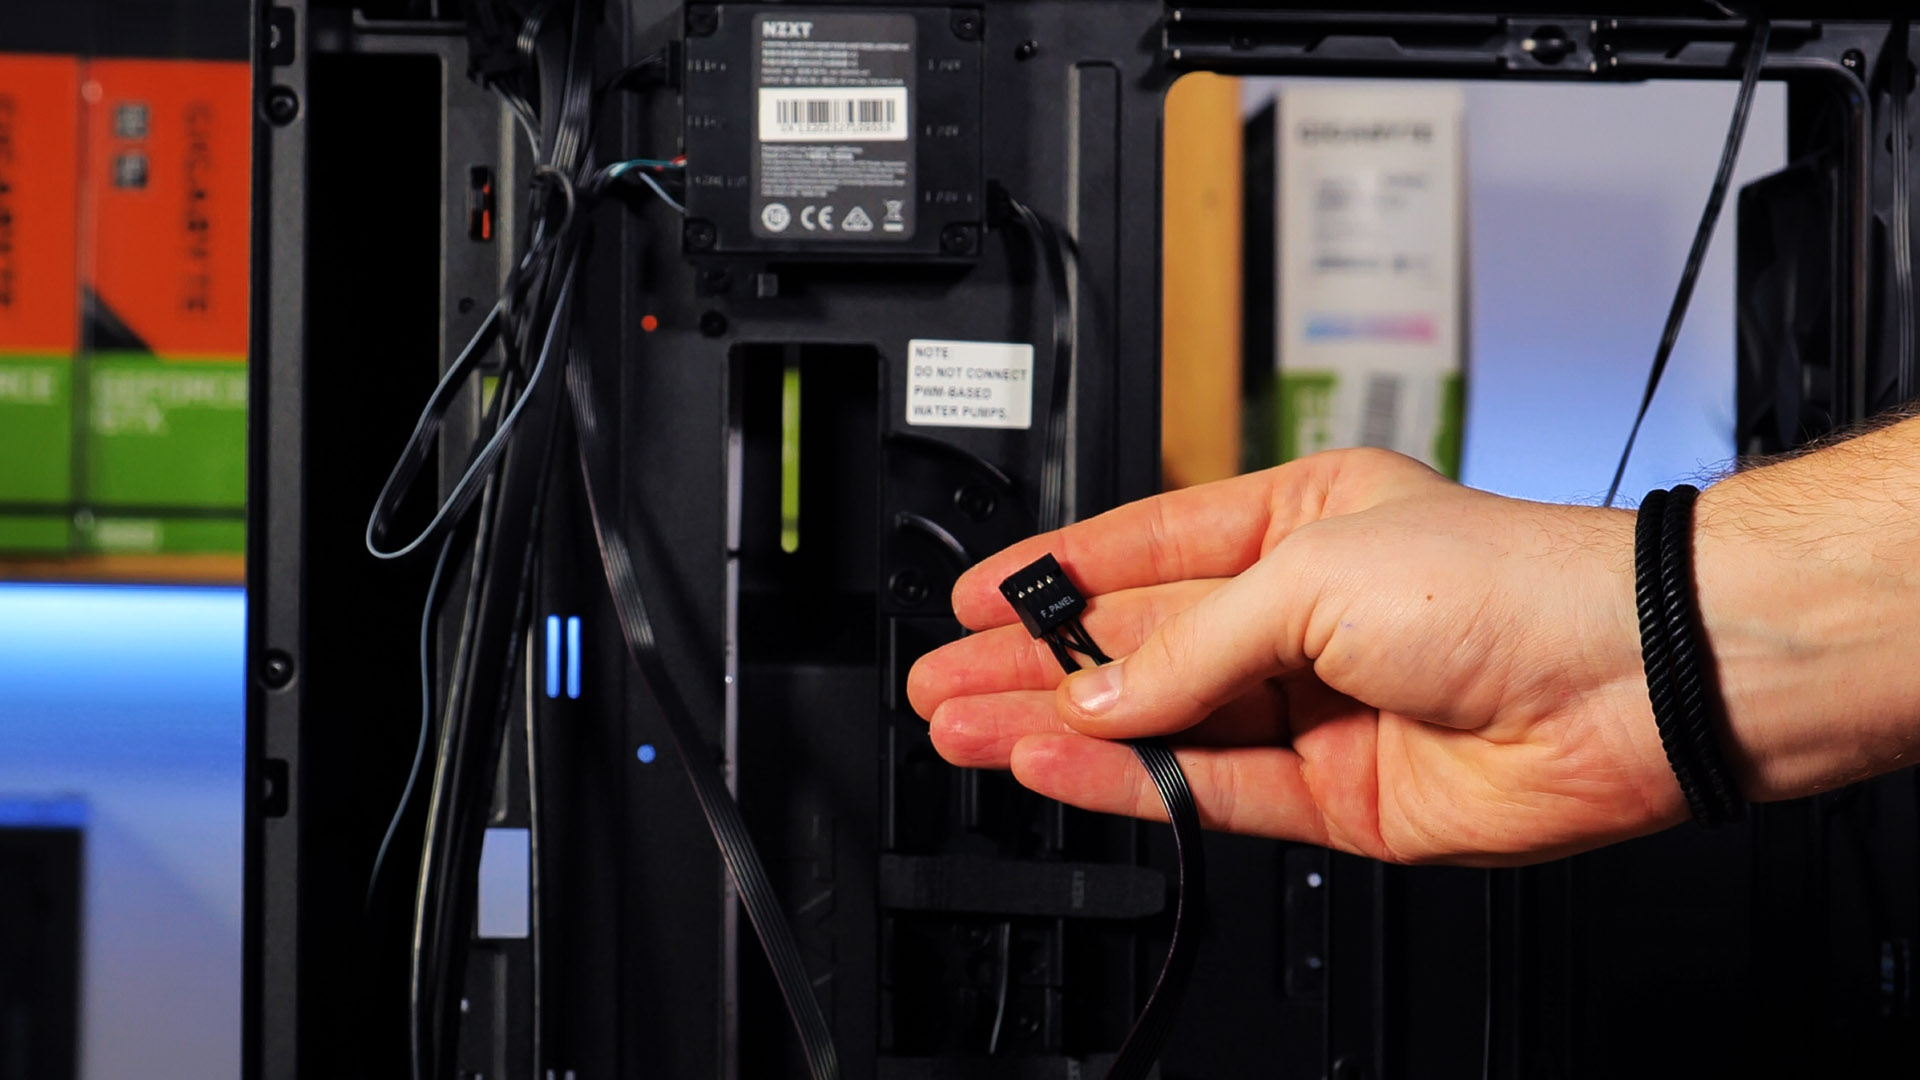
One of the most delightful aspects of building within this case is the Case Button/Lights Connection. NZXT using a single header for the Start Button and Power indication light is one of the smallest, yet best upgrades that a Case manufacturer can do.
But having all the positive points recapped, there are 2 things that we think could have been better.
The Top Fans spot is just not enough in our opinion. Providing 2 120/140mm spots would be a great upgrade. Additionally, we think that slightly pressing the Top Fan spots into the case and placing a Dust Filter ontop, would have gratefully improved the Design (looking at the top).

Another (small) point is nothing that could have been better, but something to keep in mind when planning to buy this case. The fact that most of the Air is coming through the vents on the right side of the case also means that there needs to be some clearance (all the time). This also means that it is not possible to place the H510i directly against the wall, as this would suffocate the interior, potentially cutting of fresh, cold air, resulting in overheating.
But besides those two points, there is nothing negative that came into our minds. The case delivered on every aspect and even shocked us with its cooling performance.
Right now, the NZXT H510i costs around 100€ or 100$ depending on your location. This price tag places the H510i into the upper class of Mid-Tower cases. Even though it's a relatively high premium compared to cases like the Azza Hive 450, we think the price is justified. Looking at all the Build-in features, great quality, and overall ingenuity that can be found in this case, we think that you will still be getting what you paid for.
Overall, we were very happy with the case and can recommend it to everybody with a small *. This little issue is that you have to know that you will be buying into the NZXT CAM-Universe. Sure you can use the Fan controllers on the Mainboard, but that won't make the RGB Strips shine. Though we have to clarify, that of all the Manufacturer Software we were forced to use until this day, NZXT CAM is by far the most reliable, easy to use, and useful. So in our opinion, this little * is barely noticeable, thus we can recommend the case to everybody.

Cougar Forza 135
Featuring 7 heat pipes and fans strong enough to grind a piece of wood into pieces makes the Cougar Forza 135 the next contes
Read More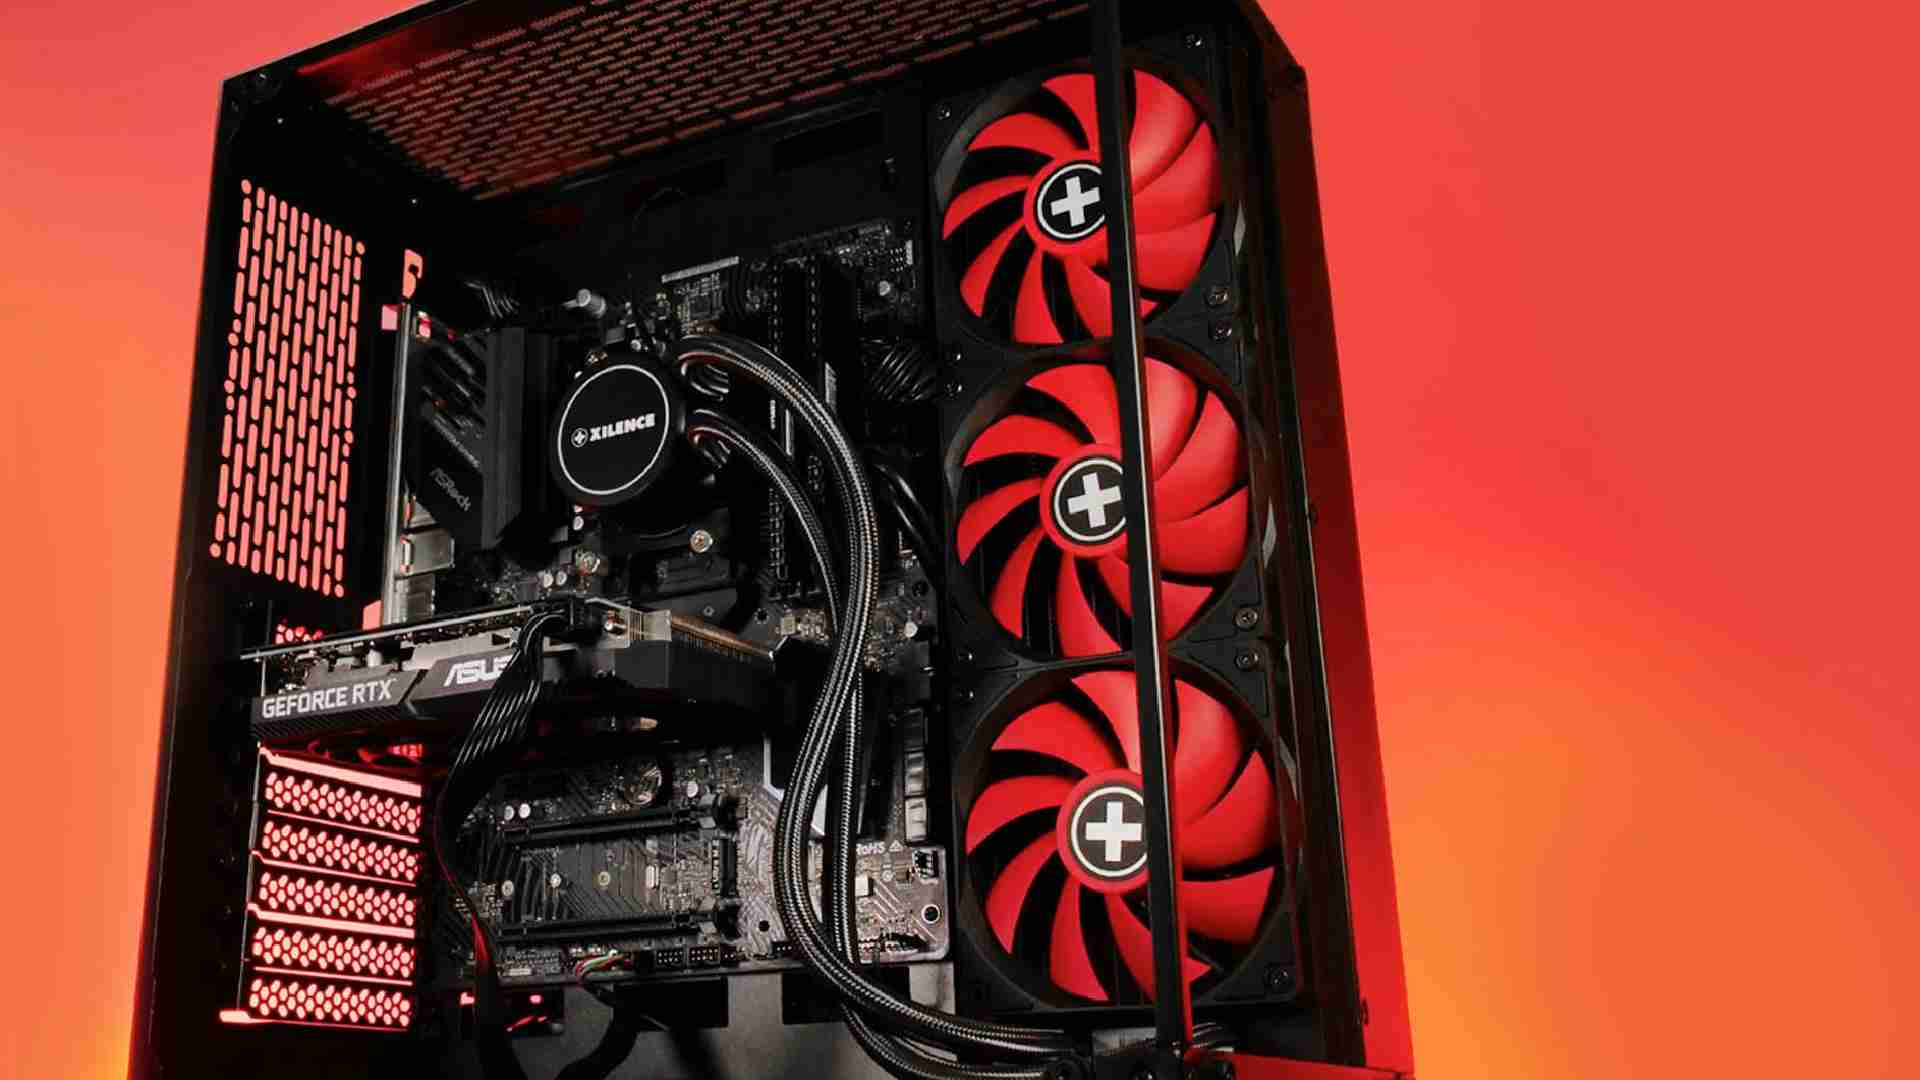
Xilence LiQuRizer LQ360 Review
Featuring their Redwing Fans, Xilences LiQuRizer promises to be both a powerful cooling machine and a retro-look with actual
Read More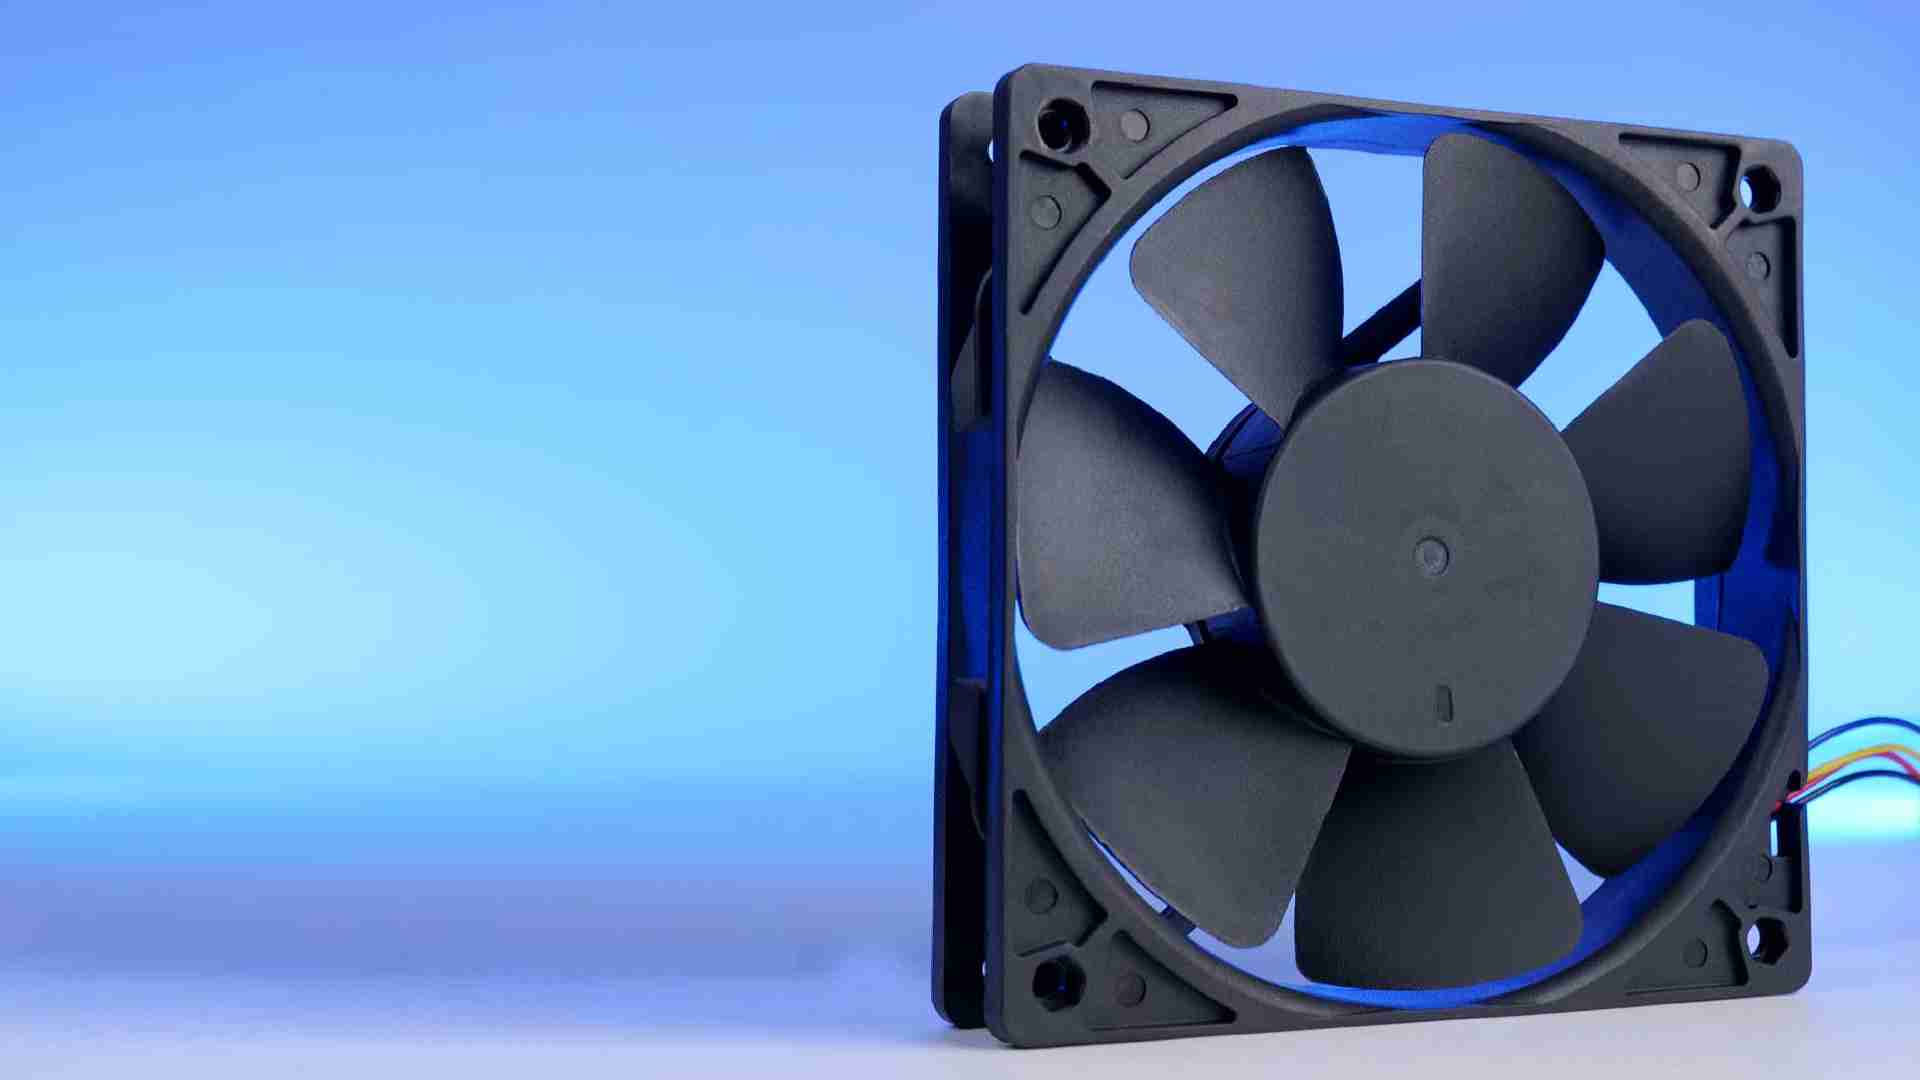
Alphacool Core 120 4000RPM Review
While the Core 120 2500 was mediocre, the 3000RPM version had at least some headroom. Now lets see if we can maximize it on t
Read More
AMD Ryzen 7950X Review
Its time to take a closer look at the biggest and most powerful Ryzen 7000 Chip, the 7950X. Lets see if it is able to keep th
Read More